
Building (and Testing) Minimal APIs in ASP.NET Core 7

Summarize with AI:
ASP.NET Framework and ASP.NET Core enable you to build Web Services using Web API controllers.
ASP.NET Framework and ASP.NET Core enabled you to build Web Services using Web API controllers. ASP.NET Core 6 and later give you a new tool: “minimal APIs.” Minimal APIs do allow you to create a Web Service with fewer files and less code than with a Web API controller, while leveraging much of what you already know from creating Web API controllers. To demonstrate that, here’s a case study around creating a minimal Web Service that retrieves and updates warehouse data using minimal APIs.
One caveat: I’m a big fan of unit testing everything I code. While I can test my Web Services by instantiating their underlying classes and calling their methods, I can’t help but feel that’s not actually testing the Web Service. A Web Service is going to be called through its URL, so it makes sense to me to unit test my service methods by calling them through their endpoints.
Enter Progress Telerik Test Studio for APIs, which makes it as easy to test my Web Services as it is to test my classes.
Your First Minimal API Method
You create a minimal API method in an ASP.NET Core project by adding your code to the project’s program.cs file. Each method in your service is defined by calling one of the Map* methods (MapGet, MapPost, MapDelete, etc.) from the WebApplication object used in the program.cs file (conventionally, the WebApplication object is held in a variable called “app”).
To define a Web Service method, you pass two parameters to the Map* method of your choice:
- The routing template for your Web Service method’s URL, using the same syntax that you’d use in adding a Route attribute to a Web API controller method
- A lambda expression containing the code for your method
When I create a Web Service, my first method is pretty much always a “GetAll” request which, in this case study, is a request that returns all my Warehouse objects. Like most Web Service methods, my service code is just a wrapper around some existing objects. In this case, the object I’m wrapping is my WarehouseRepo object which has a GetAllAsync method that returns all the warehouses.
To add a GET request method to a minimal API, you use the WebApplication’s MapGet method. The endpoint for my Get All method is my site’s URL with “/warehouses/” tacked on at the end, so I pass that as the first parameter to the MapGet method:
Then in the lambda expression, I:
- Flag the lambda expression with the async keyword because I’ll be calling an Async method in the expression
- Retrieve my WarehouseRepo object from the application’s Services collection by leveraging dependency injection in the method’s parameters list
- Use my WarehouseRepo’s GetAllAsync method to retrieve a collection of all of the Warehouse objects
- Use the Results object’s static Ok method to create an IResult object that wraps the collection of Warehouse objects in a HTTP response with a 200 status code
- Return the IResult object
Get All Method Example
Putting it all together, this is all the code I need to define my Get All method:
app.MapGet("/warehouses/",
    async (IWarehouseRepo whRepo) =>
    {
       ICollection<Warehouse> whs = await whRepo.GetAllAsync();
       return Results.Ok(whs);
    });
Testing My Method
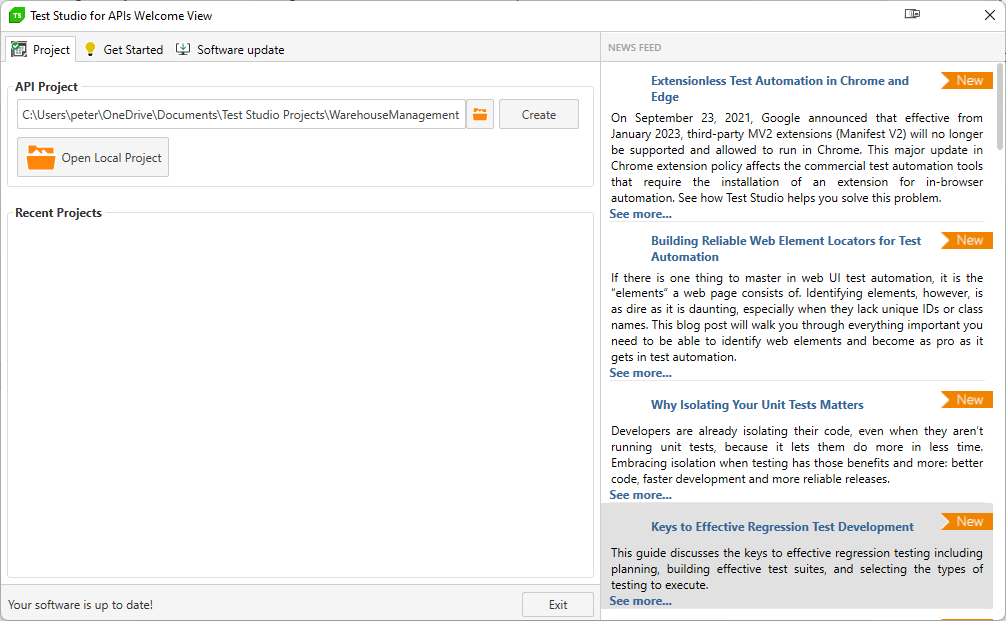
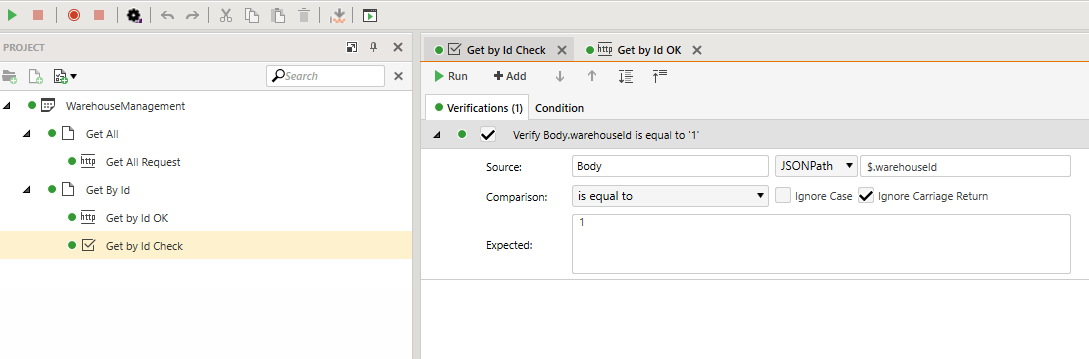
Testing my new method is a snap: I start Test Studio for APIs and, in the initial dialog, create my test project by setting the file path to the location where I want my test project to be store (I call the project “WarehouseManagement”) and then clicking the Create button.
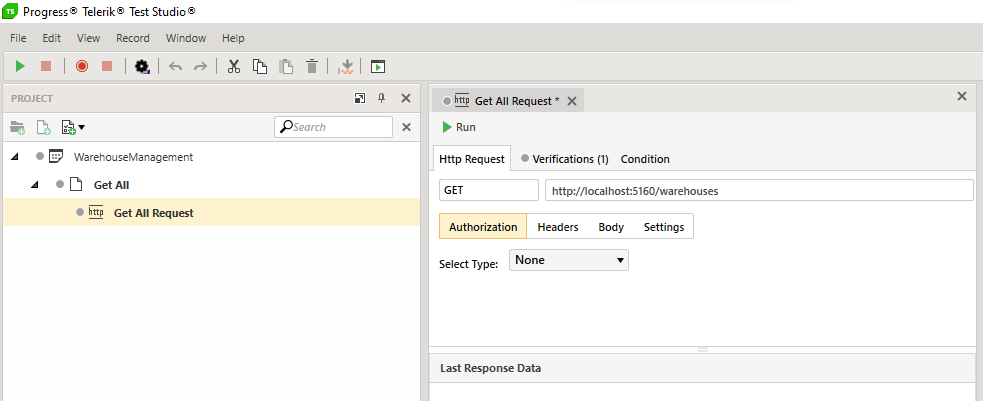
This resulting project has an initial test case named “Test Case” (I renamed it “Get All”), with one test step in it labelled “Http Request” (I renamed it “Get All Request”).
Double-clicking on my Get All Request displays the dialog for defining an HTTP request. Since, by default, the sample test is a GET request, the only thing I have to do to finish creating the test is type in the URL for my minimal method in the textbox to the right of the GET verb.
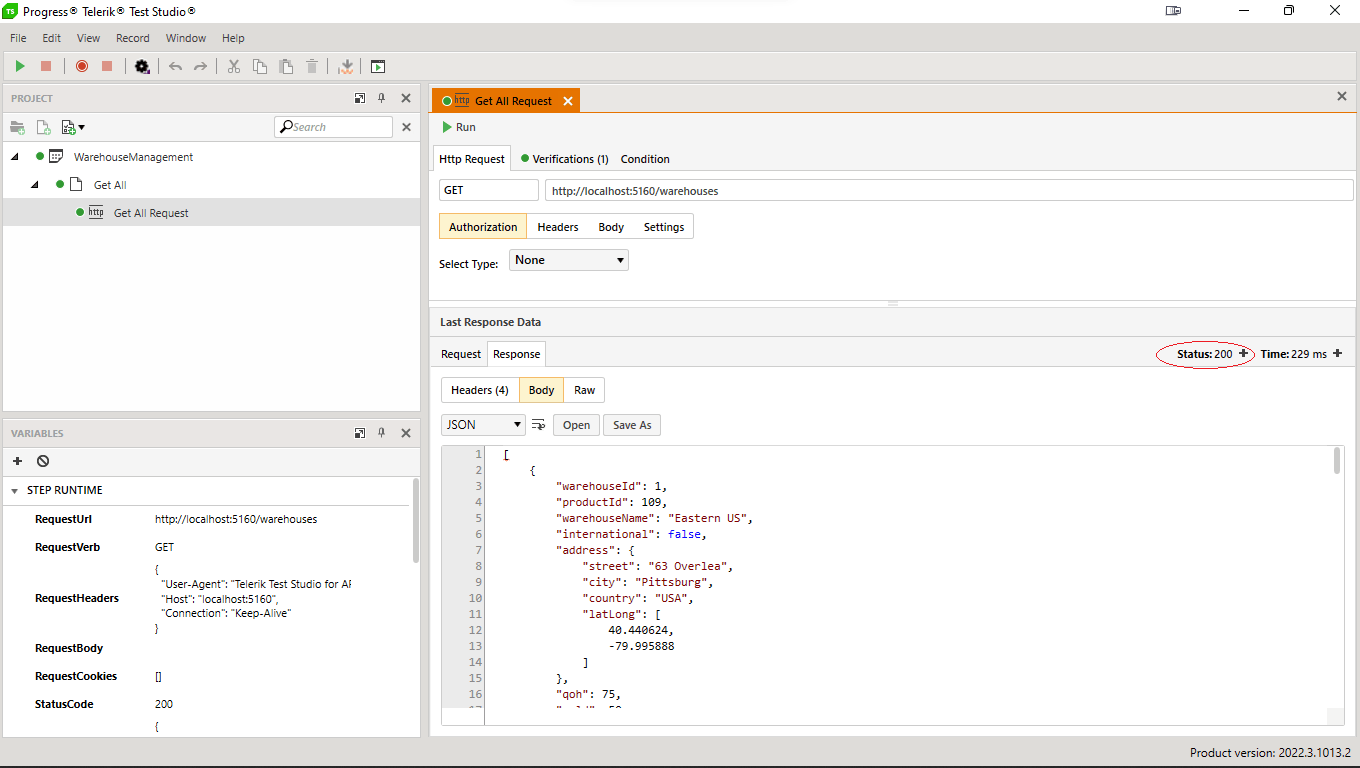
To run my test, I first press F5 in Visual Studio to start my Web Service running and then switch to Test Studio for APIs where I press F5 again to start my test. A second or two later, Test Studio displays the result of my test.
The good news is that it worked: At the top of the Response box, I can see a 200 status code and, below that, a test box that displays list of warehouses in JSON format returned by my Web Service method.
Second Get Request
Typically, my second Web Service method retrieves a single item when passed a primary key value—in my case, I can use my WarehouseRepo’s GetByIdAsync method and pass it a warehouse Id to retrieve a specific warehouse.
This new method has very few differences from my Get All method. They are:
- The routing template includes a parameter called wId, enclosed in French braces (“{….}”)
- The lambda expression accepts a nullable integer parameter (the parameter is also called wId to match the parameter name in the routing template)
Inside the lambda expression, I call my WarehouseRepo’s GetByIdAsync method, passing the wId parameter (the GetByIdAsync method returns a single, nullable warehouse object).
After calling the GetByIdAsync method, my code checks to see if the returned warehouse is null, which indicates that my WarehouseRepo couldn’t find a matching warehouse. If that happens, I use the Results object’s NotFound method to return an HTTP NotFound (404) message. If the warehouse isn’t null, though, I return the warehouse wrapped in the Results object’s Ok method as before.
The code is still pretty simple:
app.MapGet("/warehouses/{wId}",
    async (IWarehouseRepo whRepo, int? wId) =>
    {
       Warehouse? wh = await whRepo.GetByIdAsync(wId.GetValueOrDefault());
       if (wh == null)
       {
            return Results.NotFound();
       }
       return Results.Ok(wh);
   });
Testing for Success
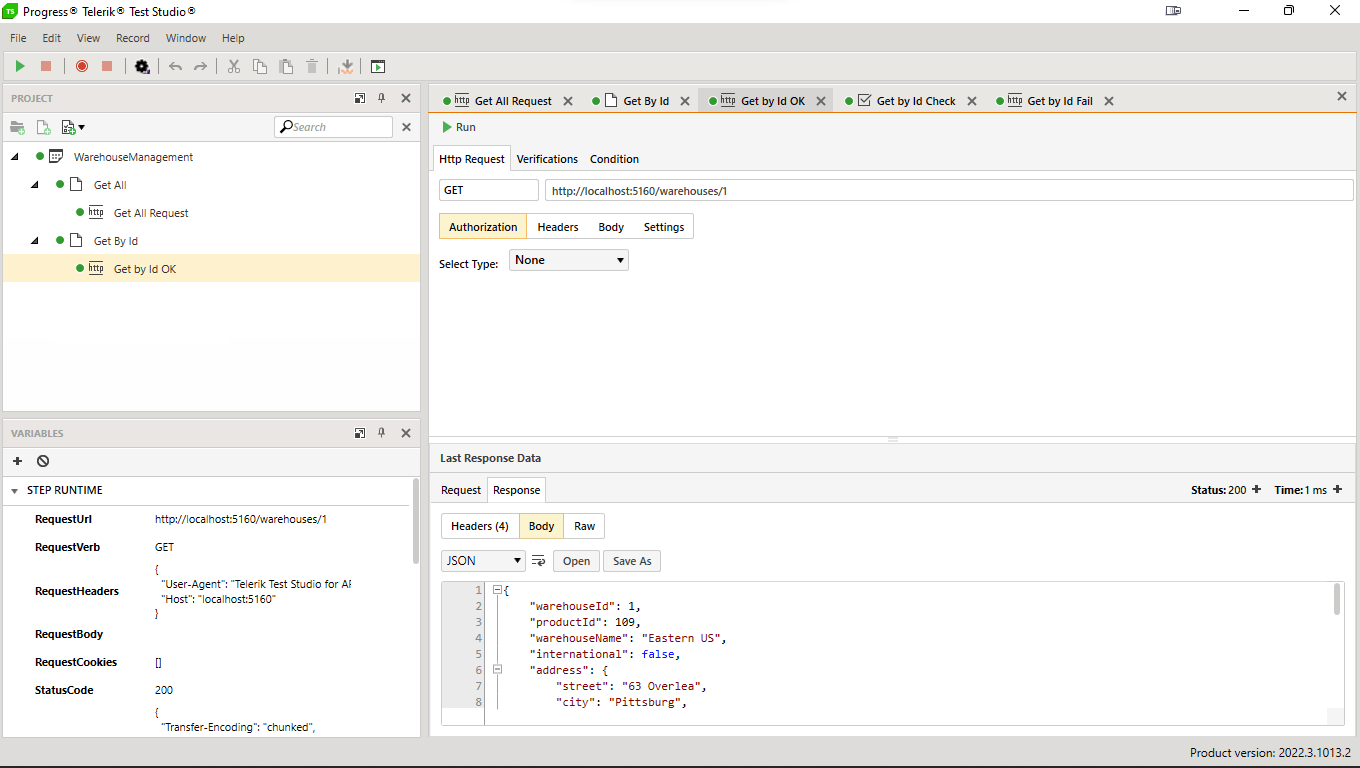
To test this method, I return to Test Studio for APIs, right-click on my project and select Add New Test to add a new test case to the project (I name the new test case “Get by Id”). I then right-click on the new test case and select Add Step | Http Request (I name the resulting step “Get by Id OK”). I put in the URL for requesting an existing warehouse and run my test.
It’s a good day! That test passes, also—in my Response area—I can see a single JSON object.
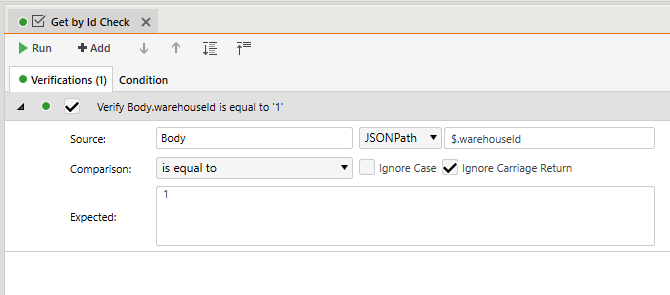
However, I don’t want to have to keep checking the test results to see if my tests are passing: I want my test cases to validate the response from my Web Service. For this test, for example, I want to know that, if I asked for warehouse number 1, the Web Service returned warehouse number 1.
For that I need to add a verification step to my test case. That’s easy: I right-click on my Get by Id test case and select Add Step | Verification. I name the resulting verification step “Get by Id Check” and double-click it to display the form for creating a verification test.
For this test, I want to check that, the JSON in my request’s response had a warehouseId of 1. In a Test Studio for APIs verification step, I can use a variety of ways to check my results but using JSONPath statement lets me retrieve a value from the JSON document returned in the previous step’s response body. To retrieve the value of the warehouseId property, for example, I select JSONPath as my search tool and enter “$.warehouseId” to retrieve my warehouseId property.
I then set the comparison operator in the verification step to “is equal to” and the expected value to “1.” When I’m done, my verification step looks like this:
Now, when I press F5 to run my tests, I can just check the green dot beside my test project to see if everything worked (and if any step fails, the project and the failing step(s) get red dots).
Checking for Failure
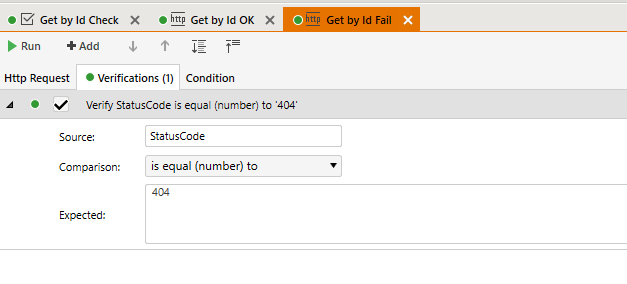
I need one more test though: I need to confirm that, if I ask for a warehouse that doesn’t exist, I get back a 404 error. To create this test, I right-click on my existing Get by Id OK test and select Copy. I then right-click on my Get by Id test case and select Paste. That adds a new test to my test case which I call “Get by Id Fail.” I double-click on my new test to open it and alter the URL used in this test to ask for a warehouse that doesn’t exist.
Now I need a verification step that flags a return code of 404 as a success. I don’t have to create this verification test as a separate step—each Http Request step comes with an included verification that flags the step as having failed if the status code in the response isn’t 200. I just need to change that verification test to check for a status code of 404 instead of 200.
In my new test, I just click on the step’s verification tab and change the expected value to 404. The result looks like this:
Now, when I press F5, I not only call my Web Service but check its results.
Testing Updates
My next step is to create my first minimal API update method. For this, I’ll create a PUT request. Again, there’s not a lot of difference between a PUT request and my previous minimal API GET methods—the route template, for example, is identical to the template I used for my Get By Id method: it’s “warehouses/{wId}.”
The three changes I make are to convert a GET request to a PUT request are:
- Use the WebApplication’s MapPut method instead of MapGet
- Have the lambda expression accept a Warehouse object in addition to the warehouseId (that warehouse object will be loaded from my PUT request’s body)
- Pass that Warehouse object to my WarehouseRepo’s UpdateWarehouseAsync method
Here’s the resulting code:
app.MapPut("/warehouses/{warehouseId}",
    async (IWarehouseRepo whRepo, int? warehouseId, Warehouse wh) =>
    {
       Warehouse updWh = await whRepo.UpdateWarehouseAsync(wh);
       return Results.Ok(updWh);
   });
To create the test for this method, I add a new test case (I called it “Put”) to my Test Studio for APIs project and then a new Http Request test step (called “Put Warehouse Name”) to that case. In the Http Request, I set the HTTP verb to PUT then copy the URL from my Get by Id test and paste it into my new test’s URL.
In my PUT request, I need to provide a JSON version of my Warehouse object. Fortunately, Test Studio for APIs remembers the results of the last test run. So, to get the necessary JSON, I just go back once again to my Get by Id test and copy the JSON object out of the test’s Response. I then paste that JSON into the body of my new test.
Since I’m passing JSON data to my minimal API, I have to add a Content-Type header to my request and set that header to application/json. When I was done, my test looked like this:
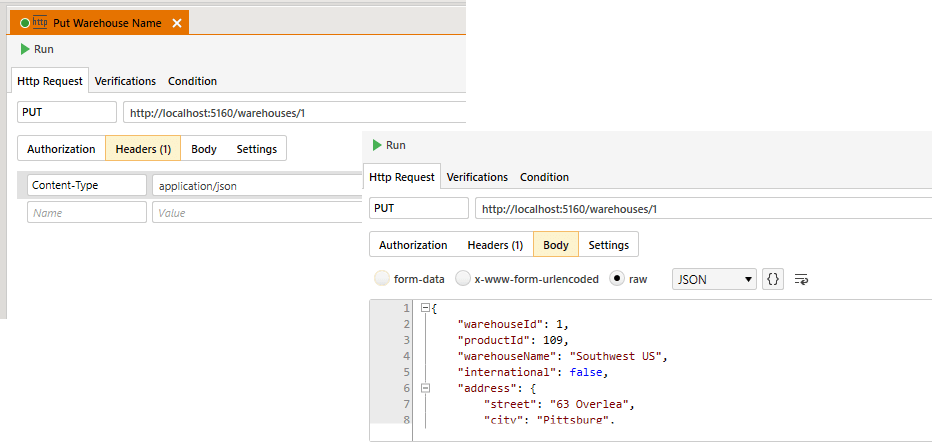
For this test, in the JSON object I’m sending to the service, I change the name of the warehouse from “Eastern US” to “Southwest US.”
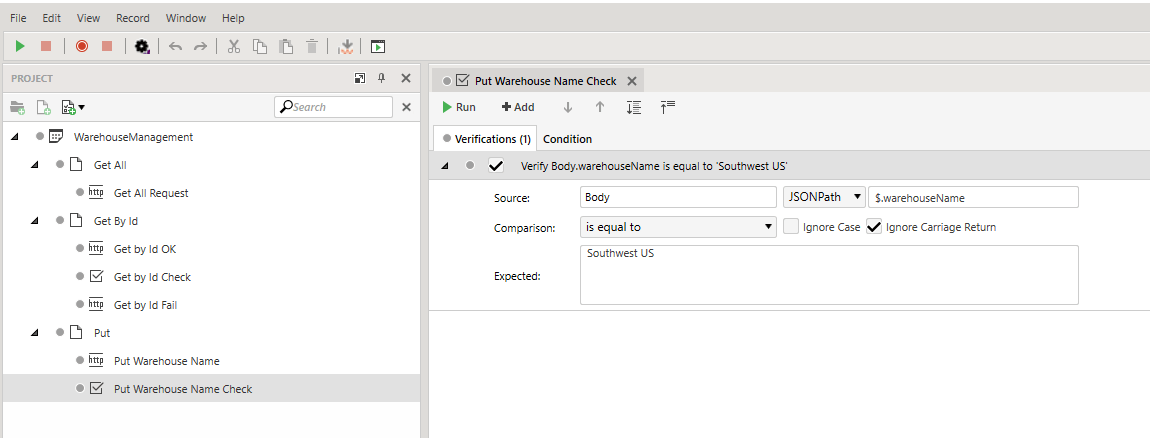
This time, I’ll add my verification test before I run my test. To do that I’ll just copy and paste the verification step from my Get by Id test case and paste it into my Put test case. To tailor this verification step for its new role, I just need to change two things (other than the name of the step—I called the step “Put Warehouse Name Check”):
- Instead of my JSONPath requesting the warehouseId property, I ask for the warehouseName property
- I set the expected value to “Southwest US” to see if the previous Web Service call successfully changed the warehouse name
I run the test and both my PUT request and my verification test get green dots. Today is a very good day.
I’m not done with this service yet, of course: I still need to write my POST and DELETE methods, along with their tests. I’ll probably also need a few more variations on my GET method. But, really, from here on, it’s just more of the same.
Here’s the key point: When I’m done, I’ll not only have a Web Service with a minimal footprint, I’ll have a Web Service that I can prove works “as intended.”

Peter Vogel
Peter Vogel is both the author of the Coding Azure series and the instructor for Coding Azure in the Classroom. Peter’s company provides full-stack development from UX design through object modeling to database design. Peter holds multiple certifications in Azure administration, architecture, development and security and is a Microsoft Certified Trainer.
Related Posts
Comments
All articles
Topics
Web MobileMobile
Desktop
Design
Productivity
People
