Image-Based Element Identification by Test Studio

Summarize with AI:
The latest and greatest Test Studio feature is finally out! Say hello to the industry-first combination between attribute-based and image-based element identification that will significantly reduce your maintenance time and make your tests more stable than ever before.
“The first rule of any technology used in a business is that automation applied to an efficient operation will magnify the efficiency. The second is that automation applied to an inefficient operation will magnify the inefficiency.”
—Bill Gates
Very often when we, the QA engineers, automate a feature and run the successfully recorded test for a first time we get a red result. Upon further investigation it turns out we are dealing with dynamic elements. Dynamic elements are elements whose attributes change every time you reload the page, and these attributes can be but are not limited to ID, Class Name, Value etc. So you cannot handle dynamic elements simply by their locators.
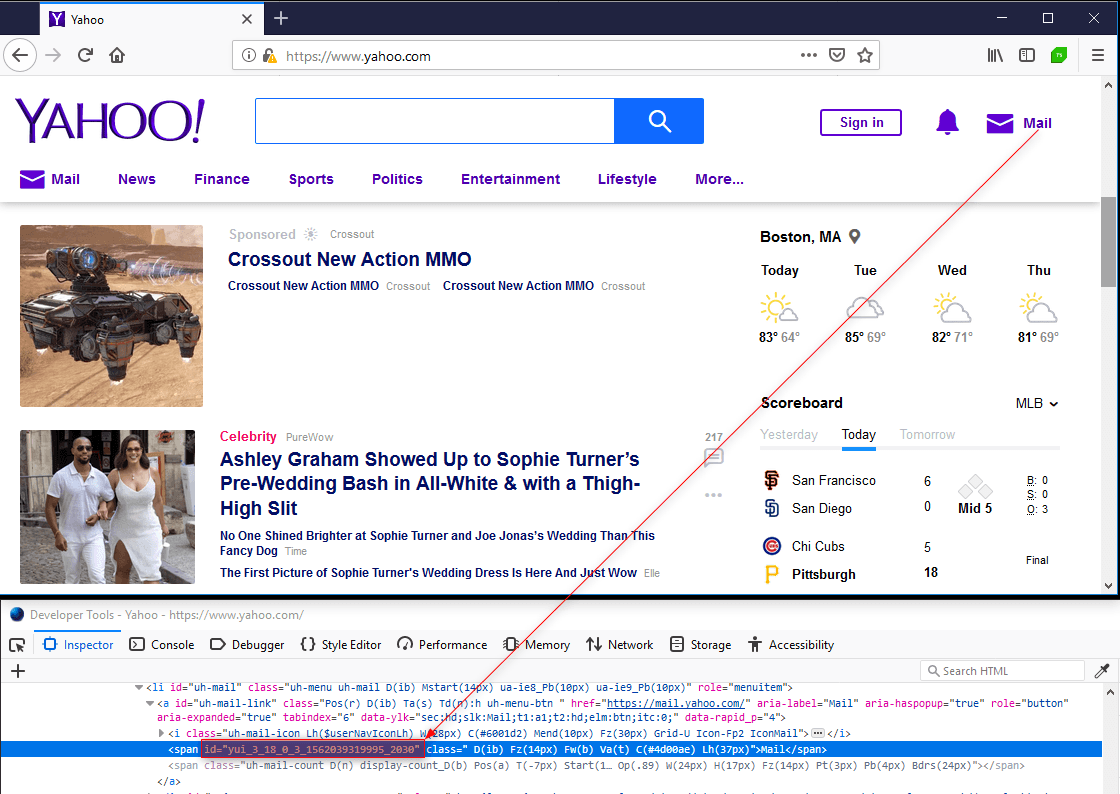
For example: All menu items on Yahoo’s home page are using dynamic ID’s as shown in the screenshot below

<spanid="yui_3_18_0_3_1562039319995_2030"class=" D(ib) Fz(14px) Fw(b) Va(t) C(#4d00ae) Lh(37px)"> Mail</span>
Using the ID locator here will result in test failure the next time when you execute your test. In such cases the ID is not the most reliable locator you have to use when creating your test case.
Let's review the most common techniques to handle such problems using any automation tool, and how this was done with Test Studio prior to the recent R2 2019 release.
Absolute XPath
Absolute XPath starts with the root of the HTML page.
Example:
/html[1]/body[1]/div[2]/div[1]/div[1]/div[1]/div[1]/div[1]/div[1]/div[2]/div[1]/ul[1]/li[3]/a[1]/span[0]
However, Absolute Paths are not recommended most of the time because:
- Absolute Paths are not reliable because a minor structural change results in different Xpath for the element
- Absolute Paths are long and this makes them hard to read
Note: Absolute Paths should be used only when a relative Xpath cannot be built.
Relative XPath
Relative XPaths are used for locating an element with respect to an element known as XPath. The element of your choice is referred relative to a known element. Relative Paths start with two forward slashes “//”
Example:
//a[@id="uh-mail-link"]/a/span
With the relative Xpath above we are first locating the parent anchor element with id uh-mail-link and then we locate the span element we would like to work with.
With the relative Xpath you can build quite robust find logic and thus more reliable tests.
Unfortunately, there is always a case where even the relative Xpath will not help. Imagine a developer decides to rewrite certain functionality and even if the web page design looks the same, something in the code behind is changed affecting your existing tests.
In such cases even if you are using CSS selectors instead of Relative Xpath you will still end up with failing tests as CSS selectors rely on CSS classes and element structure.
Wait a Minute! Stop this Endless Test Maintenance!
With the new Test Studio R2 2019 release you can avoid all those struggles mentioned above as we have introduced an industry-first combination between attribute-based and image-based element identification. This drastically reduces test failures and lets you focus on the real bugs instead of tedious test maintenance.
Nowadays all modern automated testing tools and frameworks either work with attribute-based find logic or image-based find logic. We from Test Studio put some serious thought into making the find logic experience as user friendly as possible, and decided to combine both approaches into one. The result is that test failures due to missing elements almost impossible.
So What’s the Idea?
Test Studio uses a unique combination of element attributes to identify elements, which works very well in most cases. But sometimes an ID will turn out to be dynamically changing or a developer would change something and the test will fail. Here the new tech comes to the rescue. During test recording Test Studio will also record images for each element. When the traditional find logic fails it immediately tries to find the respective image, then we identify the element that stands behind it and execute the step, no matter if it is a simple click, type, button toggle or a more complex grid filtering change, for example. The test will pass with green status with just a warning letting you know that the traditional find logic failed.
You can also add a new element image or edit and update an already recorded one either by directly uploading a new file or by using our brand-new in-house image recorder.
In Practice
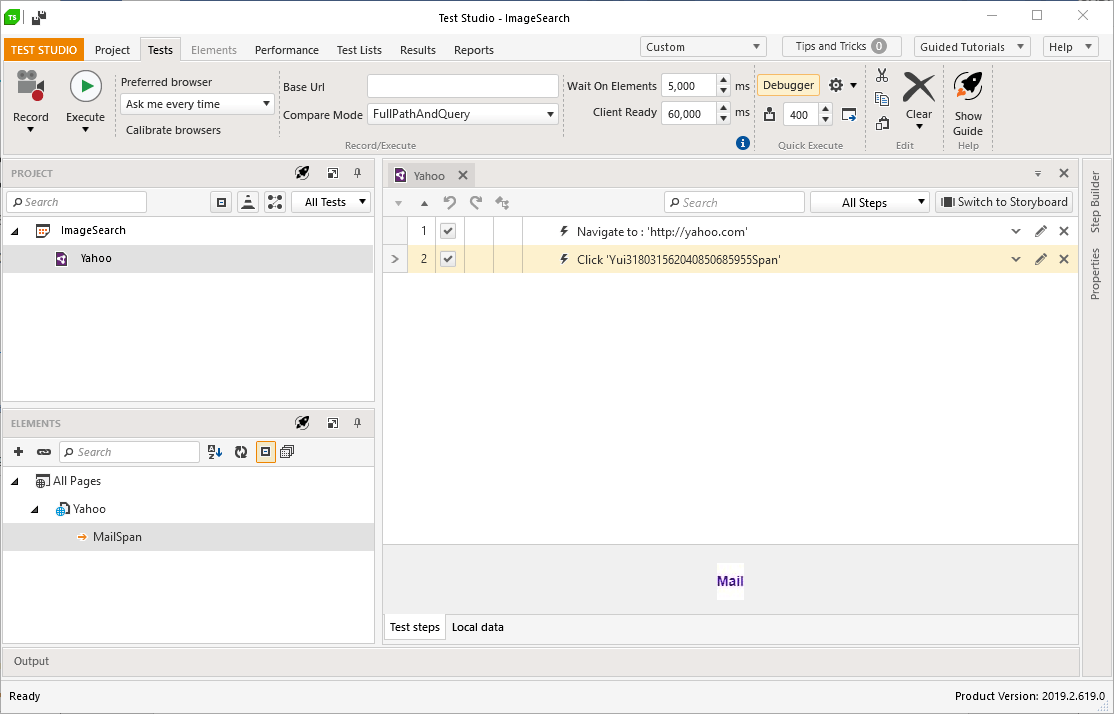
Using Yahoo’s website and Test Studio I have recorded quite a simple scenario navigating to http://yahoo.com and clicking on the Mail element in the upper right of the index page.

In Test Studio this represents with two steps, one Navigate step and one click step:

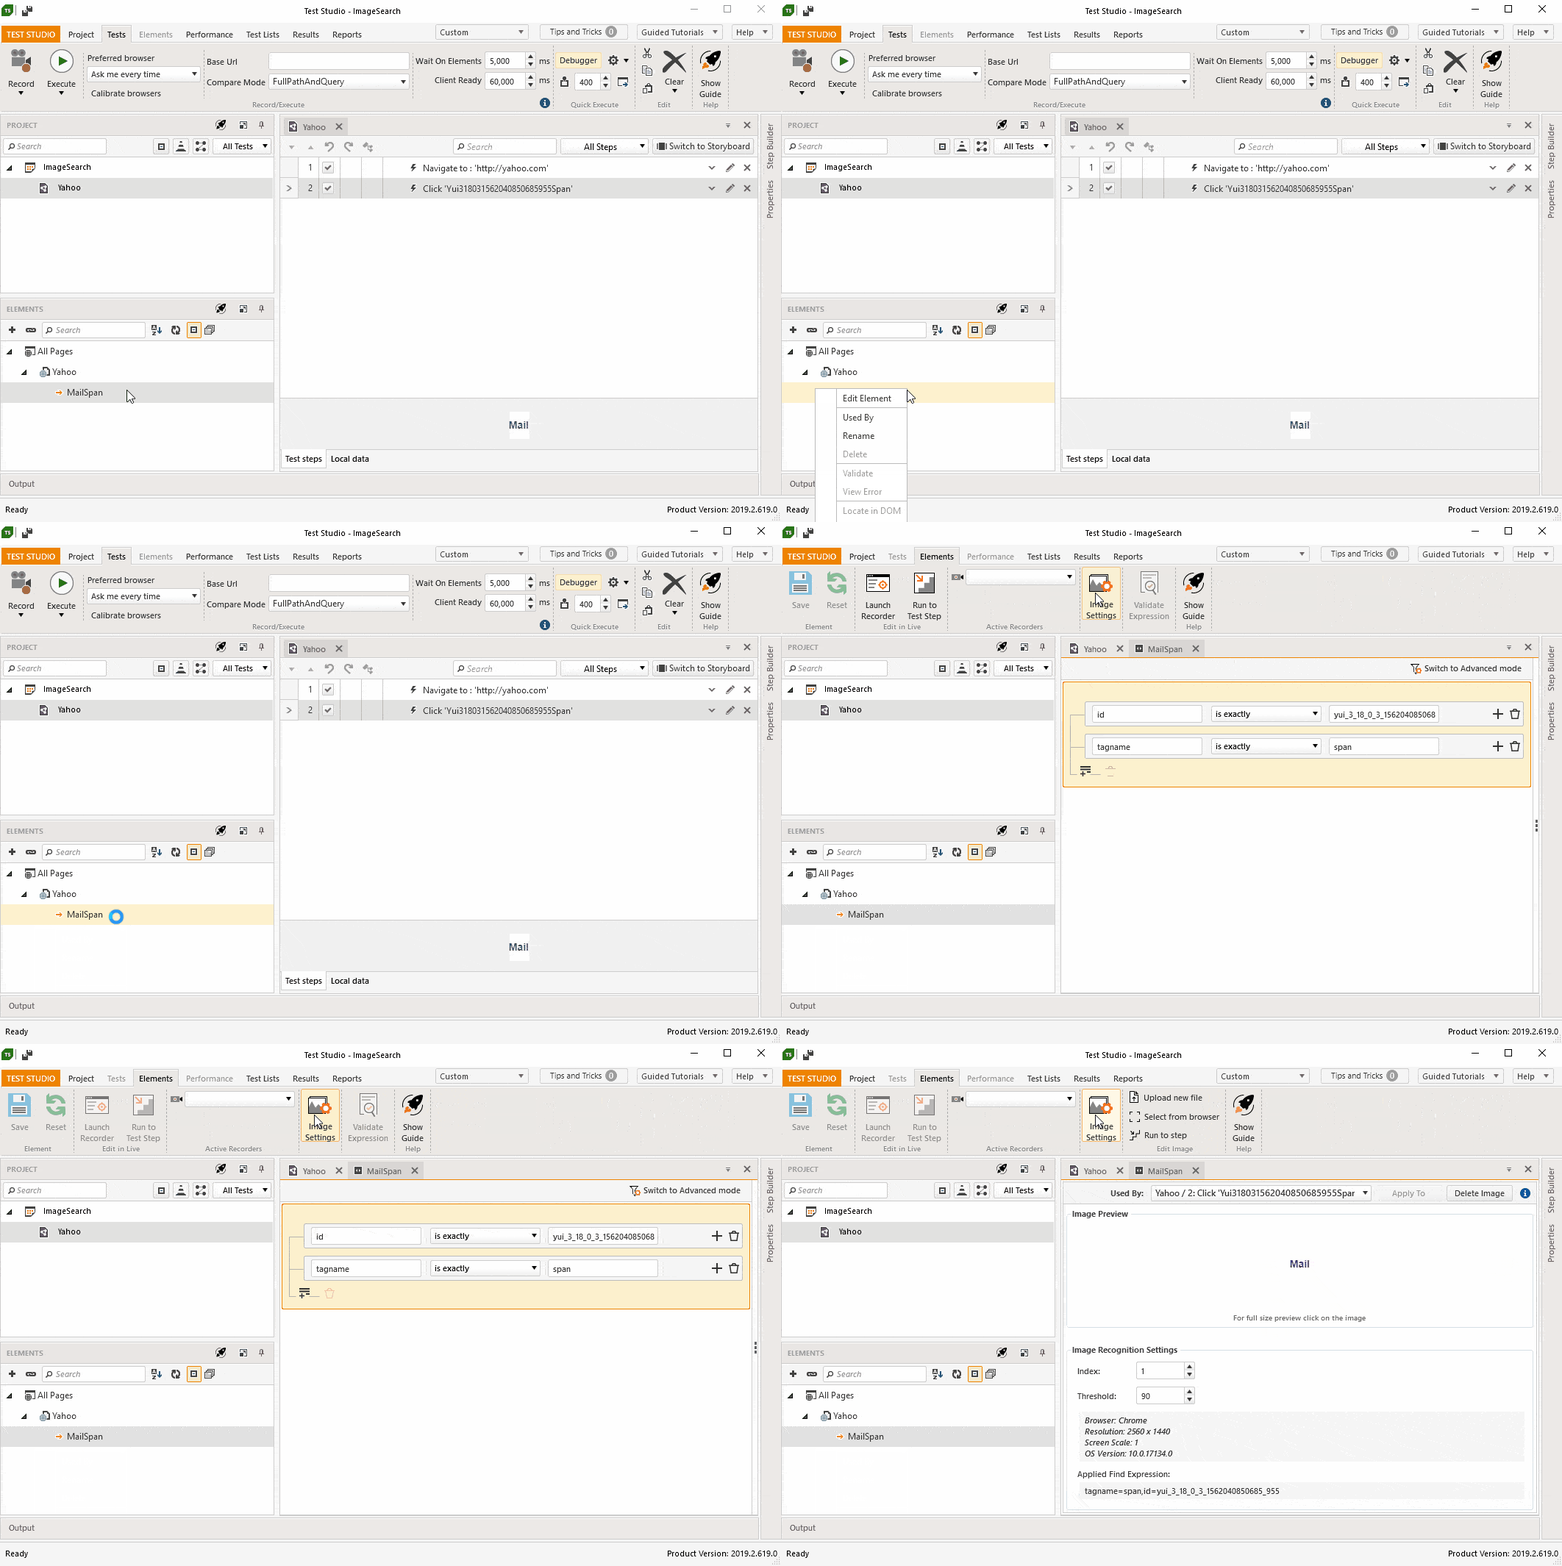
The tricky part and where our new feature really shines is when you edit the recorded MailSpan element. Along with the auto-generated find expression by ID and Tagname we have an image attached to the element (see the animation below). Now if you execute the test the applied find expression will fail due to the dynamic ID part, but Test Studio will switch automatically to search by image and will locate the element which will result in successful test execution.

We on the Test Studio team hope this innovative technology will revolutionize UI test automation for you, helping all our customers build more robust test cases and reduce the countless hours spent on test maintenance.
You can find more about working with image-based element identification in Test Studio using this KB article!
Happy Testing!
If you want to try our find element by image feature you can start a free, fully functional 30-day trial:
Try Test Studio
Ivaylo Todorov
Ivaylo is a QA Engineer on the Progress Test Studio team, where he helps build a better and more reliable product. Before starting as a QA Engineer, Ivaylo spent three years as a Technical Support Engineer in Test Studio doing his best to guide customers in their automation endeavours. Ivaylo enjoys skiing, cooking and portrait photography.
