Optical Adventures in Test Automation—to OCR or Not to OCR

Summarize with AI:
It is challenging to automate scenarios where the data inside complex visual elements needs to be verified. With its new OCR features, Test Studio enables the user to extract, validate and reuse content from images, logos, charts and other elements—ensuring tricky and cumbersome scenarios are covered during web UI test automation.
Do You See What I See?
Being able to make the computer see what you see with your own eyes, and then make the machine apply what it has “seen” to your needs, is an exciting experience. Imagine a scenario, where it feels just natural to look at an element on your website and use its contents in a search field, so that you can extract a filter from it and apply it to a list of items, literally, in a blink of an eye. With OCR you can run this extraction-verification cycle for any visual element on your site, be it a logo, graph, chart, etc., no matter how unconventional it is visually, and disregarding the complexity of the element’s find logic.
Yes, We Can!
We on the Test Studio team have just come up with a simple solution to the task at hand. With the latest release, R2 2020, there’s a set of features that will come in handy in scenarios like the above. You can now verify an entire image or parts of an image through pure visual comparison. You can extract text from a complex image containing both dynamic and static data. Even more, you can extract text from an image, assign it to a variable including validating data against the data source and use the captured string to populate input fields. Let’s put all that into action with a simple demonstration of the power of the brand-new Optical Character Recognition (OCR) features in Test Studio.
Show Me What You’ve Got!
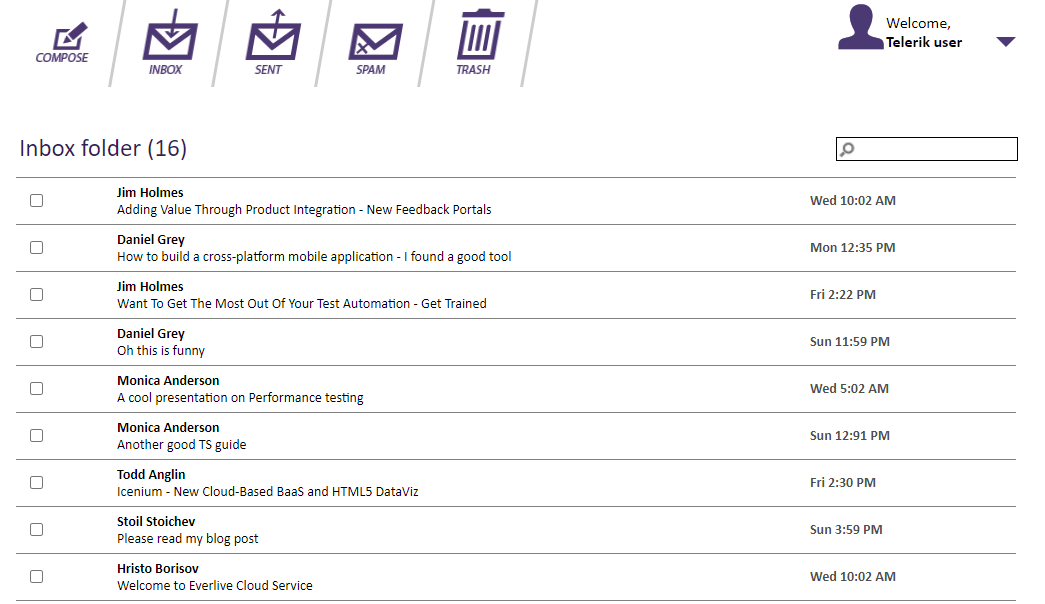
Let’s say we have a conventional mail inbox and all of the navigation buttons are images.

- The image is not loading
- The image at the src location is incorrect
To avoid such scenarios, you can use our new “Image Verification” step, which takes a snapshot of the element during recording and during test execution compares that snapshot with the actual image.
To record such a step, highlight the element which you would like to verify and select “Build Step…” from the drop down. Then from the Recorder window go to the “Verifications” tab, select “Image” and click “Add Step.”


This is awesome, right? Now you are sure that the image is loaded successfully and is the one you have recorded.
But what will happen if the image of the element we are verifying contains some dynamic content like user input, dates, etc.? The test will fail intermittently with no actual bug at hand. The good news is that we’ve got you covered. You can select a part of the element and verify that the specific part is present in the element during execution. To accomplish this, you just need to uncheck “Verify Entire Image” and adjust the selection according to your preferences.

Don’t stop there, go a bit further with our optical adventures. In our mail inbox we have a list of email messages with the sender as a header.

It would be nice to be able to just look at a single sender, extract his name as we see it, apply that name to a search field and see the results for that sender only. And then, do that again for another sender, using the steps we already described above. Let’s see how that works with the new OCR features in Test Studio.
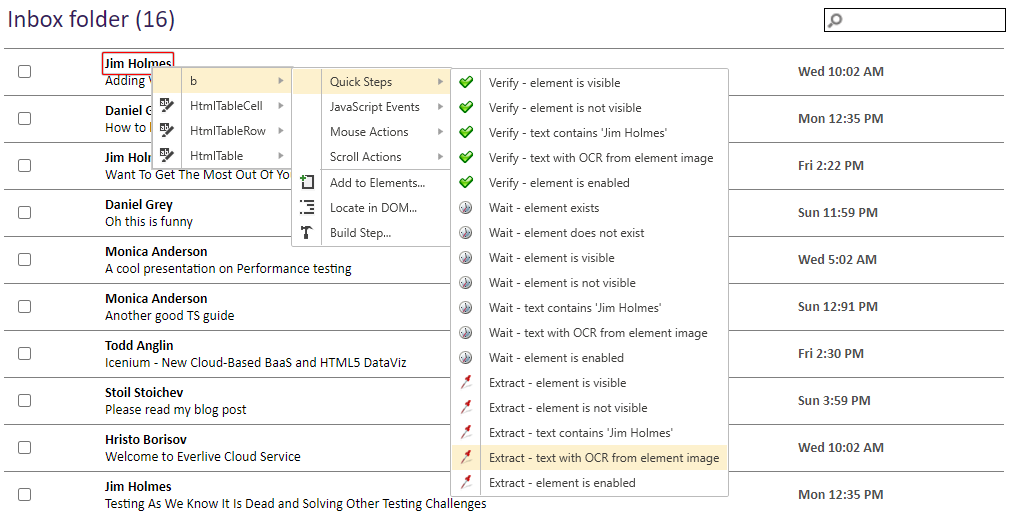
First, we pick the element of the sender of choice, and from the contextual menu of the element we choose the option to Extract—text with OCR from image:

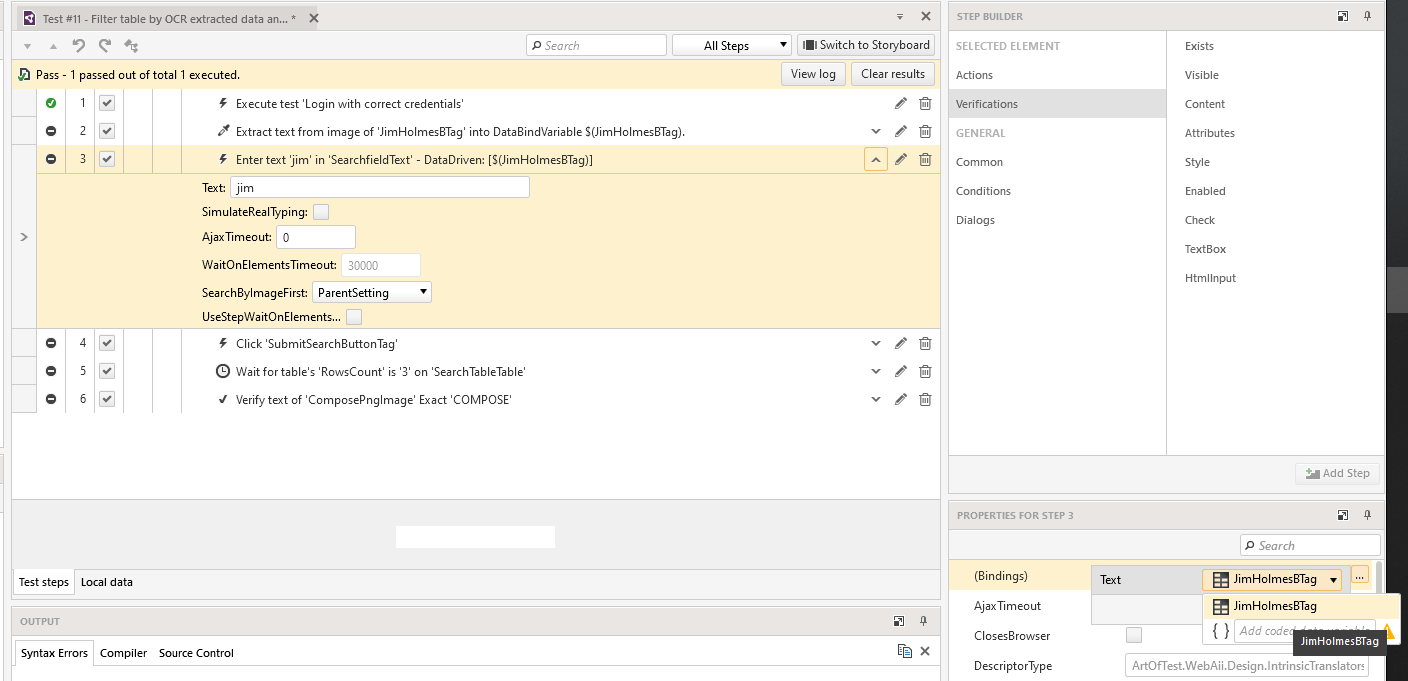
This action has automatically created a DataBindVaribale for us, containing the OCR-ed text from the element, so that we can use it in other steps later. For example, add a step that inputs the text from that variable to the search field of the mailbox.

And then, you can use the OCR verification step to make sure you’ve shown only senders that match your filter, again, from the quick context menu:

And you’re done!
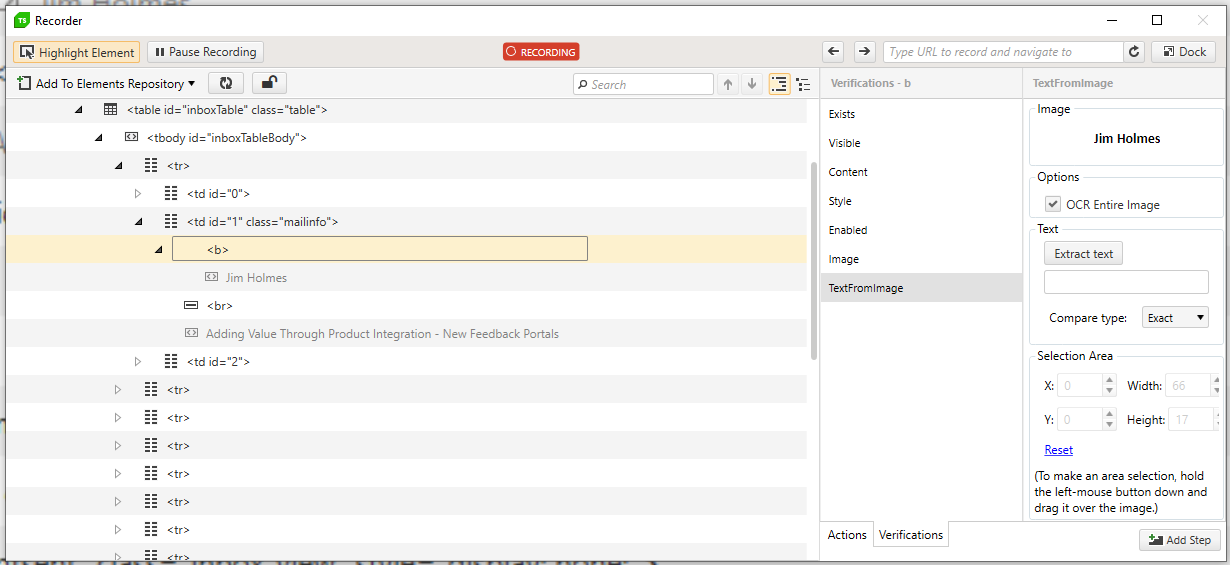
Still, there’s an alternative way to get to the OCR features, where you can play around a bit more with the extraction capabilities of Test Studio’s recorder. If you locate the element in the DOM-tree, you’ll find a new action in the step builder—TextFromImage. There, you can select a part of the image to extract text from, in correspondence with your specific scenario.

To OCR or Not to OCR?
You’re just a few clicks away from automating a relatively complex scenario, using Test Studio’s new OCR features for advanced test automation. We’ve added these steps to the sample project, which you can explore from Test Studio’s Get Started section on the Welcome Screen, or play around with your own test cases. Just give it a go and let us know what you think.
Want to try out the exciting new OCR features? Start a free 30-day trial today with full support by our dedicated support team to help you complete a successful evaluation.

Kaloyan Kalchev
Kaloyan was a Senior Developer at Progress.
