
Create and Publish an NPM Package Automatically

Summarize with AI:
Follow these steps to publish a TypeScript pakcage to npm.
There are not many good articles on publishing a TypeScript package to npm automatically. The best article I have seen is by the one and only Matt Pocock, How to Create an NPM Package. This is wonderful for understanding the package part, but publishing is not well documented. Recently, the npm publish keys have gone away, so we must connect our workflow manually with Trusted Publishing.
Let’s go through all steps to publish a TS npm package automagically!
Create Repository
Create a folder with the name of your package and open it up in VS Code.
Create your repository on GitHub with same name.
Run
git initin root.Create a
.gitignorefile in root.distwill be where it builds the JavaScript.node_modules dist .env .env.*
Note: You may not have an .env file, but it is good practice.
- Create your
README.mdwith whatever content. - Create a
LICENSEfile if you want as well. There are packages for this or you can copy and paste. - Run
git add .andgit commit -m 'first'to commit your first file. - Run
git branch -M mainto makemainthe default branch. - Add your remote origin with:
git remote add origin https://github.com/YOUR_REPOSITORY
- Push package with
git push -u origin main.
Note: My example package will be named format-price.
Create Your Package.json File
- Create
package.jsonin root.
{
  "name": "format-price",
  "version": "1.0.0",
  "description": "A demo of a simple TypeScript package that formats a price value.",
  "keywords": [
    "demo",
    "typescript",
    "price",
    "formatting"
  ],
  "homepage": "https://github.com/jdgamble555/format-price",
  "bugs": {
    "url": "https://github.com/jdgamble555/format-price/issues"
  },
  "author": "Jonathan Gamble (https://code.build)",
  "repository": {
    "type": "git",
    "url": "git+https://github.com/jdgamble555/format-price.git"
  },
  "files": [
    "dist"
  ],
  "type": "module",
  "main": "dist/index.js",
  "scripts": {
    "build": "tsc",
    "test": "vitest run",
    "ci": "npm run build && npm test"
  }
}
name- name itdescription- describe itversion- use semantic versioning for changesetskeywords- add keywordshomepage- add your homepagebugs- where to report bugsauthor- who created thisrepository- where to view git sourcefiles- the folder to installtype- use module for TypeScriptmain- entry point for nodescriptsbuild- build TypeScript filetest- test with vitestci- continuous integration command for workflow
Install Dependencies
npm i -D typescriptto install it as development dependencynpm i -D vitestfor testing
Config TypeScript
- Create
tsconfig.jsonfile.
{
    "compilerOptions": {
        "esModuleInterop": true,
        "skipLibCheck": true,
        "target": "es2022",
        "allowJs": true,
        "resolveJsonModule": true,
        "moduleDetection": "force",
        "isolatedModules": true,
        "verbatimModuleSyntax": true,
        "strict": true,
        "noUncheckedIndexedAccess": true,
        "noImplicitOverride": true,
        "module": "NodeNext",
        "outDir": "dist",
        "rootDir": "src",
        "sourceMap": true,
        "declaration": true,
        "declarationMap": true
    }
}
See Matt Pocock’s Total TypeScript for more info and if you want prettier, etc.
Add Your TypeScript Content
For this test package, we are updating the price to standard format.
/src/index.ts
export const formatPrice = (price: number) => {
    return new Intl.NumberFormat('en-US', {
        style: 'currency',
        currency: 'USD',
    }).format(price);
};
Add Testing Script
/src/index.test.ts
import { formatPrice } from "./index.js";
import { test, expect } from "vitest";

test("formatPrice", () => {
    expect(formatPrice(1234.56)).toBe("$1,234.56");
});

test("formatPrice with small value", () => {
    expect(formatPrice(5)).toBe("$5.00");
});
Note: You can test your package with npm run test, which just runs npx vitest run under the hood.
Workflow 1
GitHub has the ability to run scripts once you commit. Every workflow file will be a YAML file with the extension .yml.
Create Default Continuous Integration Workflow
.github/workflows/ci.yml
name: CI

on:
    pull_request:
    push:
        branches:
            - main

concurrency:
    group: ${{ github.workflow }}-${{ github.ref }}
    cancel-in-progress: true

jobs:
    ci:
        runs-on: ubuntu-latest

        steps:
            - uses: actions/checkout@v4

            - name: Use Node.js
              uses: actions/setup-node@v4
              with:
                  node-version: '20'

            - name: Install dependencies
              run: npm install

            - name: Run CI
              run: npm run ci
- This will install node, install dependencies and run the continuous integration script.
GitHub
When you commit your package, you will see the workflow runs in the Action tab on GitHub.
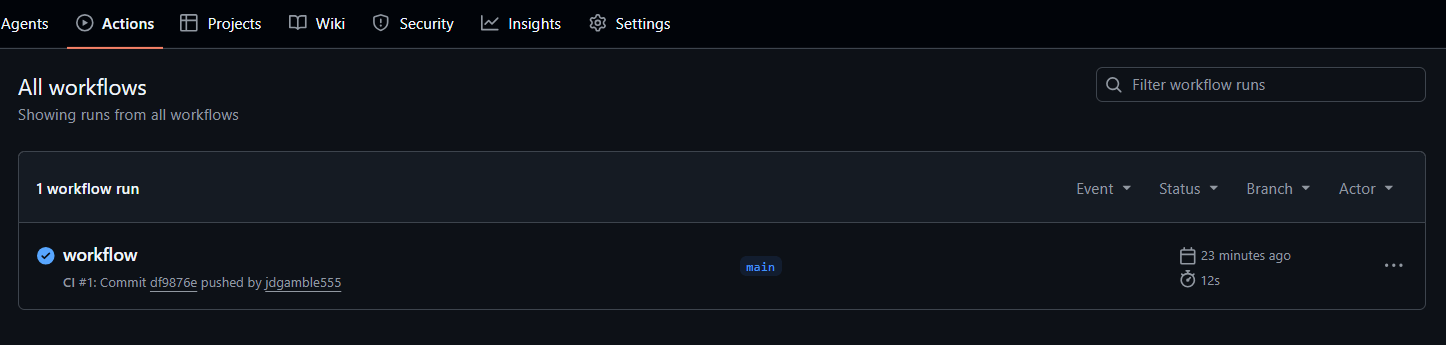
This workflow runs npm run ci, which basically makes sure the tests pass. It is queued first and then run.

And if it does not pass, you will see an error.
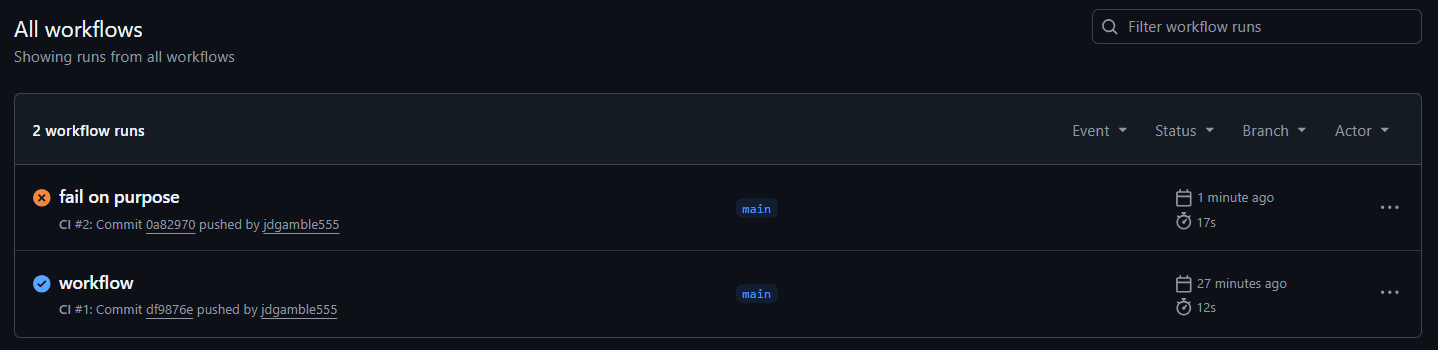
Your last commit will fail.
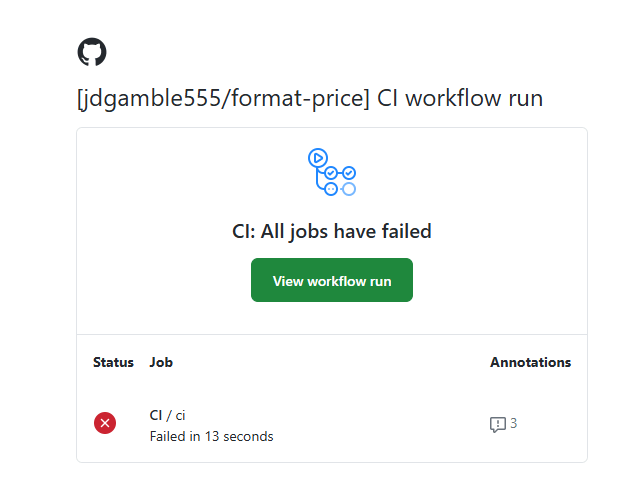
Which also notifies you in your email.
And, of course, you see a check once you re-commit with tests that pass.

Versioning with ChangeSet
Use changesets for versioning.
- Install it with
npm i -D @changesets/cli - Initialize it with
npx changeset init
Create a New Version
- Run
npx changeset- Select
patch,minorormajorfor the type of update. - Enter a summary for the log describing the change.
- You will see a new file under
.changesetlikesmooth-ads-lick.mdor some random name. This will be the log that will be appended to your rootCHANGELOG.mdfile.
- Select
- Run
npx changeset versionto automatically update your package version.- The generated file
smooth-ads-lick.md(will be different name) has been deleted, and your log in the rootCHANGELOG.mdfile has been appended.
- The generated file
# format-price

## 1.0.2

### Patch Changes

- testing for log

## 1.0.1

### Patch Changes

- first patch
- Commit to GitHub as is:
git add .git commit -m 'patch'git push
GitHub
Now, let’s set up for auto publishing.
Go to Settings in your GitHub project, then click Actions and General on the left menu.
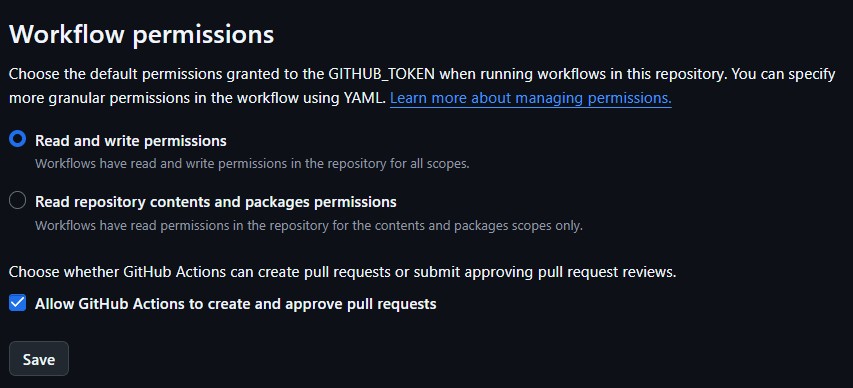
- You need to allow GitHub to publish to npm with read and write permissions.
Optional GitHub Ruleset
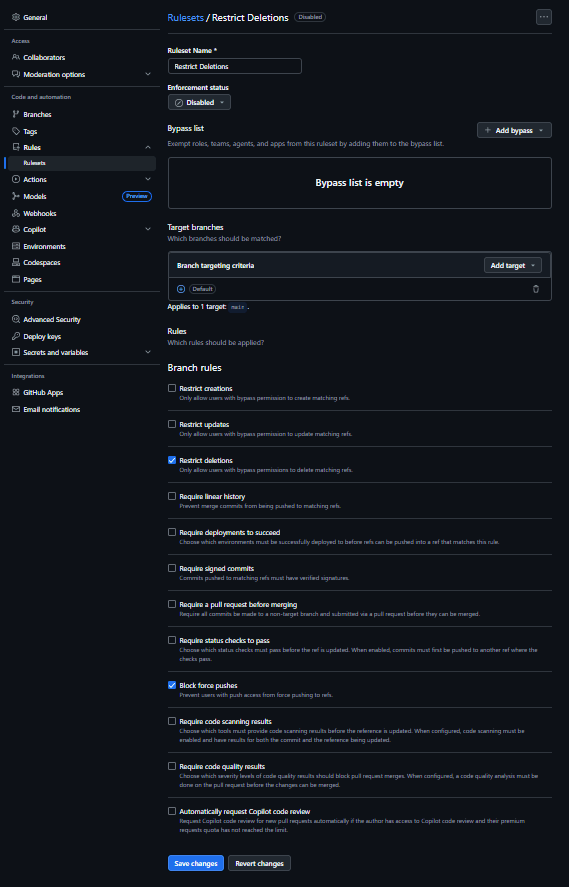
Under Rules and then Rulesets, it is wise (you will get a warning anyway) to protect your main branch.
- Name the ruleset
Restrict Deletionsor whatever you like. - Make sure
defaultis selected under target branches. - By default,
Restrict deletionsandBlock force pusheswill be selected.
Workflow 2
Create the second workflow file in the .github/workflows folder called release.yml.
name: Publish Package

on:
    push:
        branches:
            - main

permissions:
    contents: write # required for tags + version PR
    pull-requests: write # required for Version Packages PR
    id-token: write # required for npm trusted publishing (OIDC)

jobs:
    publish:
        runs-on: ubuntu-latest

        steps:
            - uses: actions/checkout@v4
              with:
                  fetch-depth: 0 # Changesets needs tag + commit history

            - uses: actions/setup-node@v4
              with:
                  node-version: '20'
                  registry-url: 'https://registry.npmjs.org'

            - name: Update npm
              run: npm install -g npm@latest

            - name: Install dependencies
              run: npm ci

            - name: Build (if needed)
              run: npm run build --if-present

            - name: Run tests
              run: npm test

            - name: Changesets version / publish
              uses: changesets/action@v1
              with:
                  # When there *are* pending changesets → create/update Version Packages PR
                  version: npm run changeset:version

                  # After the Version Packages PR is merged → publish & create tags
                  publish: npm run changeset:publish
              env:
                  GITHUB_TOKEN: ${{ secrets.GITHUB_TOKEN }}
                  NPM_CONFIG_PROVENANCE: true
This workflow will run the tests with npm test, then create a PR. Once the PR is merged (this is manual for security—you don’t want this automatic), the version is updated, and that version is published to npm.
Note: Notice the permissions at the top. We need this to allow changes to the version. This is saved in GitHub under Releases and Tags.
Publish to npm
This assumes you have an npm account. You can create one at npm if you don’t have one. Make sure to enable 2FA.
Publish your first version to npm by running.
npm login– You will log in with the browser, then enter your 2FA code.- Run
npm publish --access publicto publish a public package.
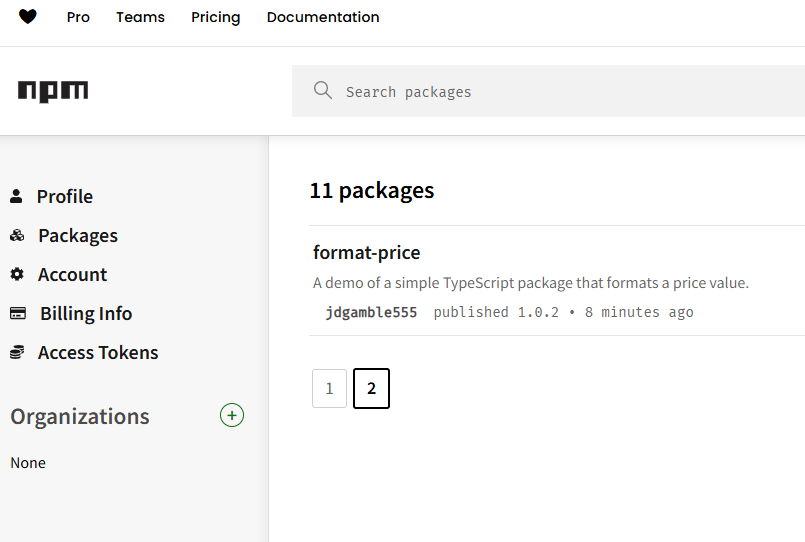
Once you publish, you will see your package published in npm. This means anyone can install it with npm i format-price in their repo.
Note: Our final goal is to publish automatically with a git commit.
Configure GitHub Publishing
Click on the package, then go to Settings.
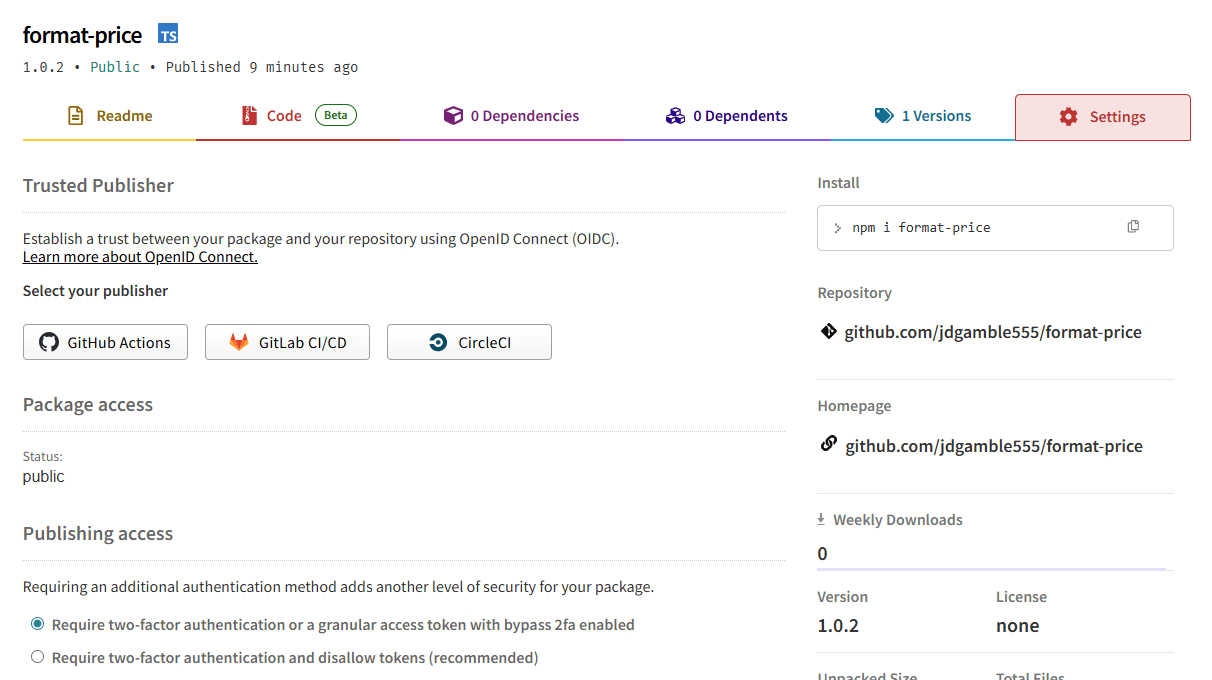
- Create a new Connection to GitHub Actions.
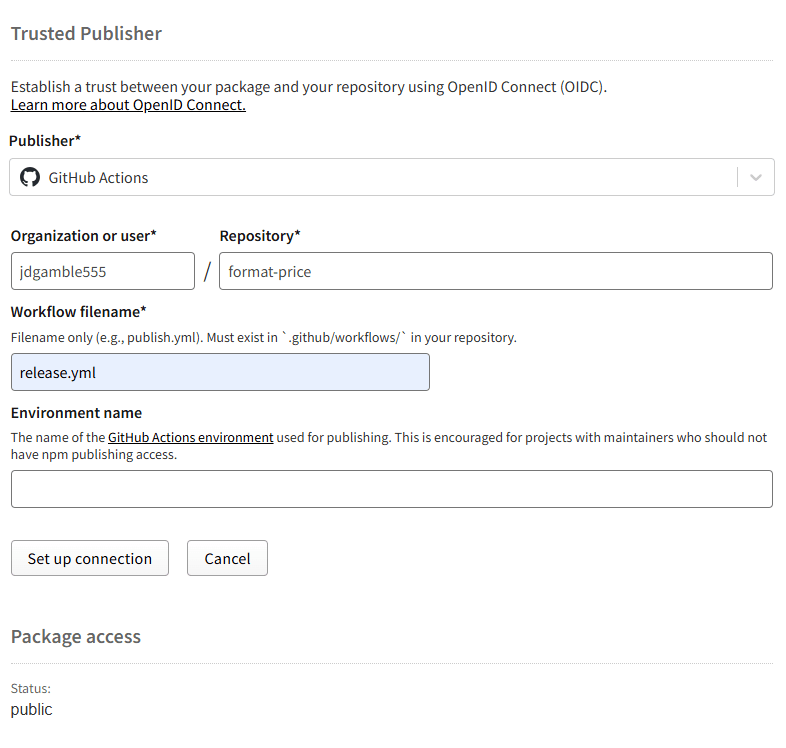
- Enter your GitHub username and repository, as well as your YAML file
release.yml.
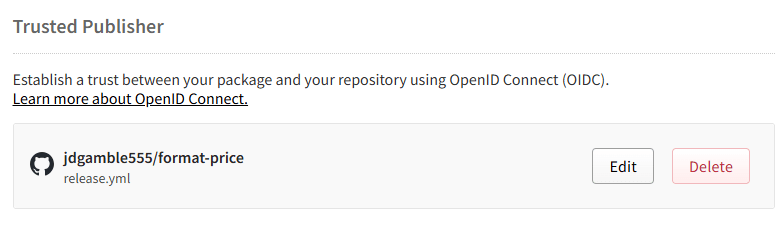
- You will see a connection enabled for GitHub to be a Trusted Publisher.
Auto Publishing
Now that the connection is setup, you can publish automatically.
- Create a change to your file.
- Run
npm run buildand then whatever other formatting or pre-publishing commands you use. - Run
npx changesetto create a new version. You can usepatchfor testing. - Create a new commit
git add .git commit -m 'auto publish'git push
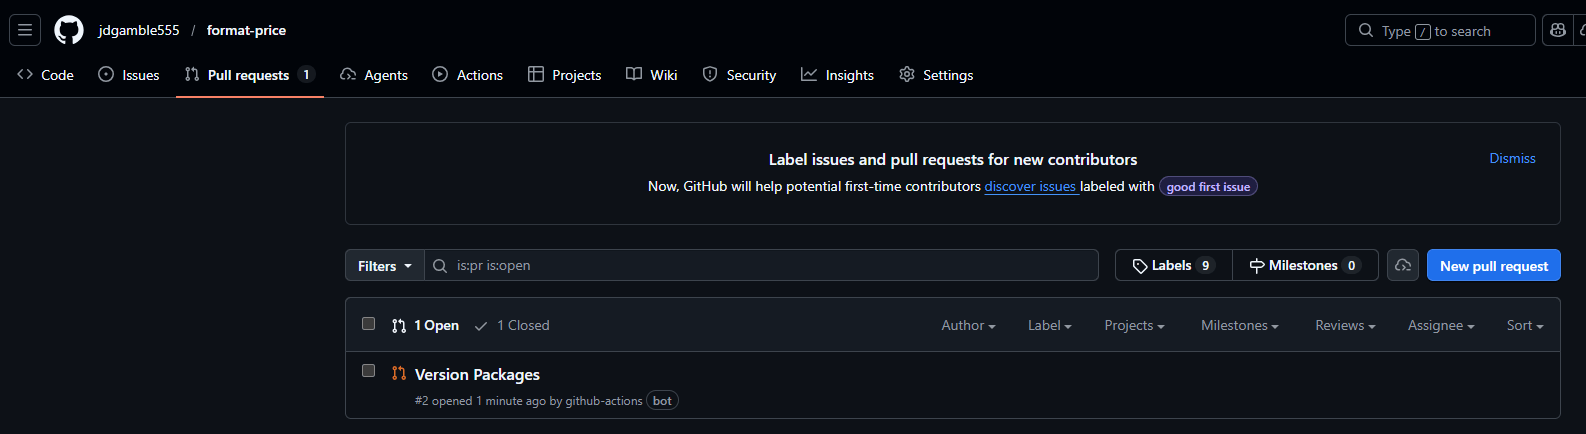
- Go to your project on GitHub, and you should see a successful Pull Request.
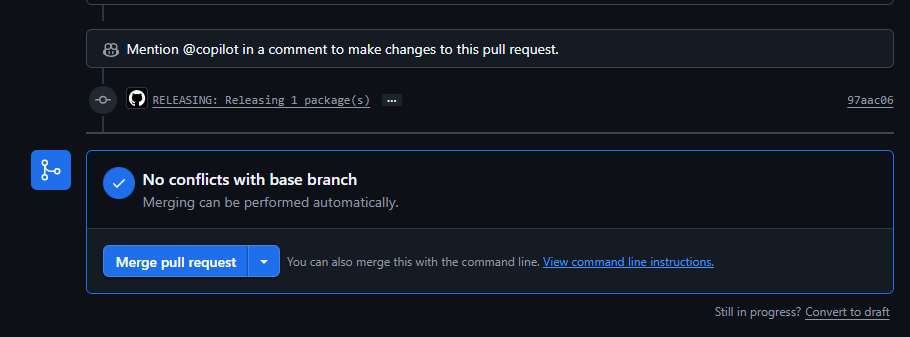
- Click the
Merge pull requestbutton to merge the versioning and changes. It will also auto publish and auto update your versions. Feel free to add any more description info for the PR. - Wait a few minutes for the publish to update, and you will now see a
Releasesoption in your GH sidebar.
- Don’t forget to pull the version changes locally with
git pull.
You now have a fully automated npm publishing pipeline!
You can install your package anywhere with npm i format-price!
Example Repo: GitHub
Read next: TypeDB: A Graph Database for Things

Jonathan Gamble
Jonathan Gamble has been an avid web programmer for more than 20 years. He has been building web applications as a hobby since he was 16 years old, and he received a post-bachelor’s in Computer Science from Oregon State. His real passions are language learning and playing rock piano, but he never gets away from coding. Read more from him at https://code.build/.
Related Posts
Comments
All articles
Topics
Web MobileMobile
Desktop
Design
Productivity
People
