Build and Deploy a Dockerized NestJS Application on Google Cloud Run

Summarize with AI:
Build an image for a NestJS project and deploy it on Google Cloud Platform and learn common tweaks and tips for updating and improving deployed services.
Containers allow us to package software and all its dependencies into a lightweight, portable unit that we can run and scale either locally or in the cloud. Google Cloud Run is a service provided on Google Cloud Platform that allows developers to deploy and scale containers for virtually any kind of application with minimal effort.
Before running containers, we have to build images. Google Cloud Run allows us to build them in the cloud using buildpacks, or build them locally on our PC with container runtimes like Docker or Podman. This article will focus on the latter. We’ll build an image for a NestJS project and deploy it on Google Cloud Platform. We’ll also cover common tips for updating and improving deployed services.
Prerequisites
This guide assumes that you’re familiar with server-side programming in TypeScript and have some familiarity with a container runtime like Docker or Podman.
Project Setup
Let’s start by setting up the NestJS project we’ll be deploying. Open your terminal and run the following command:
ng new my-nest-backend
The command above uses the Nest CLI to create a project in a folder called my-nest-backend. Follow the prompts and accept all the defaults.
Next, let’s install the dependencies we’ll be needing. Run this command in your terminal:
pnpm i -save @nestjs/config
We installed the config module to use environment variables. Later on, we’ll show how to add and use environment variables in our deployment. For now, run this command in your terminal to create a file that will hold environment variables locally.
touch .env
Next, update the .env file to look like this:
MESSAGE=dev-message
Now let’s update the contents of our app.module.ts file.
import { Module } from '@nestjs/common';
import { AppController } from './app.controller';
import { AppService } from './app.service';
import { ConfigModule } from '@nestjs/config';
import { CoreModule } from './dummy/core.module';

@Module({
imports: [
ConfigModule.forRoot({
    isGlobal: true,
    ignoreEnvFile: process.env.NODE_ENV === 'production',
    envFilePath: [process.env.NODE_ENV !== 'production' ? '.env' : ''],
}),
CoreModule,
],
controllers: [AppController],
providers: [AppService],
})
export class AppModule {}
We updated our app.module.ts to use the config module. There are two things to notice here: when not in production, we read environment variables from the .env file. In production, notice that the ignoreEnv option will be true. This allows our app to read any environment variables we inject into the container when we run our application in the cloud.
We’ll also need one endpoint. Let’s now update the app.controller.ts file with the following:
import { Controller, Get, Post } from '@nestjs/common';
import { AppService } from './app.service';

@Controller()
export class AppController {
constructor(private readonly appService: AppService) {}

@Get('/')
getHello(): string {
return this.appService.getHello();
}
}
Also update your app.service.ts file with the following:
import { Injectable } from '@nestjs/common';
import { ConfigService } from '@nestjs/config';

@Injectable()
export class AppService {
    constructor(private readonly configService: ConfigService) {}
    getHello(): string {
    return this.configService.getOrThrow<string>('MESSAGE');
    }
}
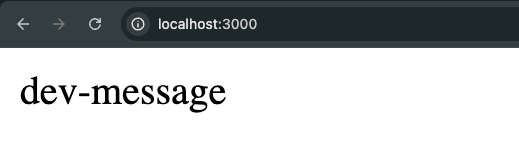
Our demo app has one route, /, which, when triggered, calls the getHello method. This method returns the value of the MESSAGE environment variable.
To see our running application, open your terminal and run the following command:
pnpm run start:dev
Our app currently listens on port 3000, as shown in the main.ts file below:
import { NestFactory } from '@nestjs/core';
import { AppModule } from './app.module';

async function bootstrap() {
    const app = await NestFactory.create(AppModule);
    await app.listen(process.env.PORT ?? 3000);
}
bootstrap();
Notice that our app listens on the special process.env.PORT value when provided. This will be important in production, since this value will be dynamically injected when the application is running within the container. For now, since we don’t have it set locally, it defaults to port 3000.
Now visit http://localhost:3000 to see the running application, as shown below:
Building the Image
We need to build the application’s image before running it as a container. We already mentioned in the introductory section that the image can be built either locally or remotely.
When building locally, we can either use local buildpacks or, as in our case, leverage container runtimes like Docker or Podman.
Now, within the my-nest-backend folder, create a file called Dockerfile and update its contents as follows:
FROM node:22-alpine AS builder
WORKDIR /app
RUN npm i -g pnpm@9
COPY package.json pnpm-lock.yaml ./
RUN pnpm install
COPY . .
RUN pnpm run build

FROM node:22-alpine AS runner
WORKDIR /app
COPY --from=builder /app/node_modules ./node_modules
COPY --from=builder /app/dist ./dist
USER test
EXPOSE 3000
CMD ["node", "dist/main.js"]
Our Dockerfile is straightforward: it has two main stages. In the first stage, we install the pnpm package manager, use it to install all dependencies listed in package.json, and then build the app.
The second stage simply copies over the contents from the build step: the node_modules folder and the generated dist folder, from the first (builder) stage.
For security reasons, we also set the USER to test so that commands don’t run as root. The EXPOSE instruction just documents in the image metadata that the app may listen on port 3000. Finally, the CMD instruction holds the command used to start the container from the image.
To build the image, open your terminal within the project directory and run the following command:
docker build . -f Dockerfile --platform linux/amd64 -t chrisnw/dummy-app:0002
The command above builds the image. The period (.) defines the build context, which in our case is the my-nest-backend folder. The -f flag specifies the file where the build script is located. This is optional if the file is named Dockerfile; we only added here for clarity.
Also notice that we specified the --platform flag and set it to linux/amd64. This is important to allow the generated image to run correctly, particularly when the image is built on an Apple Silicon machine.
We tag the image chrisnw/dummy-app:0002. This follows the standard format of <DOCKER_HUB_USERNAME>/IMAGE_NAME:TAG. If you don’t have a Docker Hub username, feel free to create one.
To push the image to Docker Hub, run the following command:
docker push chrisnw/dummy-app:0002
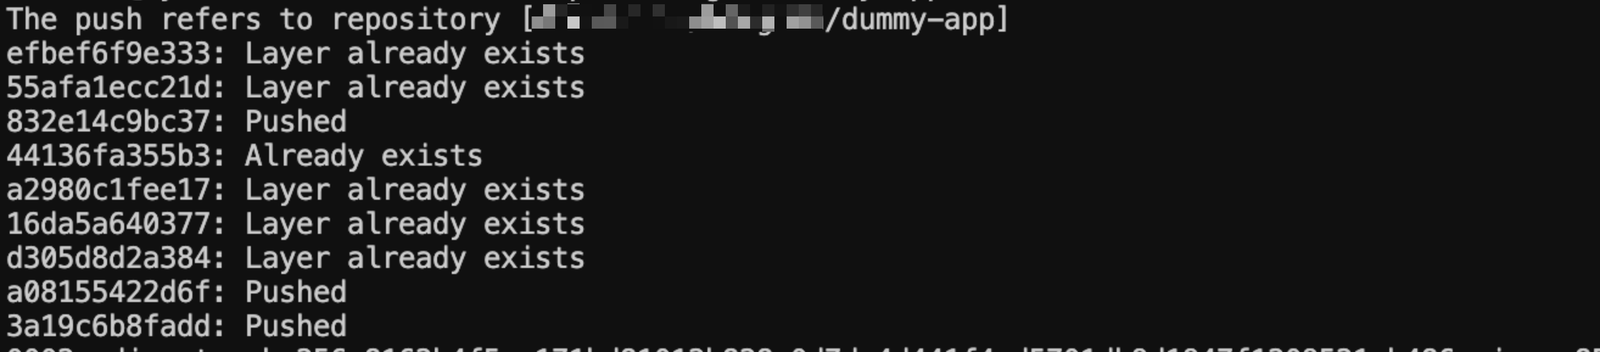
As seen above, the command executes successfully. The Docker image is pushed to the personal Docker Hub registry associated with the specified username.
Deploying the Container on Google Cloud Run
Internally, Google Cloud Run is based on Kubernetes, but with a simplified interface. Users are able to run any kind of workload, provided it’s housed in a container. You can either provide a built image, like we did, or have Cloud Run build it for you, either by pointing it to your source code or by using their provided buildpacks to have the build done in the cloud.
To start, visit Google Cloud Platform and create a project. Note that we can use the gcloud CLI to execute all these steps in the terminal, but for simplicity, we’ll be doing everything through the UI.
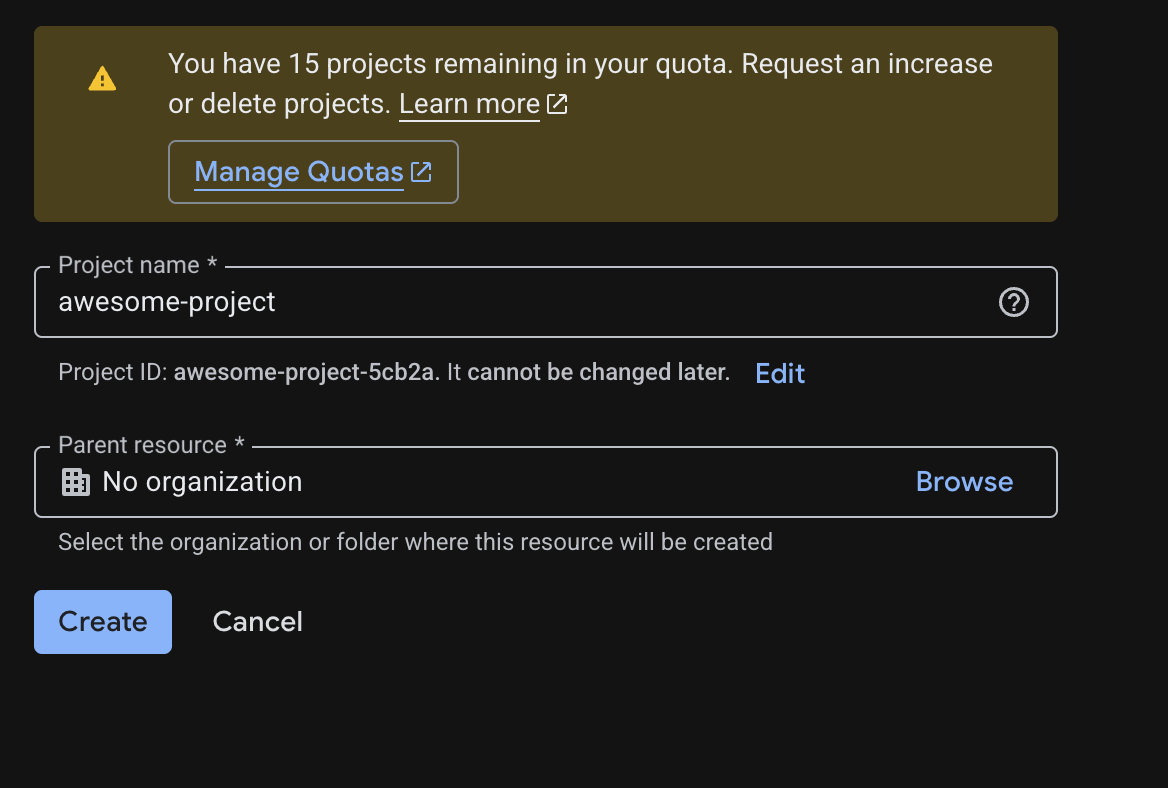
Select the project as the default project, as shown below.
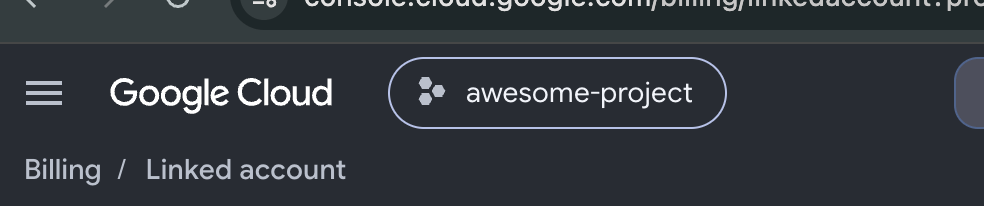
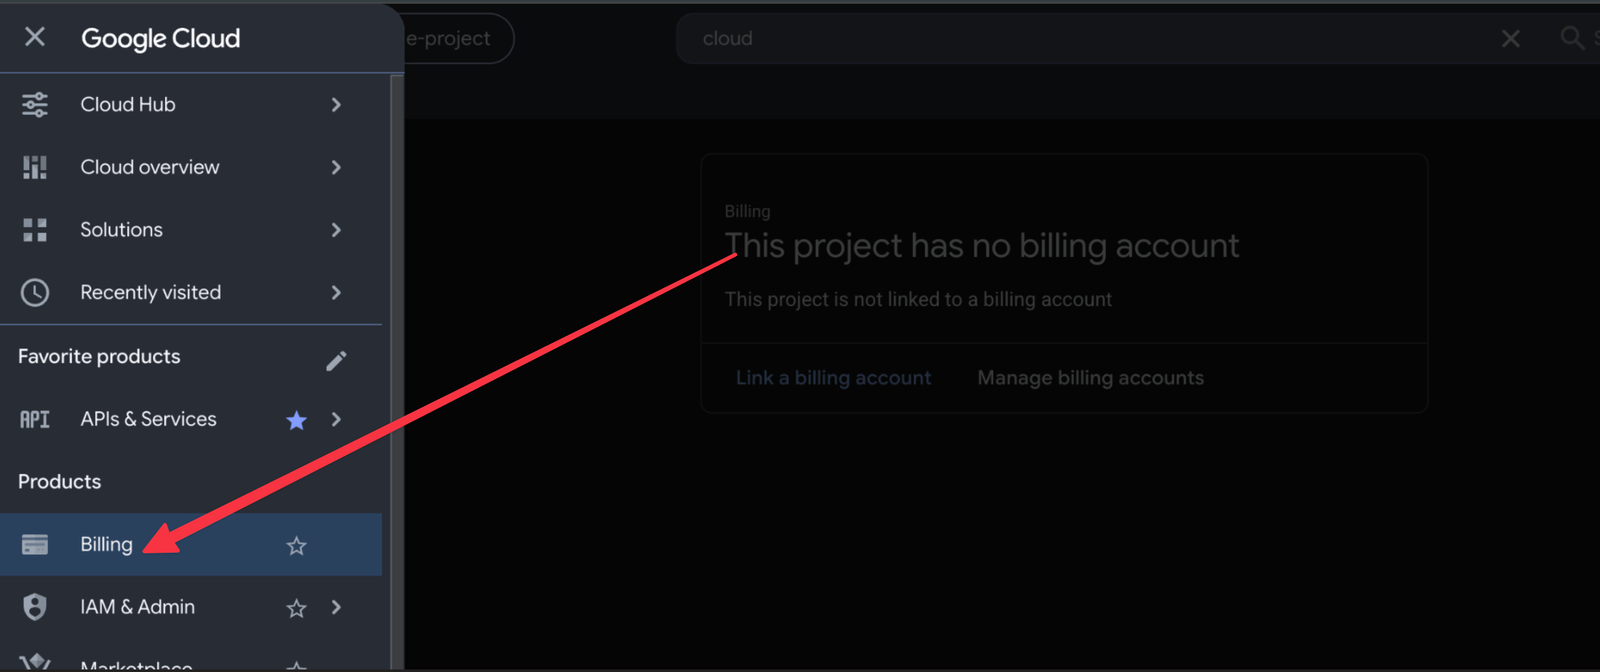
Next, we need to enable billing on our project to be able to use Cloud Run. Select Billing from the sidebar.
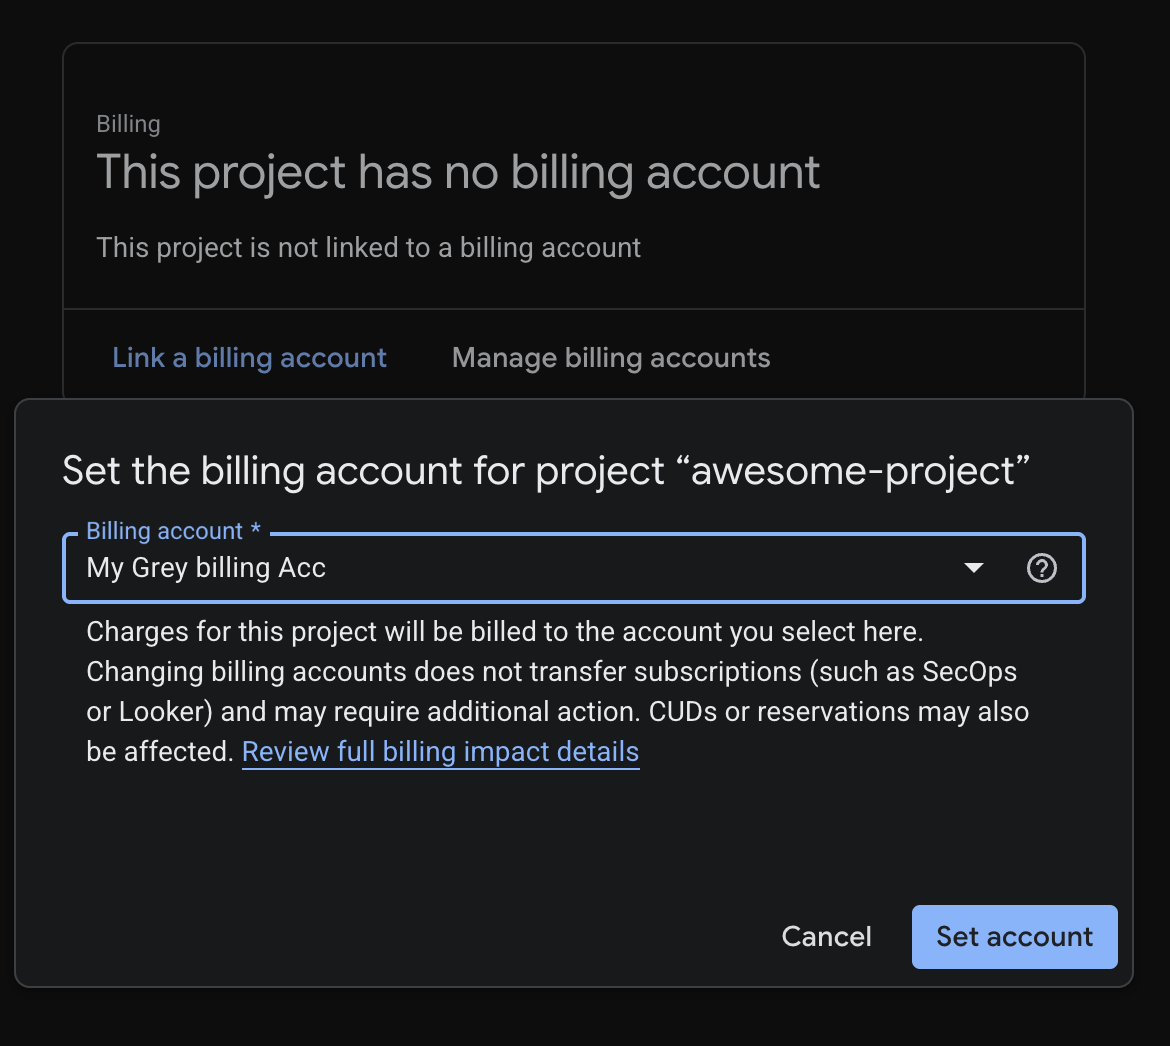
Next, click on “Link a billing account” and select an account to link.
Now that billing is set up, we can go to the Cloud Run console. The quickest way to access it is by using the search bar.

Creating a Service
Now click on Cloud Run. Next, on the sidebar, select Services and click on Deploy container.
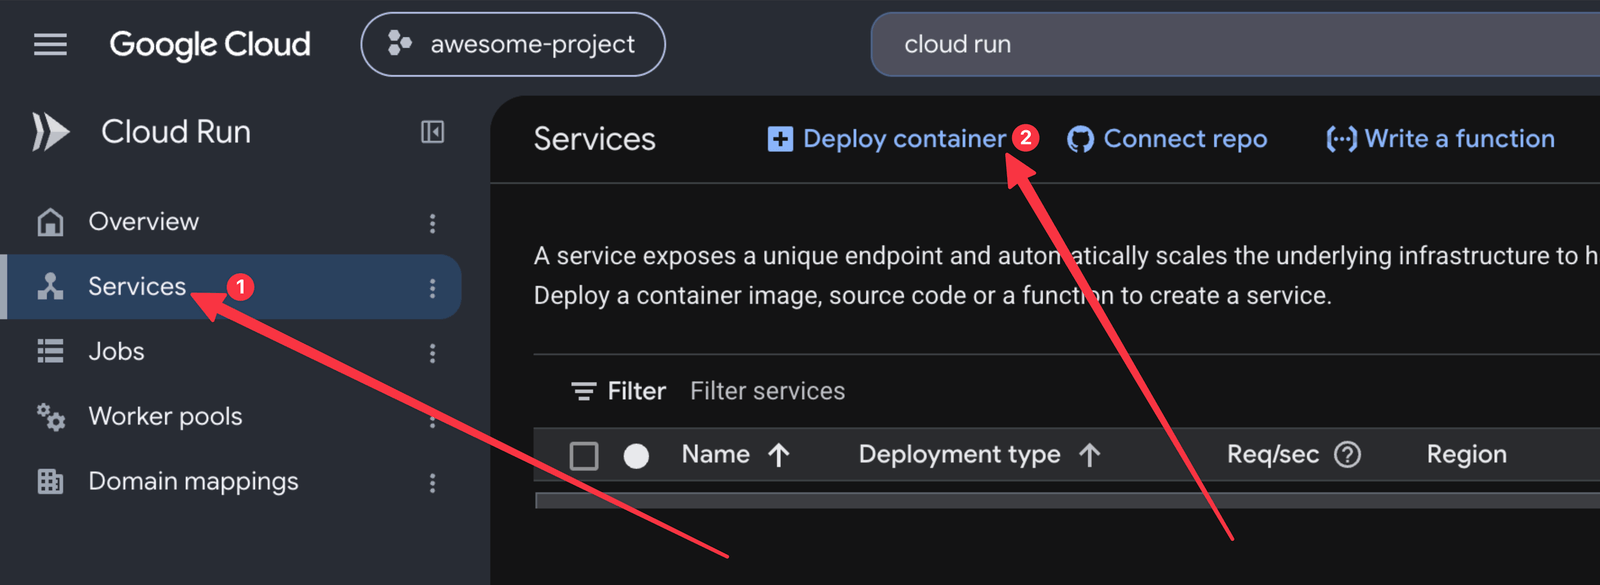
We chose the Service option because this is used for any HTTP-triggerable workload, like a web server in our case. Note that a service can be used to run one or more containers.
After clicking on Deploy container we’re presented with a form to configure the service before deploying.
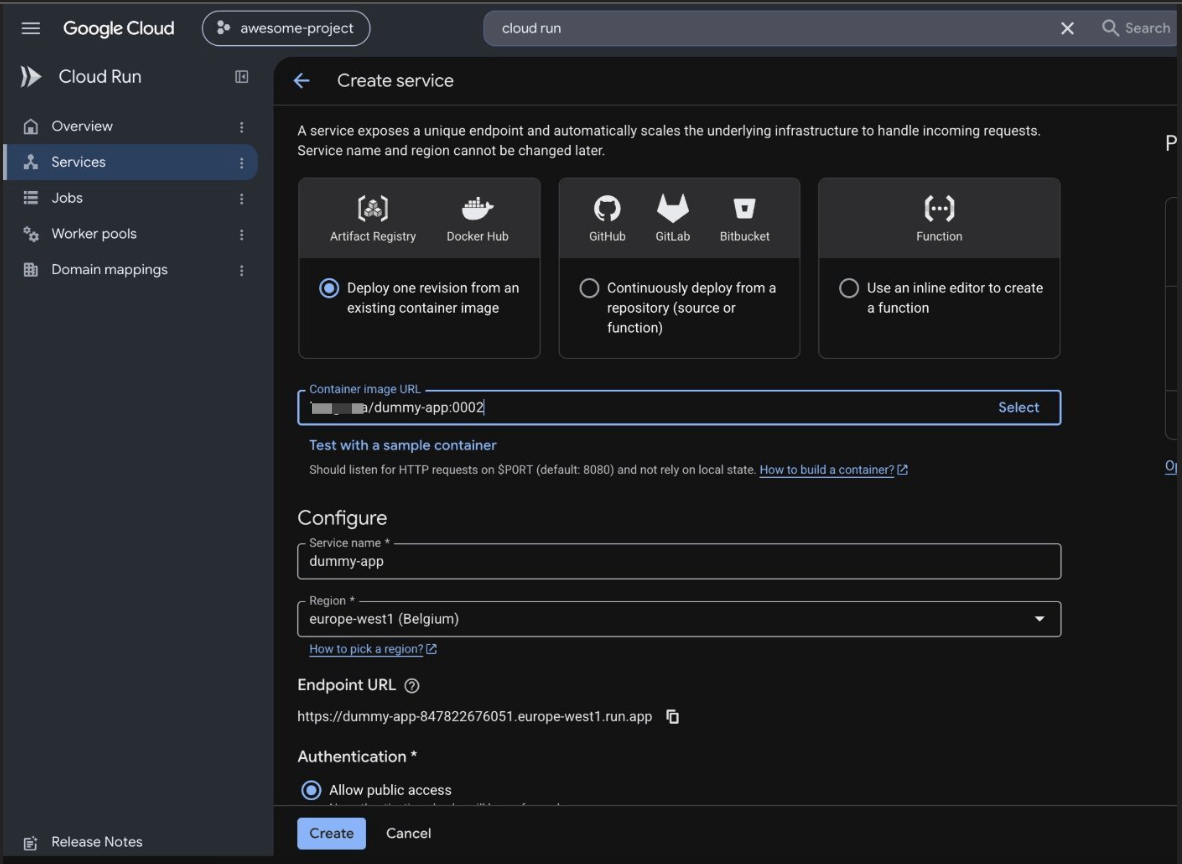
We choose “Deploy from a container image”, then provide the URL to the image we just pushed to Docker Hub. We name our service dummy-app. Notice that we also get an automatically generated URL to visit our application. In our case, it’s https://dummy-app-847822676051.europe-west1.run.app/.
Configuring Instances and Billing
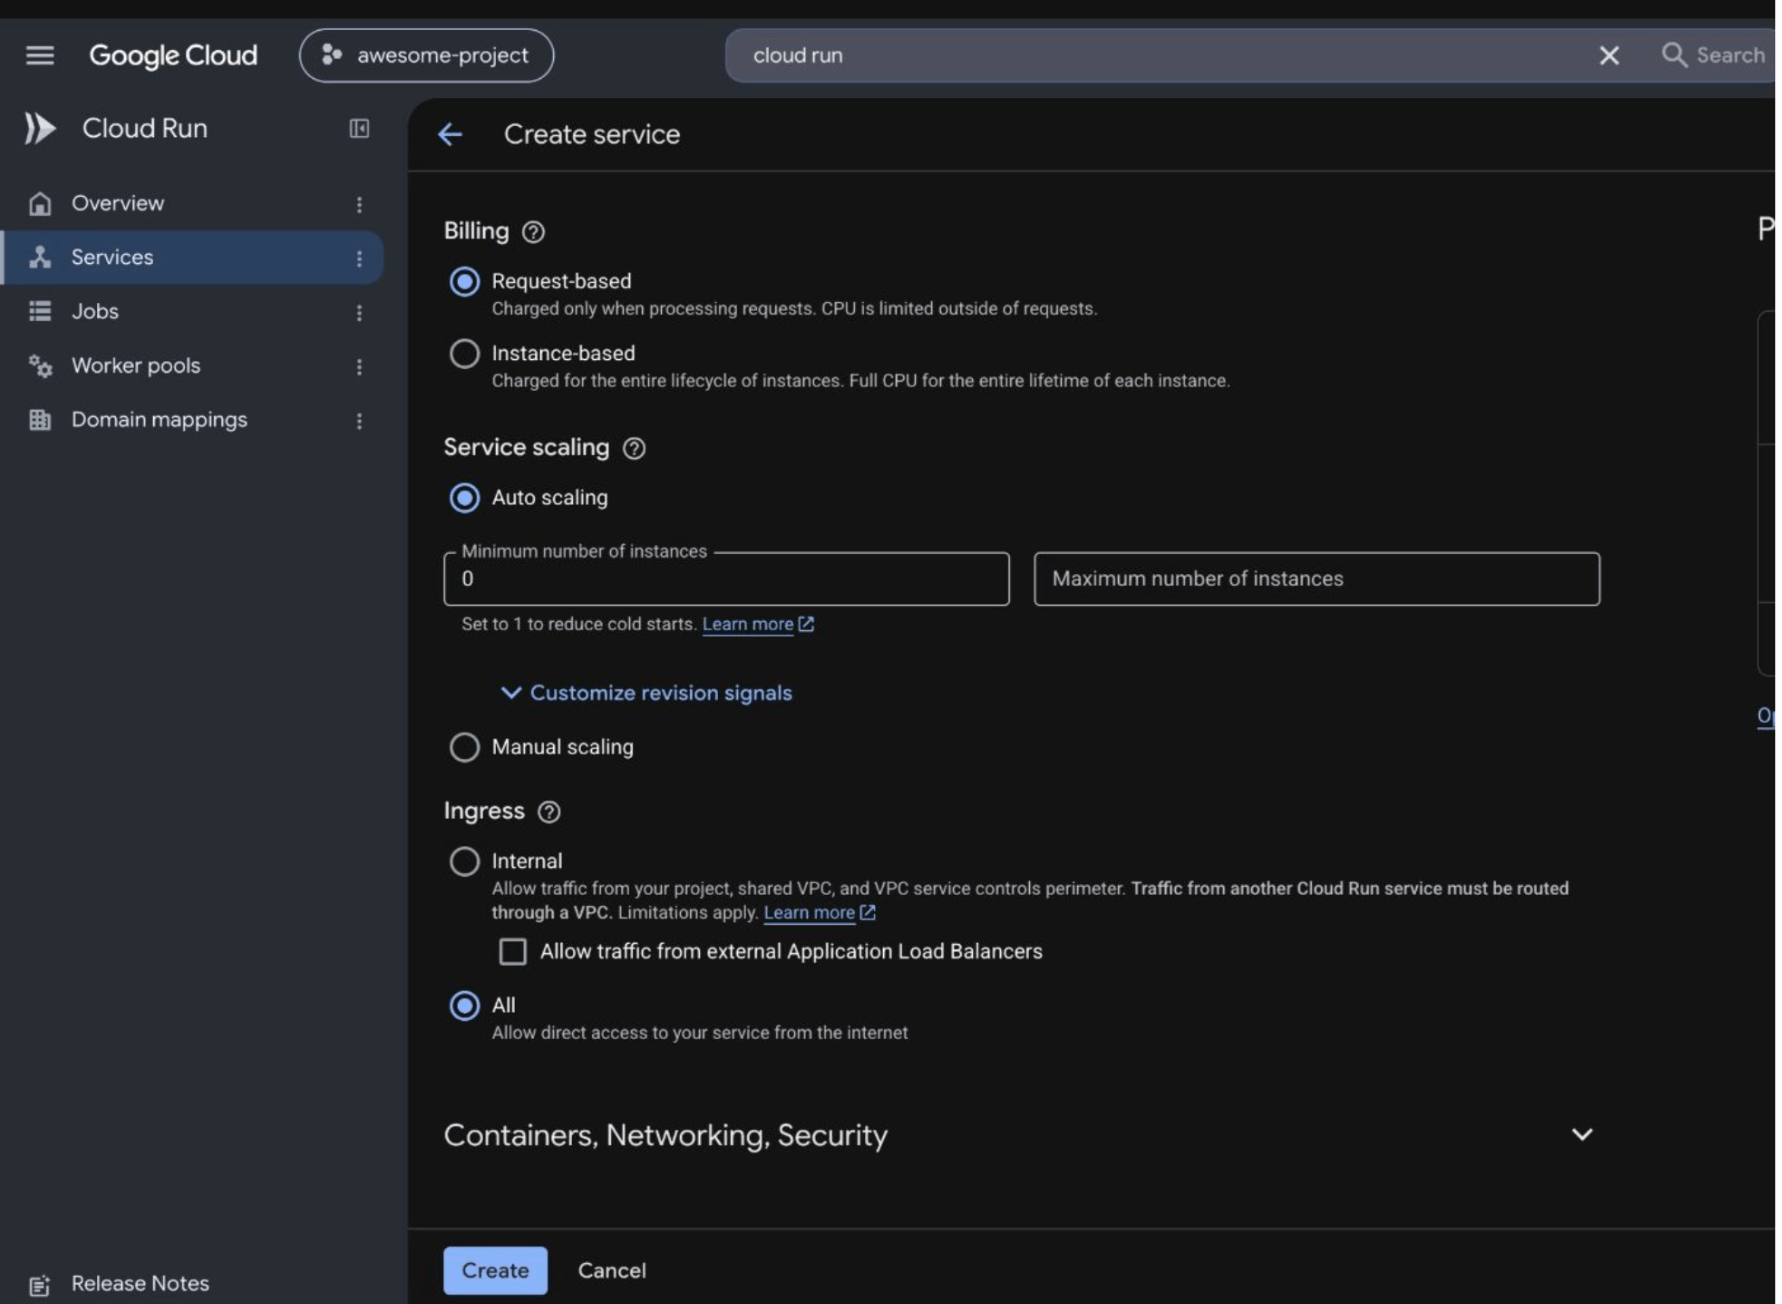
Services can be billed per request or per instance. Request-based billing, as the name implies, means you’re charged per request to your server. This way, lower traffic means lower charges, and vice versa.
However, your server won’t be able to run background tasks like CRON jobs or spawn workers to process tasks in a queue, since instances sleep when there’s no traffic.
If your web server needs to do this, it’s preferable to opt for instance-based billing and specify a minimum number of instances to run, so the server is reachable and running without any cold starts. For our small server, we’re fine with the request-based setup.
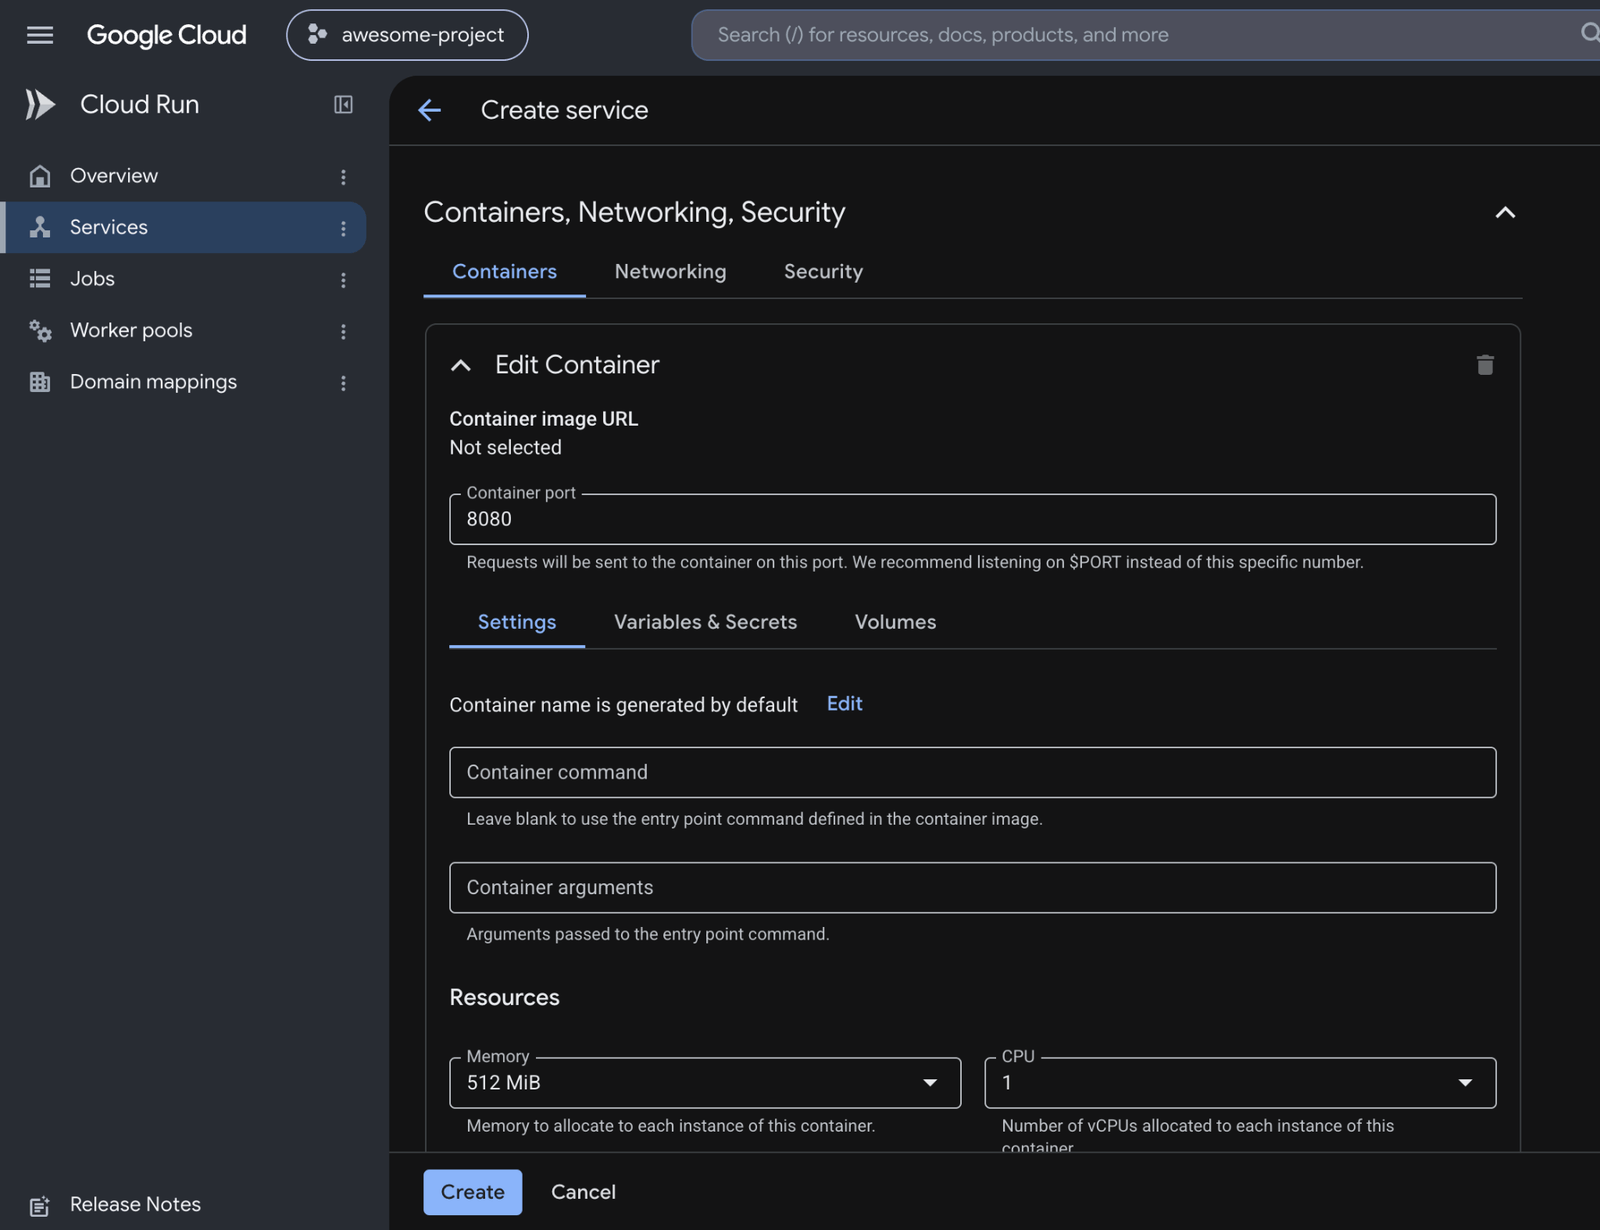
Next, we need to configure the container settings. For memory and compute, we leave the defaults. We didn’t set the container command field, since we already set it when we built the image—i.e., the CMD ["node", "dist/main.js"] we set earlier in our Dockerfile.
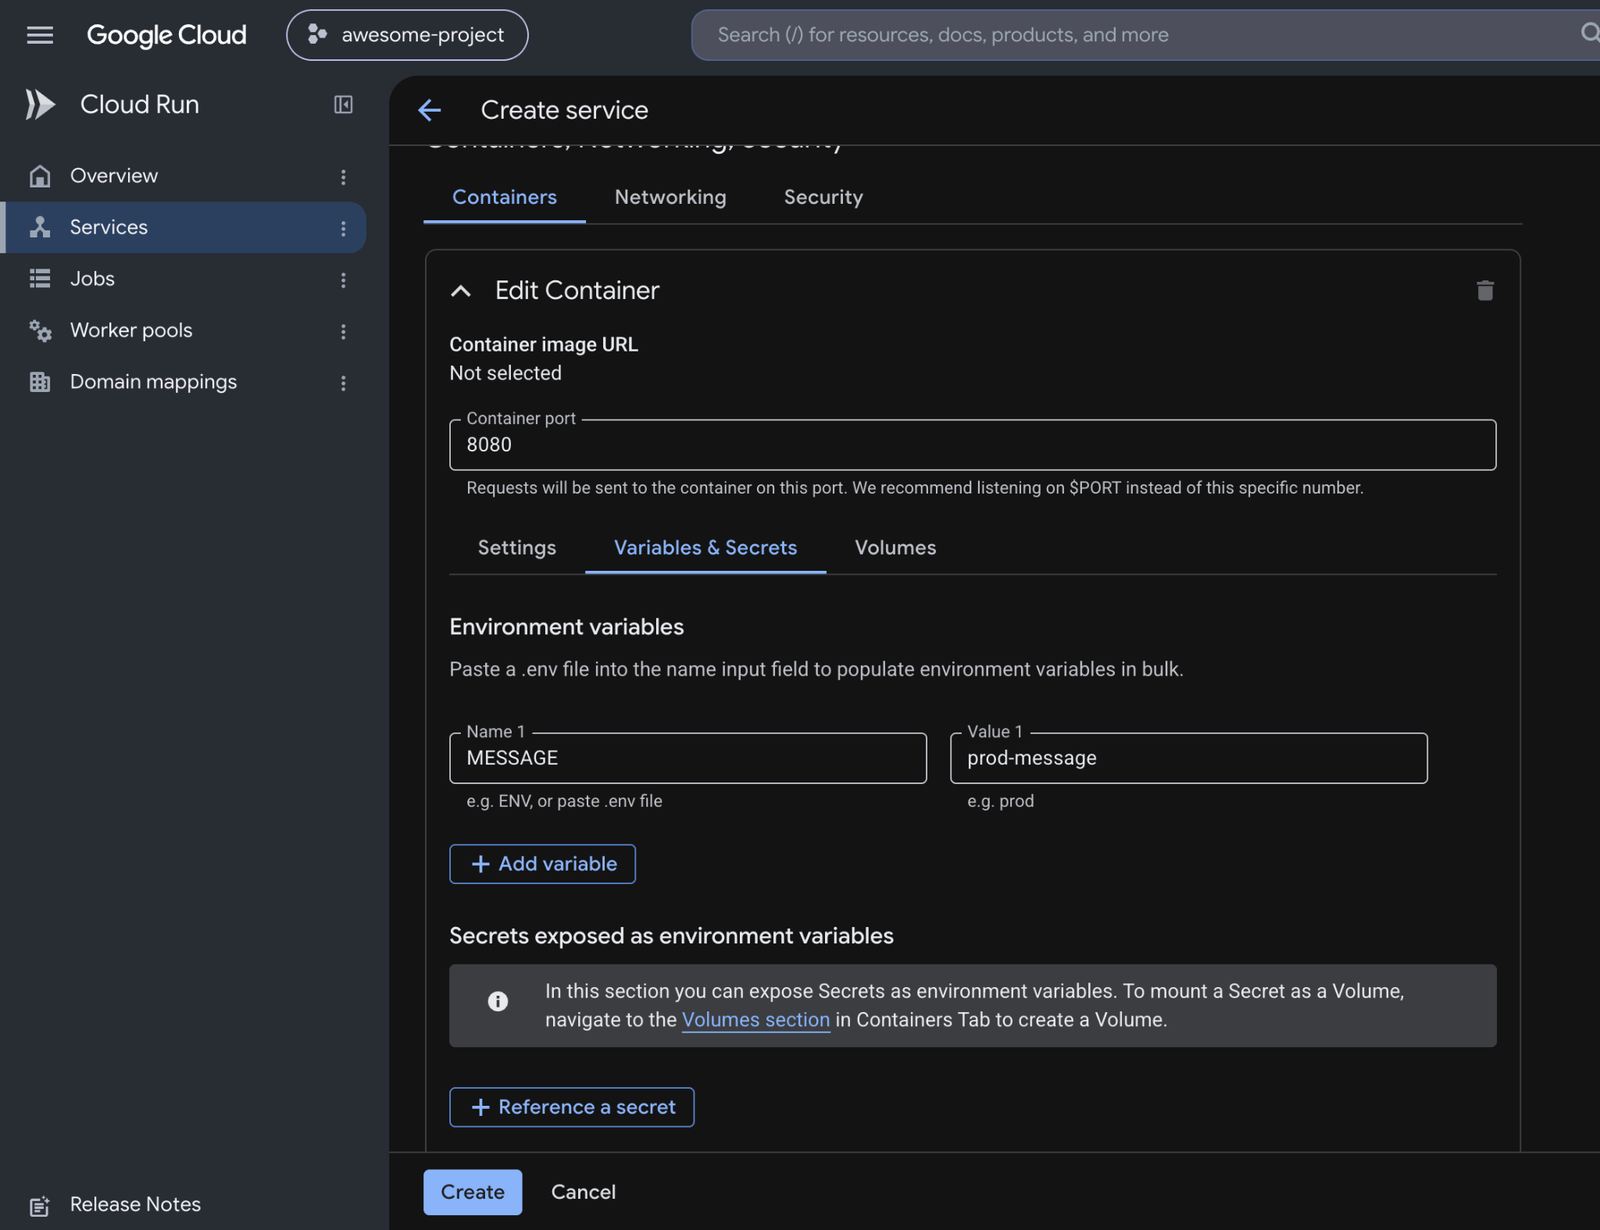
Next, we switch to the Variables and Secrets tab. We added one environment variable called MESSAGE and set its value to a dummy value we called prod-message. You can add multiple variables by clicking the Add variable button.
However, for sensitive credentials, like API keys or database connection strings, which shouldn’t be exposed as plain text, you can click on “Reference a secret” to enable the Secret Manager API and add one or more secrets to reference here.
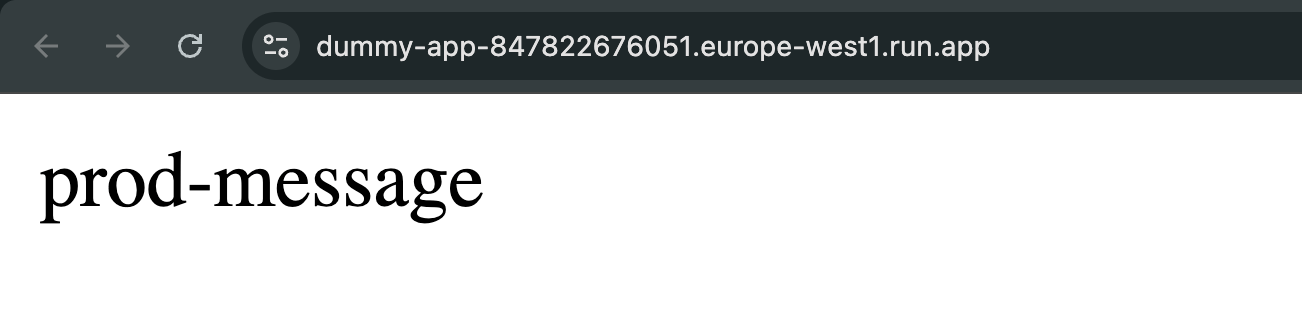
Finally, click on the Create button to deploy the service. If everything works fine, visit the URL now, and you should see the running application, as shown below:
Making Changes and Redeploying the Application
To redeploy our application, let’s make a change to the code. Update your app.service.ts file.
import { Injectable } from '@nestjs/common';
import { ConfigService } from '@nestjs/config';

@Injectable()
export class AppService {
 constructor(private readonly configService: ConfigService) {}
 getHello(): string {
   return this.configService.getOrThrow<string>('MESSAGE') + '😁';
 }
}
We simply added an emoji to the returned string from our getHello method. Now we can proceed to build the image by running:
docker build . --platform linux/amd64 -t chrisnw/dummy-app:0003
And push the image by running:
docker push benguma/dummy-app:0003
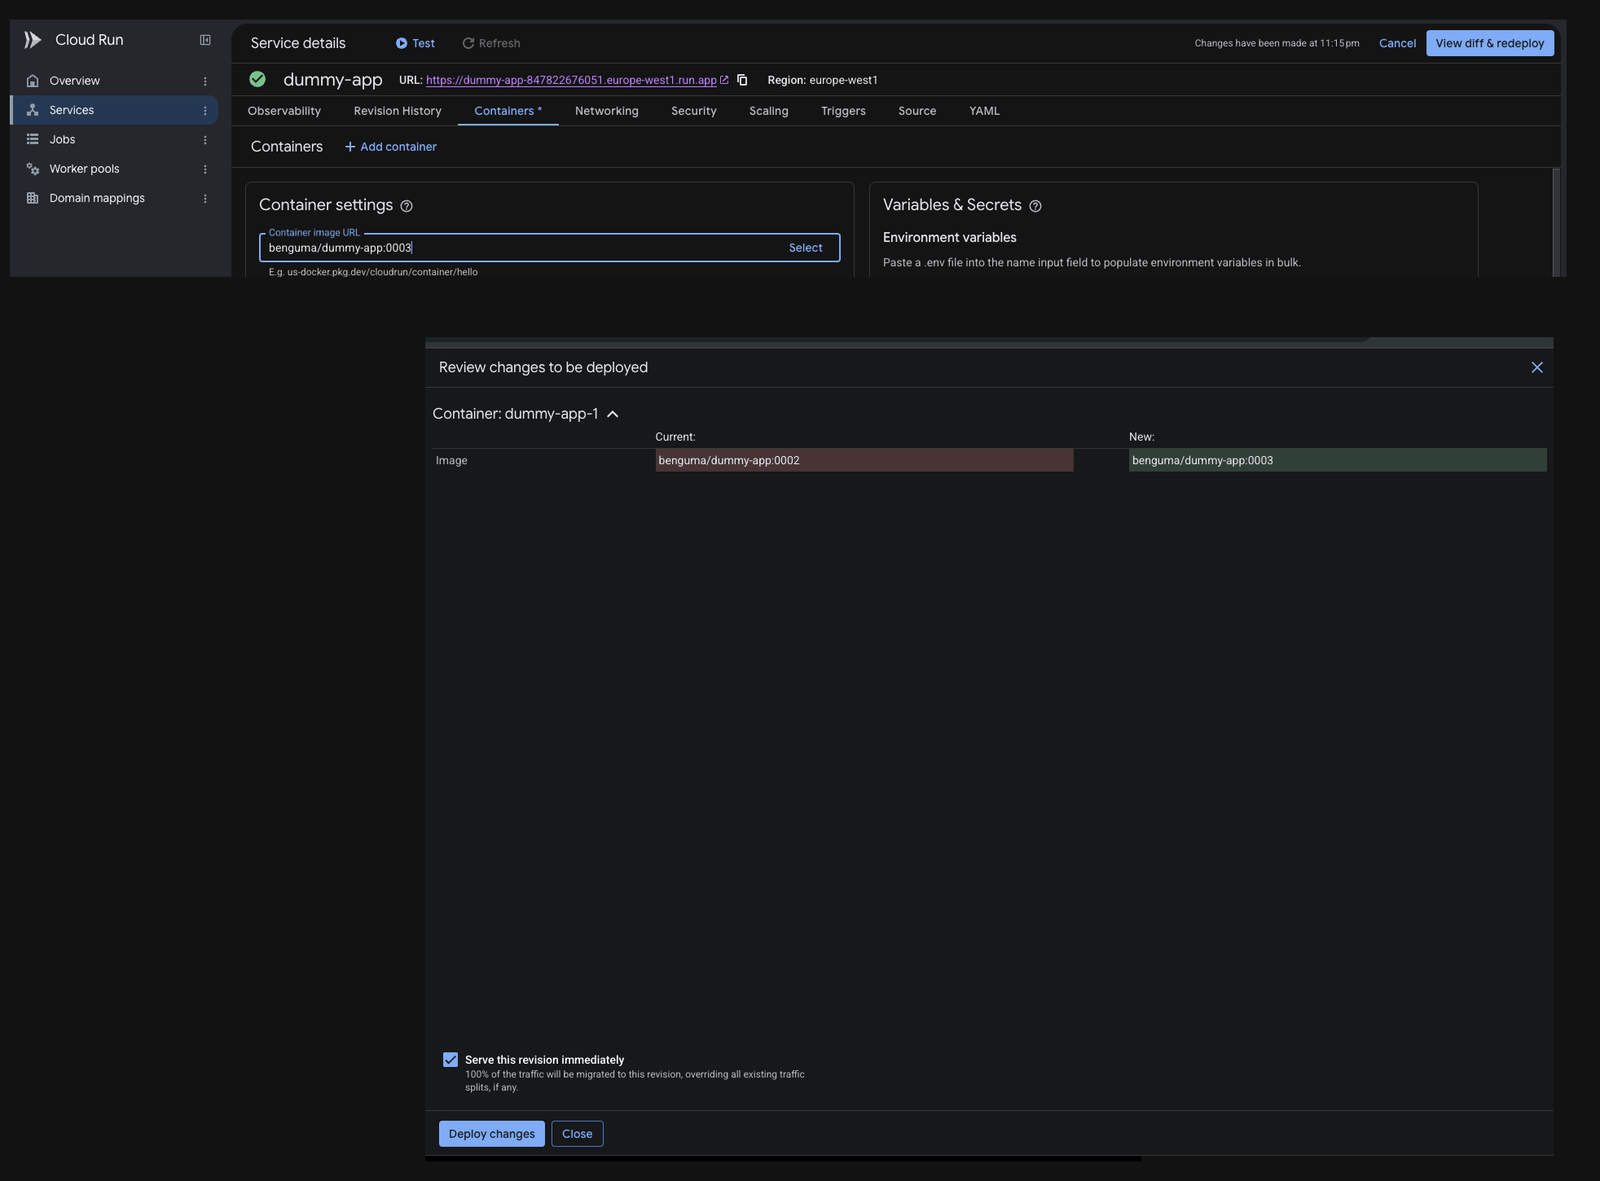
Now, on the Container tab, we update the field pointing to the new image. Click “View diff and deploy”, then click “Deploy changes”.
Automating for CI/CD
Instead of manually building and publishing the image, we can make the build step part of our CI/CD pipeline using common options like GitHub Actions. Google Cloud Run also provides the necessary automation scripts we can plug in to speed up image building, pushing and deployment.
Conclusion
Google Cloud Run makes it easy for developers to leverage the powerful features of Kubernetes, including its rich ecosystem of middleware and plugins, without dealing with the usual complexity. Hopefully, this demo can serve as a starting point for deploying similar workloads on Google Cloud Platform in your future projects.

Christian Nwamba
Chris Nwamba is a Senior Developer Advocate at AWS focusing on AWS Amplify. He is also a teacher with years of experience building products and communities.
Related Posts
Comments
All articles
Topics
Web MobileMobile
Desktop
Design
Productivity
People