Getting Started with the .NET MAUI RefreshView
This guide provides the information you need to start using the Telerik UI for .NET MAUI RefreshView by adding the control to your project and reloading data when the user pulls the content.
At the end, you will be able to achieve the following result.
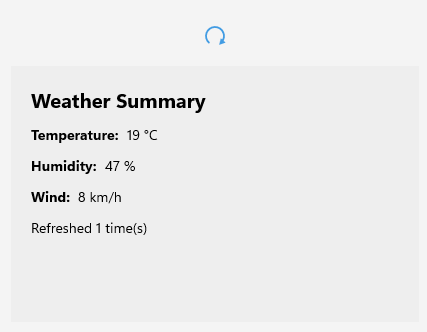
Prerequisites
Before adding the RefreshView, complete the following steps:
Define the Control
To display the RefreshView on a page and refresh its content, complete the following steps:
-
Add the RefreshView to your page in and set the content you want to refresh:
XAML<telerik:RadRefreshView x:Name="refreshView" Refreshing="OnRefreshing"> <VerticalStackLayout Padding="20" Spacing="12" BackgroundColor="#EEEEEE"> <Label Text="Weather Summary" FontSize="20" FontAttributes="Bold" /> <HorizontalStackLayout Spacing="8"> <Label Text="Temperature:" FontAttributes="Bold" /> <Label x:Name="temperatureLabel" Text="21 °C" /> </HorizontalStackLayout> <HorizontalStackLayout Spacing="8"> <Label Text="Humidity:" FontAttributes="Bold" /> <Label x:Name="humidityLabel" Text="45 %" /> </HorizontalStackLayout> <HorizontalStackLayout Spacing="8"> <Label Text="Wind:" FontAttributes="Bold" /> <Label x:Name="windLabel" Text="12 km/h" /> </HorizontalStackLayout> <Label x:Name="refreshCountLabel" Text="Not refreshed yet" /> </VerticalStackLayout> </telerik:RadRefreshView> -
Add the
teleriknamespace:XAMLxmlns:telerik="http://schemas.telerik.com/2022/xaml/maui" -
Handle the
Refreshingevent to load the new data. When the data is loaded, setIsRefreshingtofalseto end the refresh and hide the indicator:C#private async void OnRefreshing(object sender, EventArgs e) { await Task.Delay(1500); this.refreshCount++; this.temperatureLabel.Text = $"{18 + this.refreshCount % 10} °C"; this.humidityLabel.Text = $"{40 + (this.refreshCount * 7) % 50} %"; this.windLabel.Text = $"{5 + (this.refreshCount * 3) % 25} km/h"; this.refreshCountLabel.Text = $"Refreshed {this.refreshCount} time(s)"; this.refreshView.IsRefreshing = false; } -
Register the Telerik controls through the
Telerik.Maui.Controls.Compatibility.UseTelerikextension method called inside theCreateMauiAppmethod of theMauiProgram.csfile of your project:C#using Telerik.Maui.Controls.Compatibility; public static class MauiProgram { public static MauiApp CreateMauiApp() { var builder = MauiApp.CreateBuilder(); builder .UseTelerik() .UseMauiApp<App>() .ConfigureFonts(fonts => { fonts.AddFont("OpenSans-Regular.ttf", "OpenSansRegular"); }); return builder.Build(); } }
The RefreshView doesn't end a refresh automatically. You must set the
IsRefreshingproperty tofalsewhen the data is loaded. Otherwise, the indicator stays visible.
For a runnable example with the RefreshView Getting Started scenario, see the SDKBrowser Demo Application and go to the RefreshView > Getting Started category.