Using Telerik UI for Blazor Forms and TileLayout

Summarize with AI:
The powerful TileLayout component from Telerik UI for Blazor allows you to build customizable dashboards for your users and save and restore a layout.
Enhancing Web Applications Using Telerik UI for Blazor and C#
Blazor is a cutting-edge framework designed for web application development using C# and Razor syntax. One of its most distinguishing features is Blazor Forms, a built-in component providing extensive support for forms, such as a sign-up process or obtaining user feedback through comments on a website.
What makes Blazor Forms exceptionally appealing is its deployability as static files, akin to React, while taking advantage of NuGet packages. This versatile feature, and the ability to use the same components both client- and server-side, makes it a highly desirable tool for developers. Blazor also includes intrinsic support for routing, validations and form handling.
Blazor Forms goes beyond traditional forms in a multitude of ways. One of its significant advantages is its operation within a memory-safe, sandboxed environment, which results in swift execution similar to native applications. You’re well supported to construct rich, complex forms with flexible validation in a highly efficient manner. This results in a comprehensive, maintainable system for building forms.
Telerik UI for Blazor Forms
To take your Blazor Forms to the next level, Progress Telerik UI for Blazor provides an excellent enhancement in its Form component. A professional-grade UI library with more than 100 native components, Telerik UI is ideal for crafting modern, feature-packed applications.
The Telerik UI for Blazor Form component facilitates the generation and customization of forms based on the user’s specific model. This component offers substantial control through various parameters and allows the use of both default and custom editors.
Incorporating Telerik UI for Blazor with Blazor Forms brings great flexibility and customization. This powerful combination equips developers to build highly customized, user-friendly forms for their web applications, further strengthening the appeal of Blazor in modern web development.
Here we have sample code from the CRUD application template:
<TelerikForm Model="@person" OnValidSubmit="@HandleValidSubmit" class="k-form">
  <FormValidation>
    <DataAnnotationsValidator></DataAnnotationsValidator>
  </FormValidation>
  <FormItems>
    <FormGroup LabelText="User Details">
      <FormItem Field="@nameof(Person.FirstName)"
        EditorType="@FormEditorType.TextBox"
        LabelText="First name *">
      </FormItem>
      <FormItem Field="@nameof(Person.LastName)"
        EditorType="@FormEditorType.TextBox"
        LabelText="Last name *">
      </FormItem>
      <FormItem>
        <Template>
          <label for="country">Gender (optional):</label>
          <TelerikDropDownList @bind-Value="@person.Gender" DefaultText="Select gender"
            Data="@genders" TextField="Text" ValueField="Id"
            Width="100%" Id="GenderDDL">
              <DropDownListSettings>
                <DropDownListPopupSettings Height="auto"></DropDownListPopupSettings>
              </DropDownListSettings>
            </TelerikDropDownList>
          </Template>
      </FormItem>
      <FormItem Field="@nameof(Person.Email)"
          EditorType="@FormEditorType.TextBox"
          LabelText="Email">
      </FormItem>
    </FormGroup>
    <FormGroup LabelText="Team Preferences">
      <FormItem Field="@nameof(Person.StartDate)"
          EditorType="@FormEditorType.DatePicker"
          LabelText="Start date">
      </FormItem>
      <FormItem>
        <Template>
          <label for="country">Preferred Team *</label>
          <TelerikDropDownList @bind-Value="@person.PreferredTeam"
            DefaultText="Preferred team" Id="TeamDDL"
            Data="@Teams" Width="100%">
          </TelerikDropDownList>
        </Template>
      </FormItem>
    </FormGroup>
  </FormItems>
  <FormButtons>
    <TelerikButton ButtonType="ButtonType.Button" OnClick="@CancelForm">Cancel</TelerikButton>
    <TelerikButton ButtonType="@ButtonType.Submit" ThemeColor="primary">Submit</TelerikButton>
  </FormButtons>
</TelerikForm>

@if (ShowSuccessMessage)
{
<div class="alert alert-info">
  Application form submitted Successfully, we will get back to you
</div>
}
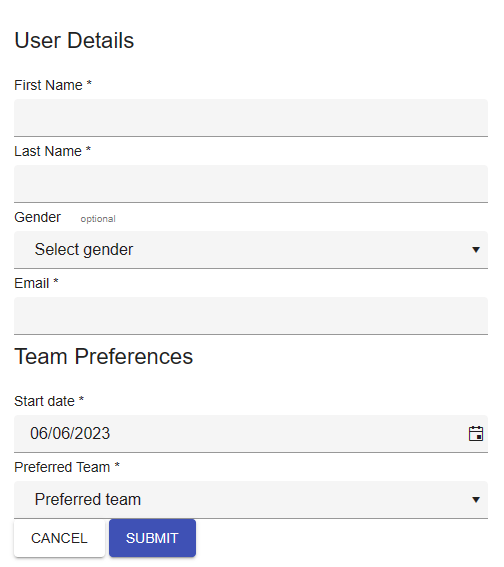
Here is the UI result:

This tutorial uses the Material-main theme.
Telerik UI for Blazor TileLayout
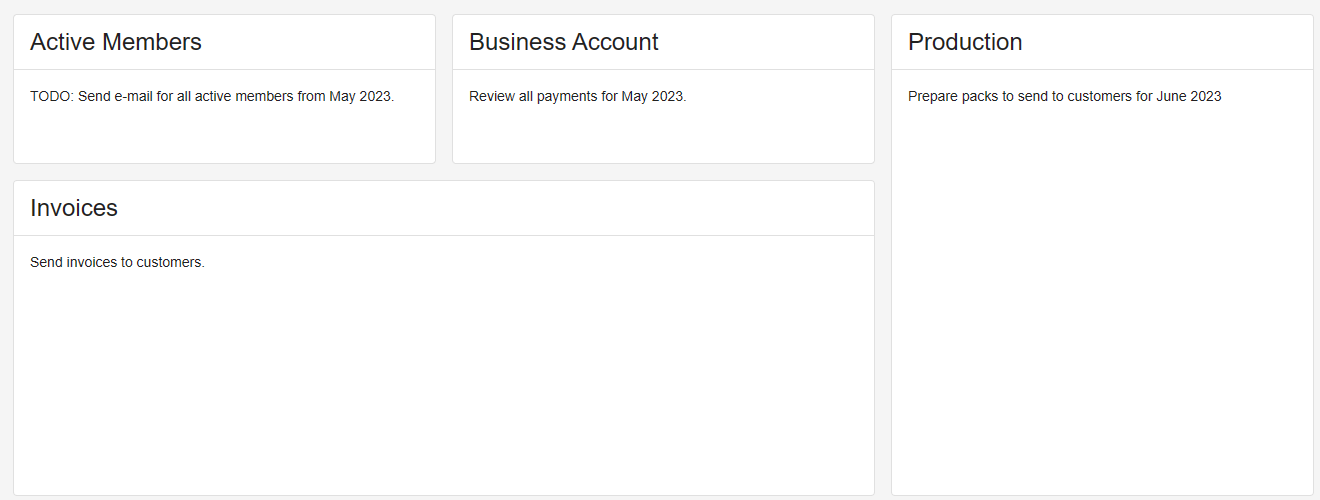
The TileLayout component in Telerik UI for Blazor is based on a two-dimensional CSS grid and displays its content in tiles. You can drag and rearrange, resizing tiles with multiple rows and columns to build customizable dashboards for your users.
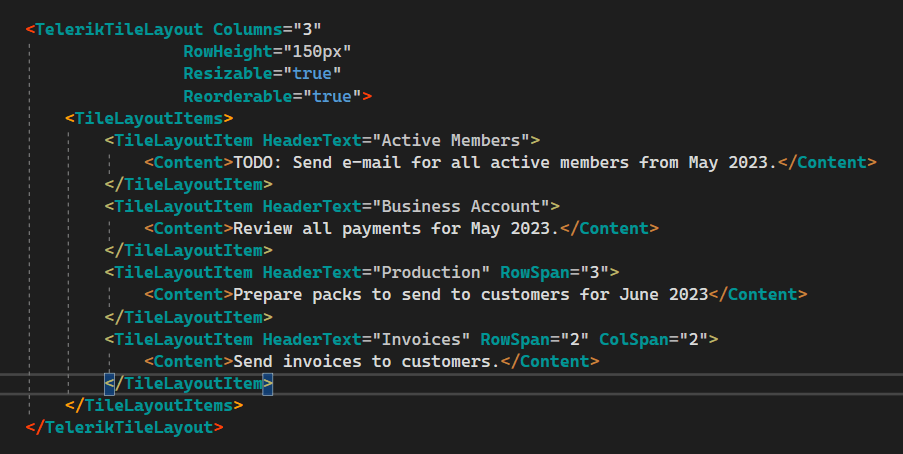
To set up the TileLayout component, configure the Width, Height, ColumnWidth or RowHeight to define the layout’s desired dimensions and the individual tile’s base size. You can also set the Resizable and Reorderable parameters to alter the layout.
Add <TileLayoutItem> instances inside a <TileLayoutItems> tag, set the HeaderText parameter of each tile, and add a nested <Content> tag
for the tile content.
Overall, the Blazor TileLayout component is efficient and easy to set up, providing a customizable and user-friendly experience for your users.


Using TileLayout Programmatically
Save and restore TileLayout positions by following these steps.
- Create your project Telerik UI for Blazor.
- Add a Razor page.
- Use NuGet and add the package
Blazored.LocalStorage.

- Add the following to your
Program.cs:
using Blazored.LocalStorage;
....
builder.Services.AddBlazoredLocalStorage();
- Add to your
_Imports.razor:
@using Blazored.LocalStorage
@using Telerik.FontIcons
@using Telerik.SvgIcons
- Add to the top of your Form:
@inject Blazored.LocalStorage.ILocalStorageService LocalStorage
@inject IJSRuntime JsInterop
- Add to your buttons:
<TelerikButton OnClick="@SaveState" Icon="@FontIcon.Save" Class="mr-sm">Save State</TelerikButton>
<TelerikButton OnClick="@ReloadPage" Icon="@FontIcon.ArrowRotateCw" Class="mr-sm">Reload the page</TelerikButton>
<TelerikButton OnClick="@LoadState" Icon="@FontIcon.Download" Class="mr-sm">Load last State</TelerikButton>
<TelerikButton OnClick="@SetExplicitState" Icon="@FontIcon.Gear" Class="mr-sm">Configure State</TelerikButton>
- Add your tiles as desired:
<TelerikTileLayout @ref="@TileLayoutInstance"
  Columns="3"
  Resizable="true"
  Reorderable="true">
    <TileLayoutItems>
      <TileLayoutItem HeaderText="Panel 1"></TileLayoutItem>
      <TileLayoutItem HeaderText="Panel 2"></TileLayoutItem>
      <TileLayoutItem HeaderText="Panel 3" RowSpan="2">
        <Content>The tiles in this demo have little content intentionally so you can focus on the state. You can put any content and components in them.</Content>
      </TileLayoutItem>
      <TileLayoutItem HeaderText="Panel 4" ColSpan="2" RowSpan="2">
        <Content>Try resizing and moving me around, for example, then click the buttons above.</Content>
      </TileLayoutItem>
      <TileLayoutItem HeaderText="Panel 5"></TileLayoutItem>
    </TileLayoutItems>
</TelerikTileLayout>
- Add the following code to save and restore TileLayouts:
@code {
        TelerikTileLayout TileLayoutInstance { get; set; }
        TileLayoutState SavedState { get; set; }

        string stateStorageKey = "TelerikBlazorTileLayoutStateDocsKey";

        async Task SaveState()
        {
            // Get state through the GetState method
            var state = TileLayoutInstance.GetState();

            await LocalStorage.SetItemAsync (stateStorageKey, state);
        }

        async Task LoadState()
        {
            TileLayoutState storedState = await LocalStorage.GetItemAsync<TileLayoutState>(stateStorageKey);

            if (storedState != null)
            {
                // Set State through the SetState method
                TileLayoutInstance.SetState(storedState);
            }
        }

        void ReloadPage()
        {
            JsInterop.InvokeVoidAsync("window.location.reload");
        }

        async void SetExplicitState()
        {
            await LocalStorage.RemoveItemAsync (stateStorageKey);
            TileLayoutState desiredState = GetDefaultDemoState();

            // set state through the SetState method
            TileLayoutInstance.SetState(desiredState);
        }

        // Loading state when the component renders
        protected override async Task OnAfterRenderAsync(bool firstRender)
        {
            var state = await LocalStorage.GetItemAsync<TileLayoutState>(stateStorageKey);
1.	            if (state != null && TileLayoutInstance != null)
            {
                TileLayoutInstance.SetState(state);
            }
        }

        TileLayoutState GetDefaultDemoState()
        {
            // Sample state object you can use as reference
            TileLayoutState defaultDemoState = new TileLayoutState()
            {
                ItemStates = new List<TileLayoutItemState>()
                {
                new TileLayoutItemState { Order = 1, ColSpan = 1, RowSpan = 1 },
                new TileLayoutItemState { Order = 2, ColSpan = 1, RowSpan = 1 },
                new TileLayoutItemState { Order = 3, ColSpan = 1, RowSpan = 2 },
                new TileLayoutItemState { Order = 4, ColSpan = 2, RowSpan = 2 },
                new TileLayoutItemState { Order = 5, ColSpan = 1, RowSpan = 1 },
                }
            };
            return defaultDemoState;
        }
    }
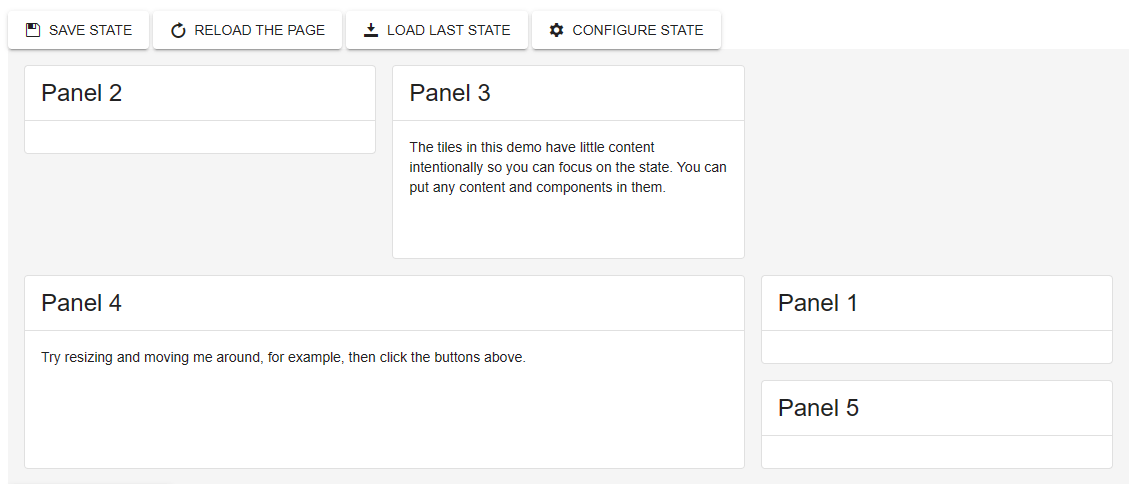
Here is the result for this code:

Conclusion
Telerik UI for Blazor is a cutting-edge framework for web application development using C# and Razor syntax. It provides extensive support for forms through its built-in Blazor Forms component.
Telerik UI for Blazor is a professional-grade UI library that enhances Blazor with over 100 native components. One of the unique components in the Telerik UI suite is the Form component, which facilitates the generation and customization of forms. The powerful TileLayout component allows you to build customizable dashboards for your users and save and restore a layout.
Blazor Forms gives you an elevated degree of flexibility and customization, so you can build highly customized, user-friendly forms for web applications.
At any time, you can call Telerik’s legendary support team, even in trial, to guide you to any solution you need. Try it out today.
References

Jefferson S. Motta
Jefferson S. Motta is a senior software developer, IT consultant and system analyst from Brazil, developing in the .NET platform since 2011. Creator of www.Advocati.NET, since 1997, a CRM for Brazilian Law Firms. He enjoys being with family and petting his cats in his free time. You can follow him on LinkedIn and GitHub.

