Getting Started with Angular Signal Forms

Summarize with AI:
Learn the basics of Angular Signal Forms, including models, validation and two-way synchronization, to build reactive forms with confidence.
Angular version 21.0 introduced one of the most exciting and awaited features: Signal Forms. Traditionally, there have been two types of forms:
- Template Forms
- Reactive Forms
Angular 21.0 introduced a new form type:
- Signal Forms
And now, Angular 22 makes Signal Forms stable. Signal Forms are a combination of Signal-based reactivity and forms. In my opinion, Signal Forms are the future of forms and user input in Angular.
This article gives you a basic introduction to Signal Forms and shows you how to work with models, validation and two-way synchronization.
First Signal Form
Signal-based forms use a new form function. It creates a form from a writable signal model, where the model is the source of truth, and any change in the form or the model is automatically reflected in the other.
Let’s start by creating an interface to represent the user:
export interface IUser {
    email: string;
    password: string;
}
Next, we create a model that will be used to create the form, as shown below. As mentioned earlier, the model must be a writable signal.
user : WritableSignal<IUser> = signal({
    email: '',
    password: ''
  })
We can create a signal-based form using the form() function from the @angular/forms/signals.
loginForm = form(this.user);
That’s it. You have created a signal-based form in Angular.
The form function returns a FieldTree, where each field is represented as a signal. In other words, the form function produces a data structure in which every field is a signal enriched with signal-based properties such as value, dirty, invalid and others.
To better understand this structure, let’s print the following values:
console.log(this.loginForm.email().value());
console.log(this.loginForm().valid());
console.log(this.loginForm.email().invalid());
console.log(this.loginForm.email().dirty());
console.log(this.loginForm.email().touched());
console.log(this.loginForm.email().errors());
As shown in the example above, the email field is a signal, and all of its properties are signals as well. Because both the field and its properties are signals, you can use them directly in the template, as demonstrated below.
<input type="email" [formField]="loginForm.email" />
<input type="password" [formField]="loginForm.password" />
To use formField, import it into the component class, as shown below:
import { form, FormField } from '@angular/forms/signals';

@Component({
  selector: 'app-login',
  imports: [FormField],
  templateUrl: './login.html',
  styleUrl: './login.css',
})
export class Login {}
As discussed earlier, the form() function creates a form from the given model, where the model is the single source of truth, so changes in the form update the model and changes in the model update the form.
In simple words, the model and the form are connected through two-way data binding. This means that when the model signal changes, the form value updates accordingly, and when the form value changes, the model updates as well.
To demonstrate this, read the model signal value inside an effect, as shown below:
constructor(){
  effect(()=>{
    console.log(this.user())
  })
}
As soon as you start typing in the form, you can read the updated value in the effect. Similarly, when you change the model signal value, the form value is reflected as well.
this.user.set({
  email: 'a@a.com',
  password:'abc'
})
console.log(this.loginForm().value()); // updated value of the form
In summary, in signal-based forms, the model used by the form and the form itself are connected via two-way data binding. Updating one automatically updates the other.
Adding Validations
The form() function in Signal Forms makes it simple to add validators to form fields. You can pass a schema function to the form() function to add validators to the form.
In Signal Forms, validations are defined using a schema function. You pass this schema function as the second parameter to the form() function.
You can add the required validators to the email and password fields as shown below:
loginForm = form(this.userModel,(schema)=>{
  required(schema.email,{message:'email is required'});
  email(schema.email,{message:'email is not valid'});
  required(schema.password,{message:'password is required'});
});
We have added the required and email built-in validators and used the message option to provide custom error messages.
As discussed earlier, in a Signal Form, all properties of a field are signals. This allows you to use them directly. For example, to display validation error messages for the email field, as shown below.
<label>
  Email
  <input type="email" [formField]="loginForm.email" />
</label>
@if (loginForm.email().invalid() && loginForm.email().touched()) {
  <div class="error">
    @for (error of loginForm.email().errors(); track error.kind) {
      <span>{{ error.message }}</span>
    }
  </div>
}
In the same way, error messages for the password field can be displayed as below:
<label>
        Password
        <input type="password" [formField]="loginForm.password" />
    </label>
    @if (loginForm.password().invalid() && loginForm.password().touched()) {
    <div class="error">
        @for (error of loginForm.password().errors(); track error.kind) {
        <span>{{ error.message }}</span>
        }
    </div>
    }
Submitting the Form
To complete the form, you can add submit functionality by importing the submit() function and using that to submit the form.
  onSubmit(event: Event) {
    event.preventDefault();
    submit(this.loginForm, async () => {
      const u = this.userModel();
      console.log('Logging in with:', u);
    });
  }
The submit() function runs the logic only when the form is valid.
In the template, the form submit event can bind to the onSubmit () function using event binding, as shown below. You can also disable the submit button when the form is invalid.
<form (submit)="onSubmit($event)">
    // other code for fields …..
    <button [disabled]="loginForm().invalid()" type="submit">Login</button>
</form>
Complete Signal-based Login Form
Putting everything together, the login form using Signal Forms can be implemented as shown below.
The IUser interface is created as shown below:
export interface IUser {
    email:string;
    password : string;
}
The Login component using a Signal Form is created as shown below.
import { Component, signal, WritableSignal } from '@angular/core';
import { IUser } from '../user';
import { email, form, FormField, required, submit } from '@angular/forms/signals';

@Component({
  selector: 'app-login',
  imports: [FormField],
  templateUrl: './login.html',
  styleUrl: './login.css',
})
export class Login {

  userModel: WritableSignal<IUser> = signal({
    email: '',
    password: ''
  });

  loginForm = form(this.userModel, (schema) => {
    required(schema.email, { message: 'email is required' });
    email(schema.email, { message: 'email is not valid' });
    required(schema.password, { message: 'password is required' });
  });

  onSubmit(event: Event) {
    event.preventDefault();
    submit(this.loginForm, async () => {
      const u = this.userModel();
      console.log('Logging in with:', u);
    });
  }
}
In the template, the form can be created as shown below:
<form (submit)="onSubmit($event)">
    <label>
        Email
        <input type="email" [formField]="loginForm.email" />
    </label>
    @if (loginForm.email().invalid() && loginForm.email().touched()) {
    <div class="error">
        @for (error of loginForm.email().errors(); track error.kind) {
        <span>{{ error.message }}</span>
        }
    </div>
    }

    <label>
        Password
        <input type="password" [formField]="loginForm.password" />
    </label>
    @if (loginForm.password().invalid() && loginForm.password().touched()) {
    <div class="error">
        @for (error of loginForm.password().errors(); track error.kind) {
        <span>{{ error.message }}</span>
        }
    </div>
    }
    <button [disabled]="loginForm().invalid()" type="submit">Login</button>
</form>
Understanding Forms Models
Signal Forms are backed by a model, which is a writable signal. When the model value changes, the form updates automatically. Likewise, when the user interacts with the form, the model is updated. In this way, the model and the form are connected through two-way binding, which means changes in one are reflected in the other.
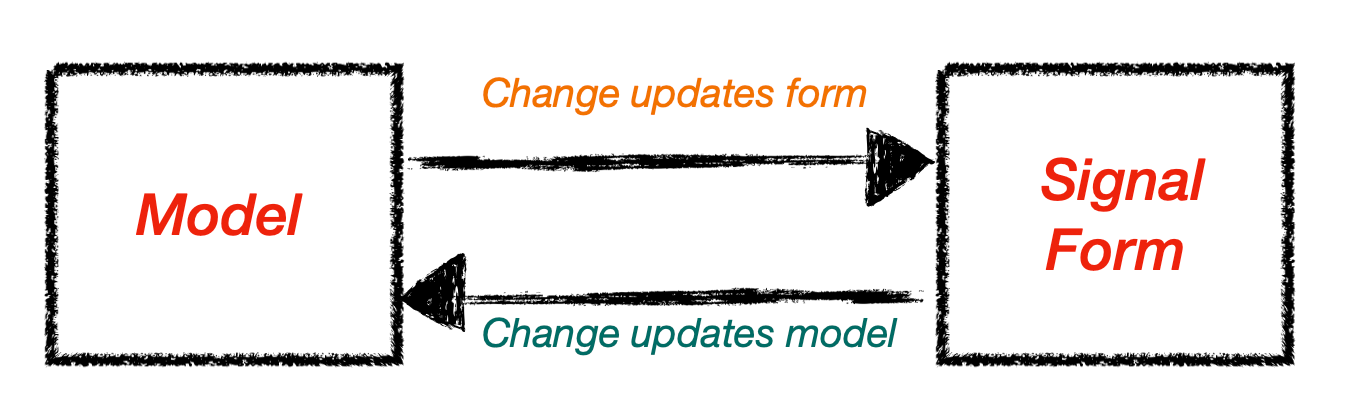
It is always best practice to use an interface to define the model. For example, if we are creating a form to edit a product, we can define a type for it as shown below.
export interface IProduct{
    id:number;
    name:string;
    price:number;
    description:string;
    category:string;
}

export interface IProductForm extends Omit<IProduct, 'id' | 'category'> {}
Now to edit the product, fetch it from the API using the resource API as shown below:
    idToFetch = signal(1);

    productsResource = resource({
        params: this.idToFetch,
        loader: async ({ params }) => {
            let id = params;
            const response = await fetch(`http://localhost:3000/product/${id}`);
            if (!response.ok) {
                throw new Error(`HTTP error! status: ${response.status}`);
            }
            return response.json() as Promise<IProductForm>;
        }
    });
We have received the product data to be updated from the API. In the next step, we will create a signal-based form to bind this data and allow the user to update the product.
   productUpdateModel = signal<IProductForm>({
        name: '',
        price: 0,
        description: ''
    });

    productForm = form(this.productUpdateModel);
That’s it. Now, in the template, use the formField directive to display the fetched product data in the form, as shown below.
<form (submit)="onSubmit($event)">
    <label>
        Name
        <input type="text" [formField]="productForm.name" />
    </label>

    <label>
        Price
        <input type="number" [formField]="productForm.price" />
    </label>

    <label>
        Description
        <input type="text" [formField]="productForm.description" />
    </label>

    <button [disabled]="productForm().invalid()" type="submit">Update</button>
</form>
To update the product, let’s add an input field and a button to load the product.
<label>Update Product Id : <input #productIdInput type="number" [value] ='idToFetch()'/></label>
<button (click)="fetchProduct(+productIdInput.value)">Load Product</button>
To fetch the updated product, set the signal accordingly. There are multiple ways to bind the value returned from the API to the productUpdateModel. You can either use productResource.value() directly in the template or assign it as shown below.
   fetchProduct(id: number) {
        this.idToFetch.set(id);
        if (this.productsResource.hasValue()) {
            this.productUpdateModel.set(this.productsResource.value());
        }
    }
As you see from the above example, the form model and form fields are in two-way data-binding synchronisation, and changes flow bidirectionally between them.
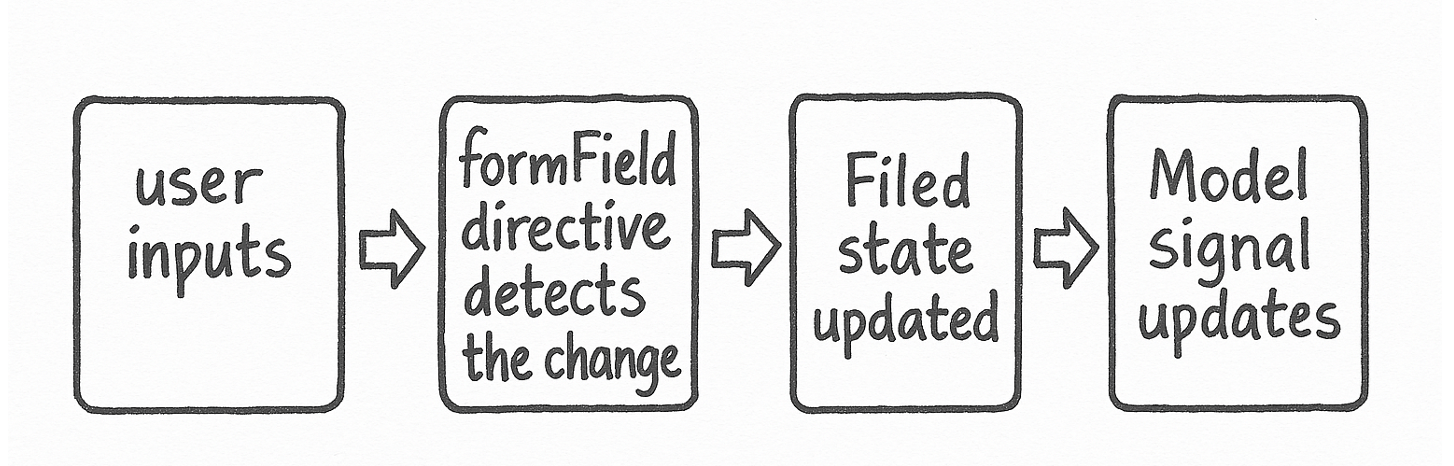
The interaction between user input and the model follows these steps:
- The user enters text or selects a value from the dropdown.
- The
formFielddirective detects the change. - The corresponding
FieldStateis updated. - The model signal is updated accordingly.
This flow is illustrated in the diagram below.
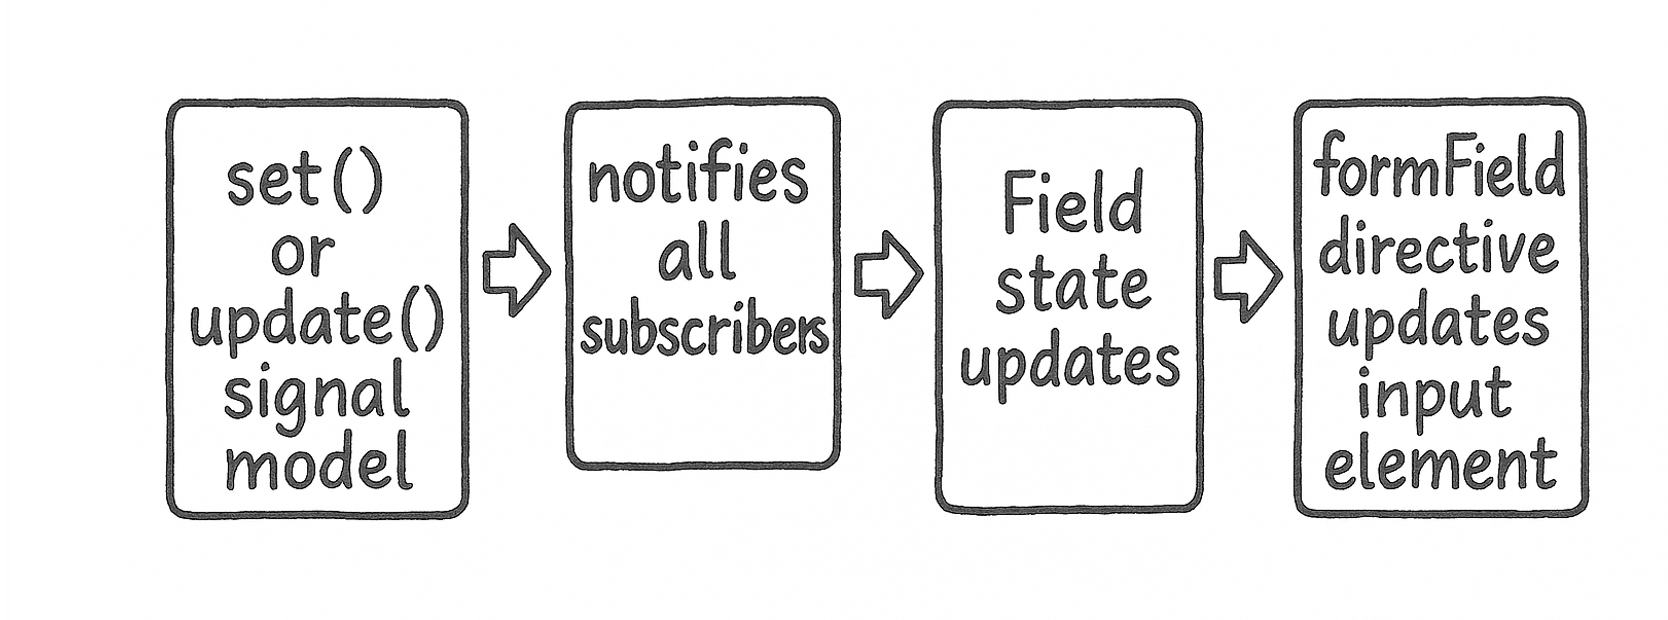
The flow between the model and the user input follows the steps below:
- Use code to
set()orupdate()signal model - Notifies all subscribers
- Field state updates
formFielddirective updates the input element
This flow is illustrated in the diagram below.
Two-way data synchronization can be better understood by the following simple code example.
count = signal({ v: 0 });
  countInput = form(this.count);

  updateCount() {
    this.count.update(c => ({ v: c.v + 1 }));
  }
And on the template:
<input type="number" [formField]="countInput.v" />
 <button (click)="updateCount()">update count</button>
 <p>Count: {{ count().v }}</p>
When you run the above code, you will see that the input and model value are in sync with each other.
Optional Fields
Always use explicit TypeScript type to define the model. So to create a login form create a type like below.
export interface IUser {
    email:string;
    password : string;
    rememeberme?: boolean;
}
You use them to create a signal form as shown below:
  userModel: WritableSignal<IUser> = signal({
    email: '',
    password: '',
    rememberMe: null
  });

  loginForm = form(this.userModel);
When you define a form using explicit types as shown above, the resulting field tree is fully type-safe. For example, loginForm.email is inferred as FieldTree<string>, and any attempt to access a property that doesn’t exist will produce a compile-time error. In the code below, TypeScript will infer type of email as string.
email = this.loginForm.email;
And to set the optional field:
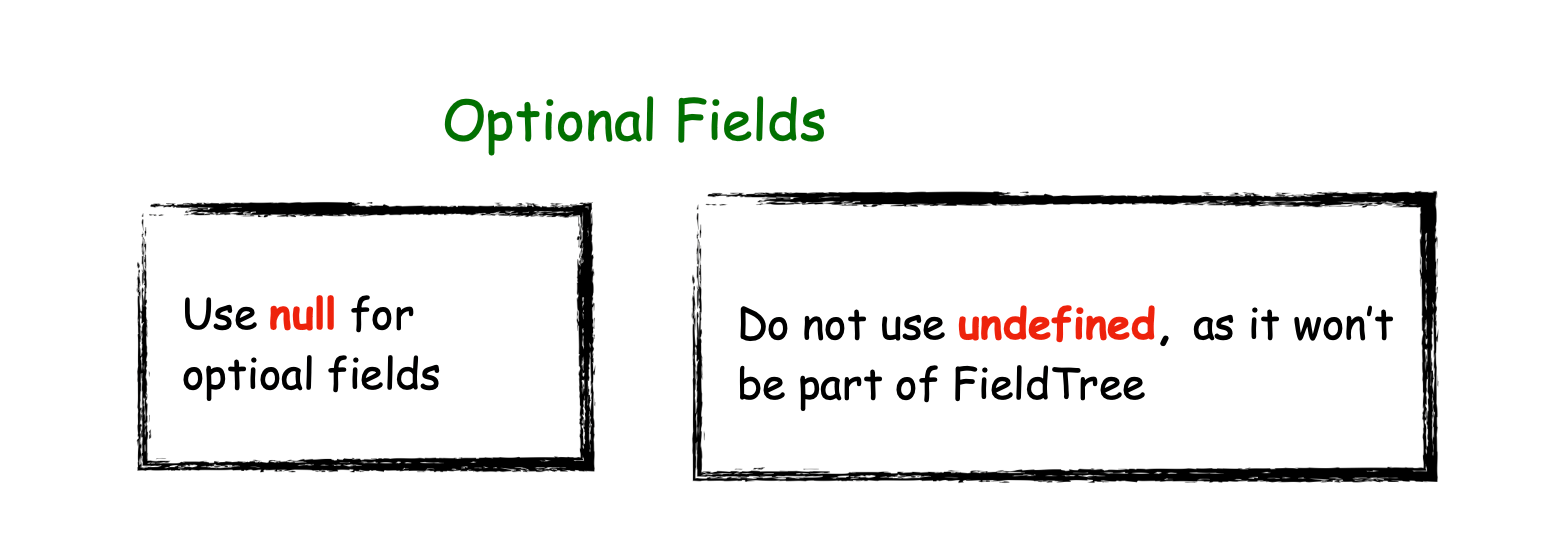
- Set the value explicitly to null
- For input fields such
<input type=”text” />, set the value to empty string. - Do not use undefined
Fields explicitly set to undefined are omitted from the field tree. A model defined as { value: undefined } behaves the same as {}. Accessing that field returns undefined instead of a FieldTree instance.
Nested Objects in Model
You can use nested objects to create a form like below:
export interface IProduct {
    id:number;
    name:string;
    price:number;
    description:string;
    category:string;
    vendor : IVendor;
}

export interface IVendor{
    id:number;
    name:string;
    email:string;
    phone:string;
}
Next, you can create the form using the nested object as shown below:
   productModel = signal<IProduct>({
    id: 0,
    name: '',
    price: 0,
    description: '',
    category: '',
    vendor: {
      id: 0,
      name: '',
      email: '',
      phone: ''
    }
   });

   productForm = form(this.productModel);
In the template, you can access nested object properties using dot notation, as shown below.
<form (submit)="onSubmit($event)">
    <label>Name</label>
    <input type="text" [formField]="productForm.name" />
    <label>Vendor Name</label>
    <input type="text" [formField]="productForm.vendor.name" />
    <button type="submit">Submit</button>
</form>
Before moving to the validation section, note that the form model and the domain model are two different concepts and should be treated separately.
Your API response may map directly to the domain model, but you should define a dedicated form model when working with signal-based forms.
We will explore this distinction in more detail in a separate article.
Validations
You pass validation rules to the Signal Forms using a schema. You pass schema as second parameter to the form function.
  userModel: WritableSignal<IUser> = signal({
    email: '',
    password: ''
  });


  loginForm = form(this.userModel, (schema) => {
    required(schema.email, { message: 'email is required' });
    email(schema.email, { message: 'email is not valid' });
    required(schema.password, { message: 'password is required' });
  });
As shown above, you provide a schema definition along with validation rules to apply validations to the respective fields of the form.
The schema function gets a SchemaPathTree object that lets us define the validation rules. The schema function runs at the time of initialization, and validation runs automatically whenever field values change.
On the template, you can use the validation as shown below:
<label>
        Email
        <input type="email" [formField]="loginForm.email" />
    </label>
    @if (loginForm.email().invalid() && loginForm.email().touched()) {
    <div class="error">
        @for (error of loginForm.email().errors(); track error.kind) {
        <span>{{ error.message }}</span>
        }
    </div>
    }
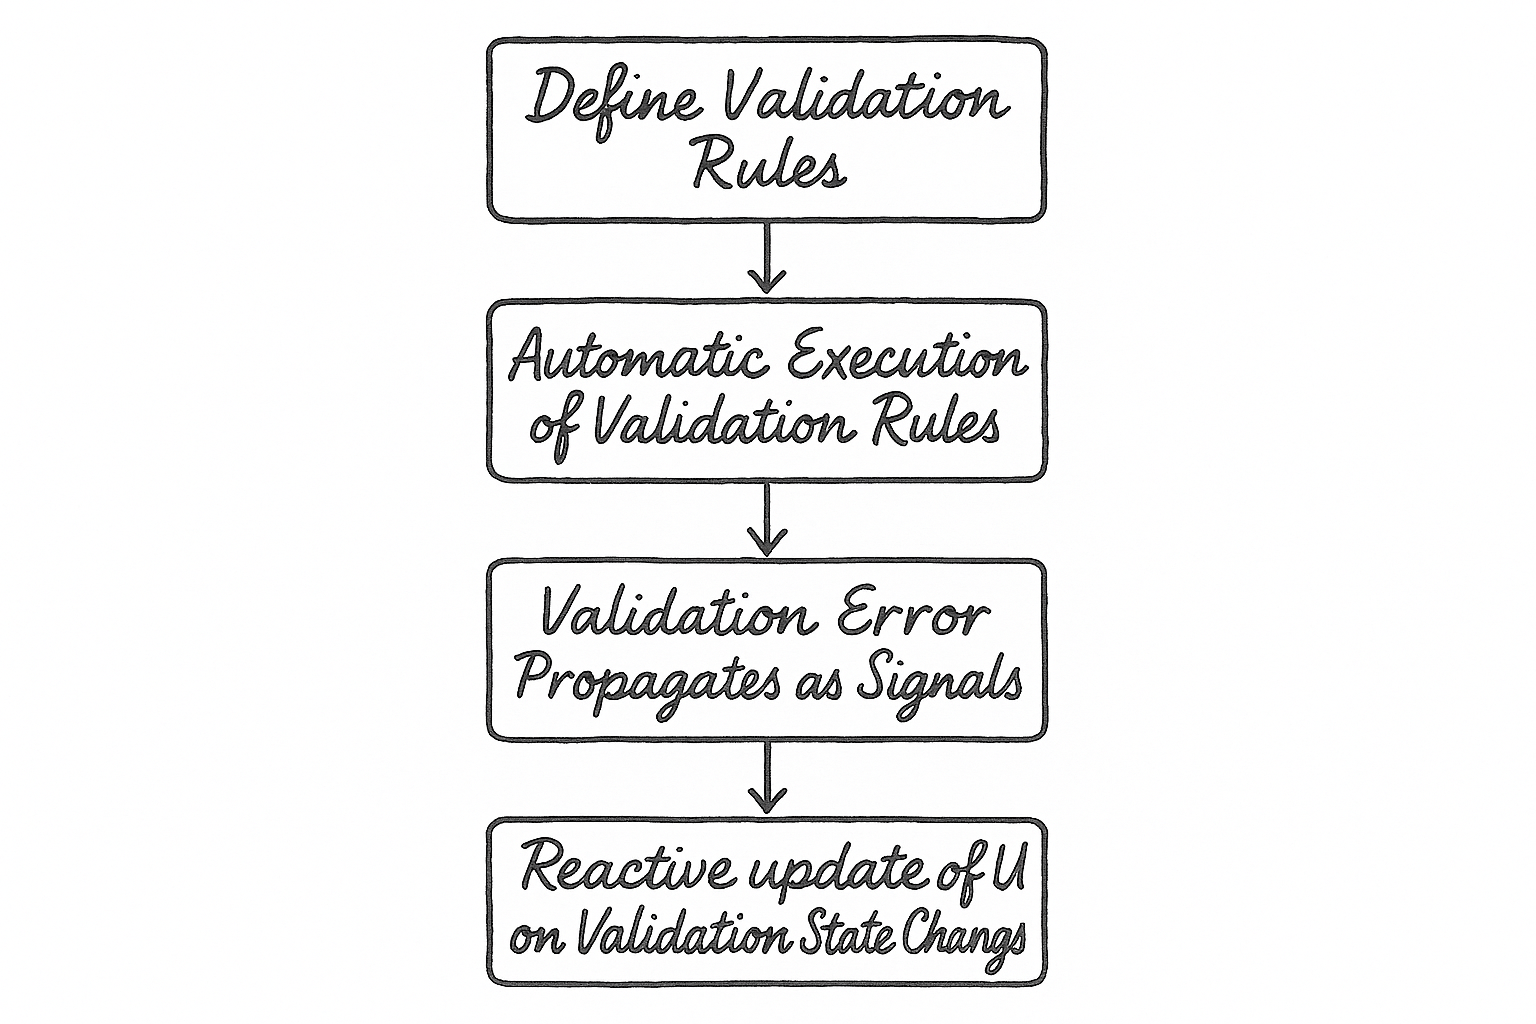
Validation works in these steps:
- Define validation rules in schema
- Validation rules runs when filed value changes
- Validation errors are propagated as signals
- UI automatically updates when validation state changes
There are two types of validations:
- Synchronous validation –
required(),email(), etc. - Asynchronous validation –
validateHttp()
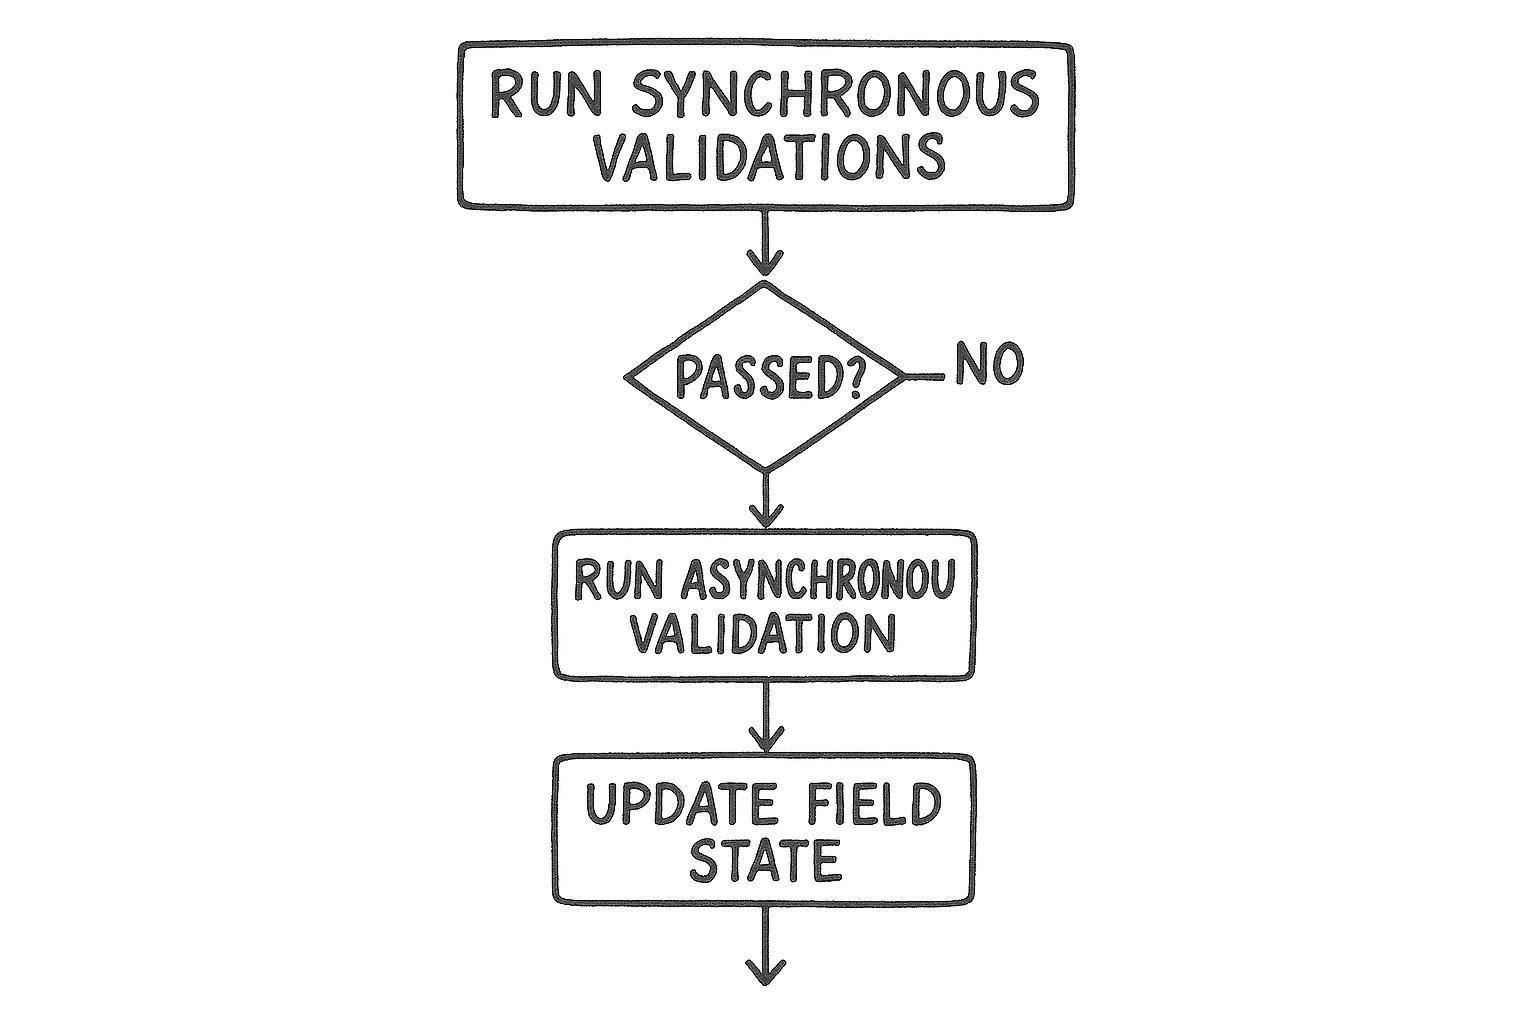
When a field value changes, Angular runs validation in the sequence:
- First it runs all synchronous validations.
- If all synchronous validation pass, then it runs asynchronous validation.
- After that, it updates the field state signal values such as
valid(),invalid(),errors()andpending().
Angular provides these built-in validation rules:
required()email()min()max()minLength()maxLength()pattern()
You can apply required() and email() validation on email field as shown below:
  loginForm = form(this.userModel, (schema) => {
    required(schema.email, { message: 'email is required' });
    email(schema.email, { message: 'email is not valid' });
  });
When you have multiple validation rules applied, each rule runs independently and can cause form to be invalid.
Angular Signal Forms make it straightforward to implement custom validations. For example, if you want to verify that the email belongs to the nomadcoder domain, you can easily add a custom validator as shown below.
  loginForm = form(this.userModel, (schema) => {
    required(schema.email, { message: 'email is required' });
    email(schema.email, { message: 'email is not valid' });
     validate(schema.email, ({ value }) => {
      if (!value().endsWith('@nomadcoder.ai')) {
        return {
          kind: 'emailDomain',
          message: 'Email must end with @nomadcoder.ai'
        }
      }
      return null;
    });
  });
In upcoming articles, we will get into details of custom validation and asynchronous validation.
Form Field and Its Signal Properties
The form function returns a FieldTree that represents all properties of the model. Each property is exposed as a signal, and each property signal includes a set of attributes that are also implemented as signals.
When you access a field from the field tree, as shown below, you can retrieve its associated attributes as illustrated:
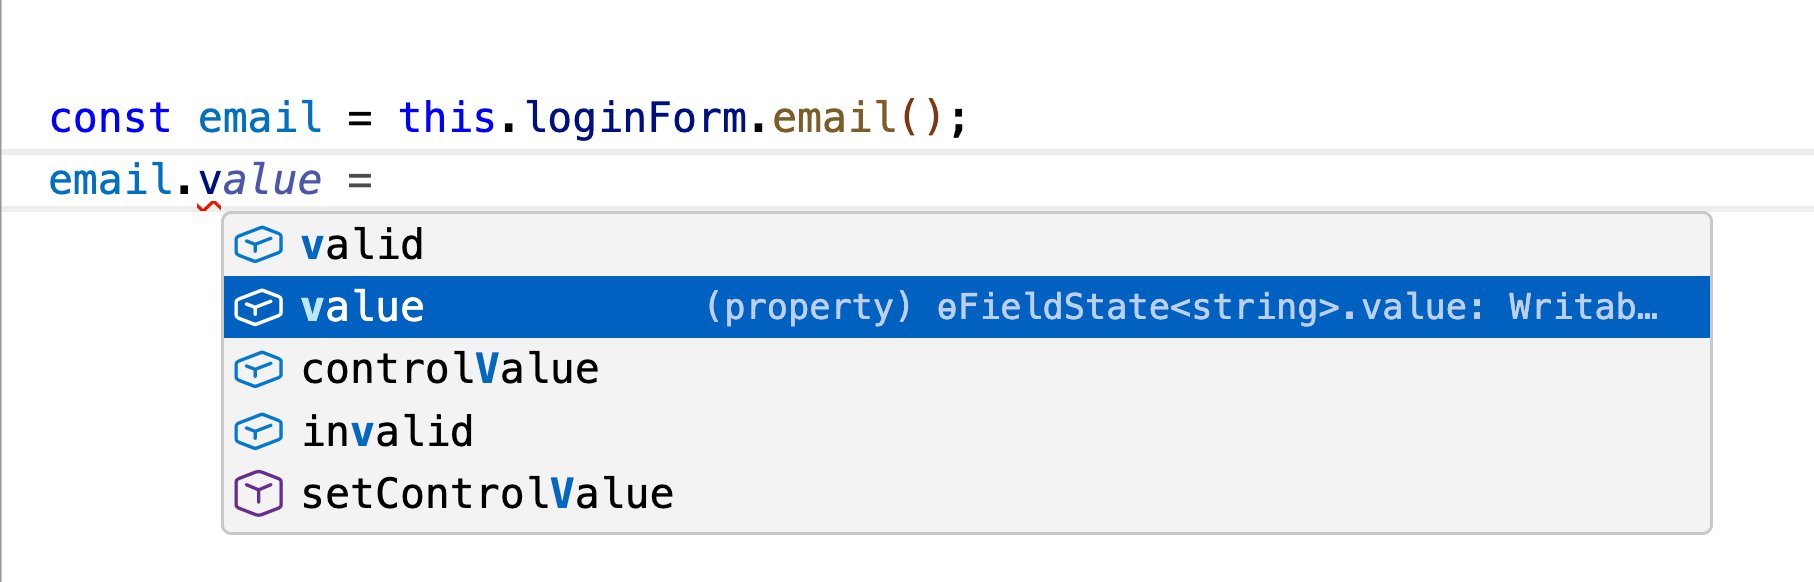
The various signal attributes are as below:
value()dirty()hidden()errorserrorSummaryvalidinvalidpendingsubmitting- Etc.
As all these are signals(), they can be directly used on the template. I hope now you understand Angular Signal Forms. In coming articles, we will go deeper into:
- asynchronous validators
- custom validators
I hope you find this article useful. Thanks for reading.

Dhananjay Kumar
Dhananjay Kumar is the founder of nomadcoder, an AI-driven developer community and training platform in India. Through nomadcoder, he organizes leading tech conferences such as ng-India and AI-India. He partners with startups to rapidly build MVPs and ship production-ready applications. His expertise spans Angular, modern web architecture and AI agents, and he is available for training, consulting or product acceleration from Angular to API to agents.
Related Posts
Comments
All articles
Topics
Web MobileMobile
Desktop
Design
Productivity
People