Generating Recurring Events with Telerik UI for Blazor Scheduler

Summarize with AI:
Telerik UI for Blazor Scheduler lets you both generate and manage future, recurring events. Learn how.
I’ve looked at Progress Telerik UI for Blazor Scheduler from a UI perspective in previous columns, but this time I’m going to look at Scheduler as, well, a scheduling tool.
As my case study, let’s assume that your company provides a subscription service that customers can pay for on a weekly or yearly schedule. Scheduler will not only provide the UI you need to manage that billing plan but supports generating a list of future payment dates that will let you keep your customers on track (e.g., sending reminders about upcoming payments and follow-up notices for missed payments). Scheduler will even let you skip dates in the future (“payment holidays”) if you want to give your customer some flexibility in making scheduled payments.
Configuring the Scheduler
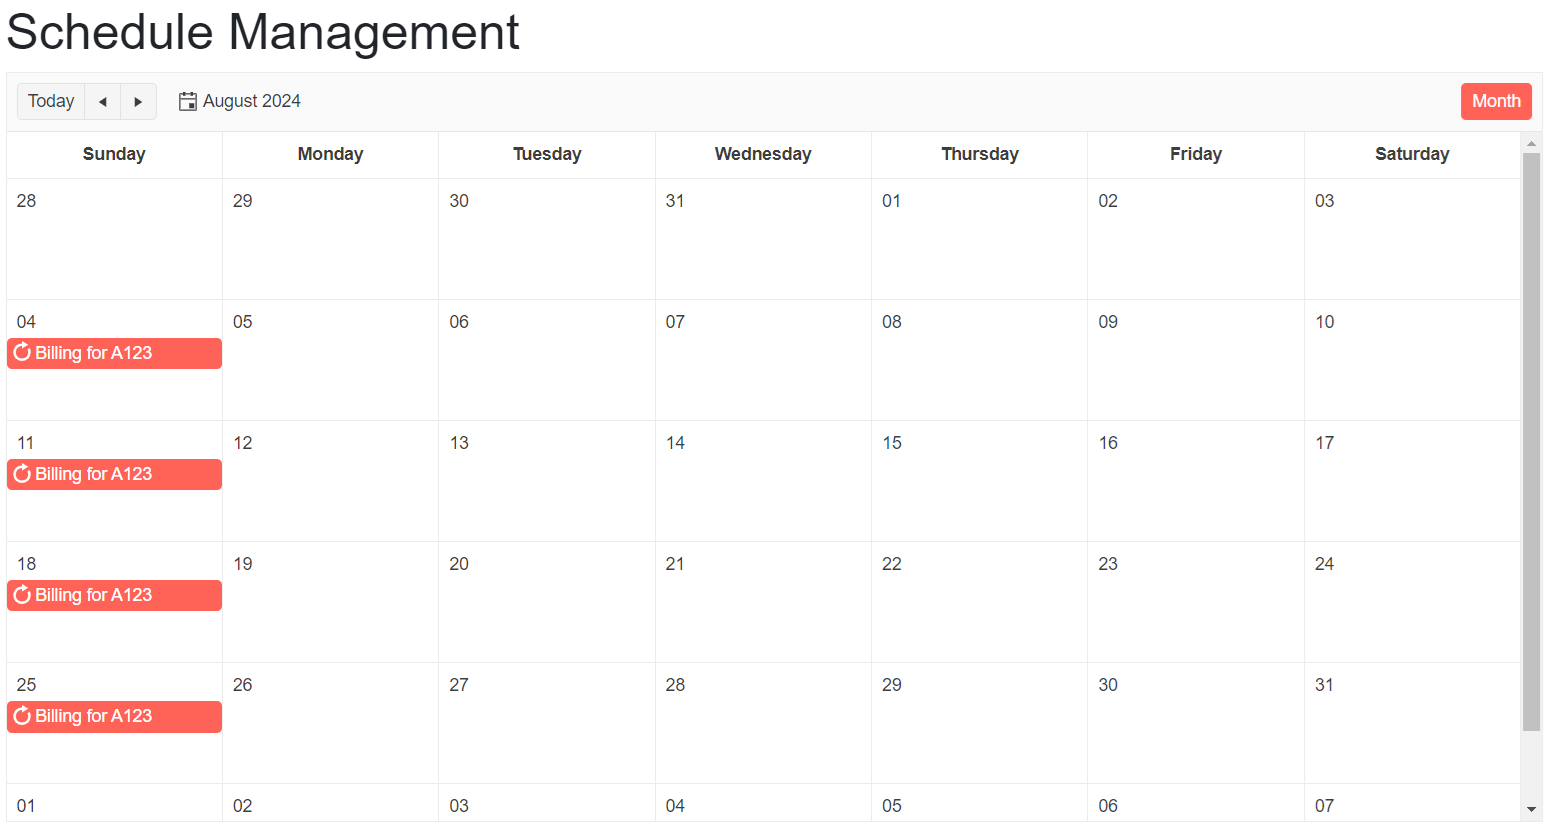
I won’t repeat the process for setting up your project from my previous post and go straight to getting Scheduler on a page. For this case study, a very simple page to display a customer’s billing schedule on a month-by-month basis will do and would look like this:
@using Telerik.Blazor.Components.Scheduler
@using Telerik.Recurrence

<PageTitle>Schedule Management</PageTitle>

<h1>Schedule Management</h1>
<TelerikScheduler Height="600px"
                                       Data="@BillingPlans">
    <SchedulerViews>
        <SchedulerMonthView />
    </SchedulerViews>
</TelerikScheduler>
In configuring my Scheduler, I just need to set Scheduler’s Data property to point to a collection of objects that represent customers’ billing plans (you can do a lot more with Scheduler’s UI, as I showed in my previous posts, but this is all that’s needed for this case study).
Creating the Billing Plan Class
To hold the information about customer’s billing plan, you’ll need to decide what information your organization needs in a billing plan. Below, I’ve assumed that means some GUID properties to identify the schedule and the billing plan that tells Account Receivable how much to charge the customer, plus a string property to identify the customer:
public class BillingPlan
{
  public Guid ScheduleId {get; set;}
  public string CustId [get; set; }
  public string PlanName {get; set; } = string.Empty;
Next, you’ll need to add the properties that the Scheduler needs. Here’s the basic set:
   public DateTime Start { get; set; }
   public DateTime End { get; set; }
   Public string Title {get; set;} = string.Empty;
   public bool IsAllDay {get; set;}
   public Guid RecurrenceId { get; set; }
   public IList<DateTime> RecurrenceExceptions = new List<DateTime>();
   public string RFC5545Rule { get; set; } = string.Empty;
}
Some properties are easy for me to explain: The Start and End properties hold the date of the customer’s first payment. Scheduler uses the Title property in its UI when displaying scheduled events. The IsAllDay property isn’t required for this case study but, if you omit, the Scheduler will whine about it.
The other properties are … less obvious. You’ll see how to use them over the rest of this article.
Displaying the Schedule
I’ll start with the RFC5545Rule property: This is where you’ll specify your schedule in a (mostly) human readable format. You do need to tell the TelerikScheduler that your RFC5545Rule property holds your schedule so the Scheduler can generate future dates. You do that by setting the Scheduler’s RecurrenceRuleField to the name of your scheduling property:
<TelerikScheduler Height="600px"
                                       Data="@BillingPlans"
                                       RecurrenceRuleField="RFC5545Rule">
    <SchedulerViews>
       …
With that class defined, I can add the code to create the BillingPlans collection that my Scheduler is using in its Data property:
@code {
    IList<BillingPlan> BillingPlans = new List<BillingPlan>();
In addition to the schedule in the BillingPlan object’s RFC5545Rule, Scheduler also uses the BillingPlan’s Start and End properties, which must hold the start and end dates for the first payment. The Start and End dates have to be different because Scheduler’s UI won’t display an event that doesn’t have a duration (for other kinds of recurring events you might include a genuine start and end time).
For a customer whose first payment is today and is going to pay weekly, an initial BillingPlan that will generate a schedule of 52 weekly payments would look like this:
BillingPlan bp = new();

bp.Id = Guid.NewGuid();
bp.CustId = cust.CustomerId;
bp.Title = "Billing for " & cust.CustomerId.ToString();
bp.PlanName = "Weekly";

bp.Start = DateTime.Now;
bp.End = DateTime.AddSeconds(1);
bp.RFC5545Rule = "FREQ=WEEKLY;COUNT=52";
With the BillingPlan fully configured, just add it to the BillingPlans collection that drives Scheduler to have Scheduler add all the future payments to its UI:
BillingPlans.Add(bp);

With this structure, if the customer is buying multiple services from you, you can add additional billing plans to the BillingPlans collection. Alternatively, you could add billing plans for different customers to the BillingPlans collection to get some idea of what your cash flow from any set of customers will look like.
And if that RFC5545 formatted scheduling rule looks intimidating to you, don’t panic! It’s actually reasonably friendly and pretty flexible. For example, if the customer wants to pay annually, you could use this specification to generate a payment schedule that runs from now until the start of 2028:
bp.RFC5545Rule = "FREQ=YEARLY;UNTIL=2028-1-1T00:00:00.000Z";
Generating Future Dates
You’ll want to store those BillingPlans in your database, of course. In addition, you’ll probably also need to store a list of those future payment dates, so that other applications can send your customer reminders as payments come due (and send threatening emails when payments are missed).
To generate that list of payment dates from your BillingPlan, you need to create a RecurrenceRule object and load it with your schedule. The RecurrenceRule class’s static Parse method will let you do that. Calling the RecurrenceRule’s ExpandRecurrence will then hand you back a list of dates based on that schedule, provided you pass the ExpandRecurrence method a RecurrenceOptions object.
That RecurrenceOptions object tells the RecurrenceRule’s ExpandRecurrence method how much work to do—you don’t want to generate a set of dates that stretches out to the heat death of the universe, for example. While the RecurrenceOptions object gives you lots of options, the only two you need are the start and end dates for the period you want to generate scheduled dates for, using the ReccurenceOptions’ StartDate and RangeEnd properties.
The following code creates a RecurrenceRule object and loads it from the BillingPlan’s RFC5545Rule property. The code then creates a RecurrenceOptions object, setting the StartDate and RangeEnd properties (again, from the BillingPlan object).
With everything created and loaded, you just pass the RecurrenceOptions object to the ExpandRecurrence method of the RecurrenceRule object to get a collection of Occurrence objects that represent future billings:
RecurrenceRule rr = new();
rr = RecurrenceRule.Parse(bp.RFC5545Rule);

RecurrenceOptions ro = new RecurrenceOptions();
ro.StartDate = bp.Start;
ro.RangeEnd = bp.Start.AddMonths(12);

IEnumerable<Occurrence> FuturePayments =  rr. ExpandRecurrence (ro);
Each Occurrence object has Start and End properties holding the dates for one scheduled payment. You can combine those Occurrence properties with data from other objects in your application to create, for example, a ScheduledPayment object that you could store in your database.
This example pulls together billing plan and occurrence data to create ScheduledPayment objects that it adds to a database:
foreach(Occurrence fp in FuturePayments)
{
   ScheduledPayment sp = new ScheduledPayment {
             BillingPlanId = bp.ScheduleId,
             DueDate = fp.Start
   }
  dbContext.Add(sp);
}
Skipping Scheduled Events
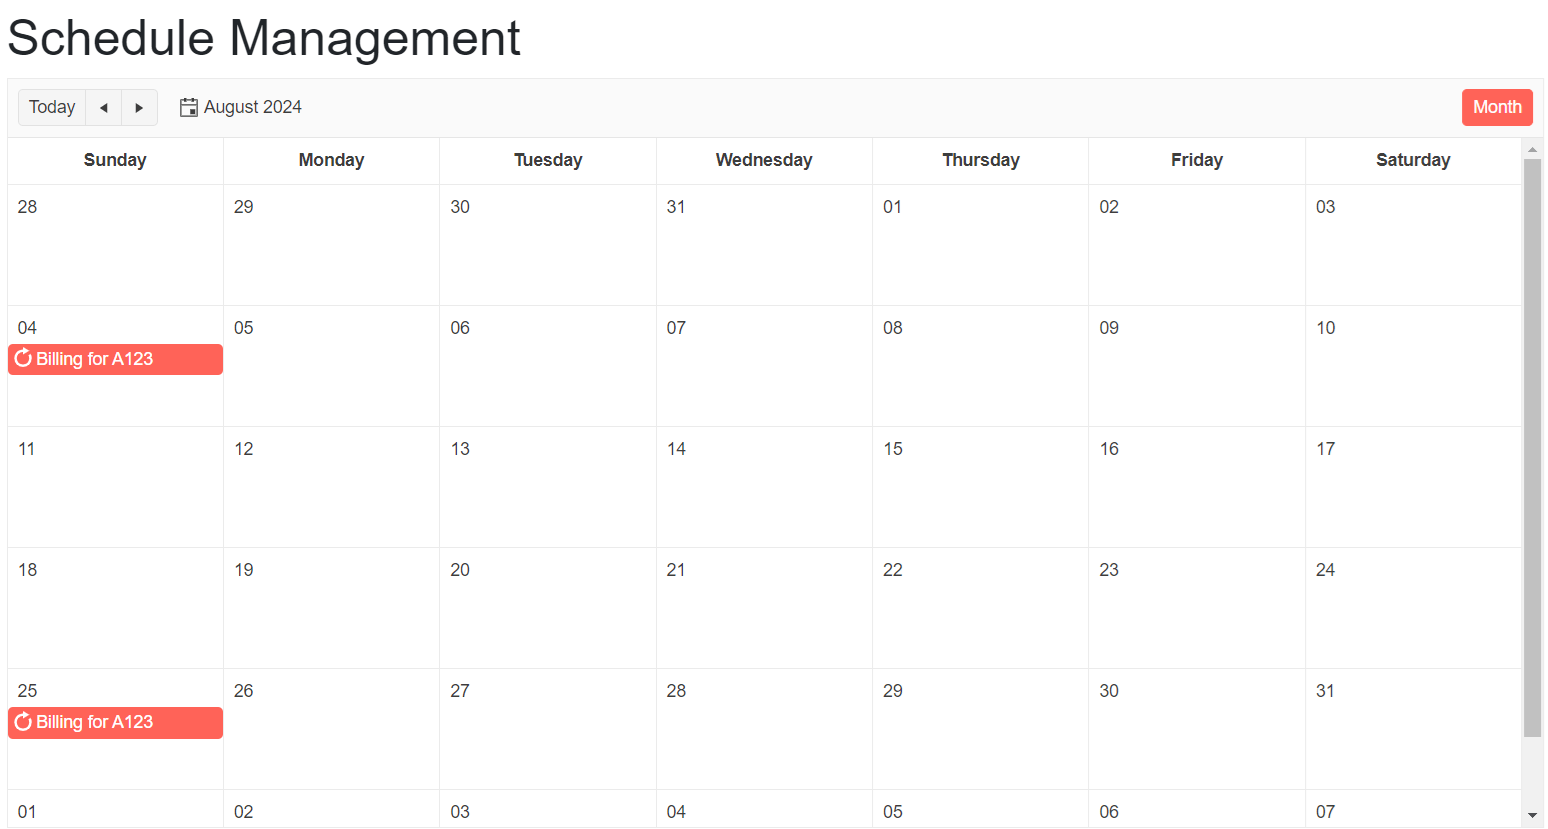
Of course, it’s not impossible that our customer may need to skip a payment occasionally. Supporting that in Scheduler is easy: Just add the dates that you want removed from the schedule to the BillingPlan’s RecurrenceExceptions property.
The following example lets our customer off the hook for the payments seven and 14 days from now (you can add any dates you want, as long as you make sure they match exactly to one of your scheduled dates):
bp.RecurrenceExceptions.Add( bp.Start.AddDays(7)  );
bp.ReccurenceExceptions.Add( bp.Start.AddDays(14) );
And those dates disappear from Scheduler’s UI:

Skipping those dates when generating the list of occurrences to store in your database is even easier, thanks to the RecurrenceOptions object: Just set your RecurrenceOptions object’s ExceptionDates property to your BillingPlan’s RecurrenceExceptions property before calling the ExpandRecurrence method. That’s what this code does:
RecurrenceOptions ro = new RecurrenceOptions();
ro.StartDate = bp.Start;
ro.RangeEnd = bp.Start.AddMonths(12);
ro.ExceptionDates = bp.RecurrenceExceptions;

IEnumerable<Occurrence> FuturePayments =  bp.ExpandRecurrence(ro);
Storing that list of exception dates can be awkward, though. The right thing to do is to store the exception dates in a separate table so they can be used by other applications. If that’s not necessary, you can convert the RecurrenceExceptions collection into a string with each date separated by a semicolon using the following code and then store that in a string property added to your BillingPlan object (here, I’ve called the new property PaymentExceptions):
bp.PaymentExceptions = string.Join(";", bp.RecurrenceExceptions);
To retrieve the string of exceptions and convert it back into a List, you could use code like this:
bp.RecurrenceExceptions = bp.PaymentExceptions.Split(';').
                                                         Select(sd => DateTime.Parse(sd)).ToList();
You’ll also want to make sure that you update your original payment schedule in your database with these exceptions. To support that, adding exceptions also causes the BillingPlan object to have its RecurrenceId property set to a GUID. You’ll want to use that GUID to tie exceptions to the BillingPlan that drives them.
You now have a user interface for managing future events, a set of future dates to load into your database and the ability to skip dates in the schedule. If your customer does skip payments, I suspect your company will want to add a new payment to the customer’s calendar (outside of the regular schedule) to make up the difference because, after all, every holiday has to be paid for.
Try Telerik UI for Blazor
Try out the Scheduler component, plus more than 110 other truly native, easy-to-customize Blazor components to cover any requirement. Try Telerik UI for Blazor for free with our 30-day trial and enjoy our industry-leading support.

Peter Vogel
Peter Vogel is both the author of the Coding Azure series and the instructor for Coding Azure in the Classroom. Peter’s company provides full-stack development from UX design through object modeling to database design. Peter holds multiple certifications in Azure administration, architecture, development and security and is a Microsoft Certified Trainer.

