
Kendo UI in SharePoint Online Pt. 4 – SharePoint Lists

Summarize with AI:
Welcome to the fourth article in this series that explores how to use Kendo UI by Progress in SharePoint Online. In the previous article, we explored how to reference Kendo UI in our solution so that we can start creating web pages that feature Kendo UI widgets.
In this article, we'll look at how to reference SharePoint Lists as a data source in Kendo UI. In most cases, you will also need to create a custom SharePoint List to suit your solution. So we will also use this opportunity to provide a more technical overview of what is going on behind the scenes for a SharePoint List.
How To Use a SharePoint List as a Data Source for Kendo UI
Since we are running in the context of a SharePoint site collection, one of the things you will want to do is query and update SharePoint Lists.
A Discussion of SharePoint Lists
SharePoint Lists are based on schema as defined by Site Columns, Content Types, and List Definitions. So if we create custom Lists to store, for instance, some form of Contact information then we need to understand the SharePoint list structure a little more deeply.
A SharePoint list can loosely be compared to a database table in SQL Server, in that there will be defined columns with defined data types. However, we should be aware that a SharePoint list is neither relational nor transactional – so please do not expect to "join" columns from multiple SharePoint lists together, outside of a very simple "lookup column" scenario.
The main thing to keep in mind if you are thinking of creating your own SharePoint list, is that there are a LOT of out of the box columns with datatypes. For example, in the Contact Information scenario columns such as First Name, Last Name, phone numbers, e-mails, and much more are already predefined. There are also many out of the box Content Types for Contacts, Announcement, Document Libraries and more. If an existing Content Type looks suitable for your purposes, you can actually inherit the definition and customize it from there.
In summary, look to first leverage what SharePoint already provides, and don't reinvent the wheel.
To understand SharePoint Lists better, let us examine behind the scenes of the out-of-the-box "My Contacts" list we created earlier.
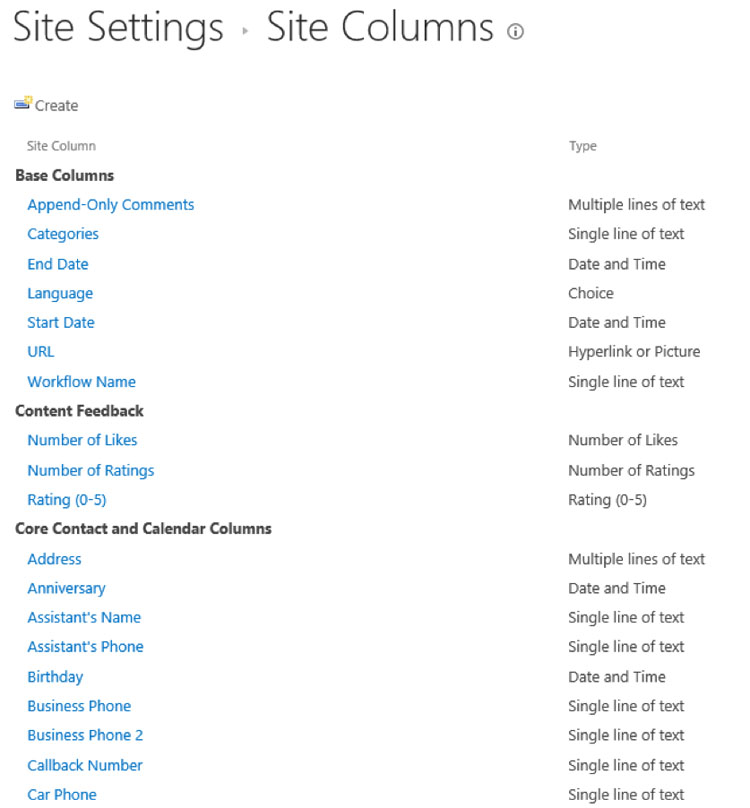
First, from Site Settings, choose Web Designer Galleries -> Site Columns. Scroll through and look at the extensive list of columns SharePoint provides. For example, if you require field(s) to store phone number(s) – re-use these in your custom list versus creating new columns that hold the same information.
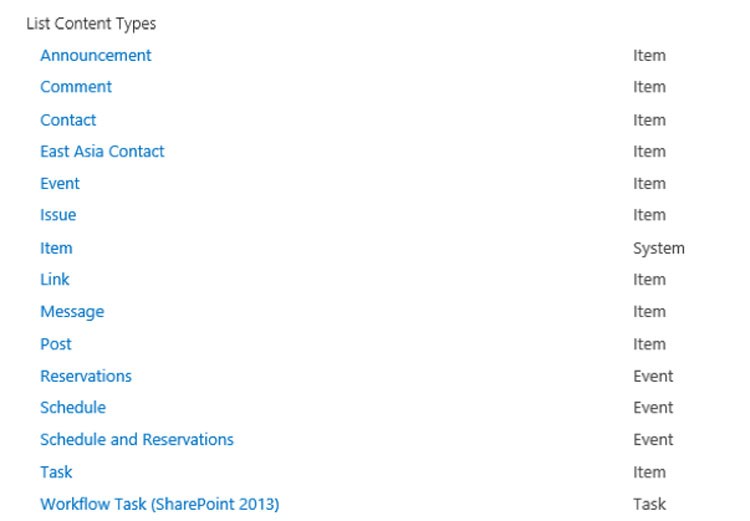
Next, from Site Settings, choose Web Designer Galleries -> Site Content Types. Scroll down and have a look at the "List Content Types". These content types are in fact the schema definition that lie in behind the SharePoint List:
Click on the Contact content type, and you can view the full list of site columns it contains:

Note that the "phonetic" fields, while shown here, are defined as "hidden".
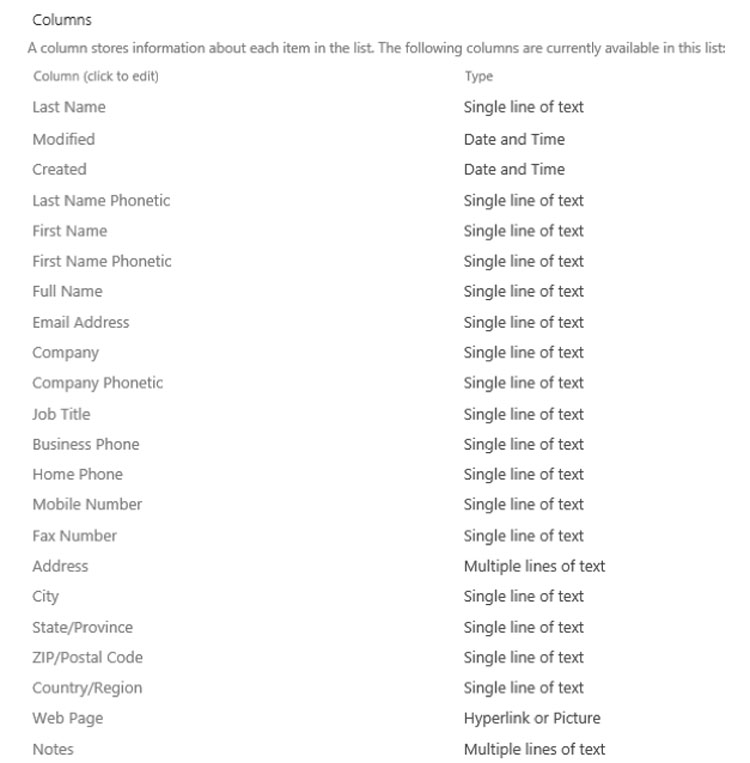
So how are the content types used? Go back to viewing the MyContacts list we created. Click the "List Settings" Icon located in the List tab of the ribbon:

Note that the Columns section of the list settings page matches up exactly to the Contact content type we viewed earlier.
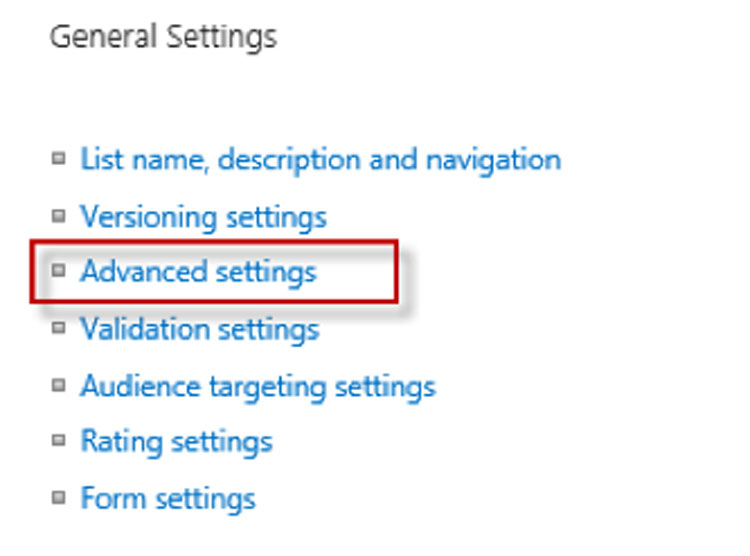
Now to expose the content type that underlies this list! From the list settings page, choose "Advanced settings" under the General Settings category:
From the advanced settings page, set "Allow management of content types" to "Yes":
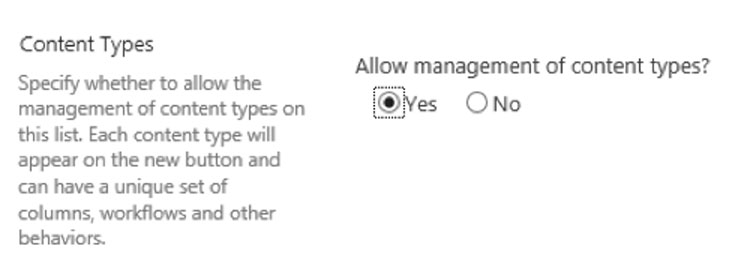
Back on the list settings page, notice that a new Content Types section has appeared, and that this does indeed verify that the Contact Content type is indeed providing the schema for our SharePoint list!

Interesting Fact: You can see from the above that you can add more content types to the SharePoint List. So in fact a SharePoint List can support multiple data schemas, and you can store different types of items in the same list, if that makes sense to you. For example, a document library could store different types of sales documents (proposals word documents, excel pricing documents, scope of work document) and each type of sales document could have its own unique metadata.
Creating SharePoint Schema in Visual Studio
Let's create some SharePoint Schema (site column, content type) and use that schema to create an instance of a custom SharePoint Contacts List. The custom site column will be a "Telerik Expertise" choice field, and the content type will inherit from the OOTB Contact content type and will be extended to include the Telerik Expertise column. Finally, we will create a list definition and list instance of "Telerik Contacts" using our custom content type.
Name: Schema Title: _KendoUI.SharePoint.Sandbox Schema Description: This feature creates a Telerik Contacts List - Site column, content type, list definition, and list instance Scope: Site
Please do not forget to see the key feature properties as demonstrated before – such as Always Force Install, Image URL, and Version.
We are going to create a custom contacts list that contains a column to indicate the person's level of expertise with Telerik products. We need to create a new site column that will hold this information.
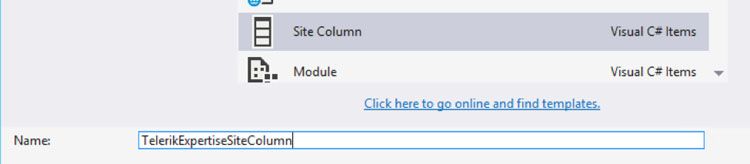
From the project menu, Add a New Item. Choose the Site Column and give it a name of "TelerikExpertiseSiteColumn".
Unfortunately, there is no "designer" or "wizard" for creating the site column XML. So paste in what you see here as the "Field" to define our choice site column. Replace the existing placeholder Field XML.
<?xml version="1.0" encoding="utf-8"?>
<Elements xmlns="http://schemas.microsoft.com/sharepoint/">
  <Field
       ID="{A653A23F-B951-4768-B2F7-38C56921D041}"
       Name="TelerikExpertise"
       DisplayName="Telerik Expertise"
       Type="Choice"
       Required="FALSE"
       Group="_Telerik NEXT">
    <CHOICES>
      <CHOICE>Novice</CHOICE>
      <CHOICE>Intermediate</CHOICE>
      <CHOICE>Advanced</CHOICE>
      <CHOICE>Master</CHOICE>
      <CHOICE>.NET Ninja</CHOICE>
    </CHOICES>
  </Field>
</Elements>
If you are creating site columns for your project, note that the GUID must be UNIQUE! As a best practice, replace the one you see above with your own – using the GUID generation from the Tools menu in Visual Studio OR use the GUID from the placeholder XML.
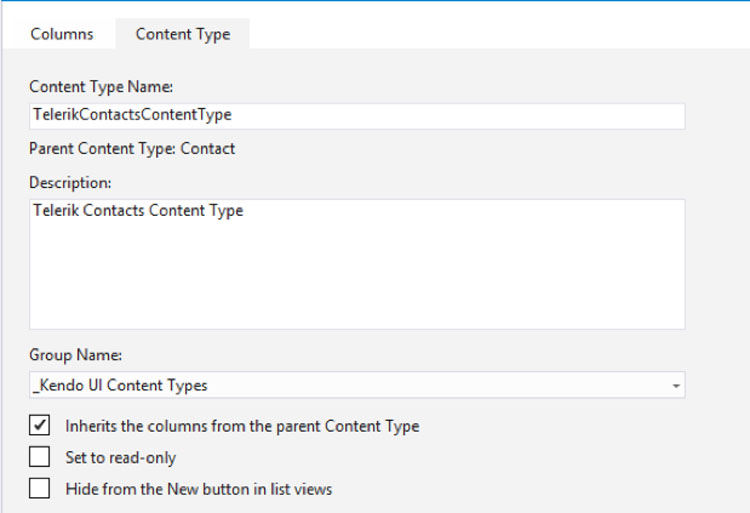
Now we will create a Content Type that inherits from Contacts and we'll add in our new Telerik Expertise Site Column. From the project menu, Add a New Item. Choose Content Type and enter the name "TelerikContactsContentType":

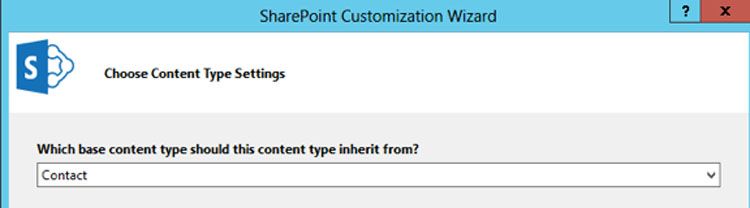
When asked to select the base content type, scroll up in the drop down selections and choose "Contact":
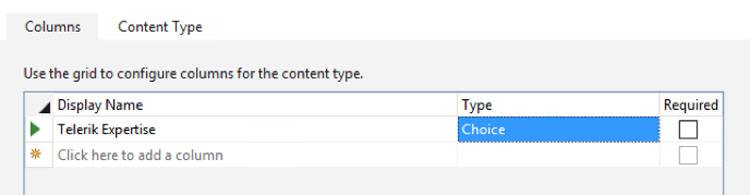
On the Designer screen "Columns" tab, select to add the "Telerik Expertise" column. Note that all of the out-of-the-box contact fields are already automatically part of the content type, so there is no need to add those.
On the Content Type tab put in an appropriate description and change the group name to "_Kendo UI Content Types". Note the use of the underscore character to begin the group name - you'll see why I use this trick a bit later.
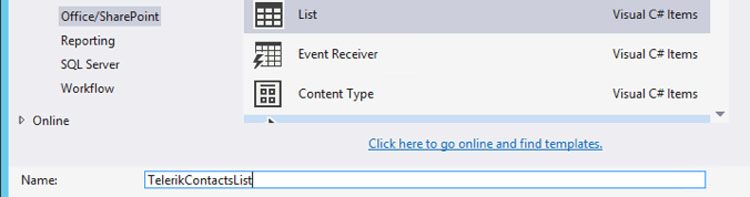
Now finally, let's define a List Definition that uses our Telerik Contacts schema and then we will also provision an instance of a Telerik Contacts list. From the project menu, Add a New Item. Choose List and enter the name "TelerikContactsList":
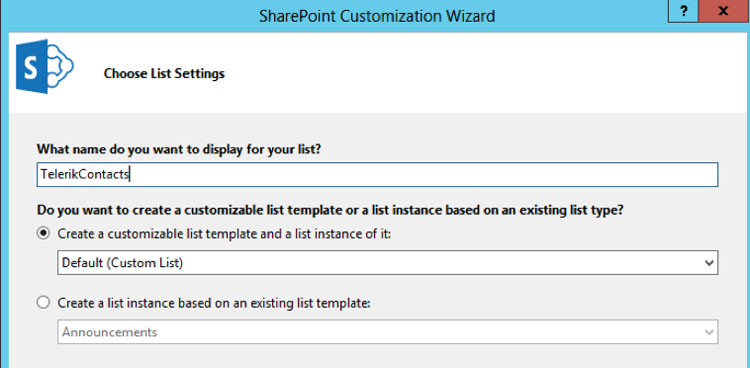
On the dialog that pops up, enter "TelerikContacts" as the Display name for your list, and ensure that "Create a customizable list template and a list instance" option is chosen and set to "Default (custom list)":
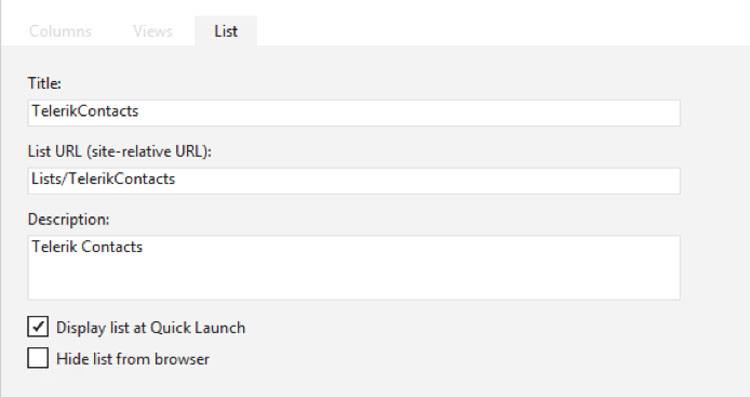
When the List Instance Designer opens, put in a proper description:
Double-click on the TelerikContactsList node in Visual Studio, to bring up the list schema designer.
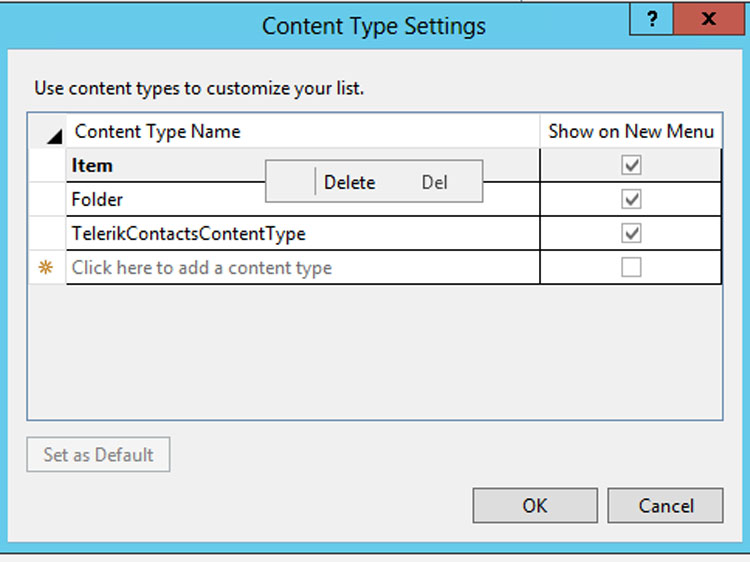
We want to attach out Custom Telerik Contact Content Type to our list schema, so click the Content Types button:

When the Content Type Settings dialog opens, type to add the TelerikContactsContentType. For the Item and Folder entries, right click on each of these and choose Delete:
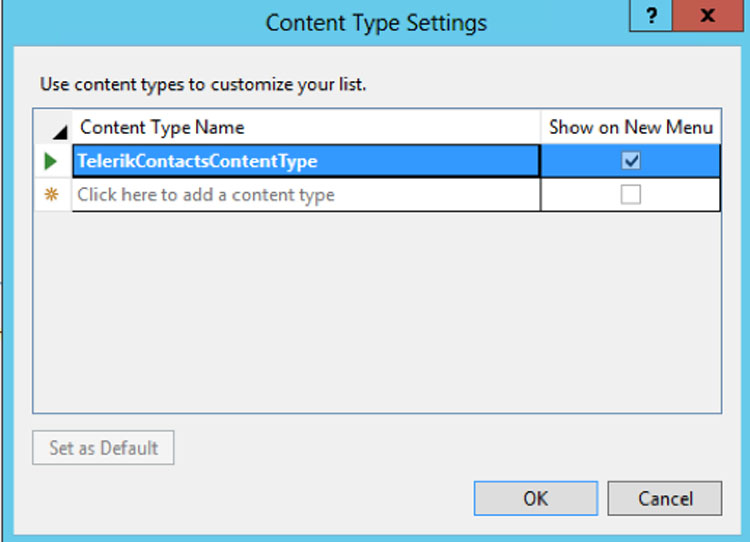
Your dialog should now look as follows. Click Ok to continue:
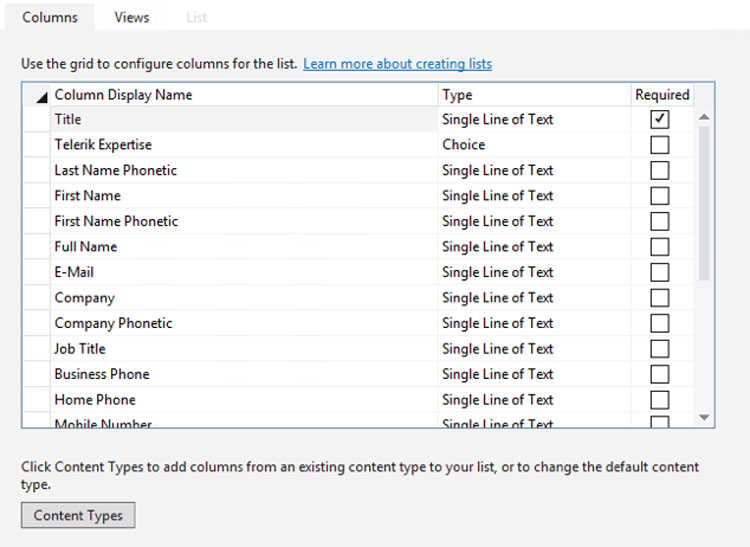
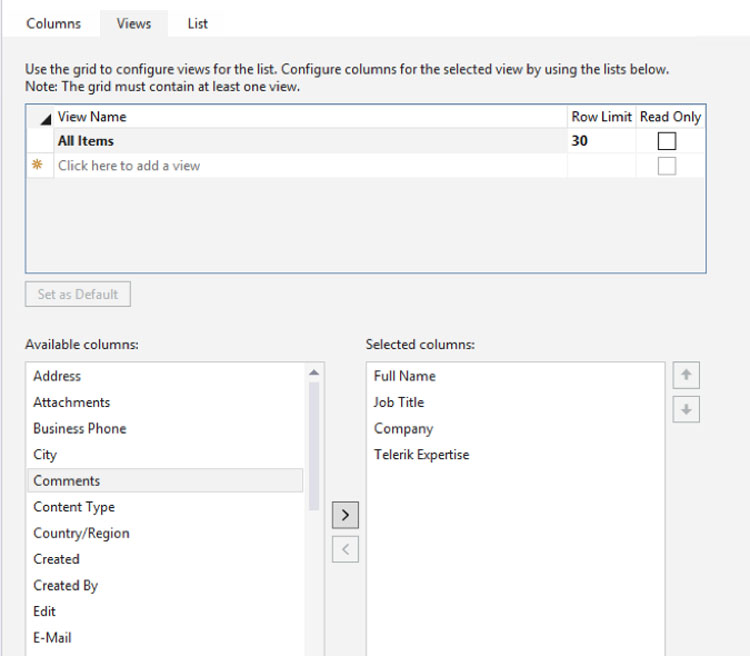
You will notice that the Columns view now contains all of the site columns that have been inherited from the Contacts content type. You will also note our Telerik Expertise custom site column included:
Click on the Views tab. Adjust the selected columns so that they display as below with Full Name, Job Title, Company, and Telerik Expertise. We are trying to more closely compare to the columns being displayed in the Telerik Basic Grid Demo.
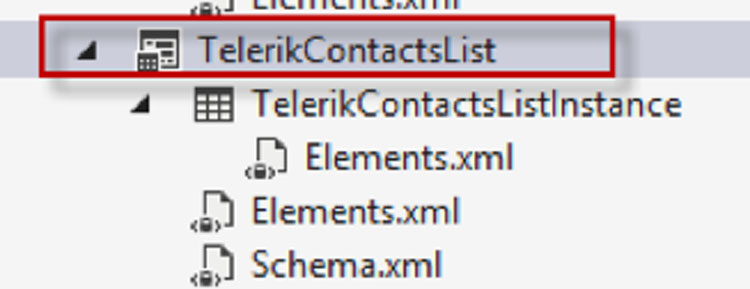
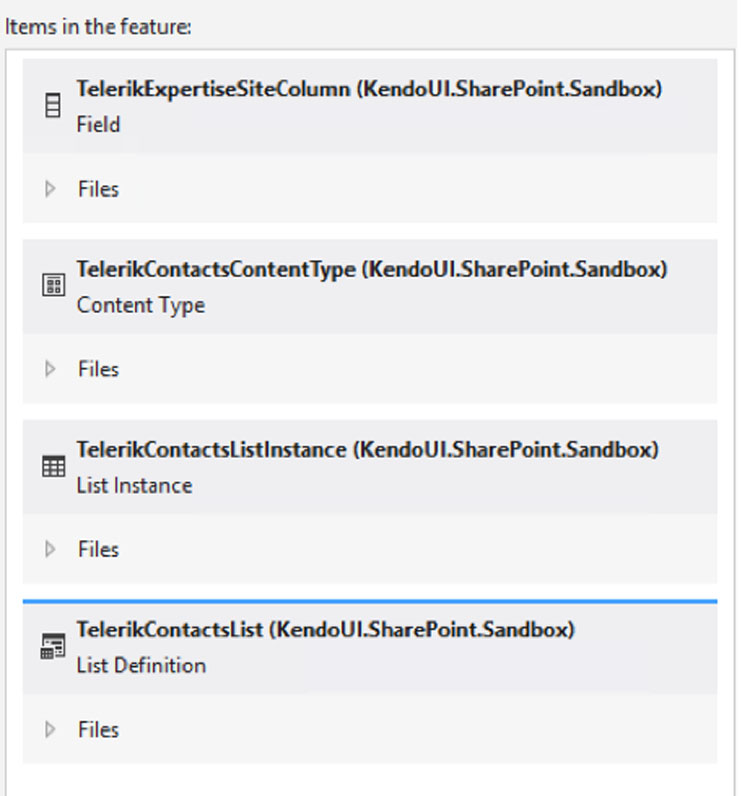
Double click back on the Schema feature to bring up the Feature Designer view. Place our new Site Column (field) Content Type, List Definition, and List Instance so they appear as "Items in the feature":
Our Visual Studio project now looks as follows:

We are now ready to deploy this updated solution and start using our custom Telerik Contact List.
Deploying The Updated Declarative Sandbox Solution
We are now ready to package our updated SharePoint Solution and deploy it to our SharePoint site. We are getting ready to start using Kendo UI with SharePoint Lists as a data source.
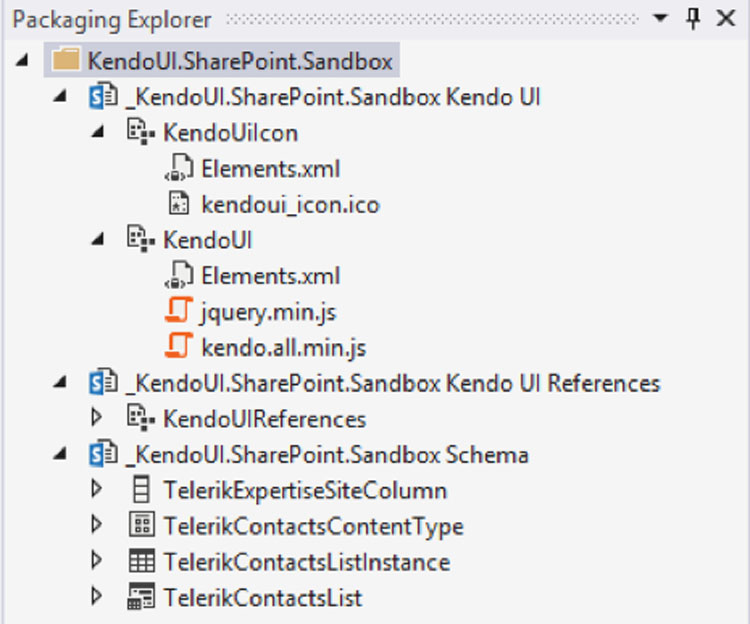
A very useful view is the "Packaging Explorer" window. It is available from Views -> Other Windows -> Packaging Explorer if it is not already open. It gives you a view inside of your WSP package and you can use it to verify what SharePoint Items are assigned to what feature. If you drill further, you can even see the files that go with each SharePoint Item:
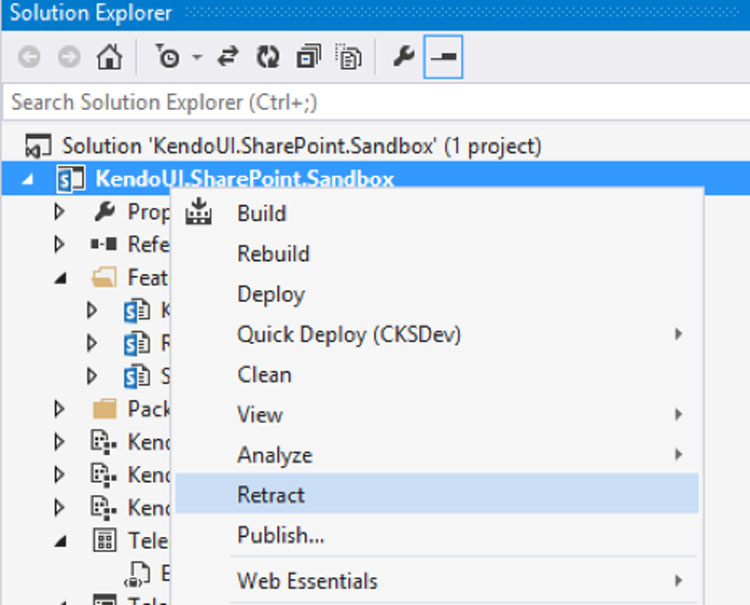
Right click on your Visual Studio project and choose the Retract option. View the results in the Output window – you will see your features deactivated and the current Sandbox Solution deleted:
To build the SharePoint Solution WSP and deploy it to the Solution Gallery of your site, right click your Visual Studio project and choose "Publish…". The following dialog will appear:
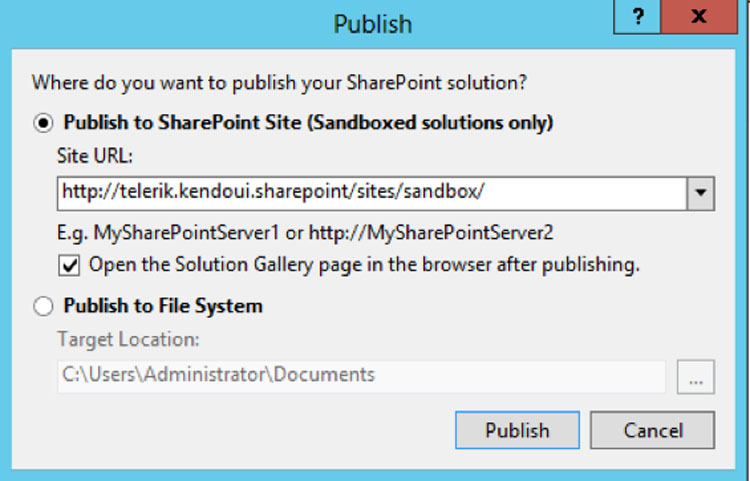
Choose the first option and fill in your site collection URL (in my case http://telerik.kendoui.sharepoint/sites/sandbox/) and click the Publish button. You will now see the Solution Gallery of your site collection open up in the browser:
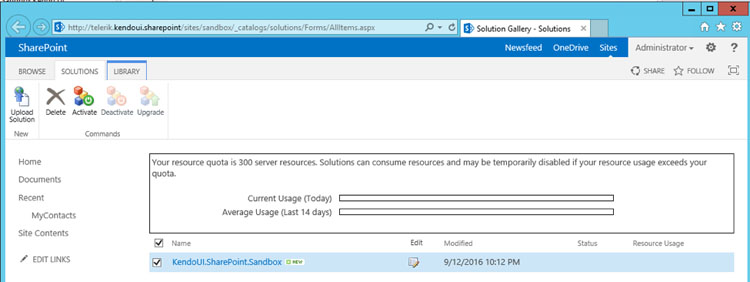
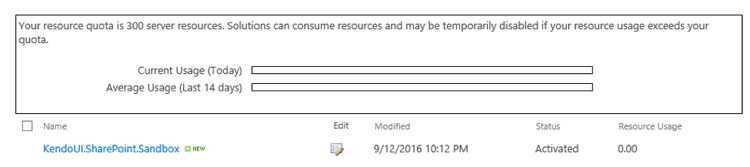
Select the KendoUI.SharePoint.Sandbox solution in the Solutions Gallery and then click on the Activate button in the Ribbon. You will get a pop up dialog, once again press the Activate button in the Ribbon.
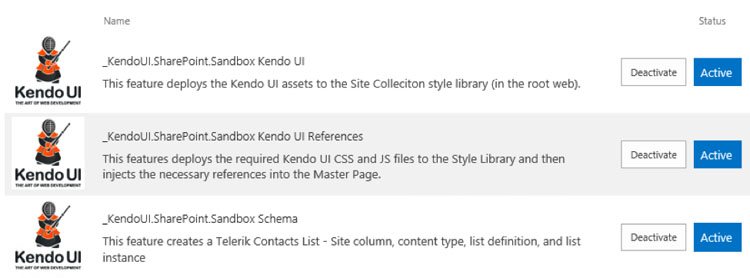
Let us check our feature activation again by looking at Site Settings -> Site Collection Administration -> Site Collection Features. You should observe that three solution Features are present and are in status "Activated" as follows:
In the Navigation you should now seek your TelerikContacts list. Click on this, and then add some new items to the list. Fill in the Last Name, First Name, Full Name, Company, and Telerik Expertise. Your list should look something like:

Now that you have learned everything you need to know to define and provision your very own SharePoint Schema, it's time to learn how to read SharePoint Lists by configuring the Kendo UI DataSource.
Hooking Kendo UI Data Source to SharePoint List – Failed Attempt
The last section just showed that you can take just about any Kendo UI sample you find on their web site and get it running pretty much "as is" in SharePoint Online. But of course we have our UI there because we want to be reading from SharePoint lists!
Even on my first attempt at doing the obvious changes with the Basic Grid Sample, it did not work as I had expected it to. I started with the DataSource from the Basic Grid Sample, and made the changes highlighted below. I changed the URL to insert the REST API call to the TelerikContact SharePoint list, and then altered the columns slightly to the equivalent field names used in the SharePoint Contacts content type:
$(document).ready(function () {
    $("#grid").kendoGrid({
        dataSource: {
            type: “json",
            transport: {
                read: " http://telerik.kendoui.sharepoint/sites/sandbox/_api/lists/getbytitle('TelerikContacts')/items"
            },
            pageSize: 20
        },
        height: 550,
        groupable: true, sortable: true, pageable: {
            refresh: true, pageSizes: true, buttonCount: 5 },
        columns: [{
            field: “FullName", title: "Contact Name", width: 200    }, {
            field: “JobTitle", title: "Contact Title“               }, {
            field: "Company", title: "Company Name"                     }, {
            field: "TelerikExpertise", title: "Telerik Expertise", width: 150   }]
        });
});
Follow the same steps from the "Test Using Kendo UI Online Sample" to create a page to test:
-
From Site Settings, choose "Add A Page, call it "Kendo SP Fail". The page will appear in edit mode. Use the Ribbon to "Edit Source" and place the following HTML snippet. Click Ok.
<div id="grid"></div> -
Using the ribbon, choose to "Insert a Web Part". Choose the Script Editor Web Part from the "Media and Content" group and place it on the page.
-
Using the Web Part drop-down menu, choose to "Edit Web Part". Then choose the "Edit Snippet" link.
-
Paste in the following, which has the changes for our first attempt to read from the Telerik Contacts SharePoint list (remember to change the URL):
<script> $(document).ready(function () { $("#grid").kendoGrid({ dataSource: { type: "json", transport: { read: "http://telerik.kendoui.sharepoint/sites/sandbox/_api/lists/getbytitle('TelerikContacts')/items" }, pageSize: 20 }, height: 550, groupable: true, sortable: true, pageable: { refresh: true, pageSizes: true, buttonCount: 5 }, columns: [{ field: "FullName", title: "Contact Name", width: 200 }, { field: "JobTitle", title: "Contact Title" }, { field: "Company", title: "Company Name" }, { field: "TelerikExpertise", title: "Telerik Expertise", width: 150 }] }); }); </script> -
Close the editor, Click OK in the web part edit pane, and save the page.
Well, since I labeled this section "Failed Attempt", you should not be surprised that your page loads with the Kendo UI Grid, but no data from our SharePoint List. What happened? Fire up the Fiddler tool! Refresh the page and look at the line to the REST call to retrieve the list items. You will see the problem is that we actually don't have JSON data, but rather Atom format – which is SharePoint's default.
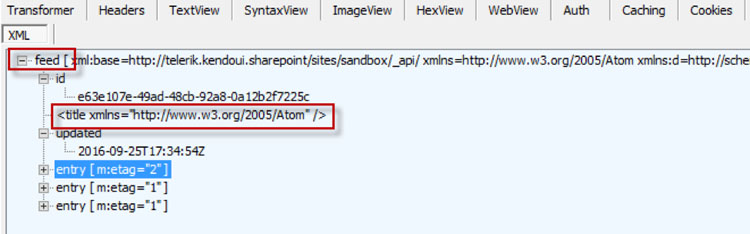
Ok, we can fix this! In the next section, we'll look at the necessary DataSource changes required to have Kendo UI read properly from a SharePoint REST API call.
Hooking Kendo UI Data Source to SharePoint List – Success!
Have a look at the following modifications to the Data Source to have it read from a SharePoint List:
dataSource: {
    type: "json",
    transport: {
        read: {
            url: "http://kendoui.office365.teleriknext/sites/kendoui/_api/lists/getbytitle('MyContacts')/items",
            beforeSend: function (xhr) {
                xhr.setRequestHeader("Accept", "application/json; odata=verbose")
            }
        }
    },
    schema: {
        data: function (data) {
            return data.d && data.d.results ? data.d.results : [data.d];
        }
    },
    pageSize: 20
},
The important changes are to modify the Accept header to specify JSON return format with odata=verbose, as SharePoint returns Atom formatted data by default. And then to specify a schema that targets the data.d node.
Follow these steps to create a page to test:
- From Site Settings, choose "Add A Page, call it "Kendo SP Fail". The page will appear in edit mode. Use the Ribbon to "Edit Source" and place the following HTML snippet. Click Ok.
markup <div id="grid"></div> - Using the ribbon, choose to "Insert a Web Part". Choose the Script Editor Web Part from the "Media and Content" group and place it on the page.
- Using the Web Part drop-down menu, choose to "Edit Web Part". Then choose the "Edit Snippet" link.
-
Paste in the following, which has the changes for our first attempt to read from the Telerik Contacts SharePoint list (remember to change the URL):
<script> $(document).ready(function () { $("#grid").kendoGrid({ dataSource: { type: "json", transport: { read: { url: "http://telerik.kendoui.sharepoint/sites/sandbox/_api/lists/getbytitle('TelerikContacts')/items", beforeSend: function (xhr) { xhr.setRequestHeader("Accept", "application/json; odata=verbose") } } }, schema: { data: function (data) { return data.d && data.d.results ? data.d.results : [data.d]; } }, pageSize: 20 }, height: 550, groupable: true, sortable: true, pageable: { refresh: true, pageSizes: true, buttonCount: 5 }, columns: [{ field: "FullName", title: "Contact Name", width: 200 }, { field: "JobTitle", title: "Contact Title" }, { field: "Company", title: "Company Name" }, { field: "TelerikExpertise", title: "Telerik Expertise", width: 150 }] }); }); </script> -
Close the editor, Click OK in the web part edit pane, and save the page.
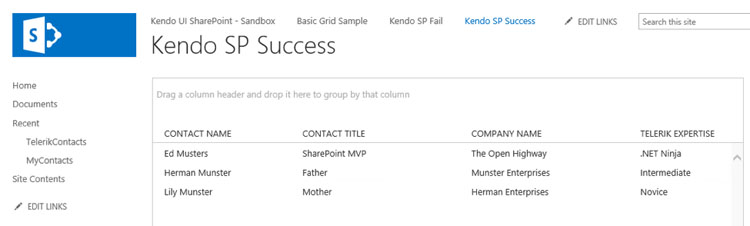
Now you should see the following page display the Kendo UI Grid showing the data from our SharePoint list! Column sorting and grouping work perfectly as well, so go ahead and try that out.
Next Steps
Including SharePoint Web Pages in Your Deployment
We just set up a web page using Kendo UI to display our SharePoint list data in a Grid. What if we wanted to include this UI as part of our deployment package? Is this possible? The answer is Yes!
This topic will be covered in a future article on how to include configured SharePoint web pages in your solution deployment.
REST Data Optimization
The specification of Odata=verbose results in more information being transferred "over the wire" than you need. We'll explore other options and see the effect on data transfer and see this simple change can have a dramatic effect on performance and responsiveness of your application.
This topic will be covered in a future article.
Updating SharePoint Lists
Now that you are reading from SharePoint lists, you will want to use the editing capabilities of the grid and update your SharePoint list.
This topic will be covered in a future article.
Implementing Optimistic Concurrency
When updating data - in our case a SharePoint list - what if the list item (e.g. a contact) has already been updated by somebody else? This is the issue of concurrency, and we'll look at using REST optimistic concurrency to solve this issue.
This topic will be covered in a future article.
Working with Document Libraries
One of the key reasons someone would use a SharePoint team site is to store documents and to take advantage of the many out-of-the-box document management features that SharePoint provides – not to mention the concurrent authoring capabilities using Office Web Applications.
This topic will be covered in a future article on how to create document libraries, as well as the unique considerations for creating and updating SharePoint list items with, effectively, "document attachments".
Conclusion
In this article, we learned how to create your very own custom SharePoint List and then have Kendo UI reference this as a Data Source.
What's Next
Next in our article series is "How To Use Kendo UI Office UI Theme and Other Frameworks". In addition to including Kendo UI as part of your solution, the majority of the time it will also include additional JavaScript frameworks as well. For example, TypeScript and Angular 2.
Including the Office UI Fabric allows you to provide User Interface that blends seamlessly into what SharePoint / Office provides out of the box. For Kendo UI widgets, an Office 365 Theme is provided and we'll learn how to use the theme out of the box as well as customizing your own theme.
Related resources:
- Prior articles in this series:
- Preparing Your Toolbox for the SharePoint Framework with Angular, Webpack and Kendo UI (Whitepaper)
- How to Prepare Your Toolbox for the SharePoint Framework (blog)
- Moving into the Modern Age of SharePoint Development (blog)
- Building SharePoint Add-ins with Kendo UI (tutorial)

The Telerik Team