
Building for the Future: Next.js and KendoReact Integration Unveiled

Summarize with AI:
Ready to take full advantage of Next.js while using KendoReact’s professionally designed UI component library? It’s a snap—see for yourself.
Next.js, a powerful React framework, is reshaping the landscape of modern web development. It introduces a seamless and intuitive approach to building web applications that are not only performant but also developer-friendly. And now you can integrate it with fully compatible components from Progress KendoReact. Let’s take a look.
Why Next.js?
Do you want to have better SEO, server-side rendering, faster FCP/TTFB, static site generation, automatic code splitting, and automatic caching? If so, Next.js is the perfect framework for you. Developed by Vercel, Next.js makes the development process easier by providing you with a production ready environment using a single line in the terminal—npx create-next-app@latest.
KendoReact Components
KendoReact makes your development process even easier by providing you with more than 120 native React UI components that are fully compatible with Next.js. These components are highly customizable in terms of visual appearance and functionality, and, as of version 7.0.1, they are all tested and adapted to work well with server-side rendering and the Next.js framework.
Integrating KendoReact with Next.js
Typically to integrate client components within server components in Next.js, you would have to import client components from a separate file and then render them inside the server components.
This is a bit of a hassle if you are working with third-party client components as it necessitates the creation of a distinct file for them, marking it with 'use client', and then importing it into the server component.
However, KendoReact makes this integration effortless. With an internal 'use client' directive, you can directly import KendoReact client components without adding the directive when event listeners and hooks are not needed.
If you are wondering what this directive does, it includes the modules imported to the component as part of the client bundle. Next.js will first pre-render the component on the server, then perform the hydration process, which attaches the React listeners to already-existing HTML DOM nodes.
On the other hand, rendering server components inside client ones can be done by passing them as children:
return (
<ClientComponent>
  <ServerComponent />
</ClientComponennt>
)
While in the client component you will receive them as props:
const ClientComponent = ({children}) => {
    return children;
}
With a more complex Next.js application, you will end up with multiple server and client components nested deeply inside each other and, in some cases, it will only be possible to pass data between far-separated components through Context.
This new paradigm of working with React is a bit challenging at the beginning, but you will eventually get used to it. And it’s worth it! The ability to nest server and client components in such a manner is awesome—it gives you the freedom to load as many components on the server as you want, decreasing the bundle size and providing a better user experience.
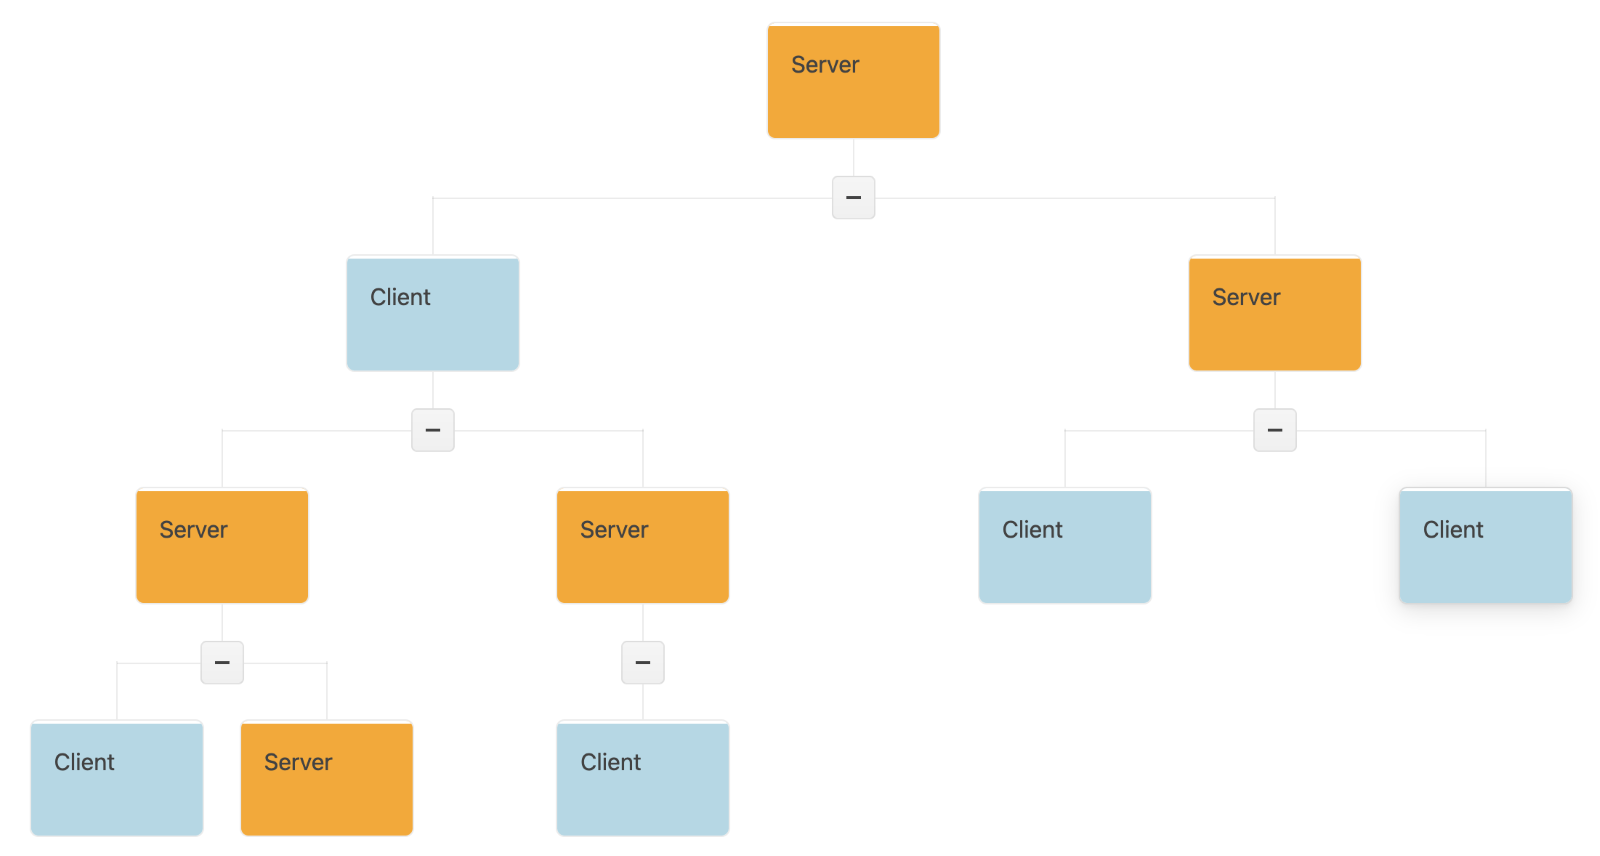
The above Chart was generated by the KendoReact OrgChart component.
Let’s now dive deeper into some Next.js implementations with the KendoReact components. In the following section, we will demonstrate how to:
- Use server actions with the KendoReact Form
- Load asynchronous data from the server to the Data Grid
- Deploy your app to Vercel with the KendoReact license
For a more straightforward setup guide with step-by-step instructions on how to import the KendoReact components, add a Kendo UI Theme and activate your KendoReact license, you can check the getting started with Next.js article.
Server Actions with KendoReact Form
Server actions, introduced in version 13.4 as an alpha version, were the highlight of the Next.js 14th release. Server actions allow you to mutate data on the server with zero client JavaScript, and therefore without blocking the UI.
Moreover, no more worries about creating API endpoints! Without server actions, you would need to create an API endpoint in a backend framework and send a request to it from the React application.
Let’s create a sign-in page with the KendoReact Form component where we call a server action after submitting the form.
First, create an “actions.tsx” file where you will store the server functions. It is required to have them in a separate file when calling them in client components. In addition, these functions should be executed in the server and used in the client component, and this is why we add the 'use server' directive on top of the file.
'use server';

interface signInPropsInterface {
  email: string;
  password: string;
}
export const signInValidation = async (signInProps: signInPropsInterface) => {
    const email = signInProps.email;
    const password = signInProps.password;
    //make an API call
 };
In the Form component, import the signInValidation function and call it in the onSubmit event handler inside the startTransition hook.
The startTransition hook lets you update the state without blocking the UI and is required to use when calling a server action outside the form’s action property, like in our case. (However, the Progress KendoReact team is looking forward to making the Form component work with the action property in an upcoming release.)
const onSubmit= (dataItem: { [name: string]: any }) => {
    const signInData = {
      email: dataItem.email,
      password: dataItem.password,
    };
    startTransition(() => {
      signInValidation(signInData);
    });
  };
There you go, the submit event is now calling the signInValidation that is executed in the server. You can also set cookies and perform a page redirection using redirect inside the signInValidation method.
For a full example, you can check this StackBlitz demo.
Asynchronous Server Data Loading with the KendoReact Data Grid and Skeleton
When using Next.js, you will want to load the data on the server and show a skeleton or a loader until the data is ready, and an error when data fails. Let’s do that with the KendoReact Data Grid and Skeleton components. This is the structure that we will have by the end of this section:
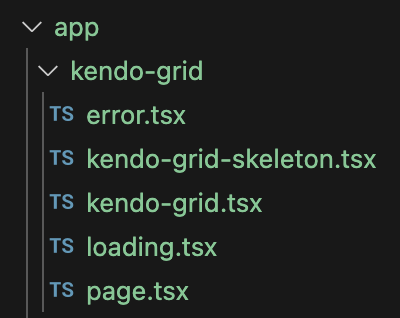
First, create the “page.tsx” as a server component. Here is the place where we will load the data and pass it to the Grid.
export default async function Page() {
  const fetchData = async () => {
    const products = await getProducts();  //fetch data from api
  return products;
}
  const data = await fetchData();
  return (
  <KendoGrid data={data}/>
)
}
Make sure that both “page.tsx” and the function for data fetching are asynchronous.
As a side note, asynchronous functions are currently only supported in server components.
The issue here is that the page will load with no content at all until the data is ready. Here you have two options. You can either wrap the KendoGrid component with React.Suspense and set its fallback property or create a “loading.tsx” file and render the fallback inside of it. Choosing between the two is a matter of personal preference.
Creating a good-looking and customizable skeleton or loader with animations is not the easiest thing to implement, and these fallback components are used heavily in server-based applications. This is why we suggest taking a look at the KendoReact Skeleton and Loader components.

In “loading.tsx”, import the Skeleton component and render it, and you are good to go.
import { Skeleton} from "@progress/kendo-react-indicators";
export default function Loading() {
  return <Skeleton
        shape={'rectangle'}
        style={{ width: '100%', height: '400px' }}
      />
}
However, what if the data fails to load? Usually, we would use React Error Boundaries, but they are class components, and using class components is not supported in Next.js.
Here, you can use the error.tsx file convention that returns a reset method through props which allows you to attempt to recover from the error. You can try this by programmatically throwing a new error—throw new Error('error-name').
In the below example, we are calling this method in the onClick event handler of the KendoReact Button component, with its themeColor property set to error. The component also has multiple other options for visual customizations.

'use client'
import { useEffect } from 'react'
Import { Button } from ‘@progress/kendo-react-buttons"
export default function Error({
  error,
  reset,
}: {
  error: Error & { digest?: string }
  reset: () => void
}) {

  return (
    <div>
      <h2>Something went wrong!</h2>
      <Button
        themeColor=”error”
        onClick={
          () => reset()
        }
      >
        Try again
      </Button>
    </div>
  )
}
For a full example, you can open this StackBlitz demo.
Deployment and License Activation
Deploying a Next.js app to Vercel is an option chosen by many developers, due to its simplicity and the awesome features that it offers. You also want to activate your KendoReact license in the deployment by setting an environment variable to remove the watermark and license warning from the components.
If you do not own a license, you can get one by starting a free trial and benefit from 30-day free technical support: https://www.telerik.com/try/kendo-react-ui
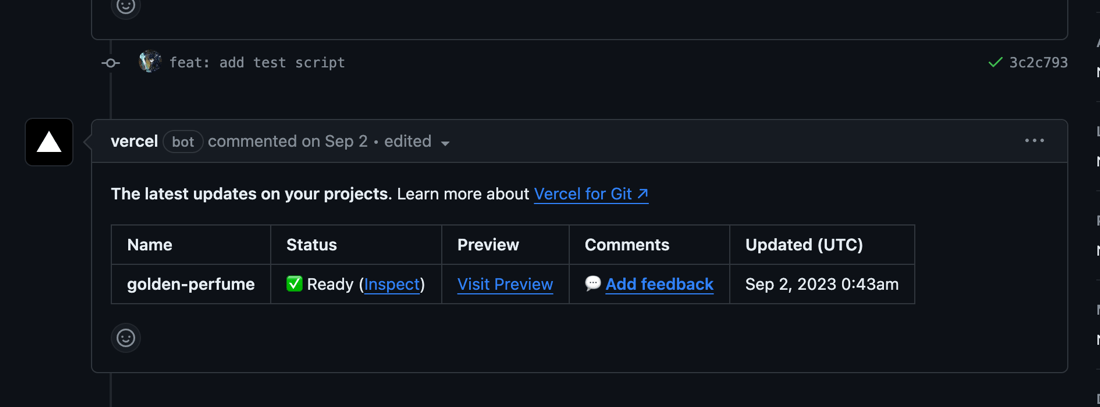
Starting with deploying to Vercel, create an account on vercel.com if you do not have one, and import the GitHub repo of your Next.js project. You will now have a deployment after each commit in the Pull Requests:
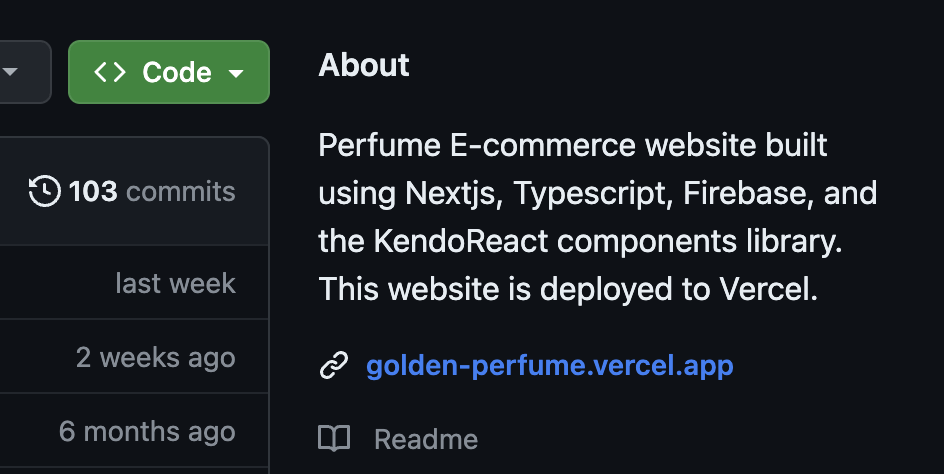
And you’ll have a main deployment link in the index page of the GitHub repository:
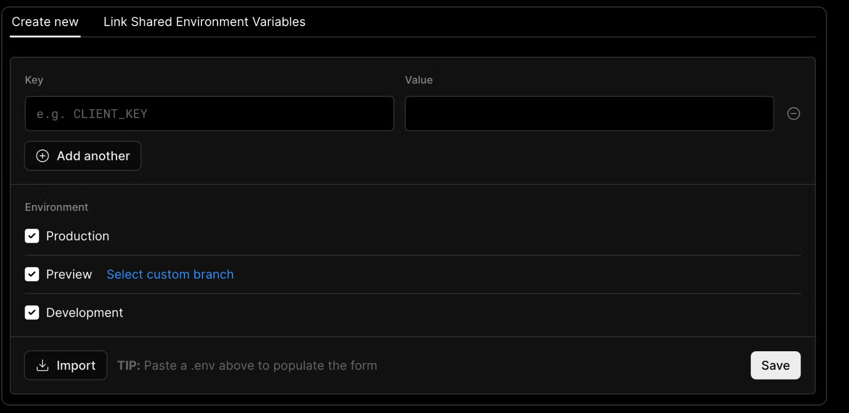
To activate the license in the deployments, add your license as an environment variable in the Environment Variables page of your Project Settings. The key name should be KENDO_UI_LICENSE.
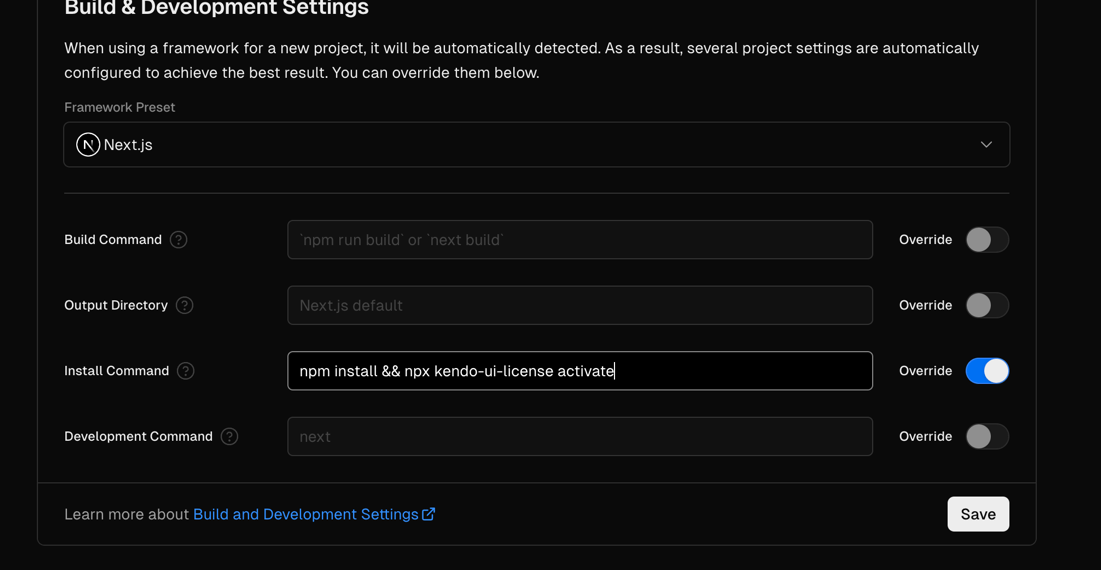
And in the general tab, add the npm installation and license activation script in the Install Command input:
Conclusion
The JavaScript world is in constant change, and React is a JavaScript library that you can use in any direction you want, making it extremely dynamic. Progress KendoReact works to stay up to date with the latest developments in order to offer our clients the best developer experience in any direction they choose to take.
Moreover, the introduction of server components in Next.js makes the React paradigm really different. In this blog, we barely scratched the surface of the features and implementations with Next.js.
Therefore, if you have any questions or if you are trying to figure out how to create a certain implementation with Next.js and KendoReact, do not hesitate to share that in our public forums, where you can receive help from the KendoReact community and the KendoReact team.
And if you haven’t tried KendoReact yet, remember you can do so free for 30 days.

Wissam Merhi
Wissam is a Technical Support Engineer in the KendoReact team. He is a big fan of the React library but is always interested in learning new frameworks and staying up-to-date with the latest tech developments. In his free time, he is open to do anything whether it is hitting the gym, going out for a football match, or sitting down to watch a movie or play a video game.
Related Posts
Comments
All articles
Topics
Web MobileMobile
Desktop
Design
Productivity
People
