Top Common Handlers in .NET MAUI

Summarize with AI:
Connect your .NET MAUI cross-platform controls with corresponding platform-specific controls using handlers. Here are some example use cases where handlers are most useful.
Handlers in .NET MAUI are the way to connect cross-platform controls with their native views on each platform. They offer a clean, decoupled and high-performance design. In this article we will analyze some scenarios where they are especially useful to solve certain problems. Let’s go!
Understanding Handlers in .NET MAUI
A handler in .NET MAUI is a special class that maps a cross-platform control to its native control. When we create the user interface in XAML, we use these cross-platform controls to build interfaces inside content pages, which are translated to native controls. For example, a .NET MAUI Entry control is mapped to an Android AppCompatEditText control, an iOS / Mac Catalyst UITextField control and a TextBox control on Windows.
At this point, you may wonder about the usefulness of handlers in your projects. The answer is that you can use them to customize controls and solve a range of problems: changing the default appearance of controls that cannot be done from XAML controls, accessing the properties of each native control, allowing you to change behavior to perform validations, etc.
Handlers can be used to:
- Remove or modify elements of a control (like an underline, border, etc.)
- Add functionality to a control (such as search capabilities)
- Create custom controls
Knowing about handlers is going a step further in your technical skills in .NET MAUI, so I highly recommend learning about them in depth.
Ways to Customize Handlers in .NET MAUI
In .NET MAUI, there are several ways to customize a handler, including:
Mapper.AppendToMapping(): To perform customizations after the default mappingCommandMapper.AppendToMapping(): To intercept actionsHandlerChanged: For a specific instance
In the above list you may have noticed the term Mapping, which refers to a dictionary of configurations that define how a control is rendered.
The way we connect to the handler will define which instances in the application we will affect through the handler. Let’s do some practical exercises to better understand them, solving common but simple problems in customizing native controls.
For these demonstrations, I created a new project using the .NET MAUI App template without sample content. Next, I created a folder called Handlers and inside a static class called HandlerCustomizations:
public static class HandlerCustomizations
{
    public static void RegisterHandlers()
    {

    }
}
Finally, you need to register the new class in Program.cs as follows:
public static class MauiProgram
{
    public static MauiApp CreateMauiApp()
    {
        var builder = MauiApp.CreateBuilder();
        builder
            .UseMauiApp<App>()
            .ConfigureMauiHandlers(_ =>
            {
                HandlerCustomizations.RegisterHandlers();
            })
            ...
    }
}
With the above ready, we are now prepared to analyze common use cases for handlers.
Removing Underline or Border from an Entry
Let’s start with the most used handler across the .NET MAUI ecosystem. The problem is that .NET MAUI does not currently expose a property that allows removing the default lines on each native platform. For example, on Android a line appears under the text, on iOS a gray rectangle is shown and on Windows a border.
The handler code looks like the following:
        Microsoft.Maui.Handlers.EntryHandler.Mapper.AppendToMapping("BorderlessEntry", (handler, view) =>
        {
#if ANDROID
            handler.PlatformView.BackgroundTintList =
                Android.Content.Res.ColorStateList.ValueOf(Android.Graphics.Color.Transparent);
#elif IOS || MACCATALYST
            handler.PlatformView.BorderStyle = UIKit.UITextBorderStyle.None;
#elif WINDOWS
            handler.PlatformView.BorderThickness = new Microsoft.UI.Xaml.Thickness(0);
#endif
        });
In the code above, we access the control mapper Entry, which is the configuration dictionary, and add an extra customization called BorderlessEntry. You can also notice a callback that handles two parameters: handler, which is the access to the native control, and view, which is the Entry of .NET MAUI.
In each conditional compilation directive, a different behavior is specified according to the platform, using handler.PlatformView, and the native properties of each control. In the case of Android, we change the border color to transparent using BackgroundTintList. On iOS, the border is completely removed using the native property BorderStyle. And on Windows, BorderThickness is used to indicate a border thickness of zero.
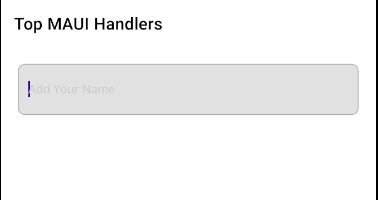
In the image above you can see the Entry control used without an underline on Android, which allows combining with other controls to improve the visual appearance.
Modifying Properties of a Button
Sometimes applications require a controlled visual style for buttons. For example, on Android the normal behavior is to add elevation and a ripple effect to all buttons. In .NET MAUI, there is no way to control these values natively directly on the control, so we can choose to use a handler again:
Microsoft.Maui.Handlers.ButtonHandler.Mapper.AppendToMapping(
    nameof(Microsoft.Maui.IButton.Background), (handler, view) =>
{
#if ANDROID
    handler.PlatformView.StateListAnimator = null;
    handler.PlatformView.Elevation = 0;

    var rippleColor = Android.Graphics.Color.Argb(80, 255, 0, 0);
    var colorStateList = Android.Content.Res.ColorStateList.ValueOf(rippleColor);

    if (handler.PlatformView.Background
                        is Android.Graphics.Drawables.RippleDrawable rippleDrawable)
        rippleDrawable.SetColor(colorStateList);
#elif IOS || MACCATALYST
            handler.PlatformView.Alpha = 1.0f;
            handler.PlatformView.AdjustsImageWhenHighlighted = true;
#endif
});
In the code above, these Android properties are modified:
StateListAnimator: Removes the elevation animation when pressedrippleDrawable.SetColor: Overrides the ripple effect color
When running the application, we can see a customized ripple effect according to the defined ink color:
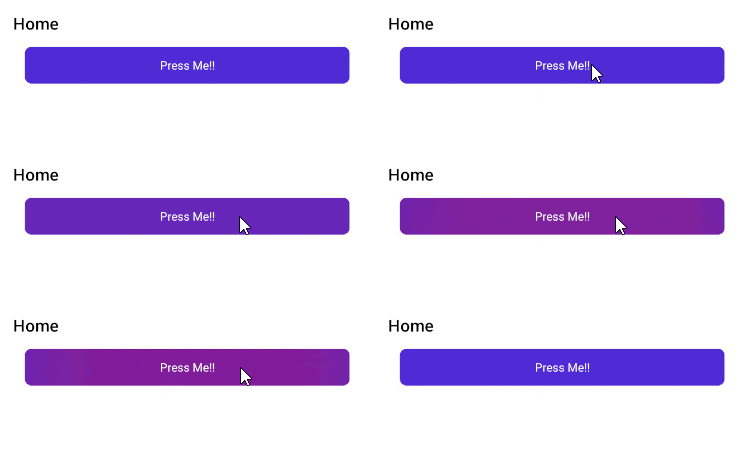
The previous handler demonstrates how to change default control effects using native properties.
Select All Text When Receiving Focus in an Entry
The following handler, which proves extremely useful, allows users to select all text in a Entry control when focusing, to then perform actions such as deleting the text, copying it, etc.
Microsoft.Maui.Handlers.EntryHandler.Mapper.AppendToMapping(
    "SelectAllOnFocus", (handler, view) =>
    {
#if ANDROID
        handler.PlatformView.FocusChange += (_, e) =>
        {
            if (e.HasFocus)
                handler.PlatformView.Post(handler.PlatformView.SelectAll);
        };
#elif IOS || MACCATALYST
        handler.PlatformView.EditingDidBegin += (_, _) =>
            Microsoft.Maui.ApplicationModel.MainThread.BeginInvokeOnMainThread(
                () => handler.PlatformView.SelectAll(null));
#endif
    });
The method Post on Android allows queuing the select-all action so the text selection is not overwritten. On the other hand on iOS the method SelectAll is invoked to carry out the selection, in the subscription to the EditingDidBegin event. This is because there is no FocusChange event similar to Android’s.
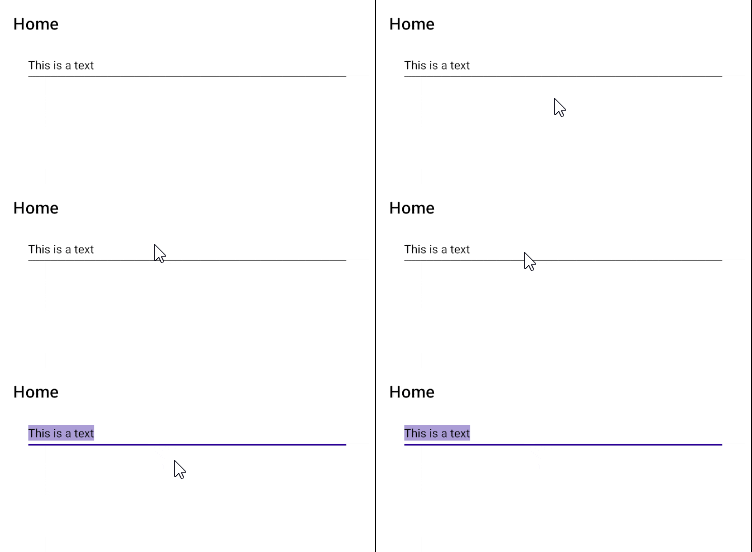
Disabling the Keyboard of an Entry Control
The following useful .NET MAUI handler is the one that allows disabling the keyboard of an Entry control. Disabling keyboards is essential when creating applications where we will have a custom keyboard, such as a calculator app or a PIN input, and we want to show text input controls without the on-screen keyboard appearing.
To implement it, we will do it as follows:
Microsoft.Maui.Handlers.EntryHandler.Mapper.AppendToMapping(
    "DisableKeyboard", (handler, view) =>
    {
        if (view.AutomationId != "no-keyboard") return;

#if ANDROID
        handler.PlatformView.ShowSoftInputOnFocus = false;
#elif IOS || MACCATALYST
        handler.PlatformView.InputView = new UIKit.UIView();
#endif
    });
In the previous code, in the Android section the property ShowSoftInputOnFocus with a false value prevents the keyboard from appearing when focusing the field, while on the iOS side, InputView replaces the keyboard with an empty view, preventing the keyboard from appearing.
DatePicker/TimePicker: Text Alignment
A common case that users want in mobile applications is to center the text in the DatePicker and TimePicker controls, which is not possible to do natively from XAML code in .NET MAUI.
To achieve this, we can once again resort to handlers. On this occasion, the code used will be the following:
Microsoft.Maui.Handlers.DatePickerHandler.Mapper.AppendToMapping(
    "CenterDateText", (handler, view) =>
    {
#if ANDROID
        handler.PlatformView.Gravity = Android.Views.GravityFlags.Center;
#elif IOS || MACCATALYST
        handler.PlatformView.TextAlignment = UIKit.UITextAlignment.Center;
#endif
    });

Microsoft.Maui.Handlers.TimePickerHandler.Mapper.AppendToMapping(
    "CenterTimeText", (handler, view) =>
    {
#if ANDROID
        handler.PlatformView.Gravity = Android.Views.GravityFlags.Center;
#elif IOS || MACCATALYST
        handler.PlatformView.TextAlignment = UIKit.UITextAlignment.Center;
#endif
    });
In the handler, the property Gravity is used on Android for both DatePicker and TimePicker, which allows aligning the text to the position we need. In the case of iOS, the TextAlignment property is used, which allows the same result:
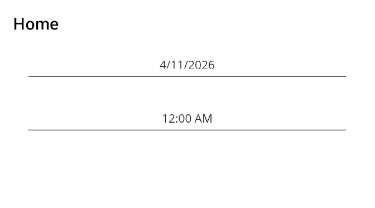
Without a doubt, it is a small handler that can solve a common visual problem.
Entry with Native Validation
Let’s move on to a more complex case related to the usefulness of handlers. Imagine a scenario where you need to apply some kind of validation to all controls in the application. To achieve this, you can combine the use of events like TextChanged on Android and EditingChanged on iOS:
Microsoft.Maui.Handlers.EntryHandler.Mapper.AppendToMapping(
    "NativeEmailValidation", (handler, view) =>
    {
#if ANDROID
        handler.PlatformView.TextChanged += (_, e) =>
        {
            var text = e.Text?.ToString() ?? string.Empty;
            var isValid = System.Text.RegularExpressions.Regex.IsMatch(
                text, @"^[^@\s]+@[^@\s]+\.[^@\s]+$");

            handler.PlatformView.Error =
                (isValid || text.Length == 0) ? null : "Invalid Email";
        };
#elif IOS || MACCATALYST
                    handler.PlatformView.EditingChanged += (_, _) =>
                    {
                        var text = handler.PlatformView.Text ?? string.Empty;
                        var isValid = System.Text.RegularExpressions.Regex.IsMatch(
                            text, @"^[^@\s]+@[^@\s]+\.[^@\s]+$");

                        handler.PlatformView.Layer.CornerRadius = 4f;
                        handler.PlatformView.Layer.BorderColor = (isValid || text.Length == 0)
                            ? UIKit.UIColor.Clear.CGColor
                            : UIKit.UIColor.SystemRed.CGColor;
                        handler.PlatformView.Layer.BorderWidth =
                            (isValid || text.Length == 0) ? 0f : 1f;
                    };
#endif
    });
Within the lambda expression that handles the text change, a regular expression validation is performed. In this example, an email address is validated to be correctly written, but any other validation can be carried out.
Finally, in the Android case, the Error property is used to indicate there is an error, while on iOS the control is colored in a more customized way:
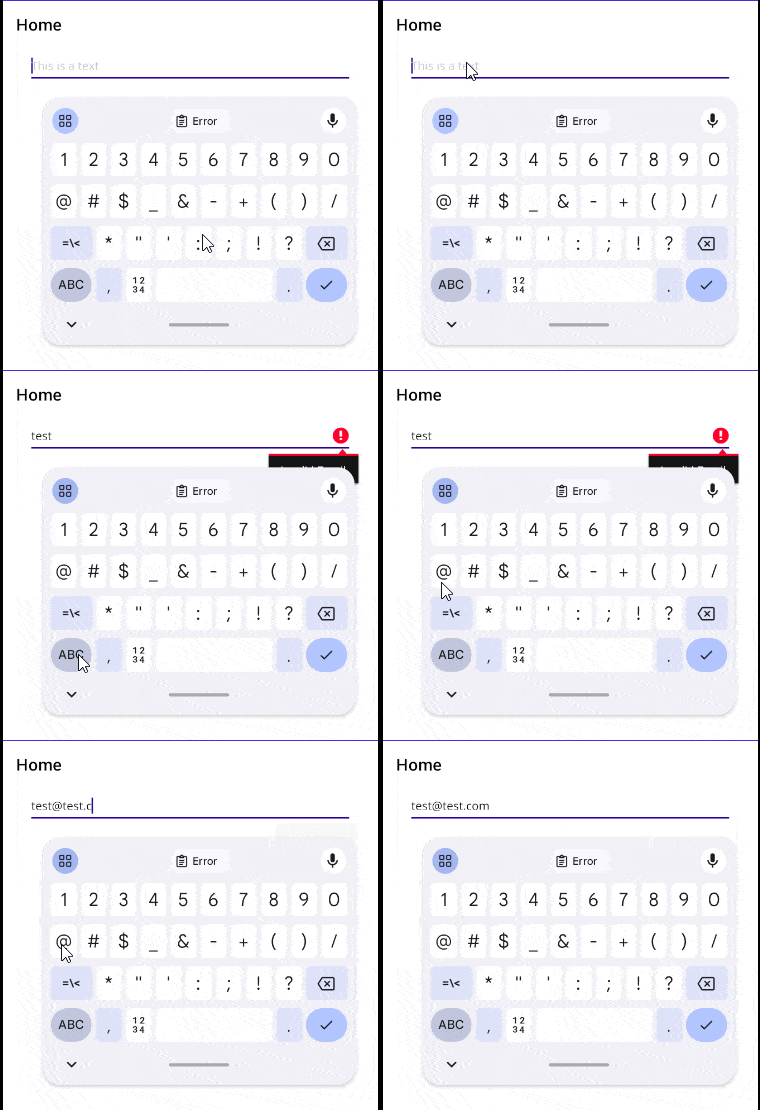
The above approach leads us to imagine scenarios with more complexity and related to events, such as saving to a database after editing a text, preventing prohibited words from a dictionary, etc.
Conclusion
Throughout this article, you have been able to see the usefulness of handlers in real, everyday scenarios. They are a controlled way to modify native properties of controls without having to wrestle with native classes on each platform.
As a final point, in my experience, if you need a higher degree of customization and want something that has been tested across all platforms, I recommend that instead of creating handlers you use prebuilt controls that have the capabilities you need, such as those from the Progress Telerik UI for .NET MAUI suite of controls, which include the functionalities mentioned in the article and many more, without the need to create custom handlers. See you in the next article!

Héctor Pérez
Héctor Pérez is a Microsoft MVP with more than 10 years of experience in software development. He is an independent consultant, working with business and government clients to achieve their goals. Additionally, he is an author of books and an instructor at El Camino Dev and Devs School.
Related Posts
Comments
All articles
Topics
Web MobileMobile
Desktop
Design
Productivity
People