
React Basics: How to Add Bootstrap to React Applications

Summarize with AI:
Bootstrap is a popular CSS framework that provides a set of pre-designed UI elements. This article provides instructions on how to integrate the Bootstrap CSS framework into a React application, by referencing the necessary files and using the relevant Bootstrap classes/elements within React components.
React is a popular JavaScript library for building user interfaces. It allows developers to build reusable UI components and manage the state of their applications efficiently. Bootstrap, on the other hand, is a popular CSS framework that provides a set of pre-designed UI elements. Combining the two can lead to the rapid development of modern and responsive web applications.
In this article, we’ll take a look at how Bootstrap can be added to a React application. There are several ways to do this but we’ll focus on three popular methods:
- Using the standard Bootstrap CSS and JS libraries.
- Using the react-bootstrap component library.
- Using the KendoReact component library with the Bootstrap UI theme.
Using the Standard Bootstrap CSS and JS Libraries
The most straightforward method of introducing Bootstrap to a React application is to introduce the compiled Bootstrap CSS and JS code directly into the application.
One way we can achieve this is by simply downloading the ready-to-use compiled code from the Bootstrap website. Once downloaded, we can have our app reference the compiled code from a directory within our app.
To avoid having to download the Bootstrap code directly, we can instead reference the compiled Bootstrap CSS and JS libraries through a CDN (content delivery network) like jsDelivr.
We can reference the compiled files from the CDN in the root index.html file of our React application.
In the <head> tag of our index.html file, we can use a <link> tag to reference the CSS.
<!DOCTYPE html>
<html lang="en">
  <head>
    <!-- ... -->
    <!-- ...  -->
    <!--  Introduce Bootstrap CSS -->
    <link
      href="https://cdn.jsdelivr.net/npm/bootstrap@5.3.0-alpha1/dist/css/bootstrap.min.css"
      rel="stylesheet"
      integrity="sha384-GLhlTQ8iRABdZLl6O3oVMWSktQOp6b7In1Zl3/Jr59b6EGGoI1aFkw7cmDA6j6gD"
      crossorigin="anonymous"
    />
  </head>
  <body>
    <!-- ... -->
    <!-- ...  -->
  </body>
</html>
In the <body> tag of our index.html file, we can use a <script> tag to reference the JavaScript.
<!DOCTYPE html>
<html lang="en">
  <head>
    <!-- ... -->
    <!-- ...  -->
    <!--  Introduce Bootstrap CSS -->
    <link
      href="https://cdn.jsdelivr.net/npm/bootstrap@5.3.0-alpha1/dist/css/bootstrap.min.css"
      rel="stylesheet"
      integrity="sha384-GLhlTQ8iRABdZLl6O3oVMWSktQOp6b7In1Zl3/Jr59b6EGGoI1aFkw7cmDA6j6gD"
      crossorigin="anonymous"
    />
  </head>
  <body>
    <!-- ... -->
    <!-- ...  -->
    <!--  Introduce Bootstrap JS -->
    <script
      src="https://cdn.jsdelivr.net/npm/bootstrap@5.3.0-alpha1/dist/js/bootstrap.bundle.min.js"
      integrity="sha384-w76AqPfDkMBDXo30jS1Sgez6pr3x5MlQ1ZAGC+nuZB+EYdgRZgiwxhTBTkF7CXvN"
      crossorigin="anonymous"
    ></script>
  </body>
</html>
With this simple change, we can begin to use Bootstrap to build the UI of our app. To test this, we can attempt to add Bootstrap elements in the root parent <App /> component of our React application.
Here’s an example of having the parent <App /> component use Bootstrap’s columns layout
to render three separate Bootstrap-styled
buttons side by side.
export default function App() {
  return (
    <div className="container mt-5 text-center">
      <div className="row">
        <div className="col">
          <button type="button" className="btn btn-primary">
            Primary
          </button>
        </div>
        <div className="col">
          <button type="button" className="btn btn-secondary">
            Secondary
          </button>
        </div>
        <div className="col">
          <button type="button" className="btn btn-success">
            Success
          </button>
        </div>
      </div>
    </div>
  );
}
All the classes used above come directly from the Bootstrap CSS library. When we save the above changes, the <App /> component will render three buttons that look like the following.

Test the above in this Codesandbox demo.
This verifies that we’ve introduced the Bootstrap CSS library appropriately. To test that we’ve also successfully added JavaScript functionality from Bootstrap into our app, we can aim to introduce some form of dynamic content.
For our dynamic content check, we’ll add a modal to our app and attempt to have the modal opened when any button in our app has
been clicked. We’ll go ahead and create a React component called <Modal /> and have it return a bootstrap-styled modal.
function Modal() {
  return (
    <div
      className="modal fade"
      id="exampleModal"
      tabindex="-1"
      aria-labelledby="exampleModalLabel"
      aria-hidden="true"
    >
      <div className="modal-dialog">
        <div className="modal-content">
          <div className="modal-body">You launched the modal!</div>
          <div className="modal-footer">
            <button
              type="button"
              className="btn btn-secondary"
              data-bs-dismiss="modal"
            >
              Close
            </button>
          </div>
        </div>
      </div>
    </div>
  );
}
In our <App /> component, we’ll then render the newly created <Modal /> component in its markup.
export default function App() {
  return (
    <>
      <div className="container mt-5 text-center">
        /* ... */ /* ... */ /* ... */
      </div>
      /* rendering the modal component */
      <Modal />
    </>
  );
}
We’ll then update each of the buttons rendered in our <App /> component to contain a data-bs-toggle property and a data-bs-target property.
The data-bs-toggle property is used to toggle the modal, and the data-bs-target property specifies the target modal to be opened, which in our case is the modal with an id of exampleModal.
export default function App() {
  return (
    <>
      <div className="container mt-5 text-center">
        <div className="row">
          <div className="col">
            <button
              type="button"
              className="btn btn-primary"
              // data- properties to toggle the modal
              data-bs-toggle="modal"
              data-bs-target="#exampleModal"
            >
              Primary
            </button>
          </div>
          <div className="col">
            <button
              type="button"
              className="btn btn-secondary"
              // data- properties to toggle the modal
              data-bs-toggle="modal"
              data-bs-target="#exampleModal"
            >
              Secondary
            </button>
          </div>
          <div className="col">
            <button
              type="button"
              className="btn btn-success"
              // data- properties to toggle the modal
              data-bs-toggle="modal"
              data-bs-target="#exampleModal"
            >
              Success
            </button>
          </div>
        </div>
      </div>
      <Modal />
    </>
  );
}
Now, when any button in our component is clicked, the Bootstrap modal we’ve created in our <Modal /> component will launch!
Test the above in this Codesandbox demo.
Notice how we’ve written no custom JavaScript code? This is because Bootstrap’s JavaScript library handles all the logic for toggling the modal. We just needed to add the appropriate data- tags and accompanying
attributes and Bootstrap takes care of the rest for us.
In our modal example, we created a <Modal /> component to represent a bootstrap modal that will be shown when a button is clicked. We did this since React gives us the ability to create components as functions that
have markup (HTML), logic (JS) and styles (CSS) coupled within them.
Creating components to represent specific UI elements (e.g., modals, buttons, cards, etc.) is helpful since it allows us to easily replicate behavior everywhere in our app without having to rewrite a component’s markup, logic and styles every time.
This brings us to the other popular method of introducing and using Bootstrap in a React application—using the react-bootstrap library.
Using React Bootstrap
Another way to add Bootstrap to a React application is to use the react-bootstrap library, which provides a set of pre-designed React components that implement the Bootstrap design system. This library allows developers to work with Bootstrap components in a React-specific way by taking advantage of React’s concepts and patterns.
The first step to adding the react-bootstrap library is to install it as a dependency using npm or yarn.
yarn add react-bootstrap
Once installed, we can then import and use any of the components from the react-bootstrap library. For example,
we can mimic the app we built earlier, of rendering multiple buttons, by instead using the components that represent the React Bootstrap grid elements
(i.e., the <Container />,
<Row /> and <Column /> components) and the <Button /> component:
import { Button, Col, Container, Row } from "react-bootstrap";

export default function App() {
  return (
    <div className="mt-5 text-center">
      <Container>
        <Row>
          <Col>
            <Button variant="primary">Primary</Button>
          </Col>
          <Col>
            <Button variant="secondary">Secondary</Button>
          </Col>
          <Col>
            <Button variant="success">Success</Button>
          </Col>
        </Row>
      </Container>
    </div>
  );
}
This will have our <App /> component render the same output we saw from our earlier example.
Test the above in this Codesandbox demo.
To have each button launch a modal when clicked, we can use the React Bootstrap Modal component to help us. The <Modal /> component comes with sub-components (e.g. <Modal.Body />, <Modal.Footer />, etc.) to help build the Modal content. We’ll use the <Modal /> component and its subcomponents to render a modal similar to our earlier example. We’ll have this be set up in a new component we’ll create called <CustomModal />.
We’ll expect our <CustomModal /> component to accept show and onHide props that will be used to dictate when the React Bootstrap modal should
be shown or hidden.
function CustomModal({ show, onHide }) {
  return (
    <Modal show={show} onHide={onHide}>
      <Modal.Body>You launched the modal!</Modal.Body>
      <Modal.Footer>
        <Button variant="secondary" onClick={onHide}>
          Close
        </Button>
      </Modal.Footer>
    </Modal>
  );
}
In our <App /> component, we’ll use the useState hook to create a state property labeled
show to dictate the visibility of the modal and we’ll initialize this state property as false. We’ll also set up two functions—handleClose() and handleShow() that will toggle the value of the show state property when triggered.
import { useState } from "react";

export default function App() {
  const [show, setShow] = useState(false);

  const handleClose = () => setShow(false);
  const handleShow = () => setShow(true);

  return (
    /* component markup */
  );
}
In the markup of our <App /> component, we’ll have each button contain an onClick() handler that triggers the handleShow() method.
import { useState } from "react";

export default function App() {
  const [show, setShow] = useState(false);

  const handleClose = () => setShow(false);
  const handleShow = () => setShow(true);

  return (
    <div className="mt-5 text-center">
      <Container>
        <Row>
          <Col>
            <Button variant="primary" onClick={handleShow}>
              Primary
            </Button>
          </Col>
          <Col>
            <Button variant="secondary" onClick={handleShow}>
              Secondary
            </Button>
          </Col>
          <Col>
            <Button variant="success" onClick={handleShow}>
              Success
            </Button>
          </Col>
        </Row>
      </Container>
    </div>
  );
}
Finally, we’ll have the component render the <CustomModal /> component and we’ll pass down the state property and handleClose() function
as props to the <CustomModal /> component.
With all the changes made, the code in our app will look like the following:
import { useState } from "react";
import { Button, Col, Container, Modal, Row } from "react-bootstrap";

function CustomModal({ show, onHide }) {
  return (
    <Modal show={show} onHide={onHide}>
      <Modal.Body>You launched the modal!</Modal.Body>
      <Modal.Footer>
        <Button variant="secondary" onClick={onHide}>
          Close
        </Button>
      </Modal.Footer>
    </Modal>
  );
}

export default function App() {
  const [show, setShow] = useState(false);

  const handleClose = () => setShow(false);
  const handleShow = () => setShow(true);

  return (
    <div className="mt-5 text-center">
      <Container>
        <Row>
          <Col>
            <Button variant="primary" onClick={handleShow}>
              Primary
            </Button>
          </Col>
          <Col>
            <Button variant="secondary" onClick={handleShow}>
              Secondary
            </Button>
          </Col>
          <Col>
            <Button variant="success" onClick={handleShow}>
              Success
            </Button>
          </Col>
        </Row>
      </Container>
      <CustomModal show={show} onHide={handleClose} />
    </div>
  );
}
When any button in our <App /> component is clicked, the Bootstrap modal we’ve created in our <CustomModal /> component will now launch!
Test the above in this Codesandbox demo.
Just like before, notice how we’ve not created any custom JavaScript code that dictates how the modal should pop up on the page. This is because, with React Bootstrap, all the components we use have been built with React at its core and have all the dynamic functionality in place. We just need to introduce our unique logic and behavior wherever applicable to dictate how we want these components to be rendered.
KendoReact
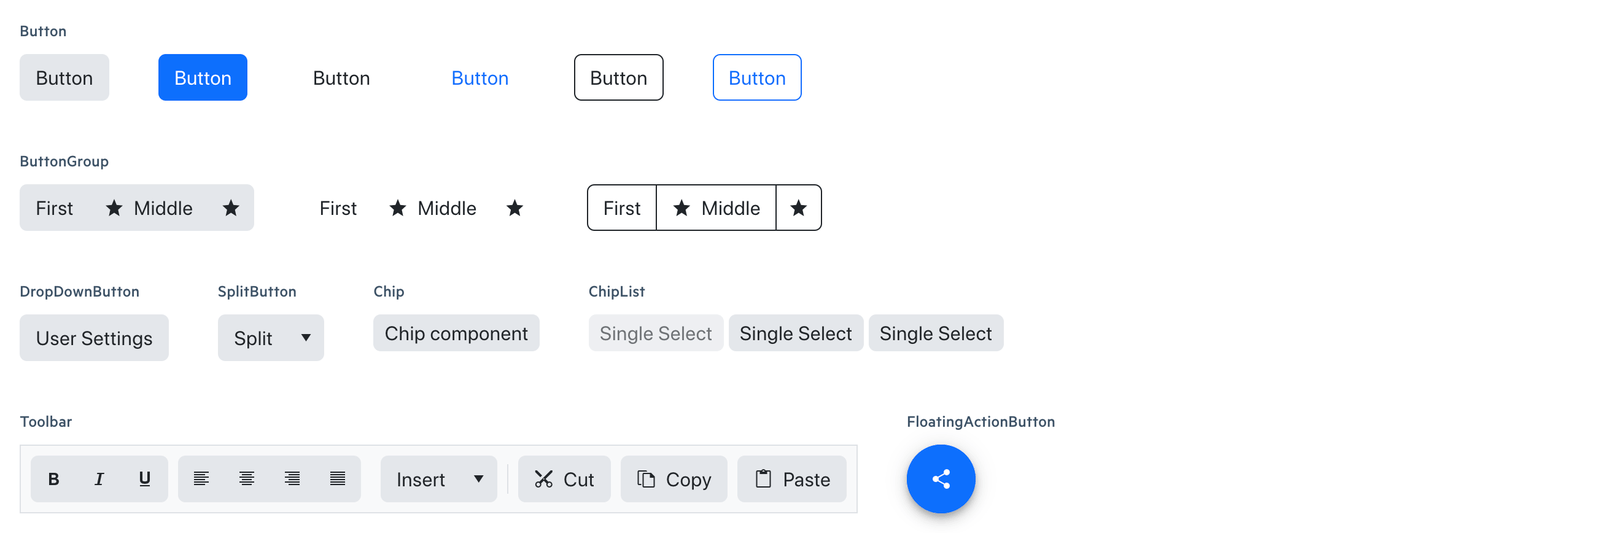
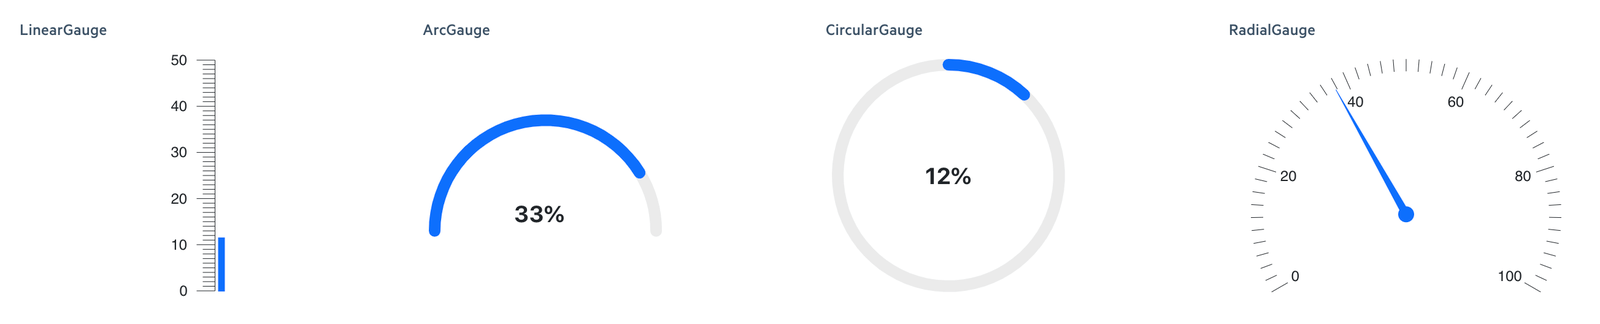
Progress KendoReact is a React component library that also provides the means for us to integrate a Bootstrap theme into our React applications. The KendoReact UI library provides a set of UI components specifically designed for React such Data Grids, Charts, Inputs, etc.
In addition to its rich set of components, KendoReact also supports the capability to switch between different themes, including the Bootstrap theme! This makes it a great option for developers who want to take advantage of Bootstrap’s design and styles while using a robust and well-maintained component library like KendoReact.
The easiest way to get started with KendoReact is to use the create-kendoreact-app tool. As mentioned in the documentation,
the create-kendoreact-app tool guides us through the process of creating a new React application with KendoReact components by running:
npx create-kendoreact-app
We can then provide information to the prompts on how we want our app to be scaffolded. Here is where we can specify that we would want our components to be styled with the bootstrap Kendo React UI theme.
? What is the name of your project? my-kendoreact-app
? Do you want to use TypeScript? No
? Do you want to use SASS? Yes
? Which Kendo UI Theme do you want to use?
  default
❯ bootstrap
  material
If we already have an existing KendoReact application, switching to using the bootstrap Kendo UI theme will involve installing the Kendo UI Bootstrap theme package directly.
yarn add @progress/kendo-theme-bootstrap
And referencing it directly in our app. As an example, this will involve importing the theme .css file in the parent App.jsx file of the application.
import '@progress/kendo-theme-default/dist/all.css';

function App() {
    return (
      // ...
    )
}

ReactDOM.render(
    <App />,
    document.querySelector('my-app')
);
Be sure to check out the KendoReact Styling Overview documentation for more details about using the Kendo UI Bootstrap theme.
Wrap-up
In this article, we’ve seen a few different ways the Bootstrap theme can be added to a React application: using the standard Bootstrap CSS and JS libraries, using the react-bootstrap component library, or using the KendoReact component library.
Integrating Bootstrap into your React application can help you quickly and easily create a professional-looking and responsive user interface without having you spend a lot of time styling and creating UI elements within your app.

Hassan Djirdeh
Hassan is a senior frontend engineer and has helped build large production applications at-scale at organizations like Doordash, Instacart and Shopify. Hassan is also a published author and course instructor where he’s helped thousands of students learn in-depth frontend engineering skills like React, Vue, TypeScript, and GraphQL.
Related Posts
Comments
All articles
Topics
Web MobileMobile
Desktop
Design
Productivity
People
