QR Codes and Barcodes: Real-World Use Cases in Blazor

Summarize with AI:
See how to use QR codes and barcodes together in a real use case of an event-ticketing Blazor application, plus checking in the ticket at the event.
QR codes and barcodes are among the most-used elements in the digital and physical world, and we interact with them daily. They serve to identify product prices in a supermarket, to show updated menus to customers in a restaurant and even to identify a boarding pass for an airplane.
That’s why in this post, we’ll see how the Blazor Barcode and Blazor QR Code components from Progress Telerik can help you represent information visually with ease. Let’s get started!
What Are QR Codes and Barcodes?
Although we constantly use QR codes and barcodes, have you ever wondered what the difference between them is? Well, in short, the difference lies in how many dimensions are used to store data:
- A one-dimensional (1D) barcode stores information using a set of bars and spaces of varying width. It is ideal for short values, such as a serial number or identifier, as is done with supermarket products.
- QR codes, which are 2D or two-dimensional, store information in a grid of white and black modules. Because they use the vertical and horizontal axes, much more information can be stored. In addition, the standard defines levels that allow a QR code to be read even if it is damaged or partially obscured.
A common question is when to use one over the other. The answer is that it is ideal to use barcodes when you need to represent a short identifier, and to reserve QR codes for when you need to encode things like URLs or contact information.
Creating a Blazor Application Using Barcodes and QR
Let’s see how to use the fabulous Telerik components to create an application that issues event tickets, composed of different sections to display ticket information, view generated tickets and perform check-in for the event.
Integrating Telerik Components into a Blazor Web Project
To use Telerik components, we must install them if we already have a Blazor project created, for which we can use the installation guide. If you want to start from scratch, you can use a prebuilt template and integrate it into VS 2026, with everything needed to get to work immediately.
Creating the Model for the Ticketing System
To manage tickets for the simulated event, we will create a new model called Ticket, which will look as follows:
public class Ticket
{
    public string Code { get; set; } = string.Empty;
    public long BarcodeNumber { get; set; }
    public string AttendeeName { get; set; } = string.Empty;
    public string Email { get; set; } = string.Empty;
    public string TicketType { get; set; } = string.Empty;
    public DateTime IssuedAt { get; set; }
    public bool CheckedIn { get; set; }
    public DateTime? CheckedInAt { get; set; }
}
In the model above, we defined the property Code, which will be the encoded value for the QR code URL, while the property BarcodeNumber is the short number to store the barcode value. The other data will be used to store attendee data as well as check-in information.
Creating a Service for the Ticketing System
With the model ready, it’s time to create the service that will handle the app logic, including issuing tickets, building the validation URL and performing the check-in process. Let’s create the new class called TicketService:
//1.
public enum CheckInStatus
{
    Success,
    AlreadyCheckedIn,
    NotFound
}

//2.
public record CheckInResult(CheckInStatus Status, Ticket? Ticket);

//3.
public class TicketService
{
    private const string DefaultValidationBaseUrl = "https://tickets.hector-events.com/validate";

    private readonly string _validationBaseUrl;
    private readonly List<Ticket> _tickets = new();
    private int _sequence = 1000;

    public TicketService(IConfiguration configuration)
    {
        _validationBaseUrl = configuration["Tickets:ValidationBaseUrl"] ?? DefaultValidationBaseUrl;

        IssueTicket("Laura Geek", "laura@company1.com", "VIP");
        IssueTicket("Alan Valley", "alan@company2.com", "Speaker");
        IssueTicket("Peter Nerd", "peter@company3.com", "General Admission");
    }

    public IReadOnlyList<Ticket> Tickets => _tickets;

    //4.
    public event Action? TicketsChanged;

    //5.
    public Ticket IssueTicket(string attendeeName, string email, string ticketType)
    {
        var number = Interlocked.Increment(ref _sequence);

        var ticket = new Ticket
        {
            Code = $"TKT-{DateTime.Now.Year}-{number:D6}",
            BarcodeNumber = number,
            AttendeeName = attendeeName,
            Email = email,
            TicketType = ticketType,
            IssuedAt = DateTime.Now
        };

        _tickets.Insert(0, ticket);
        return ticket;
    }

    //6.
    public string BuildValidationUrl(Ticket ticket) => $"{_validationBaseUrl}/{ticket.Code}";

    //7.
    public CheckInResult CheckIn(string scannedValue)
    {
        var value = scannedValue.Trim();

        var ticket = _tickets.FirstOrDefault(t =>
            string.Equals(t.Code, value, StringComparison.OrdinalIgnoreCase) ||
            t.BarcodeNumber.ToString() == value ||
            string.Equals(BuildValidationUrl(t), value, StringComparison.OrdinalIgnoreCase));

        if (ticket is null)
            return new CheckInResult(CheckInStatus.NotFound, null);

        if (ticket.CheckedIn)
            return new CheckInResult(CheckInStatus.AlreadyCheckedIn, ticket);

        ticket.CheckedIn = true;
        ticket.CheckedInAt = DateTime.Now;
        return new CheckInResult(CheckInStatus.Success, ticket);
    }
}
In the code above, we have defined some interesting things:
- We have created an enumeration
CheckInStatusto set the attendee’s check-in status. - We also defined a record
CheckInResult, which packages the check-in status together with the associated ticket information, to be able to display the correct information in the UI. - We defined the service class that will be injected into the Blazor components. The constructor receives the configuration with data such as the base URL for validation, so that scanning the QR code from a mobile device works. We also created three mock records to preload the UI with data.
- We created an event of type
Action, which will allow us to notify changes when we scan QR codes from the phone. - The method
IssueTicketgenerates a sequential number safely thanks to the use ofInterlocked.Increment, intended for scenarios where multiple objects may want to modify the same value at once. - The method
BuildValidationUrlconstructs a URL encoded in the QR code, combining the base URL plus the ticket number. - The method
CheckInis the one that performs ticket validation. It accepts a value and searches for a match either by code, barcode number or by validation URL. This will allow reading both the QR code and the barcode.
With the service class ready, it must be registered in the next section.
Registering the Ticket Service in the Blazor App
The next step will be to register the TicketService service as a singleton so it can be injected into components. We’ll do this from Program.cs as follows:
var builder = WebApplication.CreateBuilder(args);
...
builder.Services.AddSingleton<TicketService>();

var app = builder.Build();
Creating the Section for Ticket Generation
We’ll create a new component page called EventTickets.razor, starting by defining the route, the rendering mode and the injection of the service:
@page "/tickets"
@using TicketsSystemDemo.Services
@rendermode InteractiveServer
@inject TicketService TicketService

<PageTitle>Event Ticketing Studio</PageTitle>

<h1 class="mb-1">Event Ticketing Studio</h1>
<p class="text-muted mb-4">Issue attendee tickets with a scannable QR code and a 1D barcode, then validate them at the gate.</p>
Once the main part of the app is defined, we’ll create a first section that shows a form and serves to generate tickets. We can achieve this using Telerik components such as TelerikTextBox, TelerikDropDownList and TelerikButton, which allow simple configuration and implementation:
<div class="row g-4">
    <div class="col-lg-4">
        <div class="card shadow-sm h-100">
            <div class="card-header fw-semibold">1. Issue a ticket</div>
            <div class="card-body">
                <label class="form-label">Attendee name</label>
                <TelerikTextBox @bind-Value="attendeeName" Placeholder="Jane Doe" Width="100%" />

                <label class="form-label mt-3">Email</label>
                <TelerikTextBox @bind-Value="email" Placeholder="jane@contoso.com" Width="100%" />

                <label class="form-label mt-3">Ticket type</label>
                <TelerikDropDownList Data="ticketTypes" @bind-Value="ticketType" Width="100%" />

                <TelerikButton OnClick="IssueTicket"
                               ThemeColor="@ThemeConstants.Button.ThemeColor.Primary"
                               Icon="@SvgIcon.Plus"
                               Class="mt-4 w-100">
                    Generate ticket
                </TelerikButton>
            </div>
        </div>
    </div>
</div>

@code {
    private readonly List<string> ticketTypes = new() { "General Admission", "VIP", "Speaker" };

    private string attendeeName = string.Empty;
    private string email = string.Empty;
    private string ticketType = "General Admission";

    private Ticket? selectedTicket;

    private void IssueTicket()
    {
        if (string.IsNullOrWhiteSpace(attendeeName))
            return;

        selectedTicket = TicketService.IssueTicket(attendeeName, email, ticketType);

        attendeeName = string.Empty;
        email = string.Empty;
        ticketType = "General Admission";
    }
}
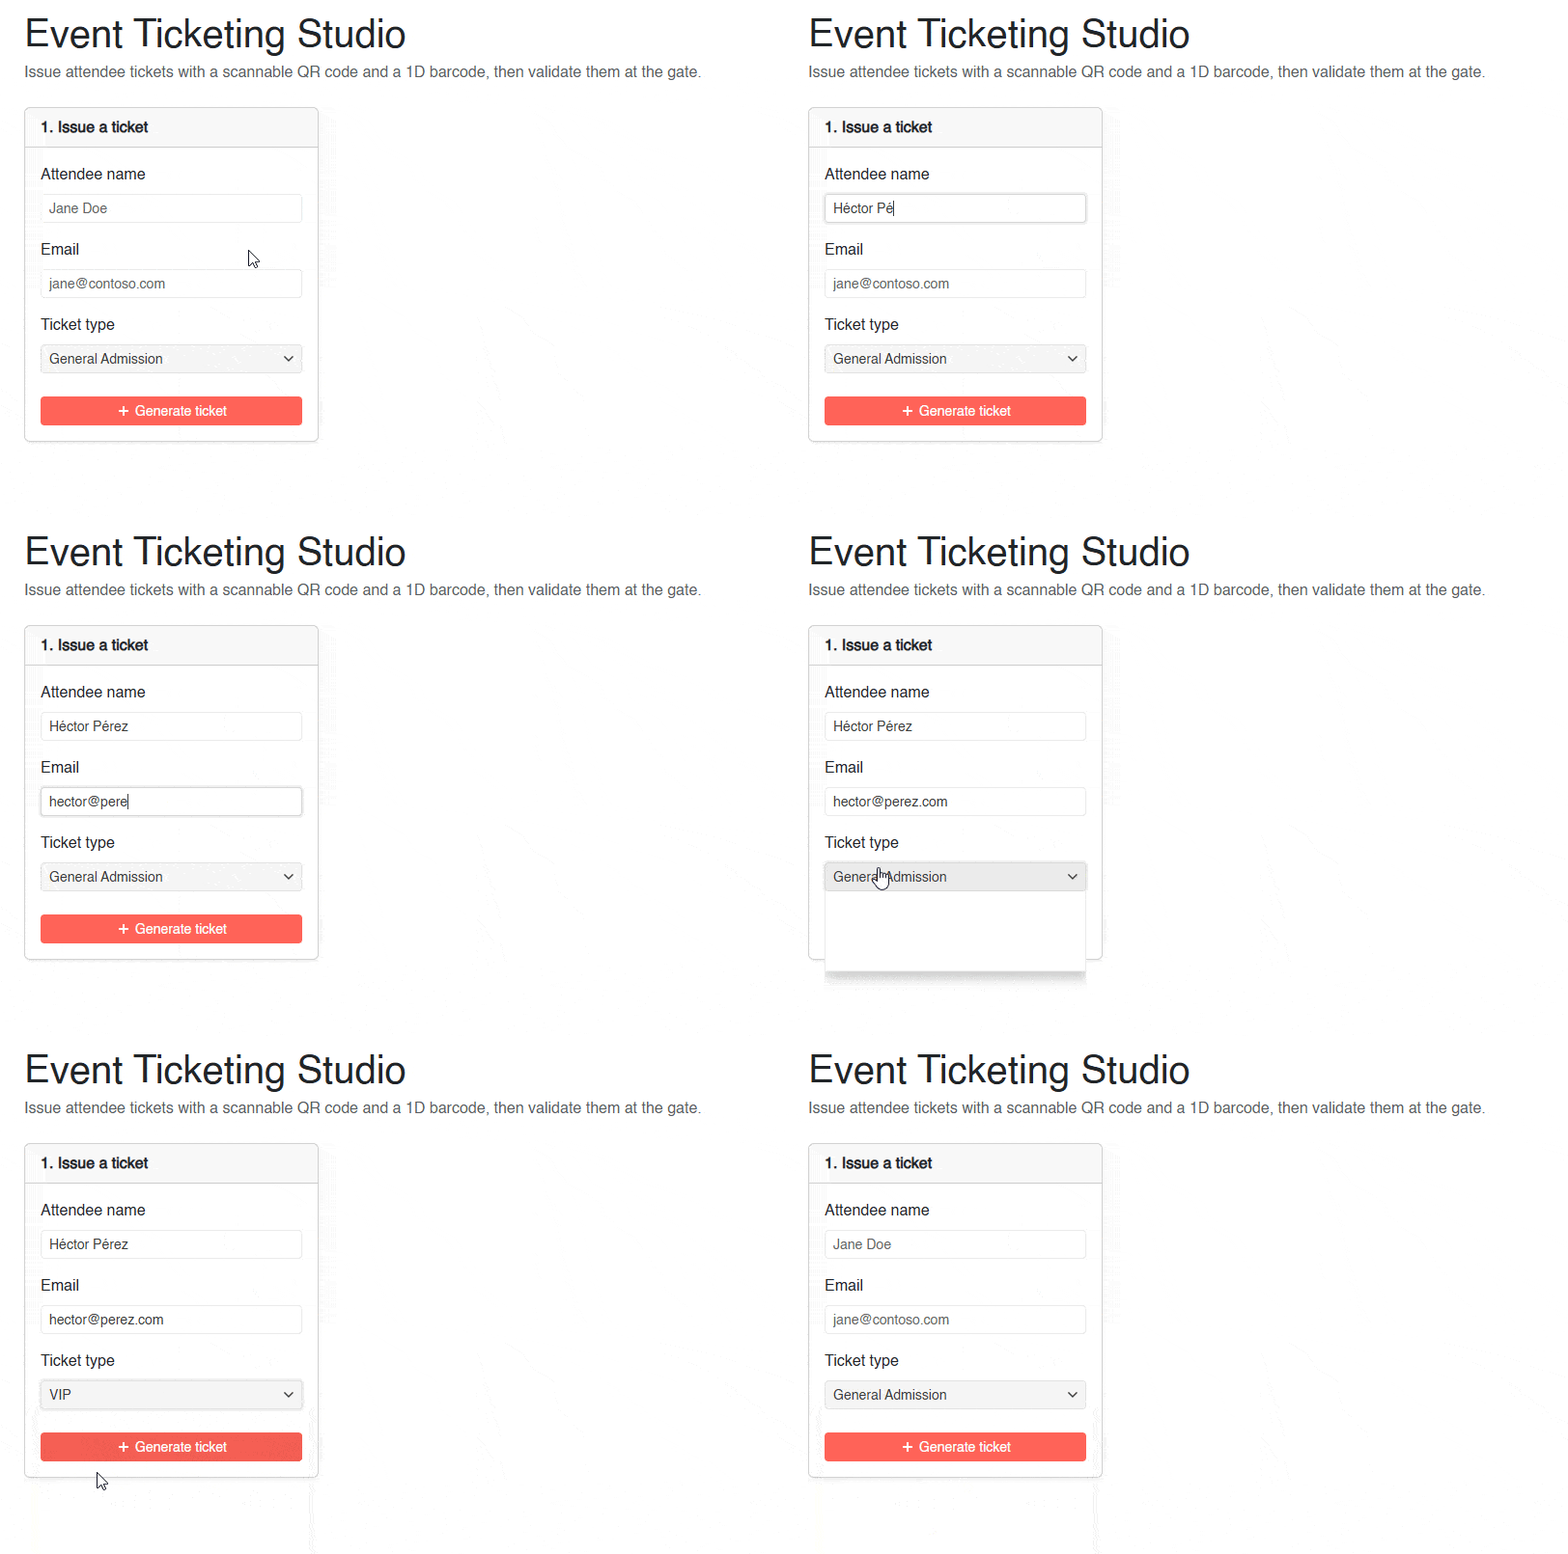
The form will allow entering the attendee’s name, email and ticket type. On the other hand, in the code section, the button event is handled to create a new ticket, using the service TicketService.
The result is as follows:
Displaying the Generated QR Codes and Barcodes
The action of creating a ticket automatically creates a Ticket, which, as you’ll recall, contains the information to display the QR codes and barcodes. To show them in the interface, simply use the TelerikQRCode component to display QR codes and TelerikBarcode to display barcodes, each of them bound to their corresponding property:
<div class="row g-4">
    <div class="col-lg-4">
        ...
    </div>
    <div class="col-lg-8">
        <div class="card shadow-sm h-100">
            <div class="card-header fw-semibold">2. Ticket preview</div>
            <div class="card-body">
                @if (selectedTicket is null)
                {
                    <div class="text-muted text-center py-5">
                        Issue a ticket or select one from the list to preview its codes.
                    </div>
                }
                else
                {
                    <div class="row align-items-center">
                        <div class="col-md-5">
                            <h4 class="mb-1">@selectedTicket.AttendeeName</h4>
                            <div class="text-muted">@selectedTicket.Email</div>
                            <span class="badge bg-primary mt-2">@selectedTicket.TicketType</span>
                            <dl class="row mt-3 mb-0 small">
                                <dt class="col-5">Code</dt>
                                <dd class="col-7">@selectedTicket.Code</dd>
                                <dt class="col-5">Issued</dt>
                                <dd class="col-7">@selectedTicket.IssuedAt.ToString("g")</dd>
                                <dt class="col-5">Status</dt>
                                <dd class="col-7">
                                    <span class="badge @(selectedTicket.CheckedIn ? "bg-success" : "bg-secondary")">
                                        @(selectedTicket.CheckedIn ? "Checked in" : "Not used")
                                    </span>
                                </dd>
                            </dl>
                        </div>
                        <div class="col-md-4 text-center">
                            <TelerikQRCode Value="@TicketService.BuildValidationUrl(selectedTicket)"
                                           Size="180px"
                                           ErrorCorrection="@QRCodeErrorCorrectionLevel.M"
                                           Color="#1b1b3a"
                                           Background="white" />
                            <div class="small text-muted mt-1">Scan to validate</div>
                        </div>
                        <div class="col-md-3 text-center">
                            <TelerikBarcode Value="@selectedTicket.BarcodeNumber.ToString()"
                                            Type="@BarcodeType.Code128"
                                            Width="180px"
                                            Height="90px" />
                            <div class="small text-muted mt-1">Gate barcode</div>
                        </div>
                    </div>
                }
            </div>
        </div>
    </div>
</div>
In the previous section, TelerikQRCode receives in its Value parameter the validation URL that the service constructs, which will allow check-in once scanned. And TelerikBarcode receives in its Value parameter the ticket number. In both cases, the components take care of rendering the codes in the UI automatically.
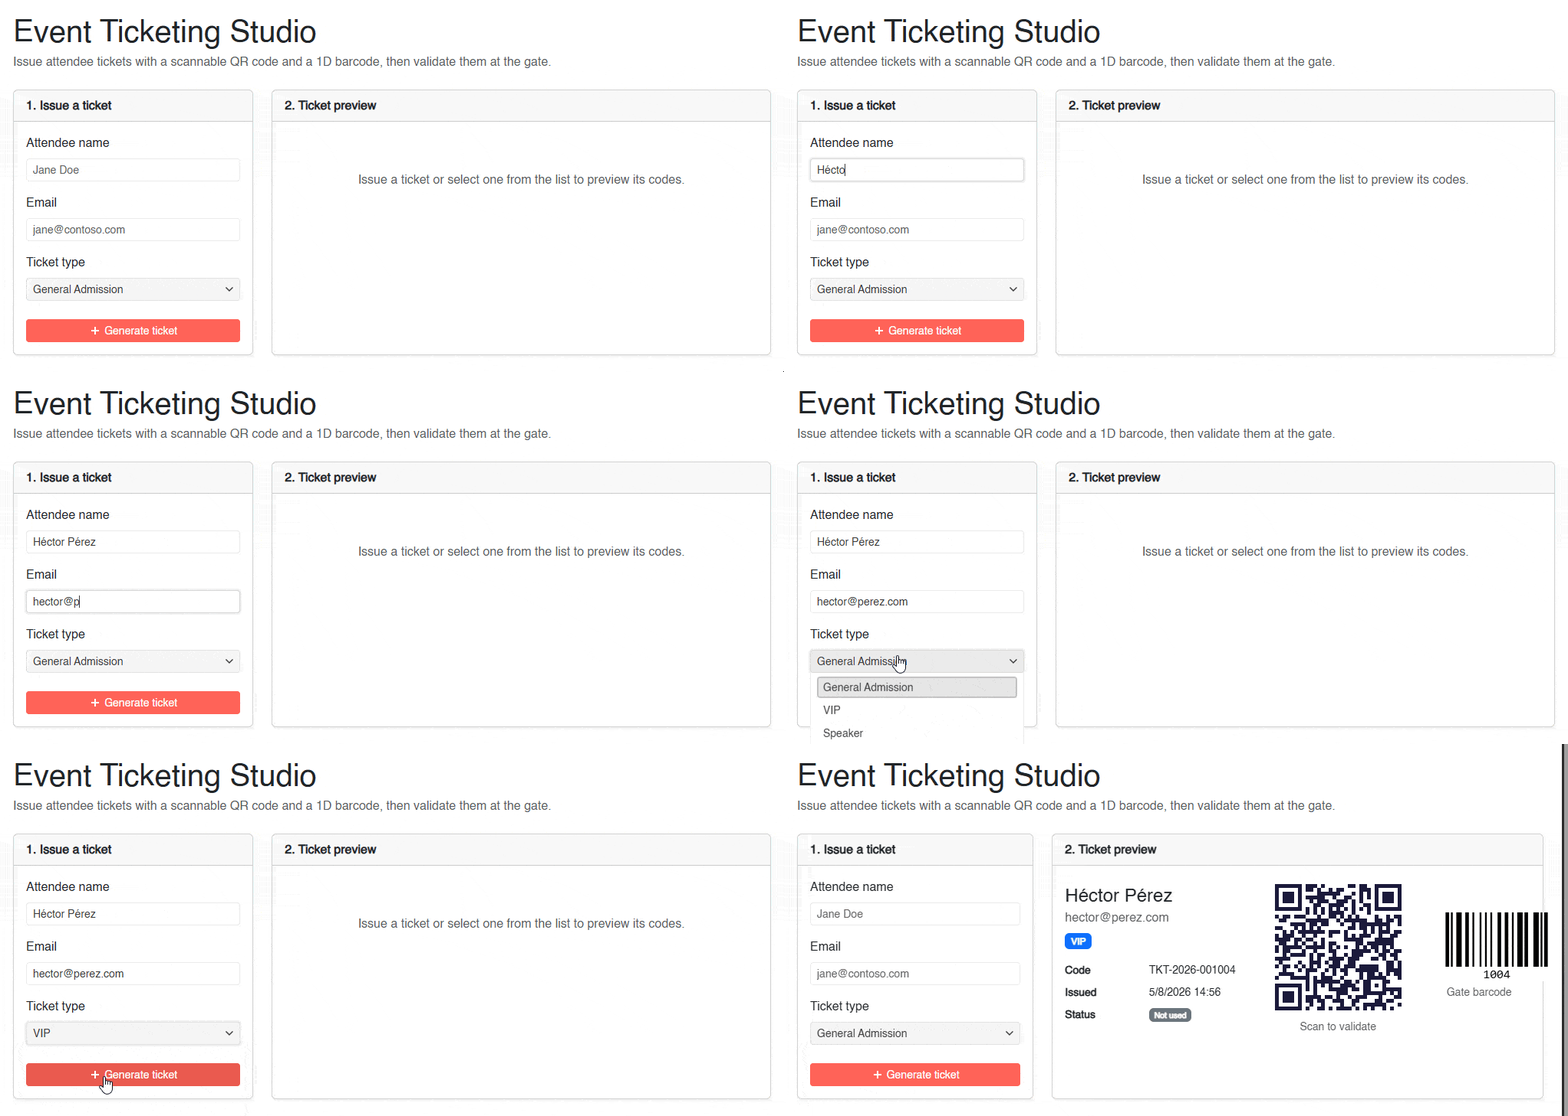
In the image above, we can see how the code preview updates almost instantaneously when a ticket is generated.
Showing Generated Tickets
Something that could be very useful is displaying previously generated tickets. This can be used to see detailed information for each ticket, as well as the ticket’s current status.
We can achieve this using a TelerikGrid component, which allows a fairly high level of customization:
...
<div class="row g-4">
  ...
</div>
<div class="row g-4 mt-1">
      <div class="col-lg-7">
        <div class="card shadow-sm h-100">
            <div class="card-header fw-semibold">3. Issued tickets</div>
            <div class="card-body p-0">
                <TelerikGrid @ref="ticketGrid"
                             Data="@TicketService.Tickets"
                             OnRowClick="@OnTicketRowClick"
                             Sortable="true"
                             Height="360px">
                    <GridColumns>
                        <GridColumn Field="@nameof(Ticket.Code)" Title="Code" Width="160px" />
                        <GridColumn Field="@nameof(Ticket.AttendeeName)" Title="Attendee" />
                        <GridColumn Field="@nameof(Ticket.TicketType)" Title="Type" Width="150px" />
                        <GridColumn Field="@nameof(Ticket.CheckedIn)" Title="Status" Width="130px">
                            <Template>
                                @{
                                    var ticket = (Ticket)context;
                                }
                                <span class="badge @(ticket.CheckedIn ? "bg-success" : "bg-secondary")">
                                    @(ticket.CheckedIn ? "Checked in" : "Not used")
                                </span>
                            </Template>
                        </GridColumn>
                    </GridColumns>
                </TelerikGrid>
            </div>
        </div>
    </div>
</div>
...
@code {
  ...
  private TelerikGrid<Ticket>? ticketGrid;
  ...
  private void OnTicketRowClick(GridRowClickEventArgs args)
  {
      selectedTicket = (Ticket)args.Item;
  }
}
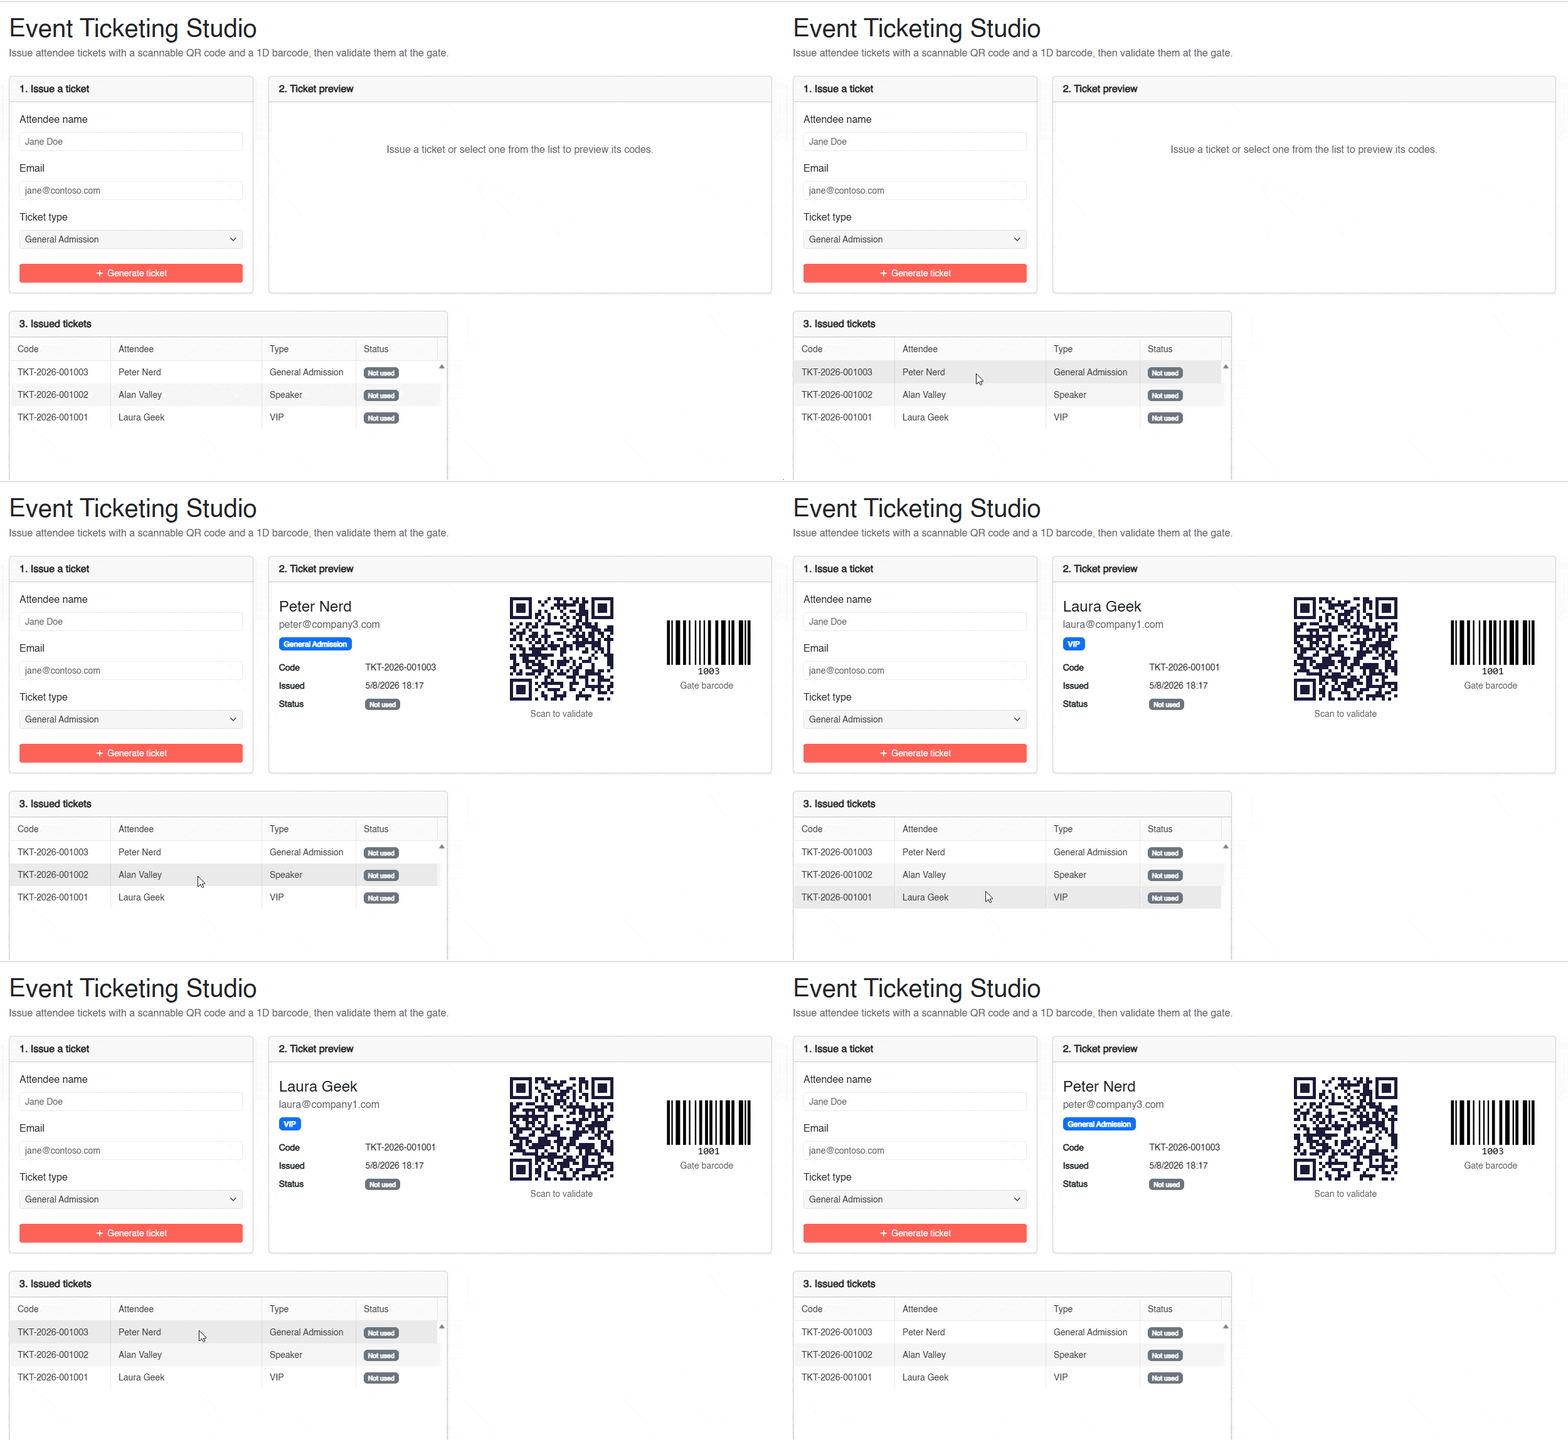
The above configuration allows binding to information obtained from the service, as well as updating the selected entry thanks to the OnTicketRowClick method. We also use Template to customize the view of the last column, indicating whether the ticket has been checked in or not.
The result of the implementation is as follows:
Now, let’s see how to check the status of a ticket.
Validating Access to the Event
The last section we will implement will be a simulation so that people can validate the status of a ticket. The implementation is as follows:
...
<div class="row g-4 mt-1">
    <div class="col-lg-7">
        ...
    </div>
    <div class="col-lg-5">
        <div class="card shadow-sm h-100">
            <div class="card-header fw-semibold">4. Gate check-in</div>
            <div class="card-body">
                <label class="form-label">Scanned value (code, barcode number or URL)</label>
                <TelerikTextBox @bind-Value="scannedValue" Placeholder="TKT-2026-001001" Width="100%" />

                <TelerikButton OnClick="ValidateTicket"
                               ThemeColor="@ThemeConstants.Button.ThemeColor.Success"
                               Icon="@SvgIcon.Check"
                               Class="mt-3 w-100">
                    Validate ticket
                </TelerikButton>

                @if (checkInResult is not null)
                {
                    <div class="alert @GetAlertClass() mt-3 mb-0" role="alert">
                        @GetResultMessage()
                    </div>
                }
            </div>
        </div>
    </div>
</div>
@code {
    ...
    private string scannedValue = string.Empty;
    private CheckInResult? checkInResult;
    ...
    private void ValidateTicket()
    {
        if (string.IsNullOrWhiteSpace(scannedValue))
            return;

        checkInResult = TicketService.CheckIn(scannedValue);

        if (checkInResult.Ticket is not null)
            selectedTicket = checkInResult.Ticket;

        ticketGrid?.Rebind();
    }

    private string GetAlertClass() => checkInResult!.Status switch
    {
        CheckInStatus.Success => "alert-success",
        CheckInStatus.AlreadyCheckedIn => "alert-warning",
        _ => "alert-danger"
    };

    private string GetResultMessage() => checkInResult!.Status switch
    {
        CheckInStatus.Success => $"Welcome, {checkInResult.Ticket!.AttendeeName}! Ticket accepted.",
        CheckInStatus.AlreadyCheckedIn => $"Ticket already used at {checkInResult.Ticket!.CheckedInAt:t}.",
        _ => "Invalid ticket. No match found."
    };
}
In the previous code, we created a button to validate the ticket based on the scanned information. Depending on the result, an appropriate color or message will be displayed.
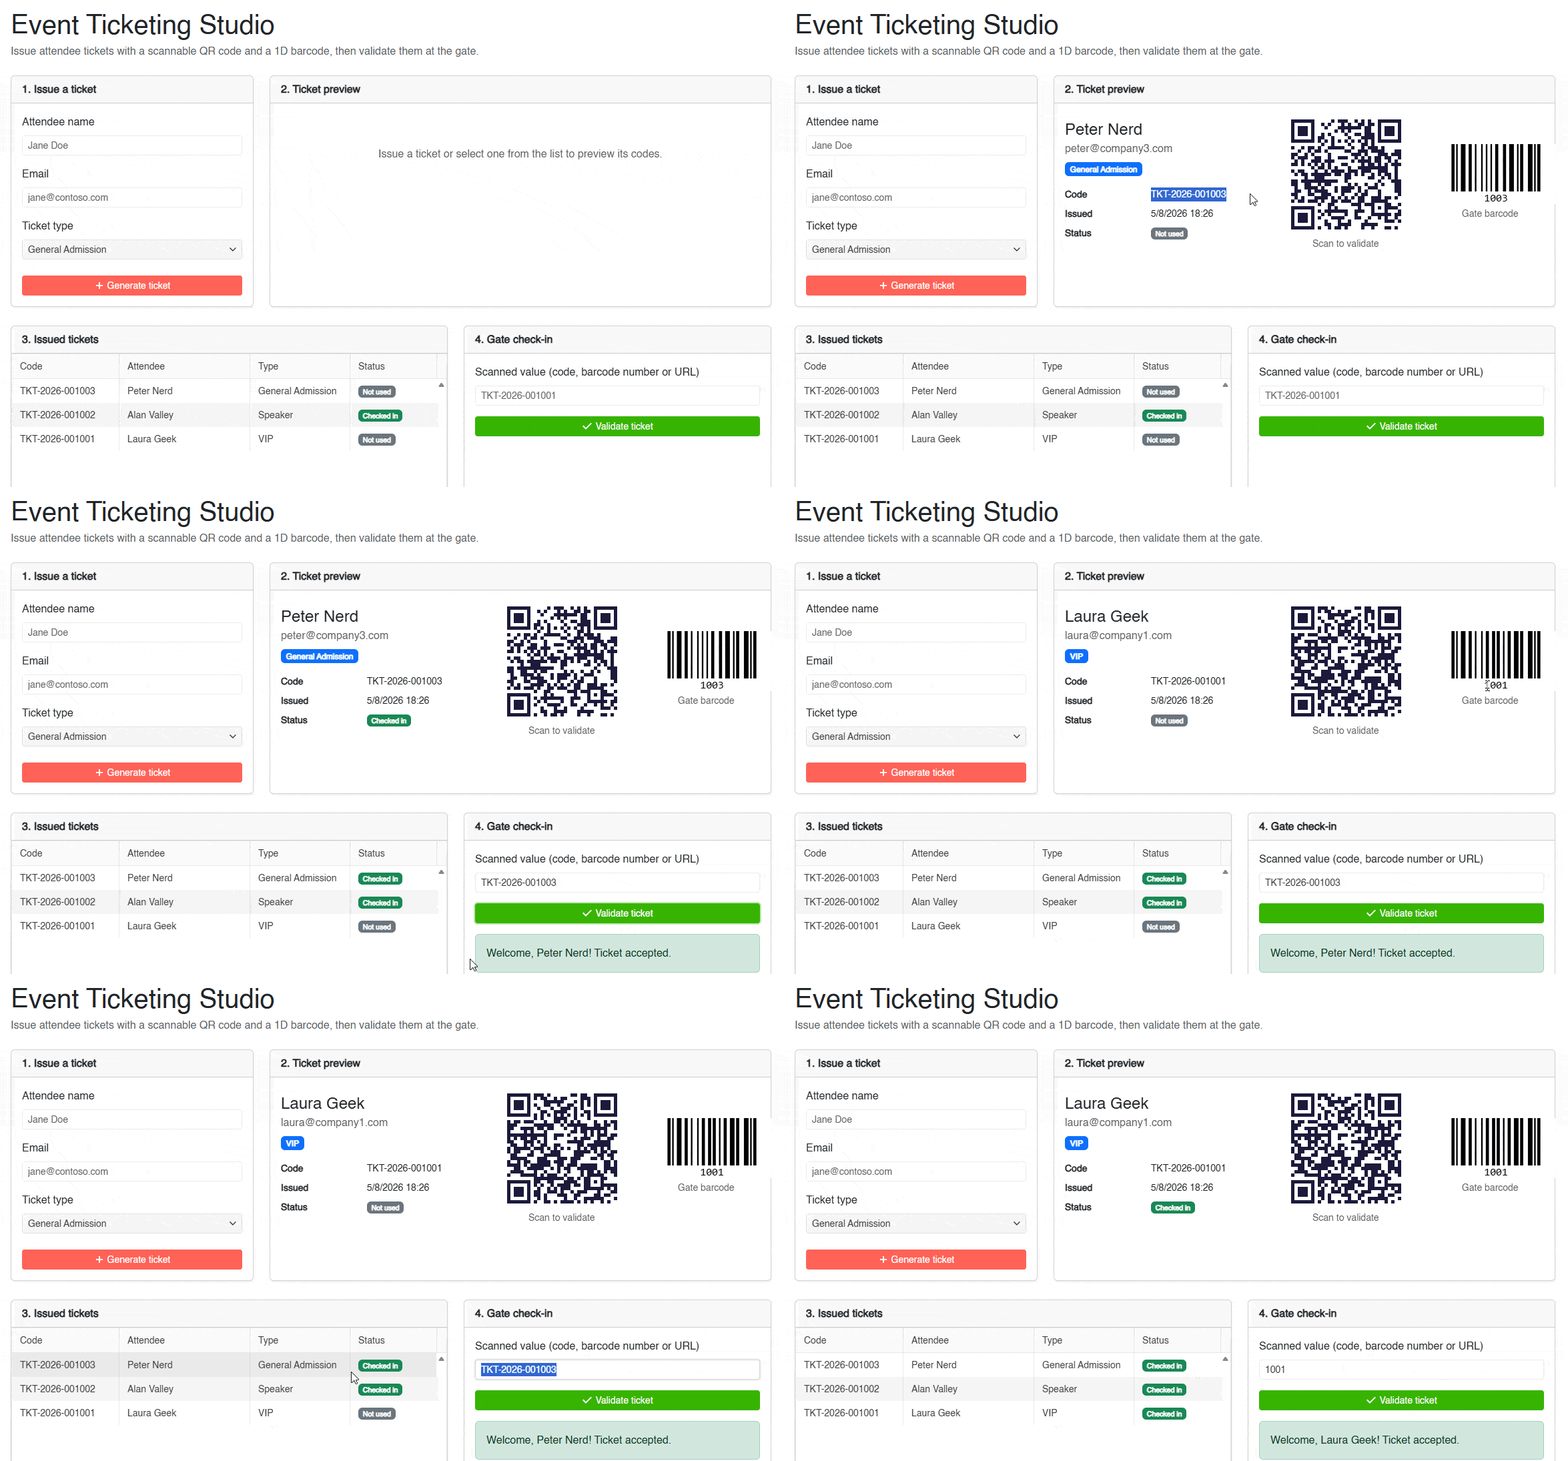
Finally, let’s see how we can test the application using our physical device.
Creating the Validation Page for the QR Code
Although in the previous section it’s already possible to do check-in using either of the two values in character format, ideally we want to use the phone’s camera or a similar device.
To achieve this, we’re going to create a page that receives the code in the route and performs the check-in as soon as it opens. We’ll do this by creating the Validate.razor component:
@page "/validate/{Code}"
@using TicketsSystemDemo.Services
@rendermode InteractiveServer
@inject TicketService TicketService

<PageTitle>Ticket validation</PageTitle>

<div class="row justify-content-center mt-4">
    <div class="col-md-6">
        <div class="card shadow-sm">
            <div class="card-header fw-semibold">Gate validation</div>
            <div class="card-body text-center py-5">
                @if (result is null)
                {
                    <div class="text-muted">Validating ticket <strong>@Code</strong>...</div>
                }
                else
                {
                    <div class="alert @GetAlertClass() mb-4" role="alert">
                        <h4 class="mb-1">@GetTitle()</h4>
                        <div>@GetResultMessage()</div>
                    </div>

                    @if (result.Ticket is not null)
                    {
                        <h5 class="mb-1">@result.Ticket.AttendeeName</h5>
                        <span class="badge bg-primary">@result.Ticket.TicketType</span>
                        <div class="small text-muted mt-2">@result.Ticket.Code</div>
                    }
                }
            </div>
        </div>
    </div>
</div>

@code {
    [Parameter]
    public string Code { get; set; } = string.Empty;

    private CheckInResult? result;

    protected override void OnInitialized()
    {
        if (RendererInfo.IsInteractive)
            result = TicketService.CheckIn(Code);
    }

    private string GetAlertClass() => result!.Status switch
    {
        CheckInStatus.Success => "alert-success",
        CheckInStatus.AlreadyCheckedIn => "alert-warning",
        _ => "alert-danger"
    };

    private string GetTitle() => result!.Status switch
    {
        CheckInStatus.Success => "Access granted",
        CheckInStatus.AlreadyCheckedIn => "Ticket already used",
        _ => "Invalid ticket"
    };

    private string GetResultMessage() => result!.Status switch
    {
        CheckInStatus.Success => $"Welcome, {result.Ticket!.AttendeeName}! Ticket accepted.",
        CheckInStatus.AlreadyCheckedIn => $"This ticket was already used at {result.Ticket!.CheckedInAt:t}.",
        _ => "No matching ticket was found for this code."
    };
}
In the previous code, we receive the code to validate thanks to the Code parameter. Likewise, RendererInfo.IsInteractive is checked before calling CheckIn. We do this to prevent the check-in from executing twice, due to Blazor’s prerendering.
Testing the QR Code Using a Dev Tunnel
When developing an app, we regularly use localhost to test the site, which means a mobile device won’t be able to reach the same development URL to perform check-in from the phone.
To solve the problem, we must somehow expose the app at a public URL. Although there are many ways to do this, I will use a dev tunnel, which is a free method provided by VS 2026 to achieve it easily.
A dev tunnel is a secure tunnel that creates a public URL while the app is running, forwarding requests that arrive at it to your local server. In VS 2026, you can create it from the View | Other Windows | Dev Tunnels menu.
We can created one with the following configuration:
- Name: eventticketing
- Tunnel Type: Persistent (to keep the same URL)
- Access: Public
After creating it, we must select it before running the application:
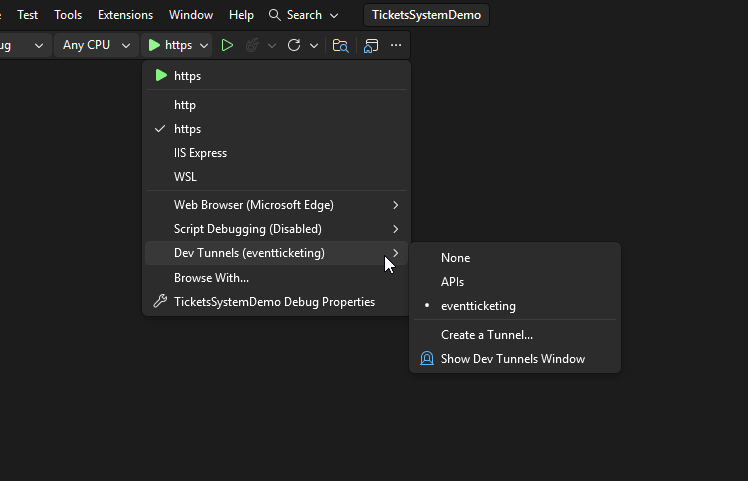
When we start the application, we will be given a tunnel like this:
https://mcbx4kgd-7121.usw3.devtunnels.ms
So that the QR code points to that tunnel instead of the fictitious domain, let’s modify the file appsettings.Development.json, adding the key in the file:
{
  ...
  "Tickets": {
    "ValidationBaseUrl": "https://mcbx4kgd-7121.usw3.devtunnels.ms/validate"
  }
}
With the above, while we are in development mode we will use the tunnel URL, while in production the URL defined in the service will be used.
Finally, in EventTickets.razor we will subscribe to the TicketsChanged event to refresh the status of the ticket scanned by QR:
...
@implements IDisposable
...
@code {
...
    protected override void OnInitialized()
    {
        TicketService.TicketsChanged += OnTicketsChanged;
    }

    private async void OnTicketsChanged()
    {
        await InvokeAsync(() =>
        {
            ticketGrid?.Rebind();
            StateHasChanged();
        });
    }

    public void Dispose()
    {
        TicketService.TicketsChanged -= OnTicketsChanged;
    }
...
}
When testing the application, the following happens:
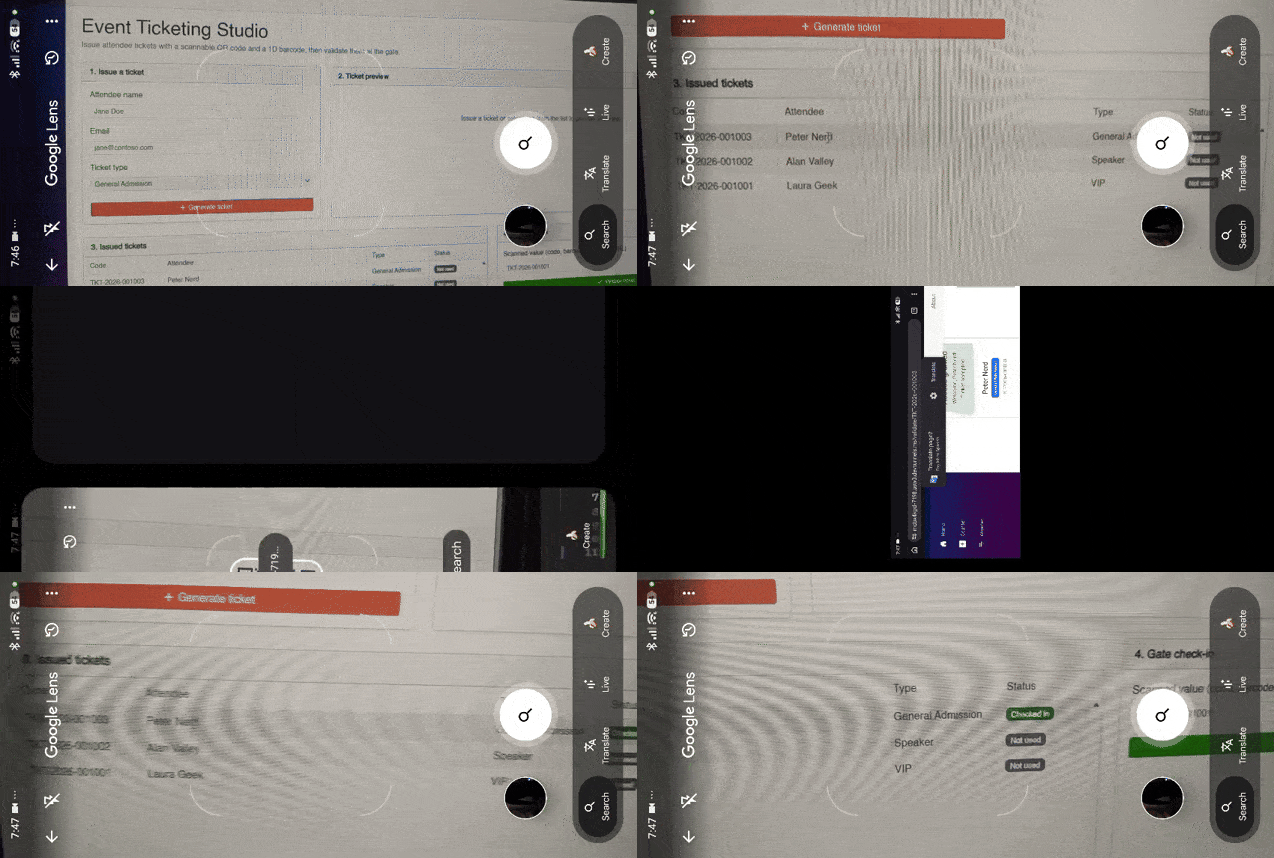
In the video above, you can see how the grid starts with all tickets in an unused state. Then, we scan the QR code, which takes us to the validation page that checks the ticket’s validity. Finally, when returning to the home page, we see the grid with the updated ticket.
Conclusion
Throughout this article, you have been able to see a real-world scenario of using the Blazor QR Code and Blazor Barcode components, which greatly simplify the task when we need to implement these types of codes in our applications.
You have learned about the model used, the service, different parts of an application that involve these kinds of apps, and even a possible implementation of QR code reading while developing the application.
It’s your turn to create solutions faster using these components in your clients’ apps.

Héctor Pérez
Héctor Pérez is a Microsoft MVP with more than 10 years of experience in software development. He is an independent consultant, working with business and government clients to achieve their goals. Additionally, he is an author of books and an instructor at El Camino Dev and Devs School.
Related Posts
Comments
All articles
Topics
Web MobileMobile
Desktop
Design
Productivity
People