
The New Kendo UI for jQuery DockManager and How to Use It: Integration with Other Components

Summarize with AI:
Create a desktop-like experience in your web application with the new Kendo UI for jQuery DockManager.
The R3 2023 release introduces numerous improvements in the Progress Kendo UI for jQuery suite. We have new components, features and improvements on multiple topics, including on the accessibility front (the entire list can be seen on the What’s New page). Not too shabby, right?
One of the significant new additions is the DockManager component, and I would like to take some time to discuss its capabilities with you. Don’t go away now!
Introducing the DockManager
The Kendo UI for jQuery DockManager component is designed to help you recreate a desktop experience on the web, replicating the docks (along with their respective behavior) in desktop applications.
It comes with a rich set of features to help you display your content. The panes are nicely separated and can be easily rearranged either by pinning them or by dragging them to the desired location.
However, as you can explore most of the component’s features in the online examples, we will talk more about the practical applications of the DockManager in a small integration project that follows below. Don’t worry if it is presented mostly through images—a full runnable version will be available at the end of the blog post.
List of Components
Before we start, let us shout out the Kendo UI components participating in the project:
- Kendo UI DockManager (surprise, surprise)
- Kendo UI TreeView
- Kendo UI ContextMenu
- Kendo UI Toolbar
- Kendo UI TextBox
- Kendo UI TextArea
- Kendo Icons
The Project Walkthrough
Let’s start with displaying the DockManager with several empty panes:
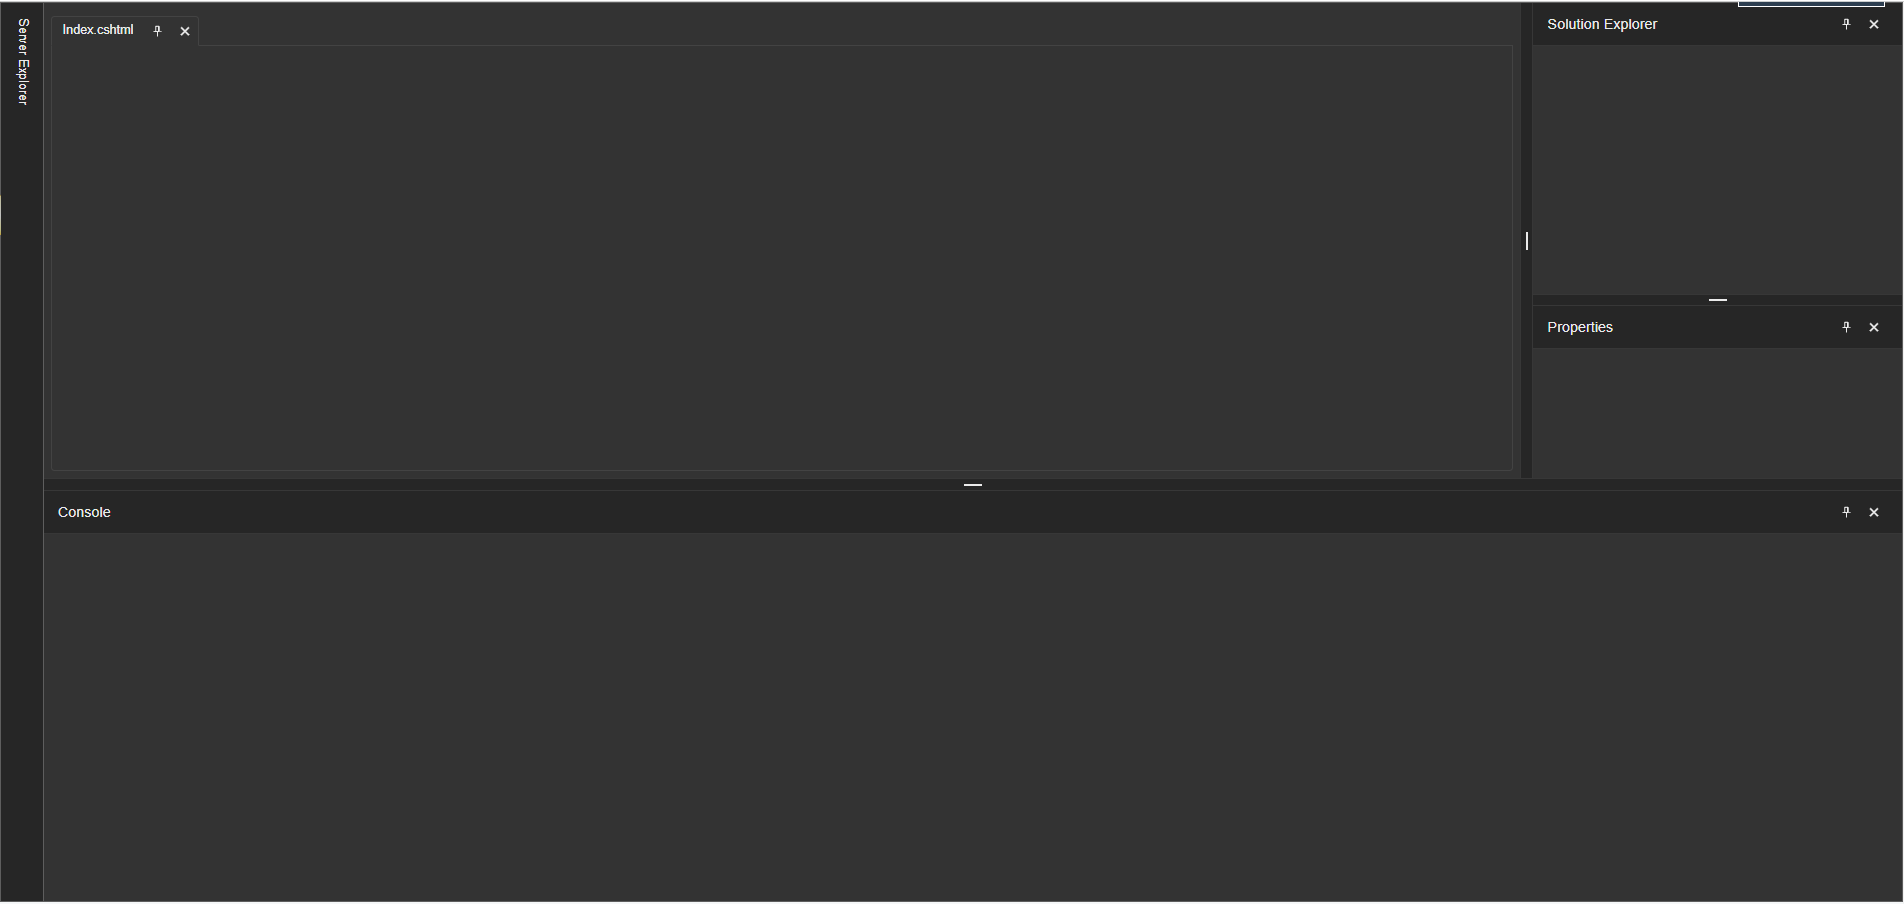
Not very impressive, right? Well, let’s place some content in the Solution Explorer pane:

Starting to look familiar? Using the TreeView component, you can simulate the structure of a project as if you are using Visual Studio. You can search for a file or a folder using the TextBox above, and you can associate the buttons in the Toolbar with whatever actions come to your mind. You will also see the Kendo UI Icons displayed according to the TrueView’s items, but if you prefer some other icon library, feel free to use it—the component will handle them nicely.
Let’s proceed by adding a ContextMenu and see what it has to offer.
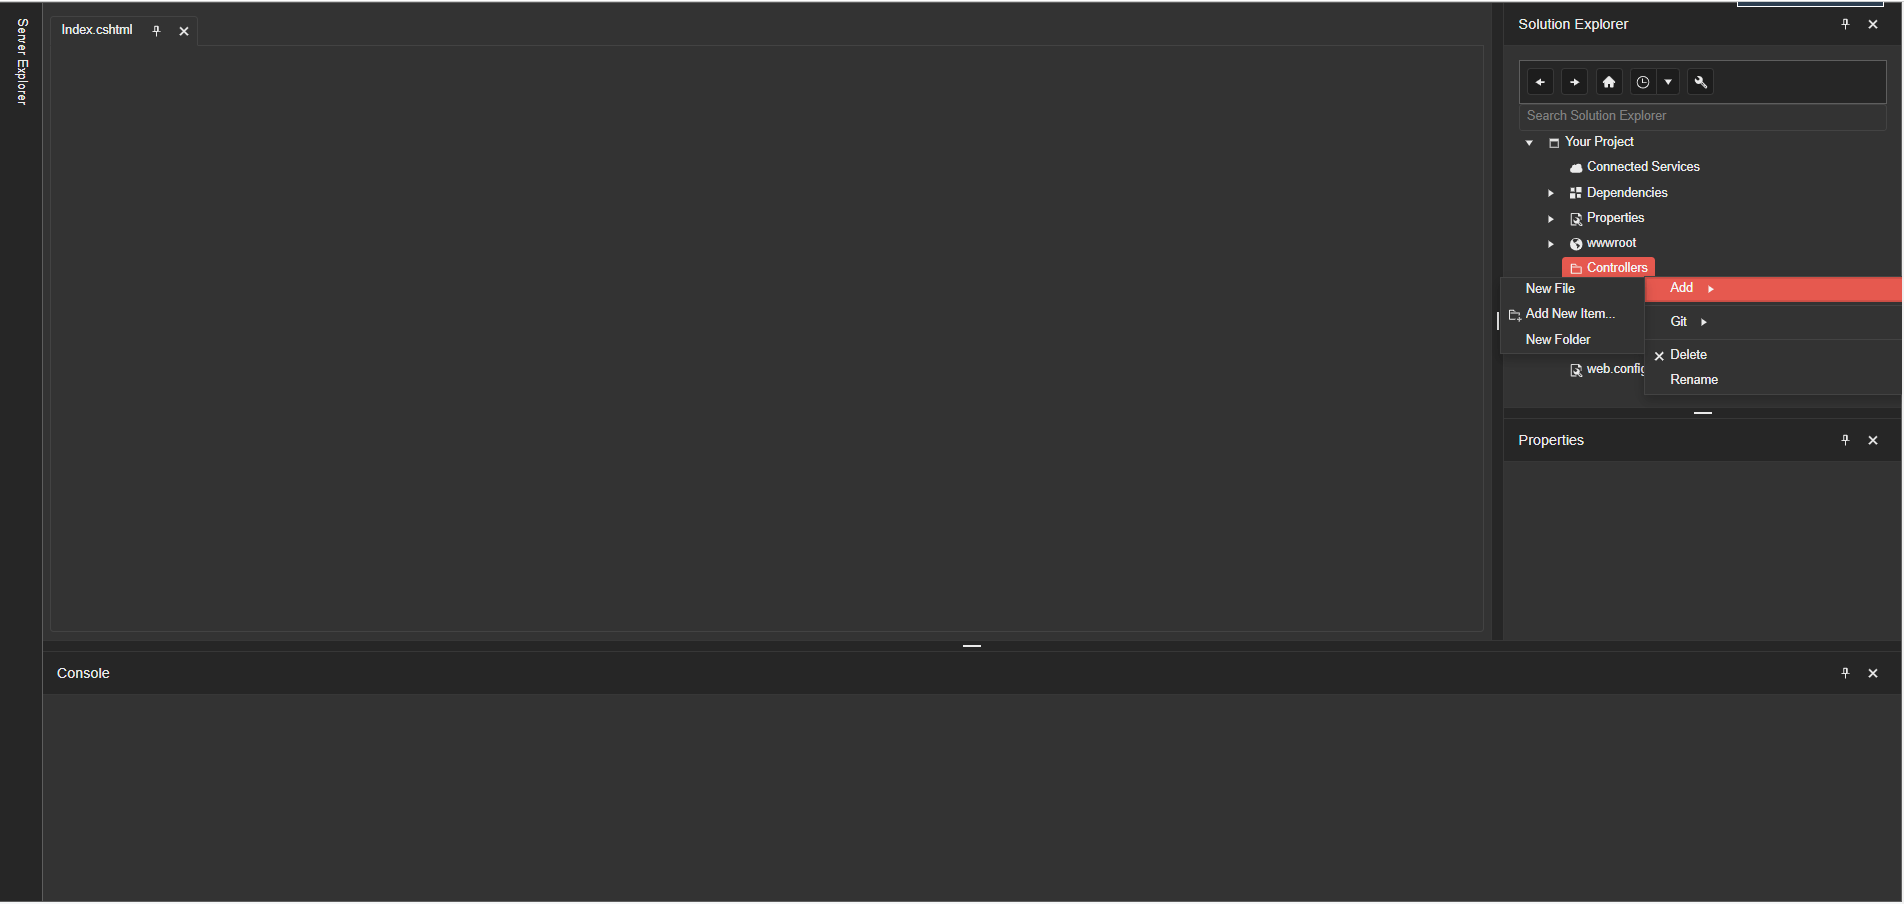
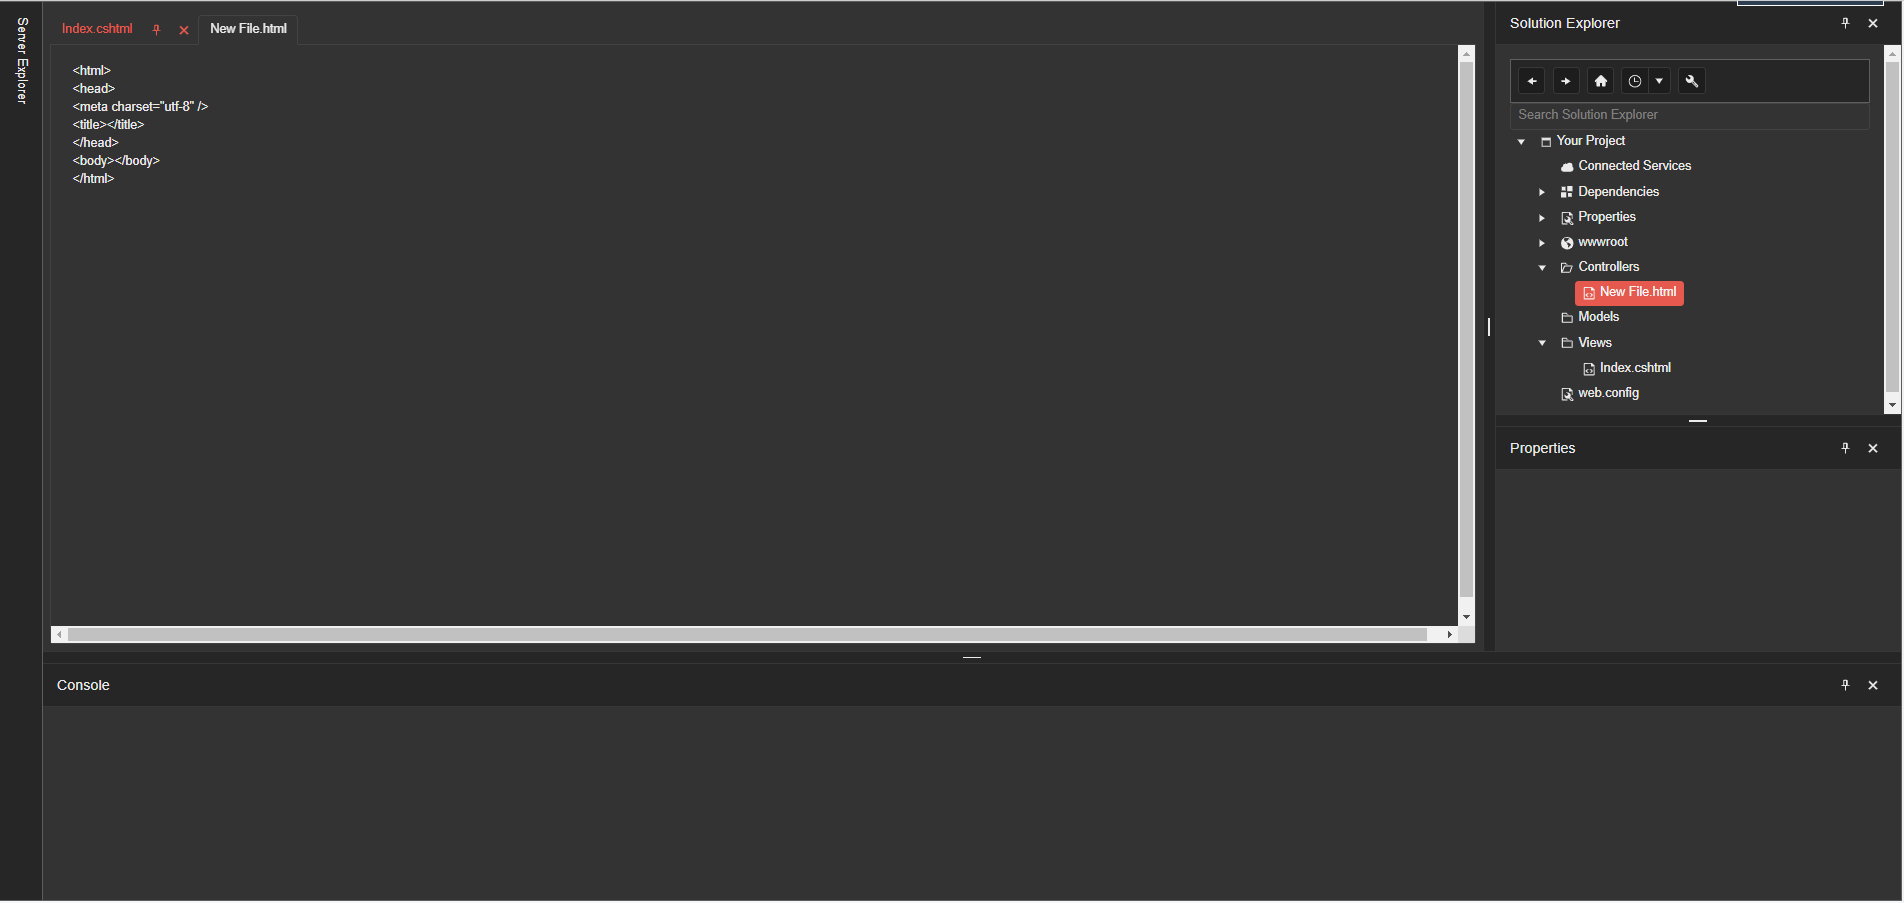
Need to add, rename or delete an item in the TreeView? Done, done and done. The “New File” menu item under the “Add” section will add a new HTML file and open it in the pane to the left, and the new folder will add an item with a folder icon under the selected node.
Choosing the “Delete” option will remove the item from the project tree, and choosing the “Rename” option will display an input where you can type the new text of the node. The transition between node and input is easily done through the TreeView’s template option, so don’t forget to check it out.
Double-clicking on a file will open the associated dummy content in the left pane.
As you have probably guessed, you can enhance that part by making a request to your server to fetch more meaningful content. The “Add” part can also be enhanced by opening a dialog with a list of different predefined file extensions—.cshtml, .html, .cs and others.
With that, we conclude the Solution Explorer part. In the “Console” Pane we have a simple Kendo UI Console which logs the DockManager’s event occurrences. You have probably seen it in the “Events” examples of the Kendo UI components.
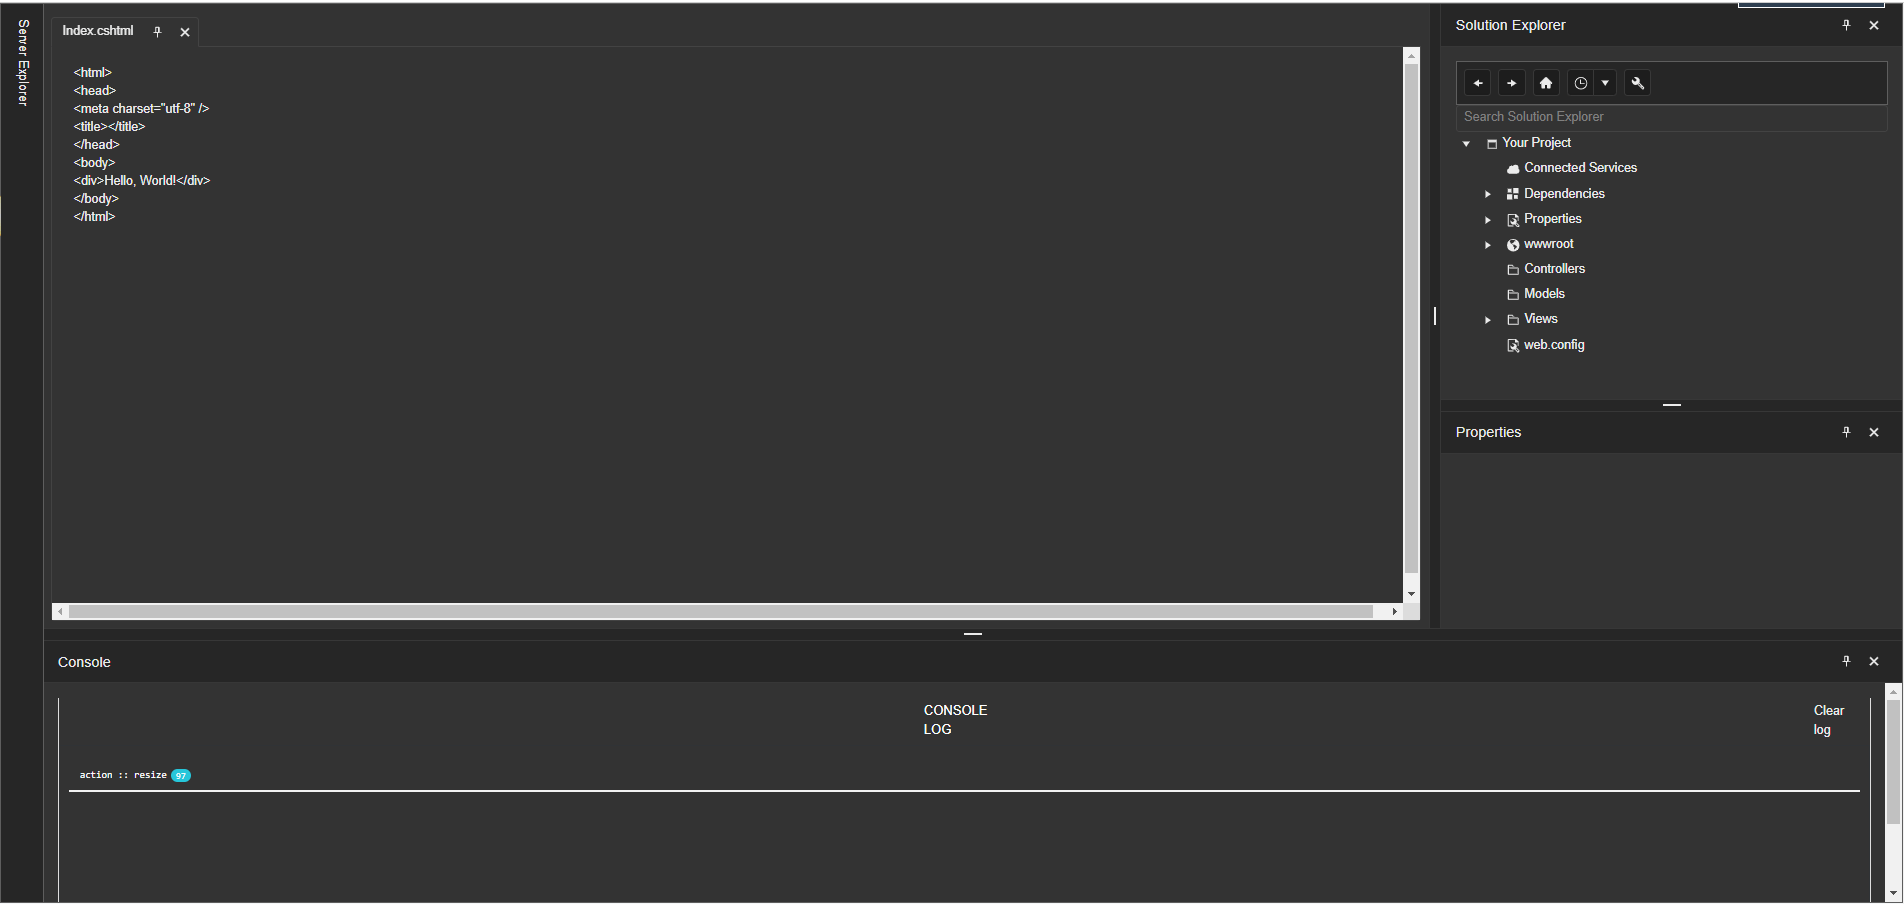
In the Server Explorer Pane, we have another TreeView and Toolbar, again similar to what we have in Visual Studio. You can do your magic here and bind the Toolbar buttons to server-side operations or use that pane for different purposes entirely.
Other Integration Ideas
Wondering how else you might use the DockManager? As you have probably guessed already, you can use the component to replicate the Visual Studio Code UI as well, but what else is there?
Have you heard of Twitch, the streaming platform? Well, if you happen to be a moderator in a channel, you will notice how the stream and the chat are neatly separated in two different draggable, resizable panes and additional information about the channel is placed below in another pane. Hint, hint—this can be achieved with the DockManager.
I think we can all agree that a DockManager is a powerful UI tool for placing your content, where the only limit is your imagination.
Time to Say Goodbye
With this, my humble blog post comes to an end. Thank you for being a wonderful reader and sticking with me to the end of what I hope was a pleasant and useful read. I am sure that you will be able to take my modest project to the next level in order to provide a great user experience for your customers.
Here you will find the downloadable copy of the project.
If you have any questions about the DockManager, or for other Kendo UI components, drop us—your friendly neighborhood Support Engineers— a line either in a support ticket or in our forums. We’ve got you covered!
And if you haven’t already done so, try out Kendo UI for jQuery free for 30 days.

Martin Tabakov
Martin was a Technical Engineer at Progress. He is always eager to explore the cutting edge of innovation and extend a helping hand. Beyond the realm of technology, he’s an avid hiker, rock music enthusiast and Dungeons and Dragons player. When he’s not delving into the mysteries of code, Martin can also be found venturing through the World of Azeroth.
Related Posts
Comments
All articles
Topics
Web MobileMobile
Desktop
Design
Productivity
People
