Creating a Serverless Application with KendoReact

Summarize with AI:
In this article, we walk you through creating a serverless application with the Serverless Framework, deploying it to the cloud, and creating a user interface for it using KendoReact.
Serverless is an execution model that allows cloud providers to dynamically allocate resources at the function level in your code rather than the entire application. This provides for a more cost-effective and flexible way to run your application in the cloud.
Some of the most widely used serverless platforms are Amazon Lambda, Google Cloud Functions, Microsoft Azure Functions and IBM OpenWhisk.
The serverless model is gaining traction due to a few advantages over traditional cloud applications:
- Low cost and high flexibility: serverless platforms automatically provision the optimal hardware to run your code when triggered
- Low overhead: serverless providers charge for the amount of time your functions spend running; you pay less if there is less traffic to your application; you also pay less if your functions run fast
- They shift the focus from cloud infrastructure to application: you are not required to manage or maintain your own servers, making it easier to focus on your application
The Serverless Framework is an open-source project that allows you to abstract the specific serverless provider and write your application the same way on all cloud platforms. The Serverless Framework adds cloud provider portability to the already impressive list of the benefits of the serverless model.
In this article, we walk you through creating a serverless application with the Serverless Framework. This is achievable with just about any serverless platform, including Progress Kinvey, but in this example we're going to deploy it to Amazon Lambda, and then create a user interface for it using KendoReact.
About KendoReact
Progress KendoReact is a library of native UI components created specifically for use in React development. KendoReact has no dependencies, and it provides a set of native UI components optimized for React. As such, we can use KendoReact to simplify and speed up UI development for Serverless applications.
Project Overview
In this article, we create a simple Pomodoro timer, using KendoReact and Serverless. If you're new to the Pomodoro technique, you can read about it here.
We create a simple interface for starting and stopping Pomodoro timers and listing the timers recently completed. The events are tracked in an AWS DynamoDB database. We use KendoReact components in the user interface.
We walk you through the dependency installation, the creation of the backend and the frontend, and the deployment of the project to AWS Lambda.
Dependencies
Backend
First, set up the credentials for your Amazon Web Services (AWS) account. If you don't have one, sign up for one on the AWS website here. Once you have the credentials, set them up with the AWS Command Line Interface (AWS CLI). Instructions on how to do this are here. For setup to be as easy as possible, your AWS account should have Admin credentials. If this is the first time you've used the AWS CLI, configure it according to these instructions.
Next, make sure that you have Node.js installed. As of writing, the latest stable version of Node.js is 10.15.0. Installing Node.js also installs the latest version of npm.
Finally, install the Serverless Framework by following the instructions listed in the article, Getting Started with Serverless.
Frontend
The requirements for the frontend of the project are similar to the backend:
- Node.js (as of this writing, the latest version is 10.15.0)
- npm (included with Node.js)
- create-react-app, which is included with modern versions of Node.js
- KendoReact, which we'll add later
Creating the Backend for the Serverless Application
Make sure that you saved your AWS credentials correctly. Serverless uses them to access the cloud provider, as detailed in the Dependencies section.
Create your backend structure by using this command:
$ serverless create -t aws-nodejs -p backendThis command produces a backend directory with two files in it, handler.js and serverless.yml:
$ tree
.
├── backend
│  ├── handler.js
│  └── serverless.yml
handler.js contains the code of our backend. serverless.yml declares all the infrastructure necessary for our backend.
We start by defining two functions — one to fetch the saved Pomodoro entries, and one to create a new Pomodoro timer. Replace the current content in handler.js with the following code:
module.exports.getPomodoros = async (event, context) => {
  // fetch all pomodoros from DynamoDB table
  const pomodoros = await documentClient
    .scan({ TableName: "pomodoros" })
    .promise();

  return response(JSON.stringify({ pomodoros }));
};

module.exports.postPomodoro = async (event, context) => {
  const Item = JSON.parse(event.body);
  await documentClient.put({
    TableName: "pomodoros",
    Item
  })
  .promise();

  return response(JSON.stringify({ Item }));
};
Both functions access the pomodoros table via the documentClient object. This is a mapping that the AWS DynamoDB JavaScript library conveniently provides. We declare the mapping it in the same file above the functions:
const AWS = require("aws-sdk");
const documentClient = new AWS.DynamoDB.DocumentClient();
With that, we are able to access the DynamoDB tables. We also define the response function with the CORS headers needed for the backend and the frontend to work together:
const response = body => ({
  // return the CORS headers in the response, without that it
  // wouldn't work from the browser
  headers: {
    "Access-Control-Allow-Origin": "*",
    "Access-Control-Allow-Credentials": true
  },
  statusCode: 200,
  body
});
This completes the handler.js file. Next, we expose both of our handler functions to the outside world via the serverless.yml file. We add the function definitions first, overwriting anything you have in the functions section:
functions:
  getPomodoros:
    handler: handler.getPomodoros
    events:
      - http:
        path: /
        method: GET
        cors: true
  postPomodoro:
    handler: handler.postPomodoro
    events:
      - http:
        path: /add
        method: POST
        cors: true
Second, we define the DynamoDB database:
resources:
  Resources:
    # DynamoDB Table for pomodoro entries
    PomodorosTable:
      Type: AWS::DynamoDB::Table
      Properties:
        TableName: pomodoros
        AttributeDefinitions:
          - AttributeName: name
            AttributeType: S
        KeySchema:
          - AttributeName: name
            KeyType: HASH
        ProvisionedThroughput:
          ReadCapacityUnits: 2
          WriteCapacityUnits: 2
Finally, we define a location where to persist stack.json — this is how the frontend later knows where to look for our backend application:
plugins:
  - serverless-stack-output

custom:
  output:
    # Save endpoint URLs to stack.json inside frontend source
    # directory
    file: ../frontend/src/stack.json
That's it! Now we can install all the dependencies and deploy our Serverless backend to Amazon Lambda. First, install the plugin we declared above:
$ serverless plugin install --name serverless-stack-outputthen
$ npm installAnd deploy:
$ npm run deploy # or serverless deployAnd after a few minutes:
$ npm run deploy

> serverless deploy

Serverless: Packaging service...
Serverless: Excluding development dependencies...
Serverless: Creating Stack...
Serverless: Checking Stack create progress...
.....
Serverless: Stack create finished...
Serverless: Uploading CloudFormation file to S3...
Serverless: Uploading artifacts...
Serverless: Uploading service .zip file to S3 (3.53 KB)...
Serverless: Validating template...
Serverless: Updating Stack...
Serverless: Checking Stack update progress...
......................................................
Serverless: Stack update finished...
Service Information
service: serverless-kendo-pomodoro
stage: dev
region: us-east-1
stack: serverless-kendo-pomodoro-dev
api keys:
  None
endpoints:
  GET - https://pyjsahfuk7.execute-api.us-east-1.amazonaws.com/dev/
  POST - https://pyjsahfuk7.execute-api.us-east-1.amazonaws.com/dev/add
functions:
  getPomodoros: serverless-kendo-pomodoro-dev-getPomodoros
  postPomodoro: serverless-kendo-pomodoro-dev-postPomodoro
Serverless: Stack Output saved to file: ../frontend/src/stack.json
Our backend is deployed to AWS! We're ready for the next step.
Cleaning Up
The Serverless Framework creates AWS resources for you. Once you've finished setting up the Serverless application and working with its frontend, remember to remove all the resources created by running $ serverless remove in the backend directory to avoid unexpected AWS charges for your account.
Creating the Frontend for the Serverless Application
The easiest way to create a structure for the frontend is to use the create-react-app utility. Run this command:
$ npx create-react-app frontendThe frontend consists of two components:
- The main one is
<App />. This is all the logic for communicating with the backend via HTTP requests and rendering the data fetched from the backend. <Timer />is used to measure the time.
For the App component, we use the Grid and GridColumn components from KendoReact. First install and save the packages:
$ npm install --save @progress/kendo-react-grid \
                     @progress/kendo-data-query \
                     @progress/kendo-react-inputs \
                     @progress/kendo-react-intl \
                     @progress/kendo-react-dropdowns \
                     @progress/kendo-react-dateinputs
Add it to the import section of App.js:
import { Grid, GridColumn } from "@progress/kendo-react-grid";And replace the current <div className="App"> with the following:
<div className="App">
  <h1 className="App-title">Serverless KendoReact Pomodoros</h1>
  <Timer onFinish={this.onFinish} />
  <Grid data={**this**.state.data} classNames="grid">
    <GridColumn field="PomodoroName" title="Pomodoros Done" />
    <GridColumn field="Date" />
    <GridColumn field="Elapsed" />
  </Grid>
</div>
Here, we use a simple table to show the Pomodoro timers that we have already completed, plus reference a Timer component that has all the logic for measuring the time spent in the Pomodoros and between them.
The Timer component uses the RadialGauge, Input, and Button KendoReact components, and you can see its entire logic here.
The frontend uses stack.json to determine the details of the endpoint it is connecting to. This file is generated during the deploy of the backend. It is important to deploy the backend before running the frontend.
Once the backend is deployed, we parse the backend endpoint in App.js:
import { ServiceEndpoint } from "./stack.json";The codebase for our frontend is small now that KendoReact implements all the components. We can focus on defining the business logic and presenting the data clearly.
We won't cover all the frontend code in this article, as there's a lot of boilerplate provided from Create React App. You can find the complete frontend codebase here. Clone that repo before continuing.
Running the Frontend
Once the frontend is ready, and after the backend is deployed, we can run the frontend locally by running the following commands in the frontend directory:
$ npm installThen:
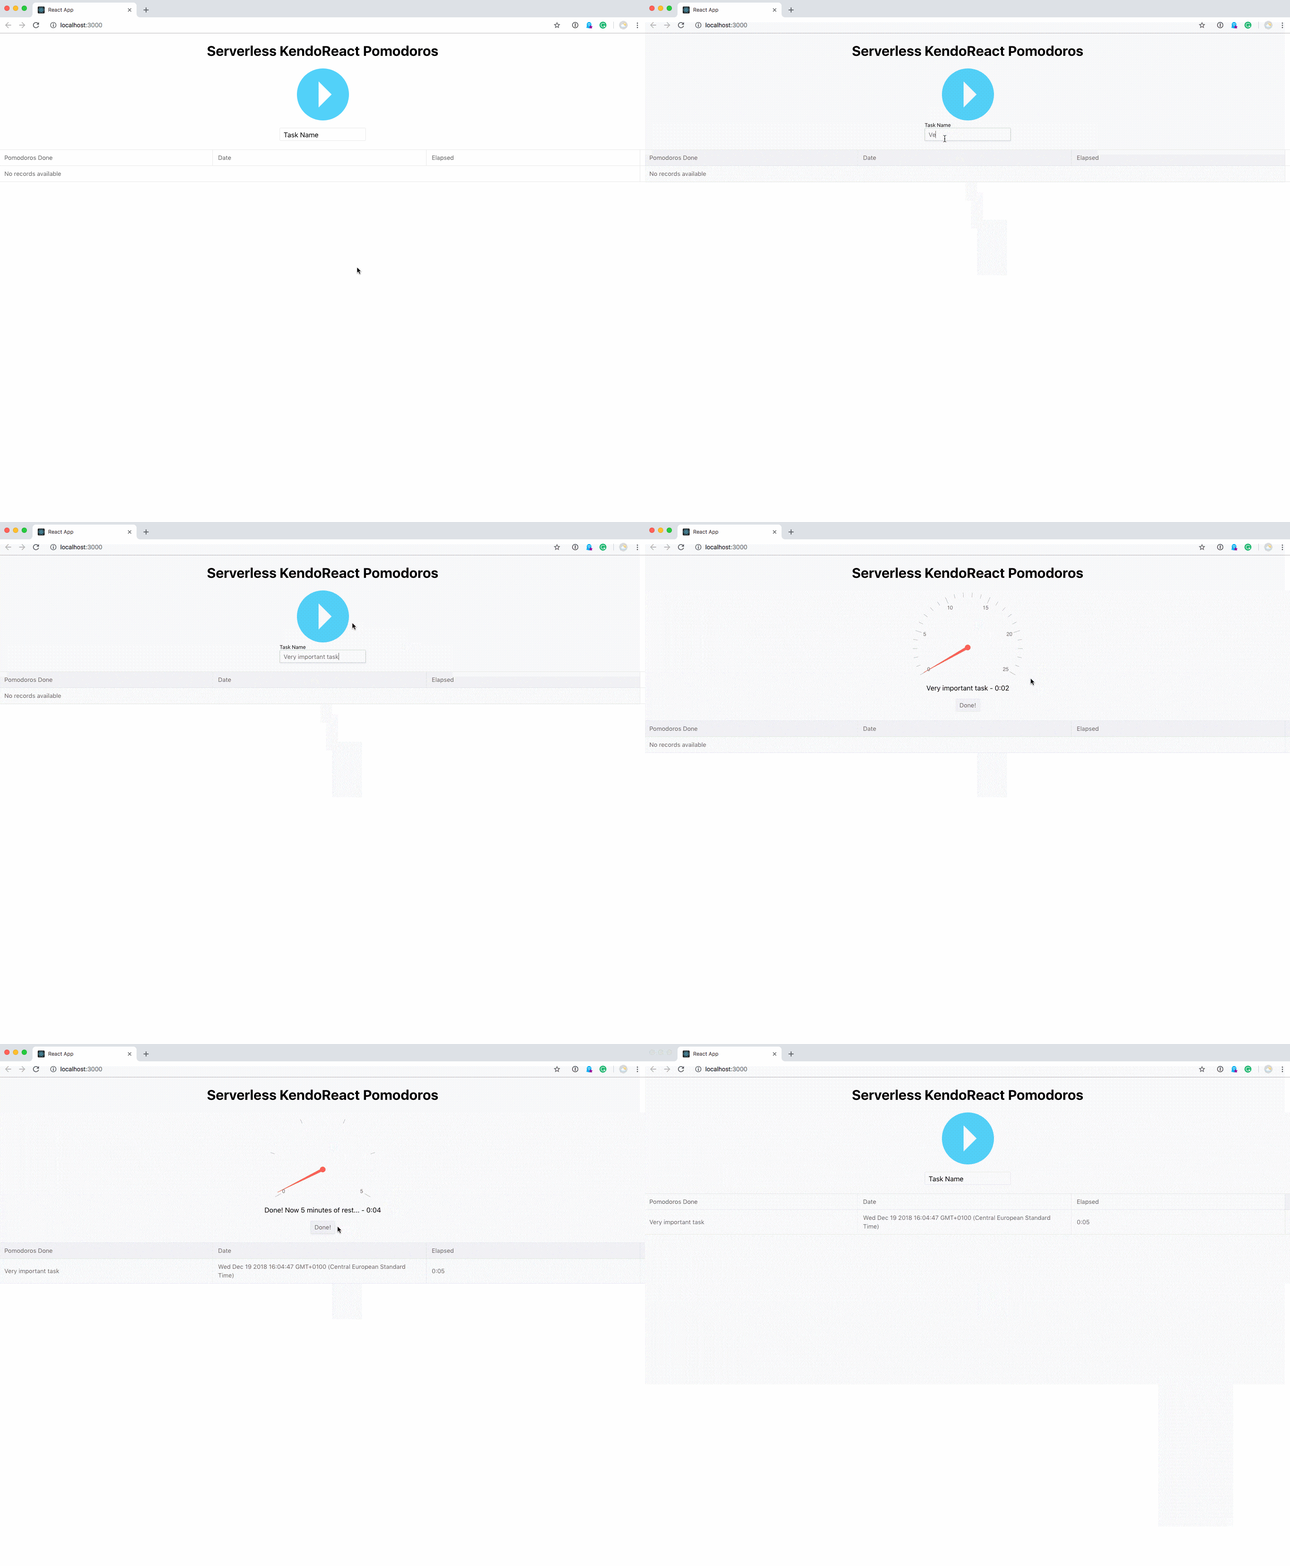
$ npm startAfter that, the frontend is accessible at localhost:3000 in your browser. Try adding a few pomodoros:

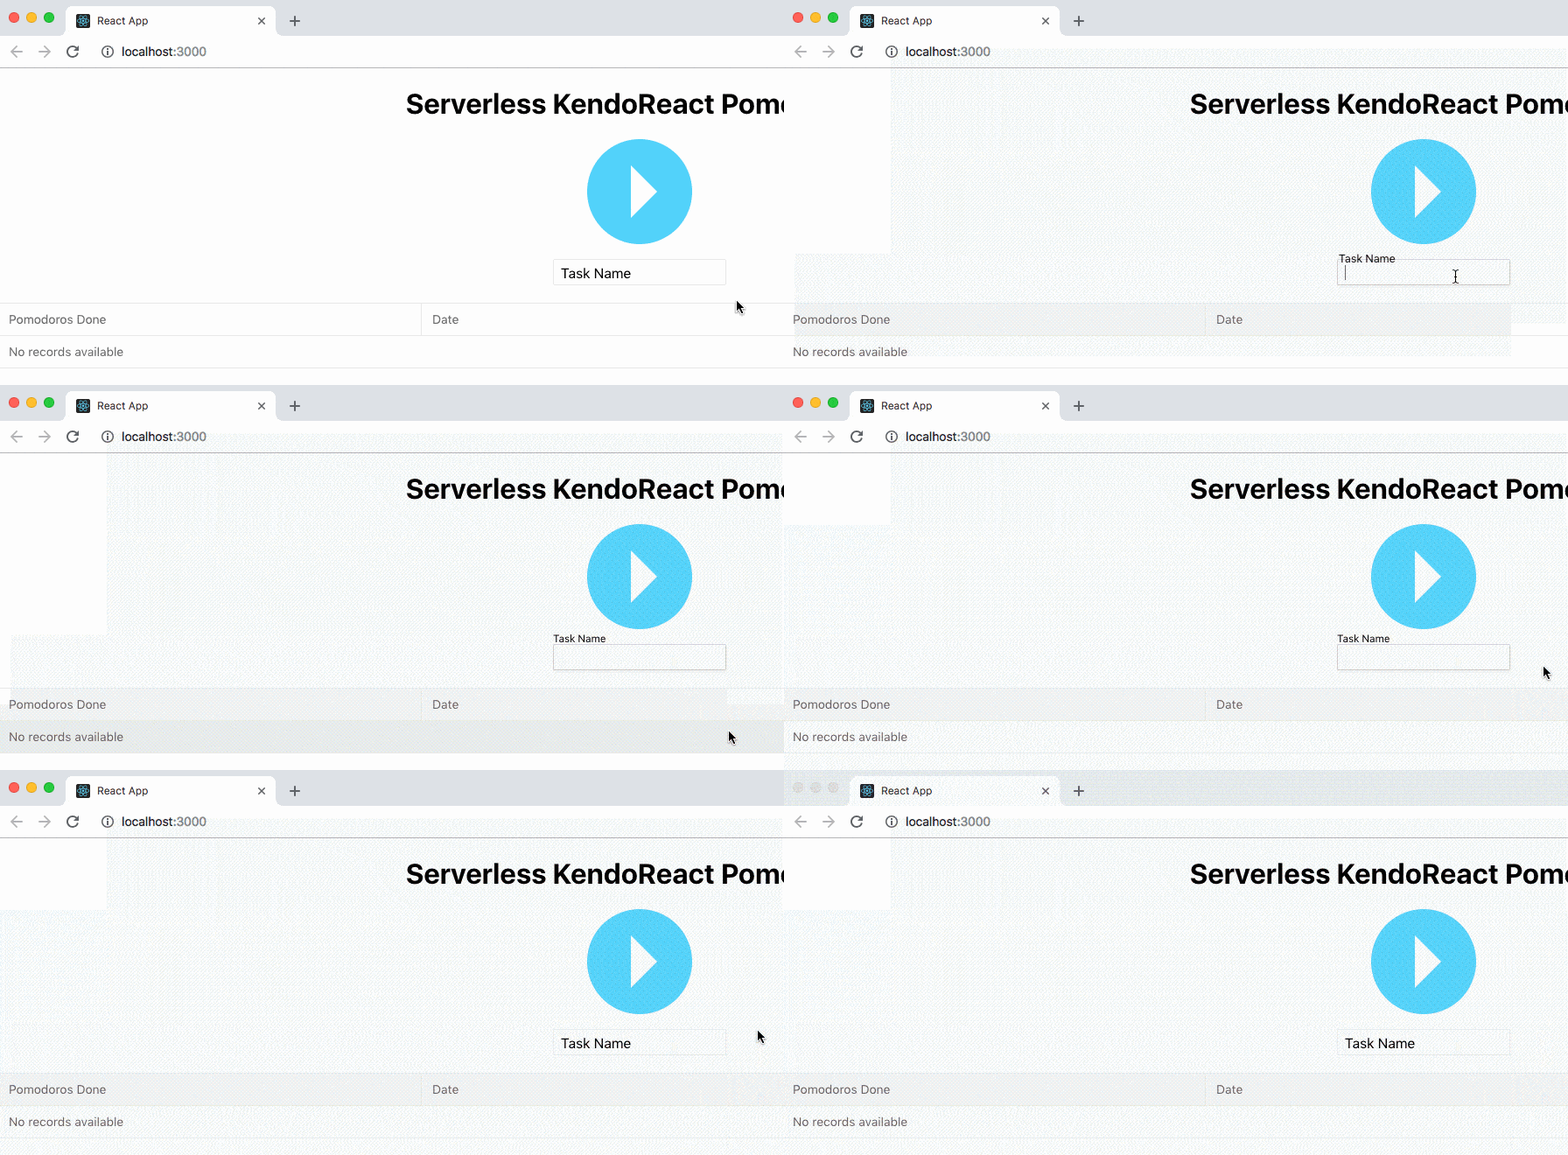
Notice the smooth transitions in the fields provided by KendoReact with no extra code on our side:

That's it! We're ready for some productive time with our Pomodoro timer.
Conclusion
As we've seen, it's easy to get KendoReact and Serverless to work together. Configuring a React application to use a Serverless backend only requires a serverless.yml and a stack.json file. There is a lot you can do with a Serverless backend.
KendoReact provides convenient components to use in many situations. We've used grids, the buttons and the text fields in this article, but there are many more — including tools for animation, conversational UIs, PDF processing, and so on.
Serverless is a great way to create simple and scalable APIs and automate the deployment of the infrastructure required for those APIs. Learn more about the Serverless Framework here. If you want to learn about how the Serverless deployment process works on AWS, go here. As I mentioned earlier, while we happened to use AWS in this example, you could also have used a platform like Kinvey, which you can learn more about here.
Learn more about the KendoReact components here. Documentation on specific components included in KendoReact is here. And here is how to install KendoReact.
How did your setup go with Serverless and KendoReact? Let us know in the comments!

Chris Ward
Chris Ward explains cool tech to the world. He is a technical writer and blogger. He has crazy projects in progress and will speak to anyone who listens. You can talk to him! :)
