Building An iTunes Player With Angular

Summarize with AI:
By Angular, we mean Angular 2.
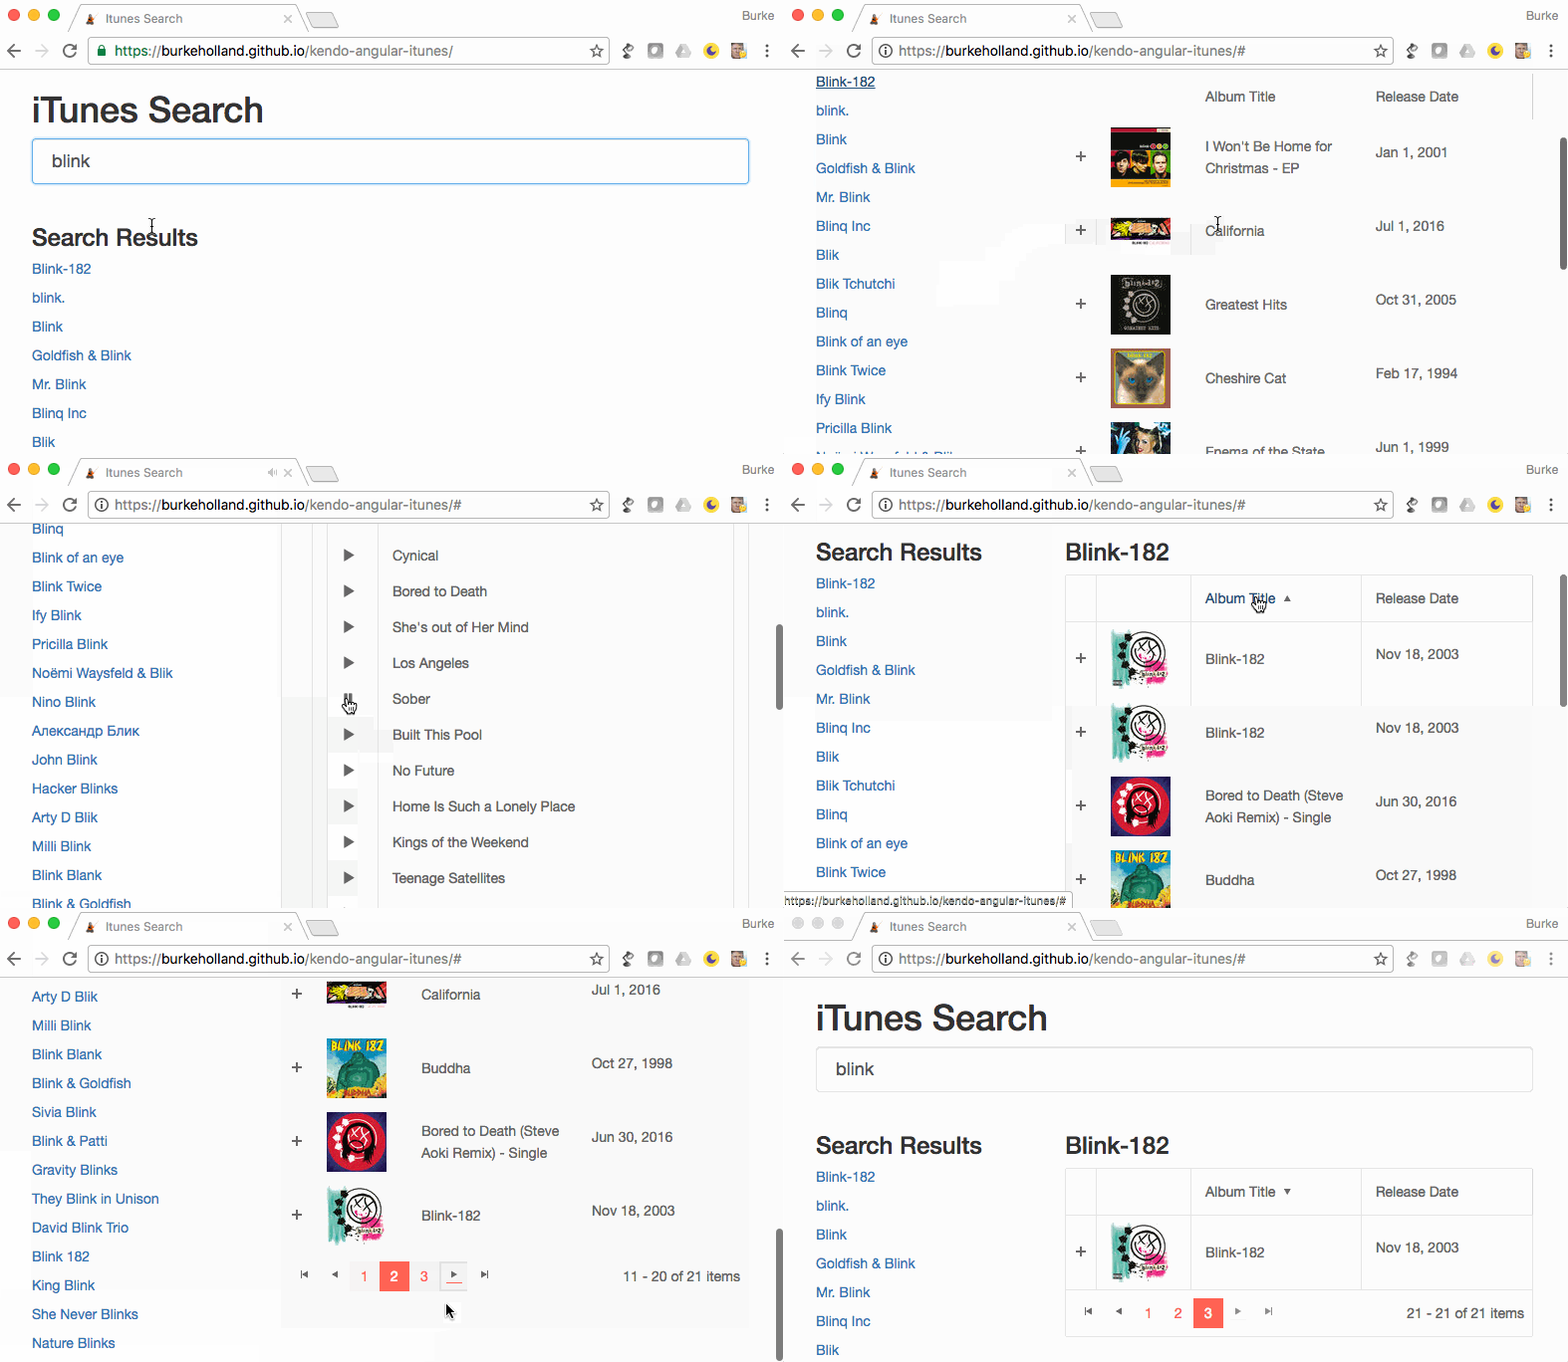
In this tutorial, we’re going to build an iTunes Search application. The app will use the open iTunes JSONP API to search for artists, display albums by that artist in a Kendo UI Grid. Each album will be expanded to show a detail grid which will contain all of the tracks. Each track will be playable with Web Audio.
You can view the completed application and get all of the code on GitHub. If you get stuck at any point, I recommend downloading the completed project for reference.
Prerequisites
Creating The App
Start by creating a new application specifying Sass as the style language of choice. If you don’t know Sass, don’t worry. You can still write plain ole CSS in Sass files. Using Sass just gives us the ability to easily include third-party style libraries. The Angular CLI will wire up all of the necessary build steps.
> ng new itunes-search -style=scss && cd itunes-search
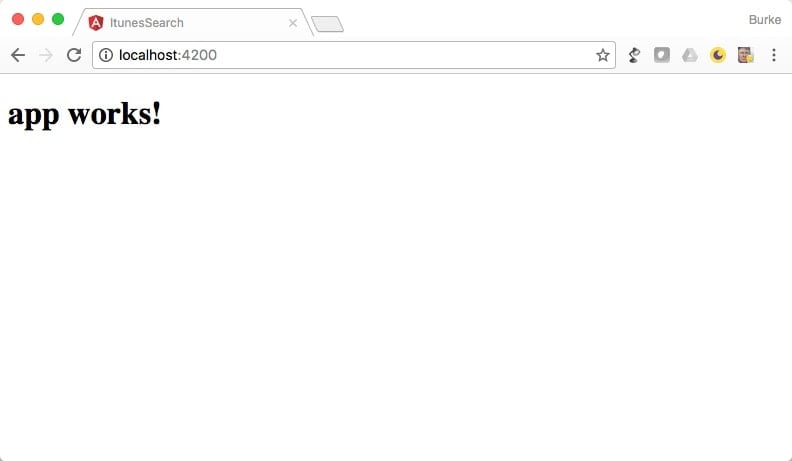
Run the application and leave it open. The application usually runs on port 4200. See this article for a more detailed explanation.
> ng serve
Next, install the Bootstrap Sass package from npm.
> npm install bootstrap-sass --save
Add the Bootstrap Sass references to your project in the src/styles.scss file.
/* You can add global styles to this file, and also import other style files */

/* Bootstrap CSS And Icon Font */

$icon-font-path: "~bootstrap-sass/assets/fonts/bootstrap/";
@import "~bootstrap-sass/assets/stylesheets/bootstrap";
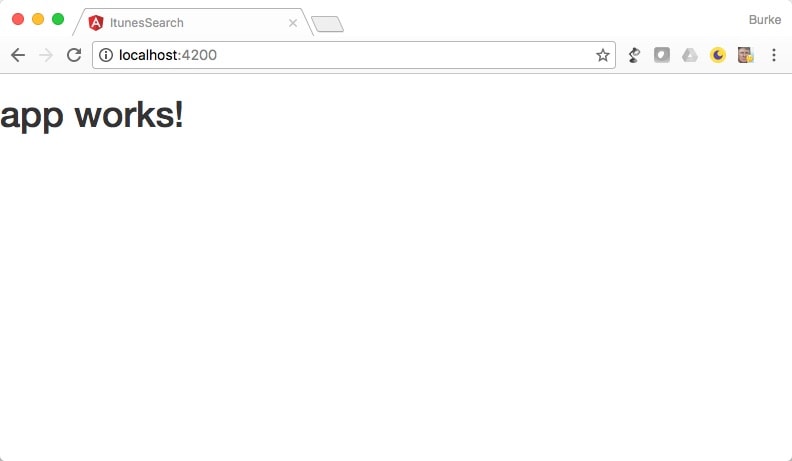
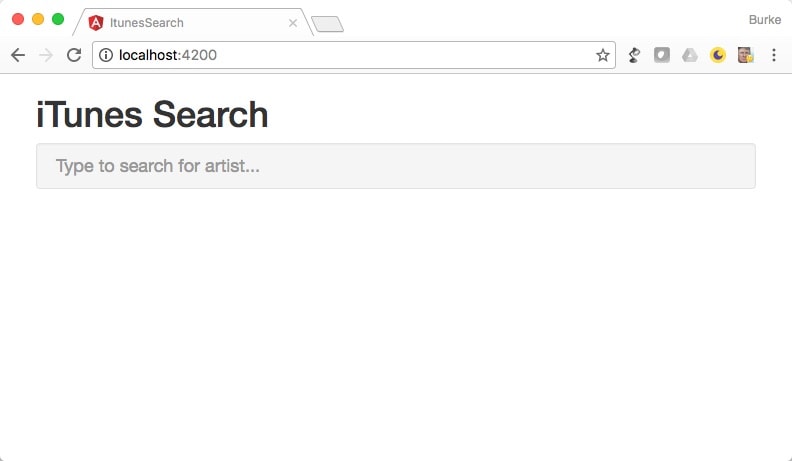
The app will update automatically. It looks slightly different because of the sans-serif font that Bootstrap uses.
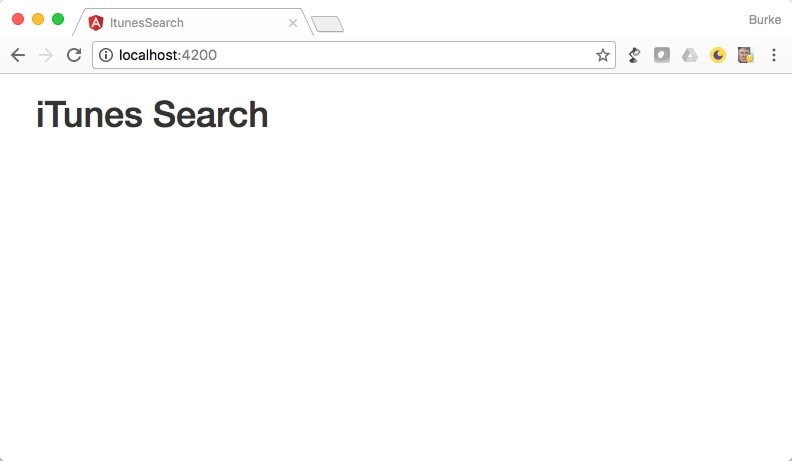
Add the following markup to the src/app/app.component.html.
<div class="container">
	<h1>iTunes Search</h1>
	<!-- Artist Component Will Go Here -->
	<!-- Audio Player Component Will Go Here -->
</div>
Creating a Service
Next, create a service that will call the iTunes Search JSON API. The Angular Style Guide recommends putting these in a “shared” folder, so create the shared folder under src/app.
> mkdir src/app/shared
Create the service using the Angular CLI generators that will scaffold out components, services and the like.
> ng generate service shared/itunes
Open the src/app/shared/itunes.service/ts file and add in the code that imports the JSONP support for Angular 2, the toPromise and catch methods from rxjs, and exposes a function that makes the HTTP call to the iTunes Service and returns a promise.
import { Injectable } from '@angular/core';
import { Jsonp } from '@angular/http';
import 'rxjs/add/operator/catch';
import 'rxjs/add/operator/toPromise';

const API = {
  SEARCH: 'https://itunes.apple.com/search?',
  LOOKUP: 'https://itunes.apple.com/lookup?'
}

@Injectable()
export class ItunesService {

  constructor(private jsonp: Jsonp) {
  }

  public search(searchTerm): Promise<any> {
    return this.jsonp.get(`${API.SEARCH}callback=JSONP_CALLBACK&media=music&country=US&entity=musicArtist&term=${searchTerm}`)
      .toPromise()
      .then(data => data.json().results)
      .catch(this.handleError)
  }

  private handleError(error: any): Promise<any> {
    console.log(error);
    return Promise.reject(error.message || error);
  }
}
The JSONP module must also be injected in the src/app/app.module.ts file, otherwise it won’t be available for use here in the service.
import { BrowserModule } from '@angular/platform-browser';
import { NgModule } from '@angular/core';
import { FormsModule } from '@angular/forms';

// Include the JSONP module for JSONP support
import { HttpModule, JsonpModule } from '@angular/http';

import { AppComponent } from './app.component';

@NgModule({
  declarations: [
    AppComponent
  ],
  imports: [
    BrowserModule,
    FormsModule,
    HttpModule,

    // include the JSONP module so it can be used in the application
    JsonpModule
  ],
  providers: [],
  bootstrap: [AppComponent]
})
export class AppModule { }
Creating Components
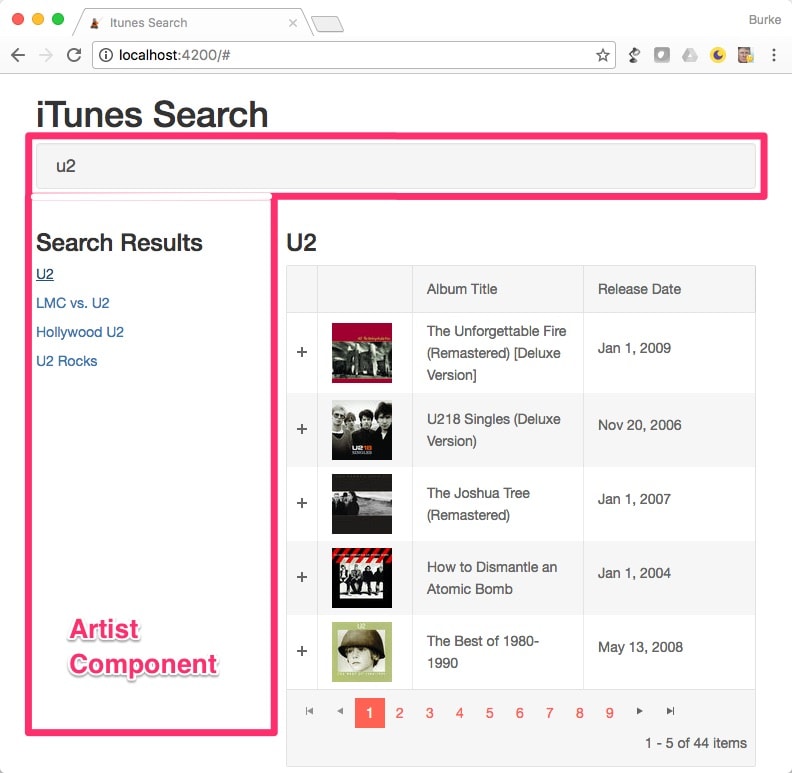
Now we’re going to add the Artist Component, which will contain the search bar and artist results. It will also call the iTunes Service to do a search for artists.
> ng generate component artist
This creates an src/app/artist folder. It also injects the component into the app.module.ts file so that it can be used in the application. The Angular CLI does all of this when you use the generate component command.
Add the following markup to the src/app/artist/artist.component.html file.
<div class="row">
  <div class="col-xs-12">
    <input type="search" #searchBox (keyup)="search(searchBox.value)" class="form-control input-lg well" placeholder="Type to search for artist...">
  </div>
</div>
<div class="row">
  <div class="col-sm-4" *ngIf="searchResults.length > 0">
    <h3>Search Results</h3>
    <p *ngFor="let artist of searchResults">
      <a id="{{ artist.artistId }}" href="#" (click)="getAlbums(artist.artistId, artist.artistName)">{{ artist.artistName }}</a>
    </p>
  </div>
  <div class="col-xs-12" [ngClass]="{'col-sm-8': searchResults.length > 0 }">
    <h3>{{ selectedArtist }}</h3>
    <!-- App Album Component Goes Here -->
  </div>
</div>
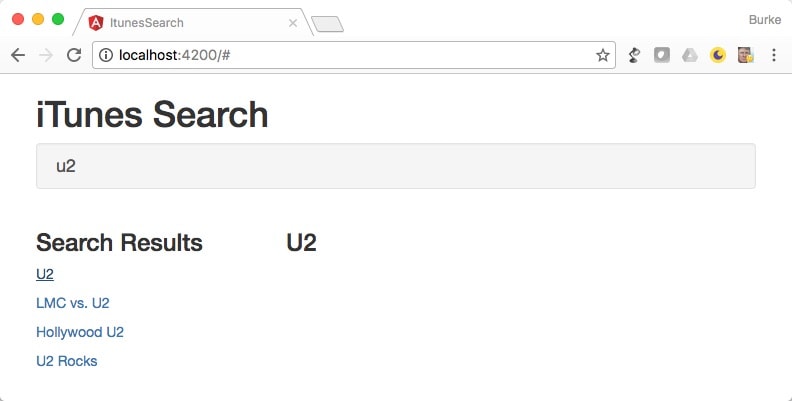
This markup creates the search box and a two column layout for the artist search results on the left. When the user clicks on an artist, all of that artists album’s will be shown in a grid on the right.
Open the src/app/artist/artist.component.ts file. Add in the necessary code to support the binding from the artist.component.html file. It needs a search method to call the iTunes Service as the user types, as well as a collection of searchResults that will be displayed on the page, and finally a getAlbums event to fire when the user clicks on an artist result.
import { Component } from '@angular/core';
import { ItunesService } from '../shared/itunes.service';

@Component({
  selector: 'app-artist',
  templateUrl: './artist.component.html',
  providers: [ItunesService]
})
export class ArtistComponent {

  searchResults: Array<any> = [];
  artistId: number = 0;

  selectedArtist: string;

  constructor(private itunesService: ItunesService) { }

  search(searchTerm) {
    this.itunesService.search(searchTerm).then(results => {
      this.searchResults = results;
    });
  }

  getAlbums(artistId: number, artistName: string) {
    this.artistId = artistId;
    this.selectedArtist = artistName;
  }
}
Calling the iTunes Service
Now we’ll add the ability to retrieve albums by artist from the iTunes Service. Open the src/app/shared/itunes/service file and add the following.
private _albums: Array<any> = [];
private _artistId: number = 0;

// Get Albums Method
public getAlbums(artistId: number): Promise<any> {

  if (artistId == this._artistId) return new Promise(resolve => resolve(this._albums));

  this._artistId = artistId;

  return this.jsonp.get(`${API.LOOKUP}callback=JSONP_CALLBACK&entity=album&id=${artistId}`)
  .toPromise()
  .then(data => {
    this._albums = data.json().results.filter(results => {
      return results.wrapperType == 'collection'
    });

    return this._albums;
  })
  .catch(this.handleError);
}
This code contains a new function, getAlbums that retrieves albums by artist ID from the iTunes API. It also caches calls to getAlbums in case the function is called repetitively with the same parameters. User interfaces tend to do that a lot.
Next, create the Album Component using the Angular CLI component generator.
> ng generate component album
Adding in Kendo UI
Now add in the Kendo UI Grid for Angular. Before you do this, stop the dev server by pressing ctrl+c. This is necessary with Kendo UI to ensure that files that need to be copied aren’t in use.
> npm login --registry=https://registry.npm.telerik.com/ --scope=@progress
> npm install --save @progress/kendo-angular-grid
> npm install --save @progress/kendo-data-query
> npm install -S @telerik/kendo-theme-default
> ng serve
Reference the Kendo UI Default Theme in the src/styles.scss file.
@import "~@telerik/kendo-theme-default/styles/packages/all";
Add the Kendo UI Grid to the src/app/app.module.ts file.
import { BrowserModule } from '@angular/platform-browser';
import { NgModule } from '@angular/core';
import { FormsModule } from '@angular/forms';
import { HttpModule, JsonpModule } from '@angular/http';

import { AppComponent } from './app.component';
import { ArtistComponent } from './artist/artist.component';

// Import Kendo UI Grid
import { GridModule } from '@progress/kendo-angular-grid';

@NgModule({
  declarations: [
    AppComponent,
    ArtistComponent
  ],
  imports: [
    BrowserModule,
    FormsModule,
    HttpModule,
    JsonpModule,

    // Register the Kendo UI Grid
    GridModule
  ],
  providers: [],
  bootstrap: [AppComponent]
})
export class AppModule { }
Now add the following markup to the src/app/album/album.component.html file.
<kendo-grid
  [data]="view"
  >
  <kendo-grid-column field="artworkUrl60" title=" " width="95">
    <template kendoCellTemplate let-dataItem>
      <img src="{{ dataItem.artworkUrl60 }}">
    </template>
  </kendo-grid-column>
  <kendo-grid-column field="collectionName" title="Album Title"></kendo-grid-column>
  <kendo-grid-column field="releaseDate" title="Release Date">
    <template kendoCellTemplate let-dataItem>
      <p>{{ dataItem.releaseDate | date }}</p>
    </template>
  </kendo-grid-column>
  <div *kendoDetailTemplate="let dataItem">
    <!-- Tracks Component Goes Here -->
  </div>
</kendo-grid>
Getting Albums by Artist
Add the logic for the Album Component that will pull in albums from the iTunes Service based on an Artist ID.
import { Component, Input } from '@angular/core';
import { ItunesService } from '../shared/itunes.service';
import { GridDataResult } from '@progress/kendo-angular-grid';

@Component({
  selector: 'app-album',
  templateUrl: './album.component.html',
  providers: [ItunesService]
})
export class AlbumComponent {

  private view: GridDataResult;

  @Input()
  set artistId(artistId: number) {
    this._artistId = artistId;

    // get the albums for this artist
    this.getAlbums();
  }
  get artistId() { return this._artistId }

  constructor(private itunesService: ItunesService) { }

  getAlbums() {
    this.itunesService.getAlbums(this.artistId).then((results: Array<any>) {
      this.view = {
        data: results,
        total: results.length
      }
    });
  }
}
The @Input allows us to specify a variable on the Album Component that can be set by the parent component, which in this case is the Artist Component. We use a setter to ensure that every time the Artist Component sets an Artist ID, the Albums component will update the contents of the grid by calling getAlbums. This is one way that Angular components can communicate with each other. For more information, see Component Interaction on the Angular docs.
Add the Album Component to the src/app/artist.component.html file. Note the use of the artistId, which gets passed to the @Input.
<div class="row">
  <div class="col-xs-12">
    <input type="search" #searchBox (keyup)="search(searchBox.value)" class="form-control input-lg well" placeholder="Type to search for artist...">
  </div>
</div>
<div class="row">
  <div class="col-sm-4" *ngIf="searchResults.length > 0">
    <h3>Search Results</h3>
    <p *ngFor="let artist of searchResults">
      <a id="{{ artist.artistId }}" href="#" (click)="getAlbums(artist.artistId, artist.artistName)">{{ artist.artistName }}</a>
    </p>
  </div>
  <div class="col-xs-12" [ngClass]="{'col-sm-8': searchResults.length > 0 }">
    <h3>{{ selectedArtist }}</h3>
    <!-- App Album-->
    <app-album [artistId]="artistId" *ngIf="artistId > 0"></app-album>
  </div>
</div>
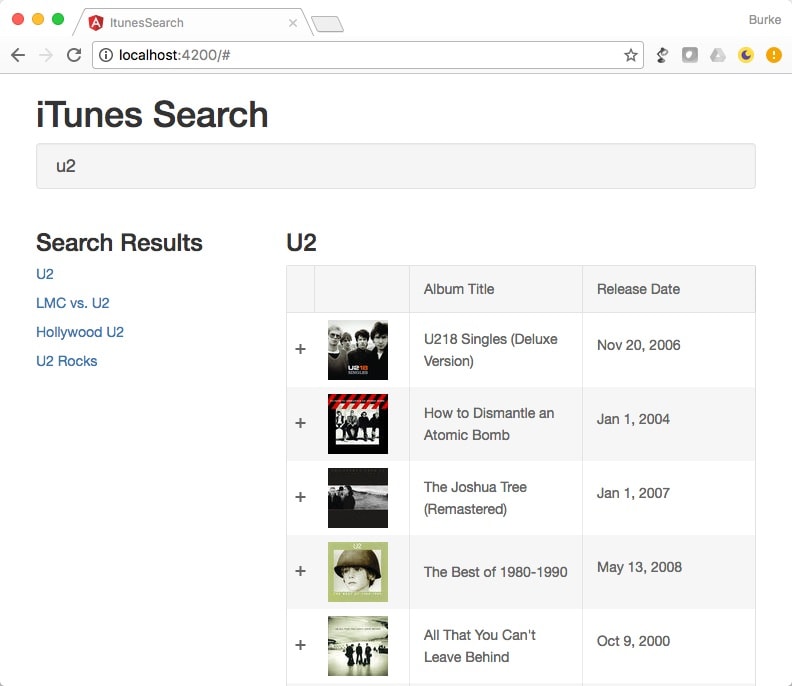
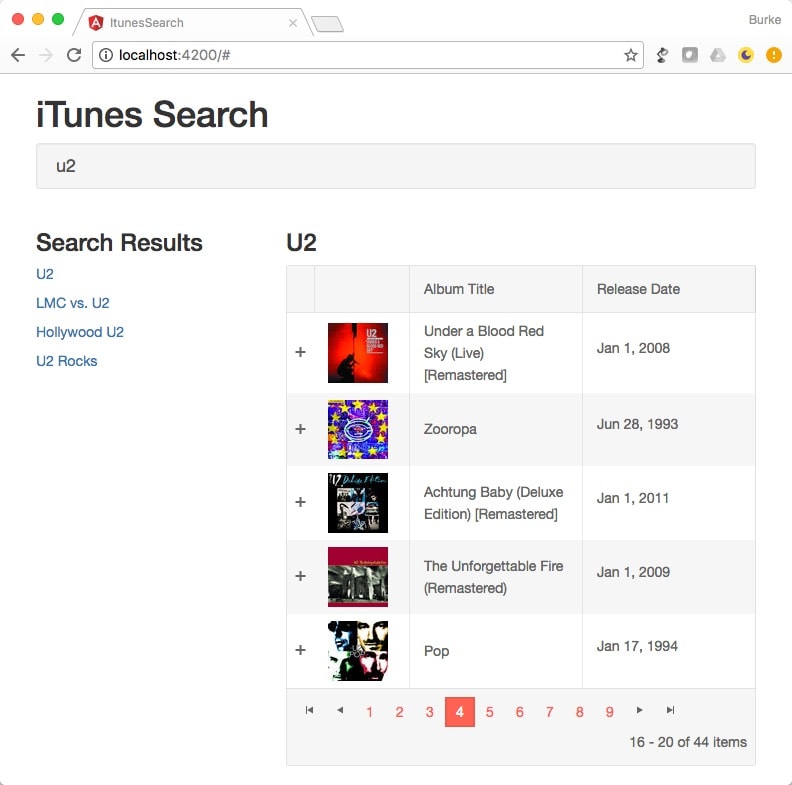
Now the Albums Component will display albums when an artist is selected.
Paging Through Results
Add paging to the Grid by setting the Grid to pageable, defining the page size (how many records to show per page), setting the skip parameter (how many records to skip from the start of the collection) and the pageChange event on the Grid component in src/app/album/album.component.html.
<kendo-grid
  [data]="view"
  [pageSize]="pageSize"
  [skip]="skip"
  [pageable]="true"
  (pageChange)="pageChange($event)"
  >
  .... Grid Content Omitted For Berevity ....
</kendo-grid>
Modify the src/app/album/album.compoment.ts file to handle the pageChange event by calling the getAlbums method again and trim the resulting array to the proper items for the current page.
import { Component, Input } from '@angular/core';
import { ItunesService } from '../shared/itunes.service';
import { GridDataResult, PageChangeEvent } from '@progress/kendo-angular-grid';
import { SortDescriptor, orderBy } from '@progress/kendo-data-query';

@Component({
  selector: 'app-album',
  templateUrl: './album.component.html',
  providers: [ItunesService]
})
export class AlbumComponent {

  view: GridDataResult;
  _artistId: number = 0;

  // controls grid paging settings
  private pageSize: number = 5;
  private skip: number = 0;

  @Input()
  set artistId(artistId: number) {
    this._artistId = artistId;

    // get the albums for this artist
    this.getAlbums();
  }
  get artistId() { return this._artistId }


  constructor(private itunesService: ItunesService) { }

  getAlbums() {
    this.itunesService.getAlbums(this.artistId).then((results: Array<any>) {
      this.view = {
        // slice the album result to get only the selected page of data
        data: results.slice(this.skip, this.skip + this.pageSize),
        total: results.length
      }
    });
  }

  // fires when the user changes pages in the grid
  protected pageChange(event: PageChangeEvent): void {
    this.skip = event.skip;
    this.getAlbums();
  }
}
The Grid now has paging support.
Displaying Detailed Track Results
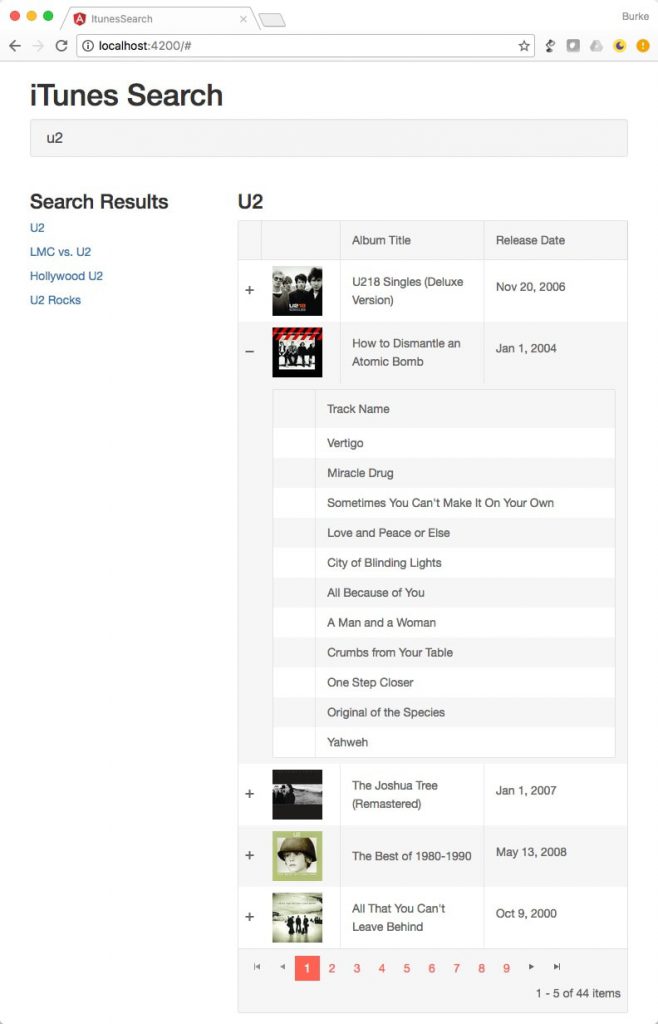
Each row has a little “+” symbol next to it indicating that you could expand the row to reveal more information. Right now, nothing happens. The desired behavior is to display all of the available tracks for the selected item. To do that, we’ll need a Tracks Component.
First, add a getTracks method to the src/app/shared/itunes.service.ts file which will return all of the tracks for a given Album ID.
public getTracks(albumId: number): Promise<any> {
  return this.jsonp.get(`${API.LOOKUP}callback=JSONP_CALLBACK&entity=song&id=${albumId}`)
  .toPromise()
  .then(data => {
    return data.json().results.filter(result => {
      return result.wrapperType == 'track';
    });
  })
  .catch(this.handleError)
}
Create the Tracks Component with the Angular CLI.
> ng generate component track
Open the src/app/track/track.component.html file and add the following markup.
<kendo-grid
      [data]="view"
      [scrollable]="'none'"
    >
  <kendo-grid-column width="50">
    <template kendoCellTemplate let-dataItem>
      <!-- Track Control Component Goes Here -->
    </template>
  </kendo-grid-column>
  <kendo-grid-column field="trackCensoredName" title="Track Name">
  </kendo-grid-column>
</kendo-grid>
Add the following code to the src/app/track/track.component.ts file. Note the use of the @Input parameter to pass the Album ID to the Tracks Component. This is the exact same feature that was used to pass the Artist ID from the Artist Component to the Album Component.
import { Component, OnInit, Input } from '@angular/core';
import { ItunesService } from '../shared/itunes.service';

@Component({
  selector: 'app-track',
  templateUrl: './track.component.html',
  styleUrls: ['./track.component.scss'],
  providers: [ItunesService]
})
export class TrackComponent implements OnInit {

  view: Array<any>

  @Input()
  set collectionId(collectionId: number) {
    this.getTracks(collectionId);
  }

  constructor(private itunesService: ItunesService) { }

  ngOnInit() {
  }

  private getTracks(collectionId: number) {
    this.itunesService.getTracks(collectionId).then(result => {
      this.view = result;
    });
  }

}
Now add the Tracks Component to the src/app/album/album.component.html file.
<kendo-grid
  [data]="view"
  [pageSize]="pageSize"
  [skip]="skip"
  [pageable]="true"
  (pageChange)="pageChange($event)"
  >
  <kendo-grid-column field="artworkUrl60" title=" " width="95">
    <template kendoCellTemplate let-dataItem>
      <img src="{{ dataItem.artworkUrl60 }}">
    </template>
  </kendo-grid-column>
  <kendo-grid-column field="collectionName" title="Album Title"></kendo-grid-column>
  <kendo-grid-column field="releaseDate" title="Release Date">
    <template kendoCellTemplate let-dataItem>
      <p>{{ dataItem.releaseDate | date }}</p>
    </template>
  </kendo-grid-column>
  <div *kendoDetailTemplate="let dataItem">
    <!-- Tracks Component -->
    <app-track [collectionId]="dataItem.collectionId"></app-track>
  </div>
</kendo-grid>
Playing the Audio
The iTunes API provides a URL to an audio sample for each track. The browser can use the Web Audio API to play these tracks.
Create a Player Component that will control the audio player for the application.
> ng generate component player
Add the following markup to the src/app/player/player.component.html file.
<audio #player="" style="display: none" (ended)="playerEnded()">
Add the following code to the src/app/player/player.component.ts file. This will handle setting the audio source (src) for the player, as well as handling what to do when a track sample stops finishes playing.
import { Component, OnInit, ViewChild } from '@angular/core';

@Component({
  selector: 'app-player',
  templateUrl: './player.component.html',
  styleUrls: ['./player.component.scss']
})
export class PlayerComponent implements OnInit {

  @ViewChild('player') playerRef;
  player: any;

  constructor() {}

  ngOnInit() {
    this.player = this.playerRef.nativeElement;
  }

  playerEnded() {
    // handle event
  }
}
Add the Player Component to src/app/app.component.html. There is only one audio control for the entire application. All tracks will use this audio player when the user clicks the ‘play’ icon next to a track.
<div class="container">
    <h1>iTunes Search</h1>
    <!-- Artist Component -->
  <app-artist></app-artist>
    <!-- Audio Player Component -->
  <app-player></app-player>
</div>
Next, create a Track Control Component that will create play/pause buttons for each track, and communicate with the Player Component.
> ng generate component track/track-control
Notice that this component is nested inside of the Track Component folder. This is due to the fact that, while not directly dependent on each other, they are very closely related and therefore logically belong in a hierarchical structure.
Add the following markup to the src/app/track/track-control/track-control.component.html file to display the play/pause icons using the Bootstrap icon font.
<div>
  <span *ngif="!isPlaying" class="glyphicon glyphicon-play" aria-hidden="true" (click)="playTrack()"></span>
  <span *ngif="isPlaying" class="glyphicon glyphicon-pause" aria-hidden="true" (click)="pauseTrack()"></span>
</div>
Add the code to the src/app/track/track-control/track-control.component.ts, which controls the state of the track (isPlaying), as well as the click events from the play/pause icons.
import { Component, OnDestroy, Input } from '@angular/core';

@Component({
  selector: 'app-track-control',
  templateUrl: './track-control.component.html',
  styleUrls: ['./track-control.component.sass']
})
export class TrackControlComponent {

  isPlaying: boolean = false;
  @Input() public track: any;

  constructor() { }

  playTrack() {
    this.isPlaying = true;
  }

  pauseTrack() {
    this.isPlaying = false;
  }

}
Now add the Track Control Component to the src/app/track/track.component.html file.
<kendo-grid
      [data]="view"
      [scrollable]="'none'"
    >
  <kendo-grid-column width="50">
    <template kendoCellTemplate let-dataItem>
      <!-- Track Control Component -->
      <app-track-control [track]="dataItem"></app-track-control>
    </template>
  </kendo-grid-column>
  <kendo-grid-column field="trackCensoredName" title="Track Name">
  </kendo-grid-column>
</kendo-grid>
At this point, each track will display a play/pause button. Each track also knows what it’s own URL is for it’s corresponding audio sample. However, the Track Control Component cannot yet communicate with the Player Component, so while the button changes from a playing to a paused state, no audio is actually played.
In order to facilitate this communication, we will use a shared service. Create a new service called Player Service.
> ng create service shared/player
The Player Service will contain some rxjs Subscriptions that other components can subscribe to. This allows components to trigger events and other components to respond to those events, even though they are completely unaware that the other component exists. For more information about communication via shared services, see the official Angular docs.
Add the following code to the src/app/player.service.ts file.
import { Injectable } from '@angular/core';
import { Subject } from 'rxjs/subject';

@Injectable()
export class PlayerService {

  private playTrackSource = new Subject<string>();
  private pauseTrackSource = new Subject();
  private trackEndedSource = new Subject();

  playTrack$ = this.playTrackSource.asObservable();
  pauseTrack$ = this.pauseTrackSource.asObservable();
  trackEnded$ = this.trackEndedSource.asObservable();

  playTrack(previewUrl: string) {
    this.playTrackSource.next(previewUrl);
  }

  pauseTrack() {
    this.pauseTrackSource.next();
  }

  trackEnded() {
    this.trackEndedSource.next();
  }

}
Inject the service into the src/app/player/player.component.ts file. This listens for when a track is selected and plays the file. It also stops playing a file if the user clicks the pause button. Lastly, it triggers an event when the sample is finished playing entirely.
import { Component, OnInit, ViewChild } from '@angular/core';
import { PlayerService } from '../shared/player.service';

@Component({
  selector: 'app-player',
  templateUrl: './player.component.html',
  styleUrls: ['./player.component.scss']
})
export class PlayerComponent implements OnInit {

  @ViewChild('player') playerRef;
  player: any;

  constructor(private playerService: PlayerService) {

    playerService.playTrack$.subscribe(previewUrl => {
      this.playTrack(previewUrl);
    });

    playerService.pauseTrack$.subscribe(() => {
      this.pauseTrack();
    })

  }

  ngOnInit() {
    this.player = this.playerRef.nativeElement;
  }

  playTrack(previewUrl) {
    this.player.src = previewUrl;
    this.player.play();
  }

  pauseTrack() {
    this.player.pause();
  }

  playerEnded() {
    this.playerService.trackEnded();
  }
}
Modify the src/app/track/track-control/track-control.component.ts file to also listen to a trigger track events via the service.
import { Component, OnInit, OnDestroy, Input } from '@angular/core';
import { PlayerService } from '../../shared/player.service';
import { Subscription } from 'rxjs/subscription';

@Component({
  selector: 'app-track-control',
  templateUrl: './track-control.component.html',
  styleUrls: ['./track-control.component.sass']
})
export class TrackControlComponent implements OnInit, OnDestroy {

  isPlaying: boolean = false;
  @Input() public track: any;

  playSub: Subscription;
  endedSub: Subscription;

  constructor(private playerService: PlayerService) {
    this.playSub = playerService.playTrack$.subscribe(
      track => {
        this.isPlaying = false;
      });

    this.endedSub = playerService.trackEnded$.subscribe(() => {
      this.isPlaying = false;
    })
  }

  ngOnInit() {
  }

  ngOnDestroy() {
    // clean up any subscriptions we aren't using anymore
    this.playSub.unsubscribe();
    this.endedSub.unsubscribe();
  }

  playTrack() {
    this.playerService.playTrack(this.track.previewUrl);
    this.isPlaying = true;
  }

  pauseTrack() {
    this.playerService.pauseTrack();
    this.isPlaying = false;
  }

}
Lastly, inject the service into the src/app/app.component.ts. This component is top-level for both the Player Component and Track Control Component. Injecting the service here automatically injects it anywhere further down the component tree if it is referenced.
import { Component } from '@angular/core';
import { PlayerService } from './shared/player.service';

@Component({
  selector: 'app-root',
  templateUrl: './app.component.html',
  styleUrls: ['./app.component.scss'],
  providers: [PlayerService]
})
export class AppComponent {

}
Now the app will play music when the play button is clicked next to a track. In addition, playing any other track while a track is playing will set the correct state for the play button on both the newly playing track, as well as the one that was playing before. This is how Angular 2 manages rather complex state.
Get The Kendo UI for Angular components
In this article, you’ve seen how to populate a grid with data, how to use paging and even how to wire up detail grids. The Grid is capable of much and more than just this. I highly recommend checking out the Grid tutorials.
You can see the finished app here. All of the code from this article is available on GitHub. Follow the README instructions to get it setup and running on your own machine.

Burke Holland
Burke Holland is a web developer living in Nashville, TN and was the Director of Developer Relations at Progress. He enjoys working with and meeting developers who are building mobile apps with jQuery / HTML5 and loves to hack on social API's. Burke worked for Progress as a Developer Advocate focusing on Kendo UI.

