Build a Dynamic Breadcrumb Trail with Kendo UI for Angular

Summarize with AI:
Learn how to provide users with pain-free navigation throughout your application with a dynamic breadcrumb trail from Kendo UI for Angular.
As a developer, you build products, and navigation plays a crucial role in enhancing the user experience of a product. If you don’t provide an easy way to navigate within the app, users can waste time or even overlook important features.
A simple menu is often not enough. It may not always provide a clear picture of the user’s current position in the application or provide a comfortable way to navigate back to previous pages.
One great solution is to provide a breadcrumb trail. This allows users to see their current location within the application and easily navigate back to previous sections. However, building one from zero could be a daunting task.
The Progress Kendo UI for Angular Breadcrumb simplifies adding a breadcrumb trail to your application. But how exactly does it enhance your application? Let’s find out with a real-world scenario.
Scenario for Sample Application
Imagine an NBA web application that covers information about team profiles, players and statistics. Navigating through this application can be a challenging task for users if you don’t provide a breadcrumb trail.
For example, let’s say that a user wants to view player statistics per team. But to switch to stats for another player, they have to return to the team page and select a new player—an inefficient and time-consuming process.
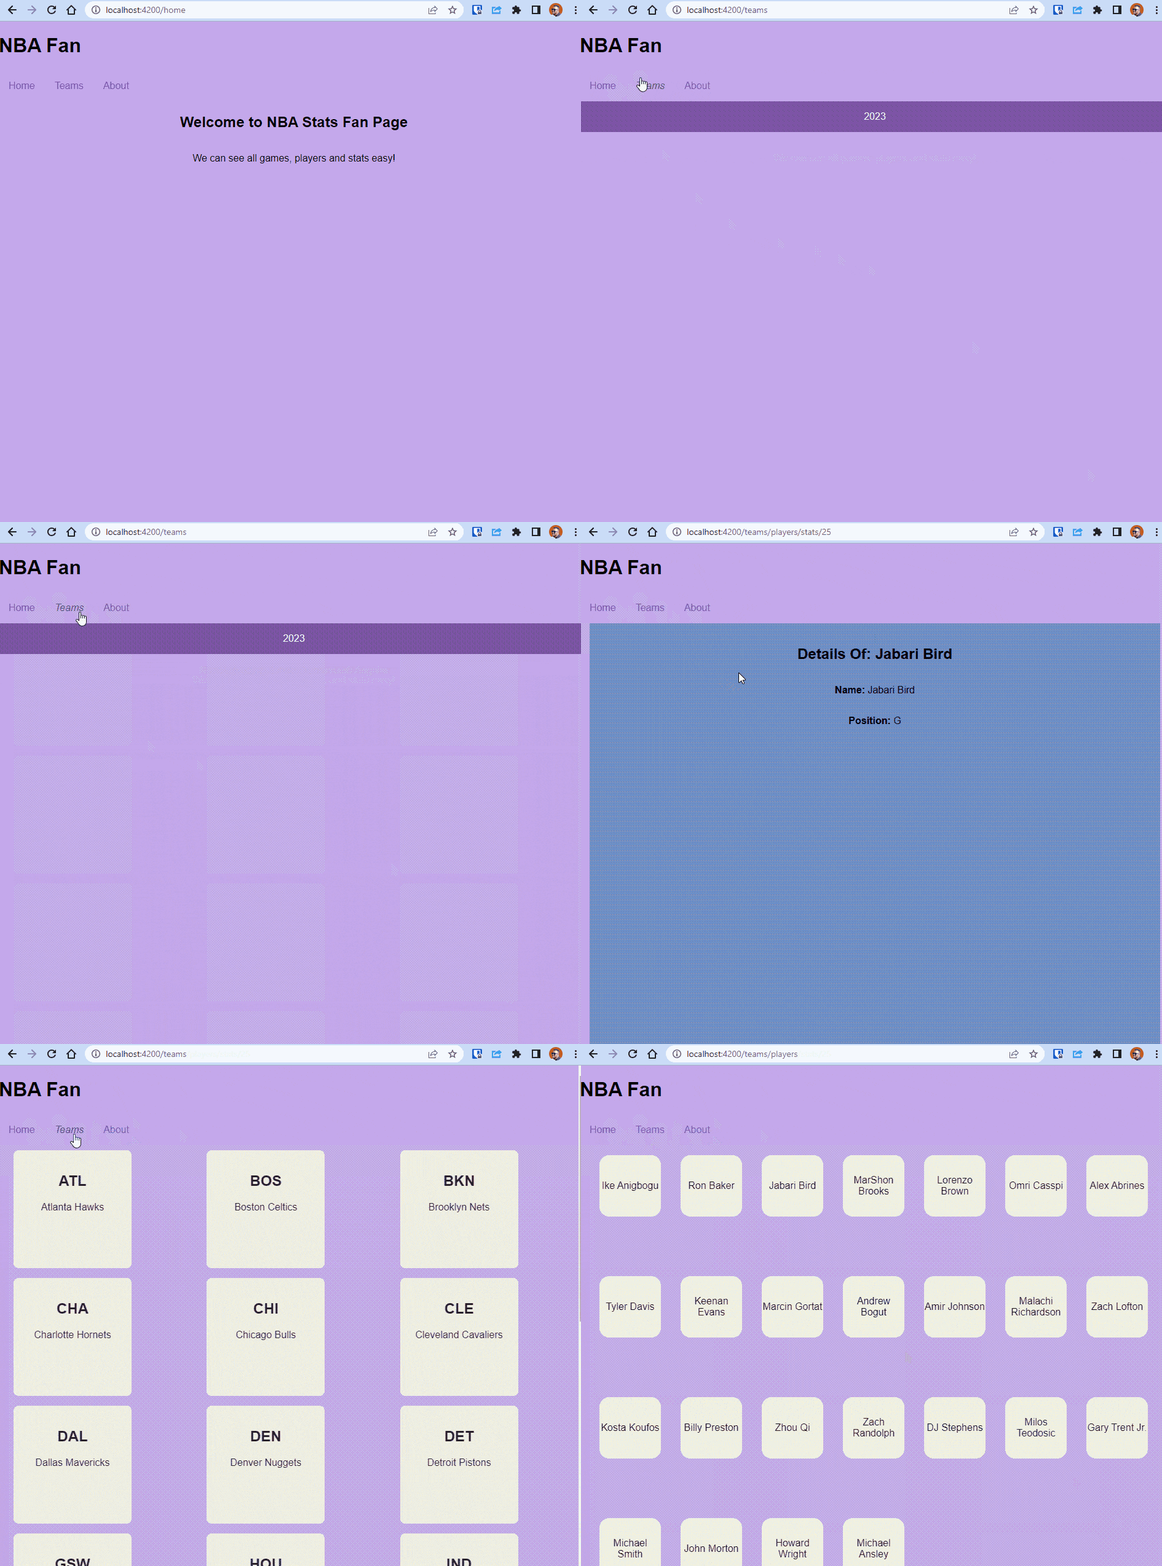
To address this issue, we’ll utilize the Kendo UI for Angular Breadcrumb component. It effortlessly displays a breadcrumb trail, indicating the user’s current location and facilitating navigation back to previous sections.
Implementing this solution involves these steps:
- Installing Kendo UI for Angular Breadcrumb.
- Creating a Breadcrumb Service.
- Implementing Kendo UI for Angular Breadcrumb.
- Making the Kendo UI for Angular Breadcrumb dynamic using the BreadcrumbService.
Let’s go!
Installing the Kendo UI for Angular Breadcrumb
To install the Kendo UI for Angular Breadcrumb in your app, run the following command in the terminal:
ng add @progress/kendo-angular-navigation
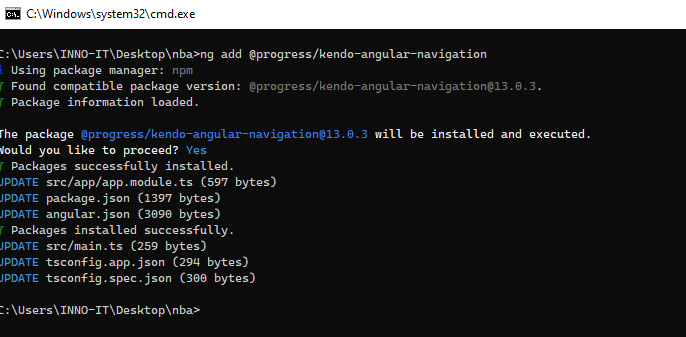
This command automatically adds the NavigationModule to the app.module file, making the Kendo UI for Angular Breadcrumb available for use.
import { NavigationModule } from '@progress/kendo-angular-navigation';

@NgModule({
   imports: [
     NavigationModule
   ],
   ...
 })
 export class AppModule { }
Don’t worry if your app has special constraints, such as feature modules or a module-less structure. Kendo UI will still work. You can check the manual installation instructions for each component group.
Creating a BreadcrumbService
The BreadcrumbService is responsible for managing the breadcrumb trail. It keeps track of the breadcrumb items and provides methods to add, update and remove items as the user navigates through the application. Here’s an overview of the BreadcrumbService code:
import {Injectable} from '@angular/core';
 import {BehaviorSubject} from "rxjs";

@Injectable()
 export class BreadCrumbService {

    items$ = new BehaviorSubject<any>([
         {
             text: 'Home',
             title: 'home',
             path: ''
         }
     ])

    addChild(item: any) {
         const currentItems = this.items$.value;
         if (currentItems.some((p: any) => p.title !== item.title)) {
             this.items$.next([...currentItems, item]);
         }
     }

    addParent(item: any) {
         this.items$.next([item]);
     }

    updateBreadcrumb(item: any) {
         const currentItems = this.items$.value;
         if (currentItems.some((p: any) => p.title === item.title)) {
             currentItems.pop();
         }
         this.items$.next([...currentItems]);
     }
 }
The BreadcrumbService has the following methods:
addChild(item: any): Adds a new breadcrumb item to the trail after checking if it already exists.addParent(item: any): Replaces the entire breadcrumb trail with a new item. It’s typically used to set the initial breadcrumb item.updateBreadcrumb(item: any): Updates the breadcrumb trail by removing the last item and adding a new one, keeping the breadcrumb trail current as users navigate through the application.items$ property: This is a BehaviorSubject that holds the current state of breadcrumb items. Subscribe to it to receive updates whenever breadcrumb items change.
The service is ready and the Kendo UI for Angular Breadcrumb is installed, so let’s play with them.
Using the Breadcrumb Component
To display the Kendo UI for Angular Breadcrumb in our component, subscribe to the items$ property of the Breadcrumb Service. You can also manage a user’s click events on the breadcrumb items.
In the component class, inject the BreadcrumbService and the Router. When a breadcrumb item is clicked, update the breadcrumb trail using BreadcrumbService’s addParent method and navigate to the specified path using the Router.
  #breadcrumbService = inject(BreadCrumbService);
   items$ = this.#breadcrumbService.items$;
   #router = inject(Router);

  public onItemClick(item: any) {
     this.#breadcrumbService.addParent(item);
     this.#router.navigate([item.path]);
   }
In the HTML template, subscribe to items$ to get the breadcrumb items and call onItemClick when an item is clicked. The final code will look like this:
 <ng-container *ngIf="items$ | async as items">
         <kendo-breadcrumb
           (itemClick)="onItemClick($event)"
           [items]="items"
         ></kendo-breadcrumb>
  </ng-container>
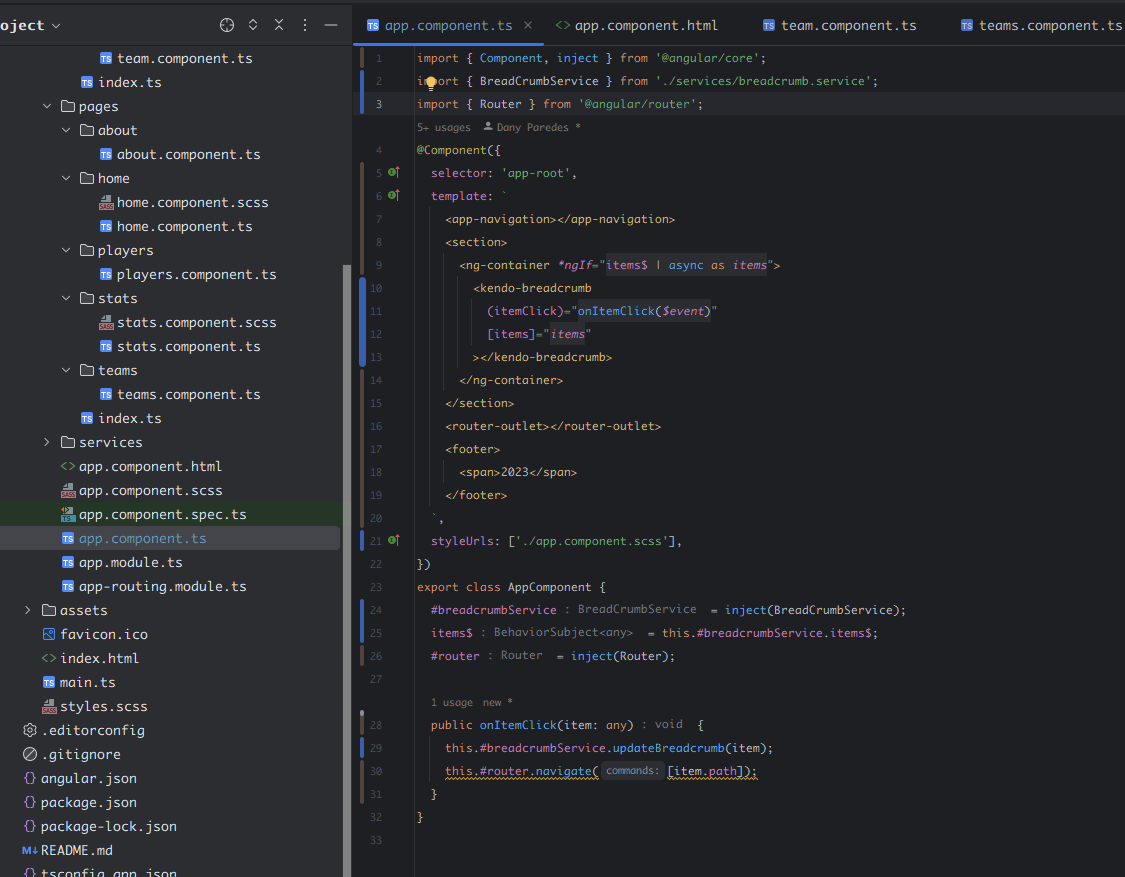
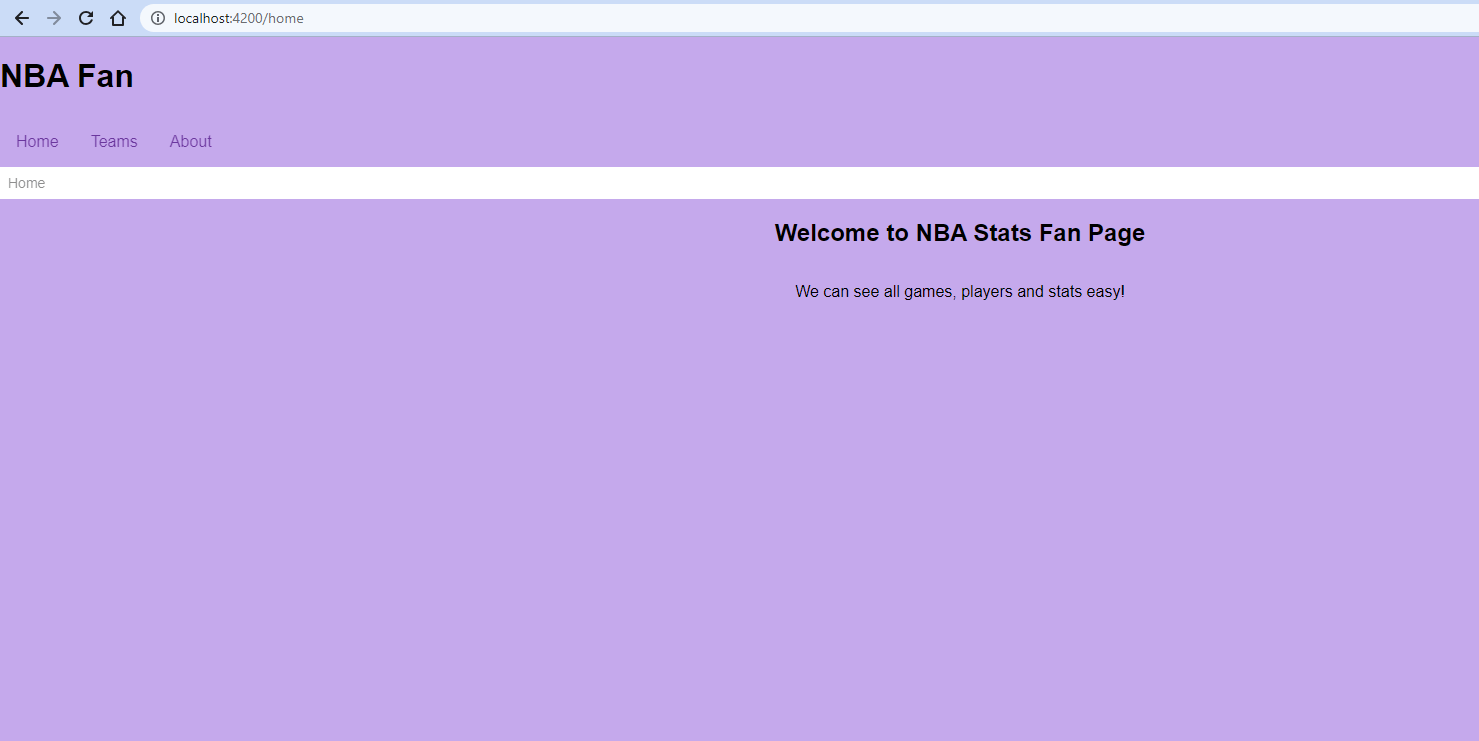
Save the changes, and the Kendo UI for Angular Breadcrumb will appear with the initial Home item.
Adding Dynamic Items with the Breadcrumb Service
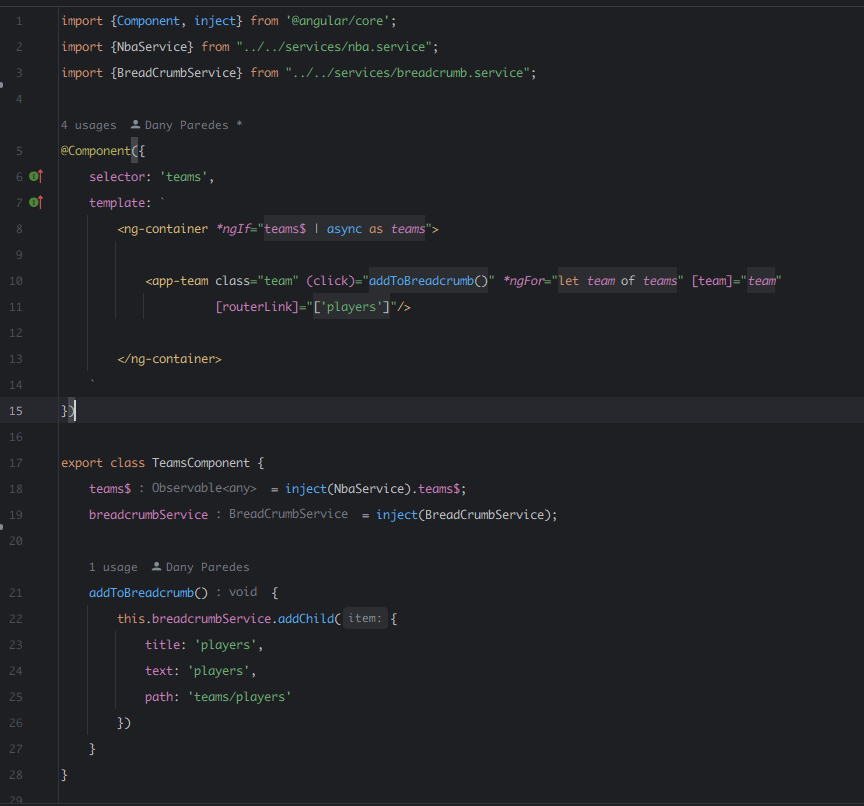
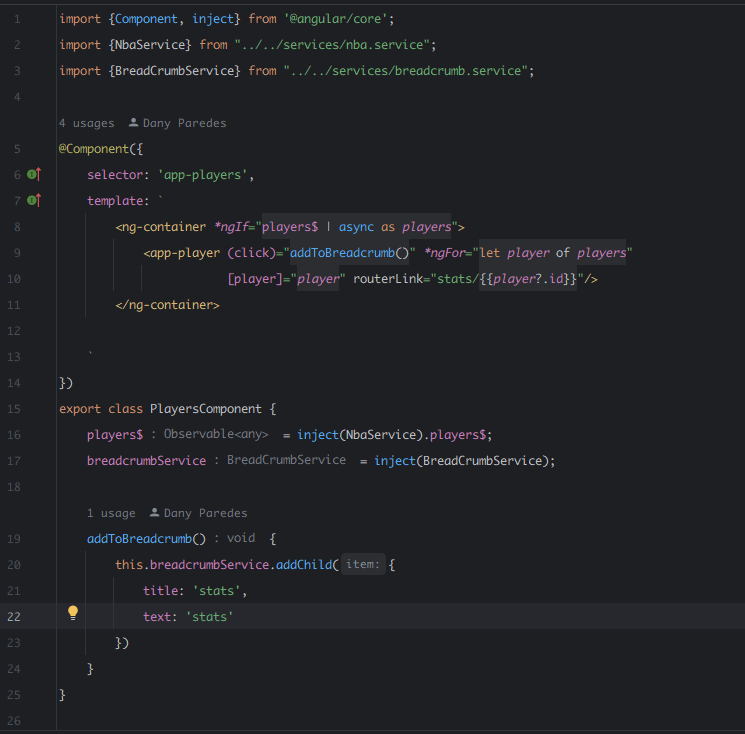
To dynamically update the Kendo UI for Angular Breadcrumb as users navigate between pages, you need to use the BreadcrumbService in the respective components.
For instance, when a user clicks on a team in the Team component, you can call the addChild method of the BreadcrumbService to add the team to the breadcrumb trail. Similarly, you can add a player to the trail when a user selects one in the Player component.
The BreadcrumbService ensures that duplicate items are not added to the trail. It keeps track of the breadcrumb items and updates them accordingly.
The final code looks like this:
Teams
Players
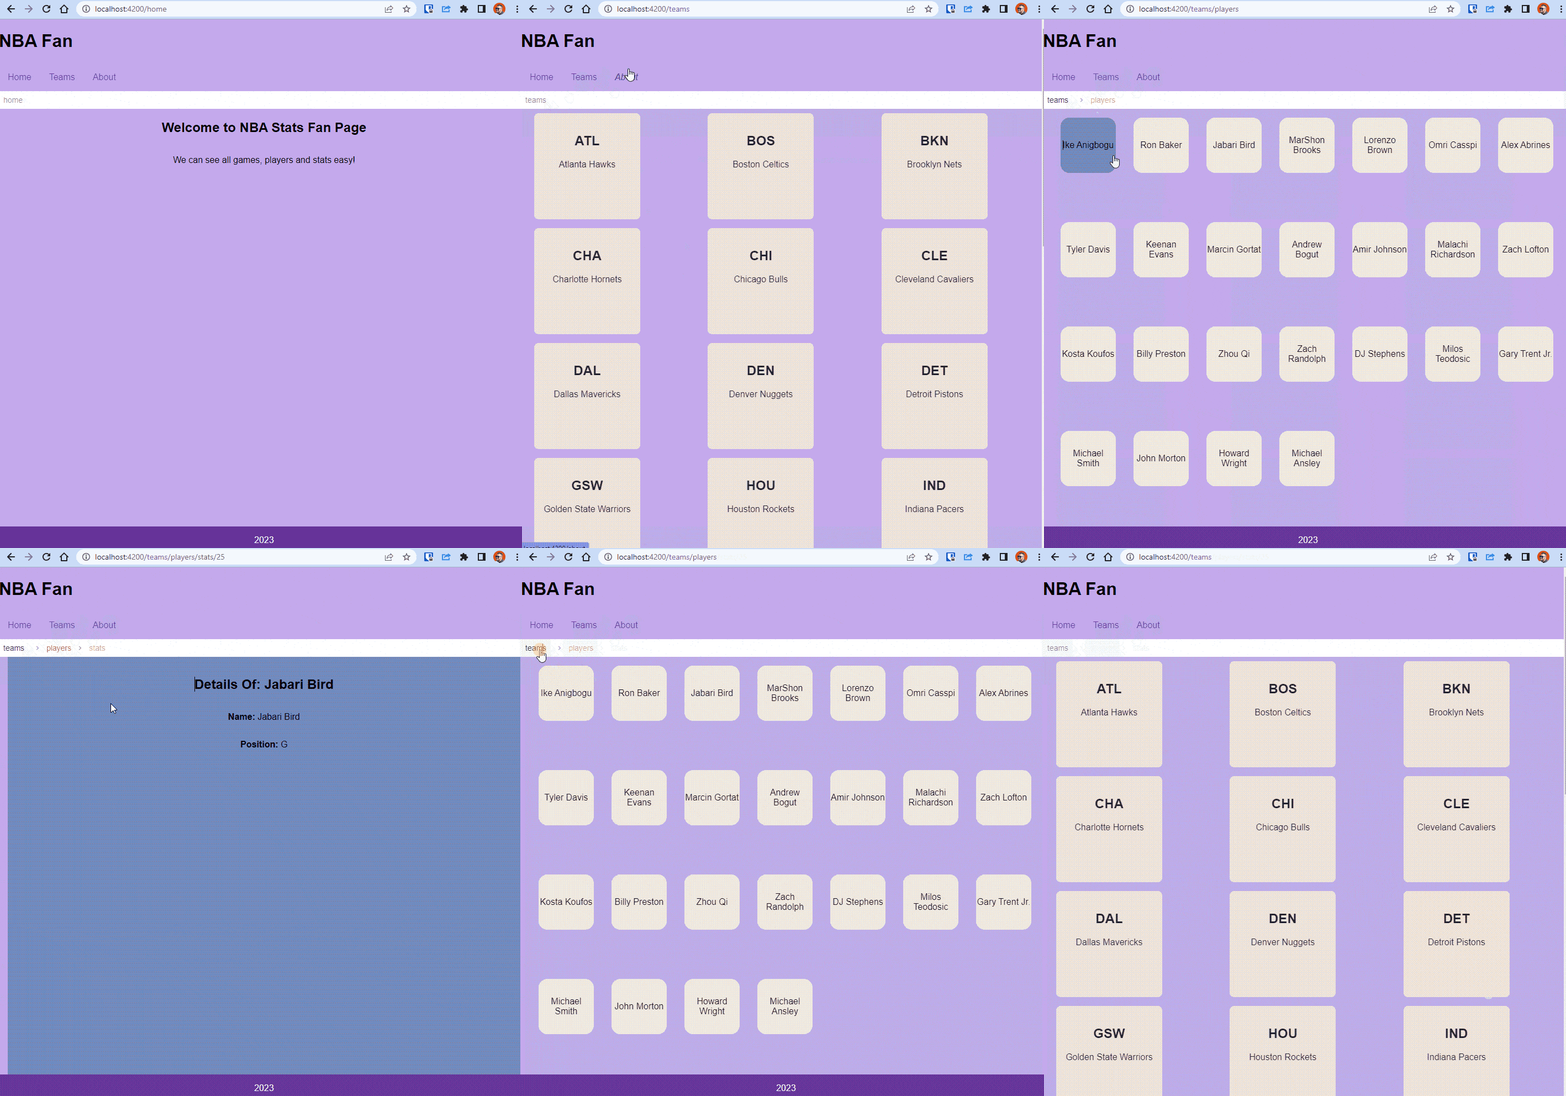
Finally, with these changes saved and implemented, your users can now easily navigate through your application using a dynamic breadcrumb trail. Save your changes and reload!
Yay! You now have a dynamic breadcrumb and our users can navigate easy in our application.
Wrapping up
In this article, you explored how to implement dynamic breadcrumbs using the Kendo UI for Angular Breadcrumb. You combined it with the BreadcrumbService to make it dynamic.
The Kendo UI for Angular Breadcrumb component gives users a clear understanding of their current location within your application. Providing an easy way to navigate back to previous sections will significantly enhance the user experience of your applications.
For more examples and customization options, refer to the official documentation. Remember, you can try Kendo UI for free to explore its full potential.
Check out the source code for this article’s tutorial on GitHub.

Dany Paredes
Dany Paredes is a Google Developer Expert on Angular and Progress Champion. He loves sharing content and writing articles about Angular, TypeScript and testing on his blog and on Twitter (@danywalls).

