Blazor SSR Gets Auto Render Mode in the Latest .NET 8 Preview

Summarize with AI:
The final .NET 8 preview (before the release candidates start rolling out) brings a much-hailed feature—Auto render mode. Now you can run your interactive components using Server for that fast initial load, before switching (automatically) to WASM once it’s finished loading in the background.
The next .NET 8 release will be the first of a couple of release candidates but, just before that lands in September, there’s time for one final preview release.
Preview 7 brings support for plain old HTML forms, an option to break large forms down into separate components, plus a nifty Auto render mode for your interactive components (that uses the built-in advantages of both
Blazor Server and Blazor WASM to provide a seamless experience for your users).
Here are the highlights!
Any Form Will Do
The first new change in this release is that you can now use regular HTML forms when rendering your Blazor components using server-side rendering (SSR). With SSR, your component is rendered on the server, and plain old HTML returned to the browser.
Earlier previews made it possible to use Blazor’s Edit Forms to then accept user input and post it to your components. Now with Preview 7, you can use standard HTML forms to achieve the same result.
Here’s the form we explored in a previous release (using Edit Forms) updated to use a regular HTML form instead.
@page "/CustomerInviteHTMLForm"

<form method="post" @formname="invite" @onsubmit="InviteCustomer" class="col-md-4">
    <div class="mb-2">
        <label for="firstName" class="form-label">First Name:</label>
        <InputText id="firstName" class="form-control" @bind-Value="CustomerInvite.FirstName"/>
    </div>
    <div class="mb-2">
        <label for="firstName" class="form-label">Email:</label>
        <InputText id="email" class="form-control" @bind-Value="CustomerInvite.Email"/>
    </div>
    <div class="mb-2">
        <button type="submit" class="btn btn-primary">Invite</button>
    </div>
    <AntiforgeryToken />
</form>

@if (customerInvited)
{
    <div>
        <span>Customer Invited - Ask them to check their inbox to complete the signup process.</span>
    </div>
}
It’s now required (by default) to wire up anti-forgery tokens when submitting form data using forms and Razor components.
This will be handled automatically if you use an EditForm, but in this case, because we’re using a standard HTML form, we need to include the AntiforgeryToken ourselves.
This will add a token to the form data when the form is submitted, which the component will then check when it handles that submitted form data.
Here’s the UI code for our form.
@code {

    [SupplyParameterFromForm]
    public CustomerInvite CustomerInvite { get; set; } = new();

    bool customerInvited = false;

    private void InviteCustomer()
    {
        Console.WriteLine("Inviting Customer: " + CustomerInvite.Email);
        customerInvited = true;
        CustomerInvite = new();
    }

}
When the form is submitted, ASP.NET will automatically bind the submitted data to the CustomerInvite property.
Notice how we’ve specified a formname for our form. As of Preview 7, each form is required to have a unique form name so ASP.NET can route incoming
submitted form data to the correct component.
Here’s how this all looks when the form is submitted:
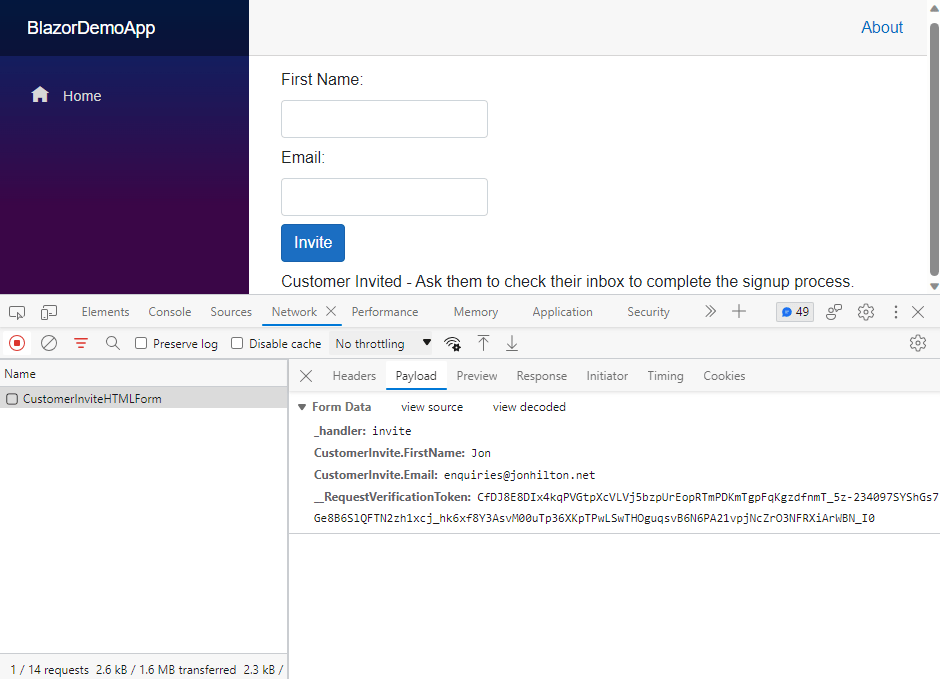
Notice the _handler field is set to the formname we specified, and the __RequestVerificationToken has been populated thanks to the AntiforgeryToken component.
Scope Form Names to Avoid Conflicts
Form names need to be unique when submitting forms to the server like this (so ASP.NET can route your form data to the correct component), but if you do want to use the same name for multiple forms, there is a way to do it.
You’ll need to use the new FormMappingScope component to provide a sort of parent identifier.
InviteCustomer.razor
@page "/InviteCustomer"

<FormMappingScope Name="customer">
	<InviteHTMLForm />
</FormMappingScope>
Here I’ve created a new page which declares an instance of the FormMappingScope component, and uses it to provide a parent identifier for any forms contained within.
Then I’ve declared an instance of the HTML form we saw above (for inviting customers).
Now when we submit that form we’ll see a value for _handler which is set to a combination of the parent and form names.
![Form Data The browser dev tools showing a POST request to InviteCustomer. The submitted payload includes fields from the form plus a value for _handler which is set to [customer]invite](https://d585tldpucybw.cloudfront.net/sfimages/default-source/blogs/2023/2023-08/customer-invite-post.png?sfvrsn=5b47e6f2_3)
Break Those Forms Down
If you’ve spent any time building line-of-business apps with .NET, you’ll know your forms can sometimes become a little, well, on the large side!
This can be unwieldy to work with (and also prevents reuse if all the fields are declared in one giant form). In this preview, we get the option to encapsulate parts of the form in separate components.
For example, say we’re building a checkout form, and want the user to be able to enter their address.
<EditForm Model="Command" method="post" OnValidSubmit="SubmitOrder" FormName="checkout">
    <DataAnnotationsValidator/>

    <h4>Bill To:</h4>
    <div>
        <label>Name</label>
        <InputText @bind-Value="Command.BillingAddress.Name"/>
    </div>
    <div>
        <label>Address 1</label>
        <InputText @bind-Value="Command.BillingAddress.AddressLine1"/>
    </div>
    <div>
        <label>Address 2</label>
        <InputText @bind-Value="Command.BillingAddress.AddressLine2"/>
    </div>
    <div>
        <label>City</label>
        <InputText @bind-Value="Command.BillingAddress.City"/>
    </div>
    <div>
        <label>Post Code</label>
        <InputText @bind-Value="Command.BillingAddress.PostCode"/>
    </div>
    <button type="submit">Place Order</button>
    <ValidationSummary/>
</EditForm>
@code {

    [SupplyParameterFromForm]
    public PlaceOrderCommand? Command { get; set; }

}
Notice how all the address fields are hardwired to properties a couple of levels down in the PlaceOrderCommand:
<InputText @bind-Value="Command.BillingAddress.AddressLine1"/>
This effectively means we’re very tied in to the specific structure of that PlaceOrderCommand. But what if we wanted to present exactly the same fields for the shipping address?
We could just copy and paste the fields, but then we’d be looking at a giant form, with lots of very similar looking fields pointing at slightly different paths in the underlying model.
This is the kind of thing that turns out to be quite brittle when you’re maintaining an app, and can lead to accidental regressions as you continue to evolve the form over time.
.NET 8 brings a neat way to encapsulate some of the form elements into a separate component.
AddressEntry.razor
@inherits Editor<PlaceOrderCommand.Address>

<div>
    <label>Name</label>
    <InputText @bind-Value="Value.Name"/>
</div>
<div>
    <label>Address 1</label>
    <InputText @bind-Value="Value.AddressLine1"/>
</div>
<div>
    <label>Address 2</label>
    <InputText @bind-Value="Value.AddressLine2"/>
</div>
<div>
    <label>City</label>
    <InputText @bind-Value="Value.City"/>
</div>
<div>
    <label>Post Code</label>
    <InputText @bind-Value="Value.PostCode"/>
</div>
Notice how this doesn’t know anything about billing or shipping addresses, it just interacts with the (shared) Address object.
Now we can include as many instances of AddressEntry as we like in our checkout form.
<EditForm Model="Command" method="post" OnValidSubmit="SubmitOrder" FormName="checkout">
    <DataAnnotationsValidator/>

    <h4>Bill To:</h4>
    <AddressEntry @bind-Value="Command.BillingAddress"/>

    <h4>Ship To:</h4>
    <AddressEntry @bind-Value="Command.ShippingAddress"/>

    <button type="submit">Place Order</button>
    <ValidationSummary/>
</EditForm>
Auto Render Mode is Here!
With .NET 8, you’ll be able to use server-side rendering for large parts of your app, with the option to make specific components interactive using Blazor Server or WASM.
But what if you want to use WASM, but don’t want users to have to wait while your app and the .NET runtime are downloaded to the user’s browser? It would be nice if you could use Blazor Server initially (so the component becomes interactive right away), then use WASM once the client download has finished.
That’s exactly what Auto render mode does. It uses WebAssembly rendering if the .NET WebAssembly runtime can be loaded quickly (within 100ms).
This will work if the runtime was previously downloaded and cached (or your users have a super-fast network connection).
If it can’t be loaded quickly enough, the Auto render mode will fall back to using Blazor Server (using socket connections) while the .NET WebAssembly runtime is downloaded in the background.
Now, inevitably, this does add a little bit of complexity to your components. Any component you want to use Auto render mode will need to be configured to work with both WASM and Server.
This means it will need to live in the Client project for your app, and probably use an interface for interacting with the backend (so you can have two implementations: one which goes to the DB/backend services direct,
and another which goes via a Web API for use with WASM).
<Banner Text="Hi from Blazor Web Assembly" @rendermode="@RenderMode.Auto"/>
Once you’ve got this set up the user experience is seamless. Here’s how it looks with a simulated mobile connection:
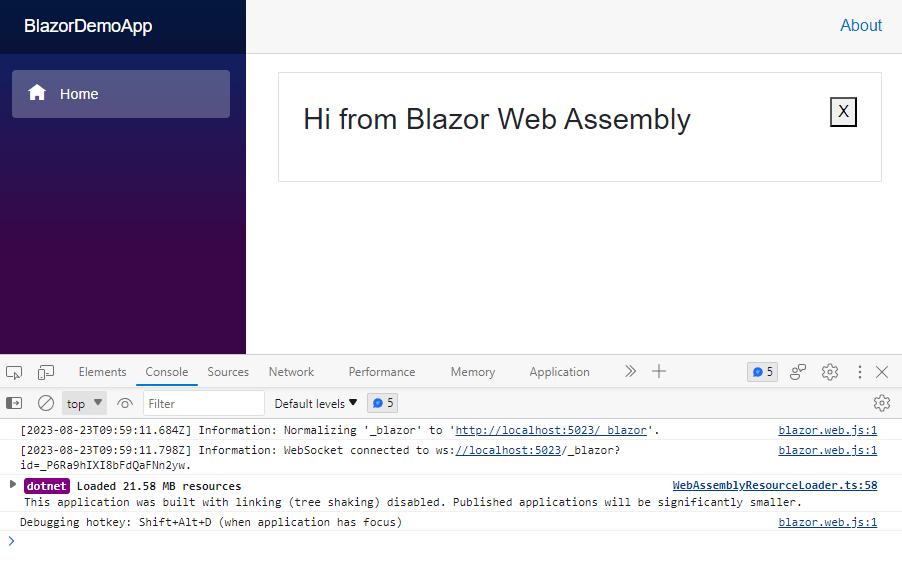
Notice how the web socket connection was used initially, then WASM loaded and took over rendering after that.
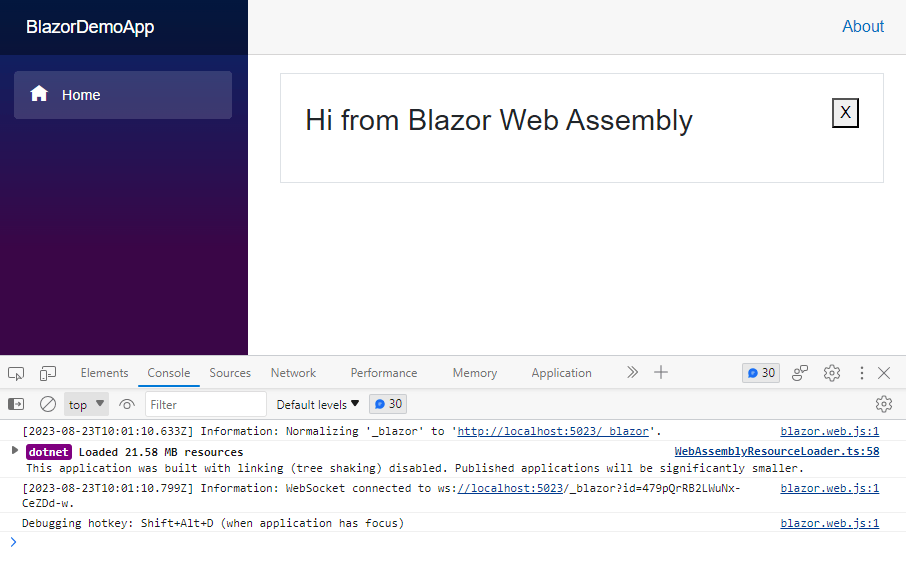
Now, when we refresh this page, WASM loads quickly, avoiding the need to use Blazor Server at all.
Root-Level Cascading Values
Cascading values are useful when you want to pass data down the component tree, from a parent component to a child which might be several layers deep in the tree.
For example, say you have a dashboard which can have multiple widgets. Now imagine the user has set some preferences (like theme, or units for currency, weights, etc.)
You could pass those preferences “down” the tree using regular parameters, but you might end up passing them through several components even though only the “bottom” component actually needs them (in this case, the SalesReport component needs access to the preferences, but you’d have to pass it to SalesSummaryWidget which then passes it along).
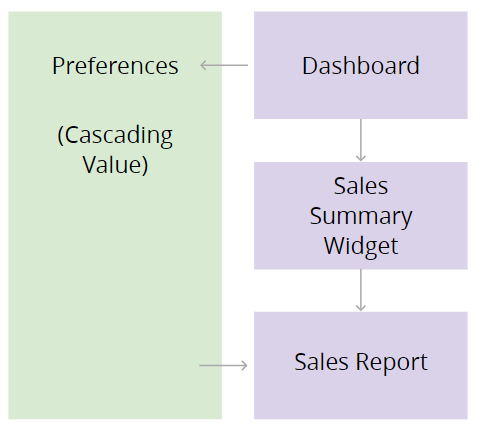
Cascading values enable you to access that Preferences data from anywhere down the tree, without passing it through lots of components in the middle.
In Dashboard you can set the value like this:
Dashboard.razor
@page "/Dashboard"

<h3>Dashboard</h3>

<CascadingValue Value="preferences">
    <SalesSummaryWidget/>
</CascadingValue>
@code {

    Preferences preferences = new() { Theme = "Dark" };

}
Then access it directly from the SalesReport component.
SalesReport.razor
<h3>SalesReport</h3>

Your theme is: @Preferences.Theme
@code {

    [CascadingParameter]
    private Preferences Preferences { get; set; }

}
With SSR and the new option to enable interactive components (using Server or WASM), there is a gap in how this works.
Specifically, when you render components interactively, they don’t receive cascading values from the parent component.
For example, say we decided to render the SalesReport using Blazor Server. Everything else is still using SSR.
SalesReport.razor
@attribute [RenderModeServer]

<h3>SalesReport</h3>

@if (Preferences == null)
{
    <p>Uh oh, no preferences!</p>
}
else
{
    <p>Your theme is: @Preferences.Theme</p>
}

@code {

    [CascadingParameter]
    private Preferences? Preferences { get; set; }

}
When we visit /Dashboard, the SalesReport component is rendered using Blazor Server and Preferences is null.
The solution comes from a new option to register root-level cascading values which are then available to both SSR rendered components and those rendered using Server/WASM.
Program.cs
builder.Services.AddCascadingValue(sp => new Preferences { Theme = "Dark" });
Now every component in our app, including those which are running interactively, have access to the Preferences value value via [CascadingParameter].
This is specifically useful where you have global/application level state (like preferences or auth state) which every component needs to access.
EmptyContent Parameter for Virtualize
Finally, a small quality-of-life improvement to virtualization.
You can use the Virtualize component to fetch data in the background when scrolling through large amounts of data (for example in a grid view or list).
There is now an EmptyContent parameter that can be used to show content when the ItemsProvider (which fetches data for the virtualization) returns zero items.
In Summary
.NET 8 is hurtling toward Release Candidate status, and this final preview rounds off the sharp edges of the newly introduced features.
It’s now possible to build entire applications using SSR and Forms with a little bit of interactivity where you need it (using interactive components which load seamlessly using Server or WASM depending on network conditions).

Jon Hilton
Jon spends his days building applications using Microsoft technologies (plus, whisper it quietly, a little bit of JavaScript) and his spare time helping developers level up their skills and knowledge via his blog, courses and books. He's especially passionate about enabling developers to build better web applications by mastering the tools available to them. Follow him on Twitter here.

