.NET 8 Preview 5 Combines Upcoming Blazor Changes in Handy New Project Template

Summarize with AI:
Now, with Preview 5, we get a handy new project template which pulls together all the .NET 8 changes for Blazor, plus the ability to make specific components “interactive.” Let’s take a look.
Microsoft is forging ahead with its proposed changes for Blazor in .NET 8.
In the previous preview releases, if you wanted to take advantage of things like server-side rendering and streaming rendering, you had to configure the various moving parts yourself.
Now, with Preview 5, we get a handy new project template which pulls all that together, plus the ability to make specific components “interactive.”
Here are the highlights:
New Blazor Project Template
The new project template includes the plumbing you need to enable server-side, and streaming, rendering for your Blazor app.
A quick recap:
Server-side rendering enables you to define your web UI as Blazor components, but have them rendered “statically” on a server. The resulting HTML is then sent back to the user’s browser.
With this approach, the component isn’t interactive. It’s rendered once, and once only, on the server.
Streaming rendering makes it possible to return partial states during this process.
For example, if you want to render your Blazor components on the server but show a loading indicator while content is being loaded (say from a database, or backend API).
Streaming rendering enables you to return an initial loading indicator while the backend operation completes then, once the data is available to render the rest of the page and stream it to the browser (where the newly rendered HTML will replace the loading indicator).
Check out this post for more details on these two technologies.
You can use the new project template from the command line, or Visual Studio:
dotnet new blazor -o BlazorWebApp

The resulting application has a couple of pages:
- Index.razor
- ShowData.razor
Here’s Index.razor:
@page "/"

<PageTitle>Index</PageTitle>

<h1>Hello, world!</h1>

Welcome to your new app.
If you’ve worked with Blazor before, this will look familiar.
Hit F5 to launch the web app in your browser, where that feeling of familiarity continues!

The difference lies in how these pages are working “under the hood.”
When you visit these pages (Home or Fetch data), a request is sent to the server. The server routes this request to the relevant Blazor component.
The component is then rendered (on the server) and the resulting HTML is sent back to the browser.
This all works because ASP. NET can now route requests to your Blazor components …
Blazor Routing on the Server
Preview 5 brings integration of Blazor routing with endpoint routing, and means you can use Blazor routing to route requests to components like this one:
ContactUs.razor
@page "contact"

<h2>Contact Us</h2>
But still route requests to other resources (like MVC controllers, Razor Pages) in the same project:
[ApiController]
[Route("[controller]")]
public class SalesController : ControllerBase
{
    [HttpGet]
    public IActionResult Index()
    {
        var sales = GetDemoSales();
        return Ok(sales);
    }
}
In this case, a request to /contact would return the rendered ContactUs component.
A request to /sales would return sales data as JSON.
The plumbing for this lives in Program.cs.
// This is included in the new Blazor project template
app.MapRazorComponents<App>();

// I added these to enable routing to controllers
app.UseRouting();
app.MapControllers();
The call to MapRazorComponents ensures incoming requests can be routed to the App component which, in turn, uses a standard Blazor router to route the request to the relevant component (if found):
App.razor
<Router AppAssembly="@typeof(App).Assembly">
     ...
</Router>
Streaming Rendering
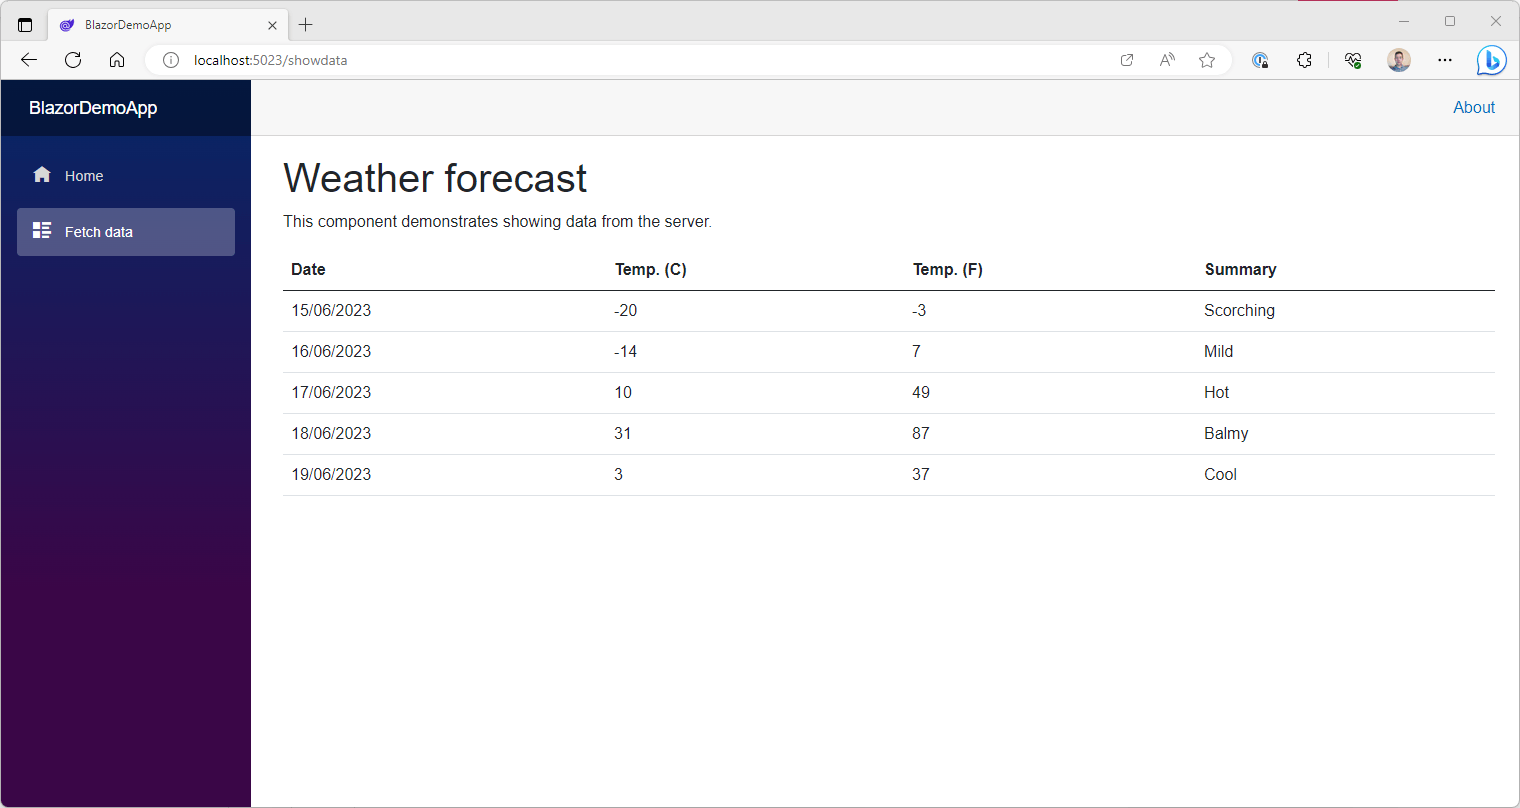
The ShowData.razor page demonstrates both server-side rendering and streaming rendering.
Server-side rendering happens automatically when requests are routed to your Blazor components.
You can enable Streaming Rendering using the new StreamRendering attribute.
@page "/showdata"
@attribute [StreamRendering(true)]

@if (forecasts == null)
{
    <p><em>Loading...</em></p>
}
else
{
    <table class="table">
        <thead>
            <tr>
                <th>Date</th>
                <th>Temp. (C)</th>
                <th>Temp. (F)</th>
                <th>Summary</th>
            </tr>
        </thead>
        <tbody>
            @foreach (var forecast in forecasts)
            {
                <tr>
                    <td>@forecast.Date.ToShortDateString()</td>
                    <td>@forecast.TemperatureC</td>
                    <td>@forecast.TemperatureF</td>
                    <td>@forecast.Summary</td>
                </tr>
            }
        </tbody>
    </table>
}

...
With this, when the user requests /showdata, they’ll first see the Loading… text.
Then, when the network request to fetch data has completed, they’ll see the weather data table.
Making Individual Components Interactive
Server-side rendering is all well and good, but it does mean the user can’t interact with the component after it’s been rendered on the server (and HTML returned to the browser).
You may want some of your components to be interactive and, with this release, you can do this on a component-by-component basis—in effect, enabling islands of interactivity on your pages.
As of Preview 5, you can make a component interactive using Blazor Server (with Blazor WASM to come).
First, you need to add required services in Program.cs:
builder.Services.AddRazorComponents()
    .AddServerComponents();
By itself, this won’t make our components interactive.
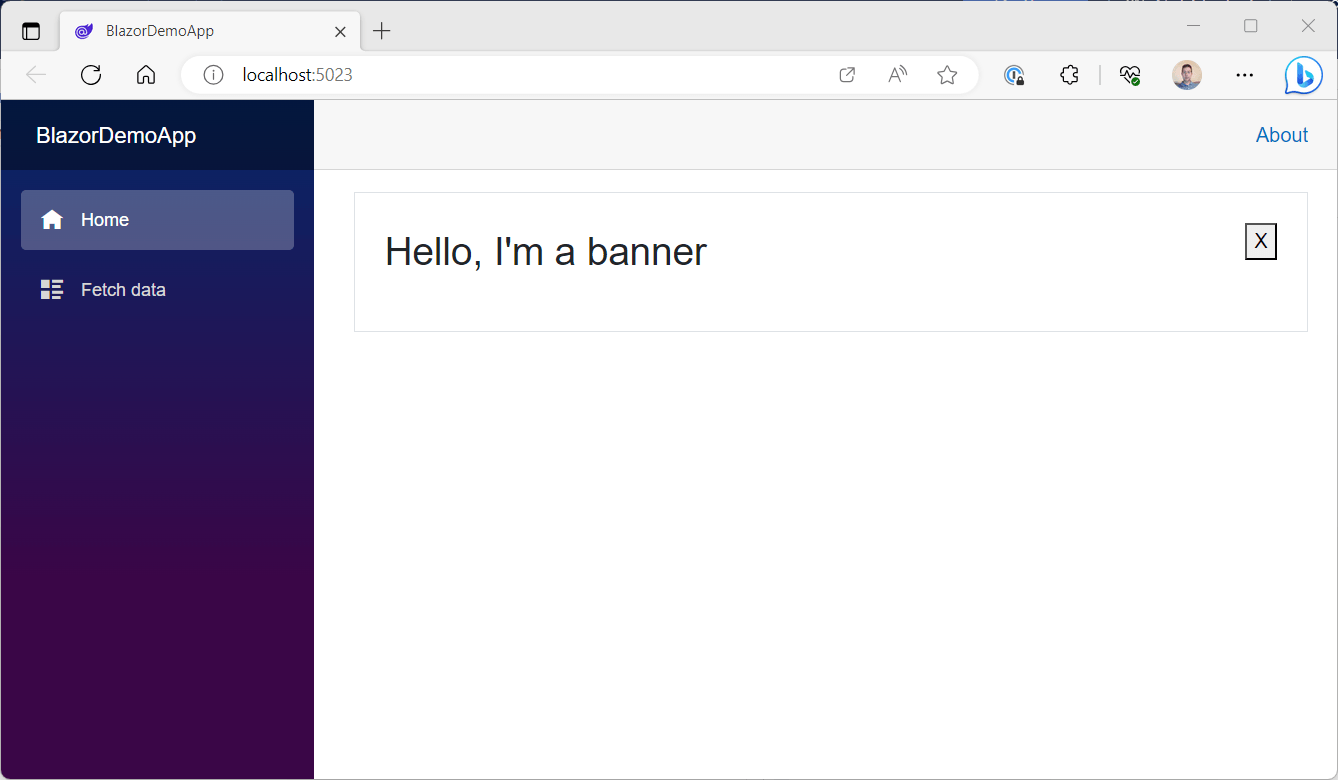
For example, here’s a Banner component.
Nothing too fancy, just a banner that can be dismissed when you click the X button.
In the demo .NET 8 project I’ve added this component, then rendered an instance of it in Index.razor.
@page "/"

<PageTitle>Index</PageTitle>

<Banner Text="Hello, I'm a banner"/>
Run this now, and the banner is rendered.

But no matter how hard we click that X button, the banner won’t disappear! That’s because the component was rendered on the server, and plain HTML sent back to the browser.
To make the Banner component interactive, using Blazor Server, we need to use the new RenderModeServer attribute.
Banner.razor
@attribute [RenderModeServer]

@if (!dismissed)
{
    <div class="border p-4 d-flex justify-content-between align-items-start">
        <p class="fs-2">
            @Text
        </p>
        <button @onclick="() => dismissed = true">
            X
        </button>
    </div>
}

...
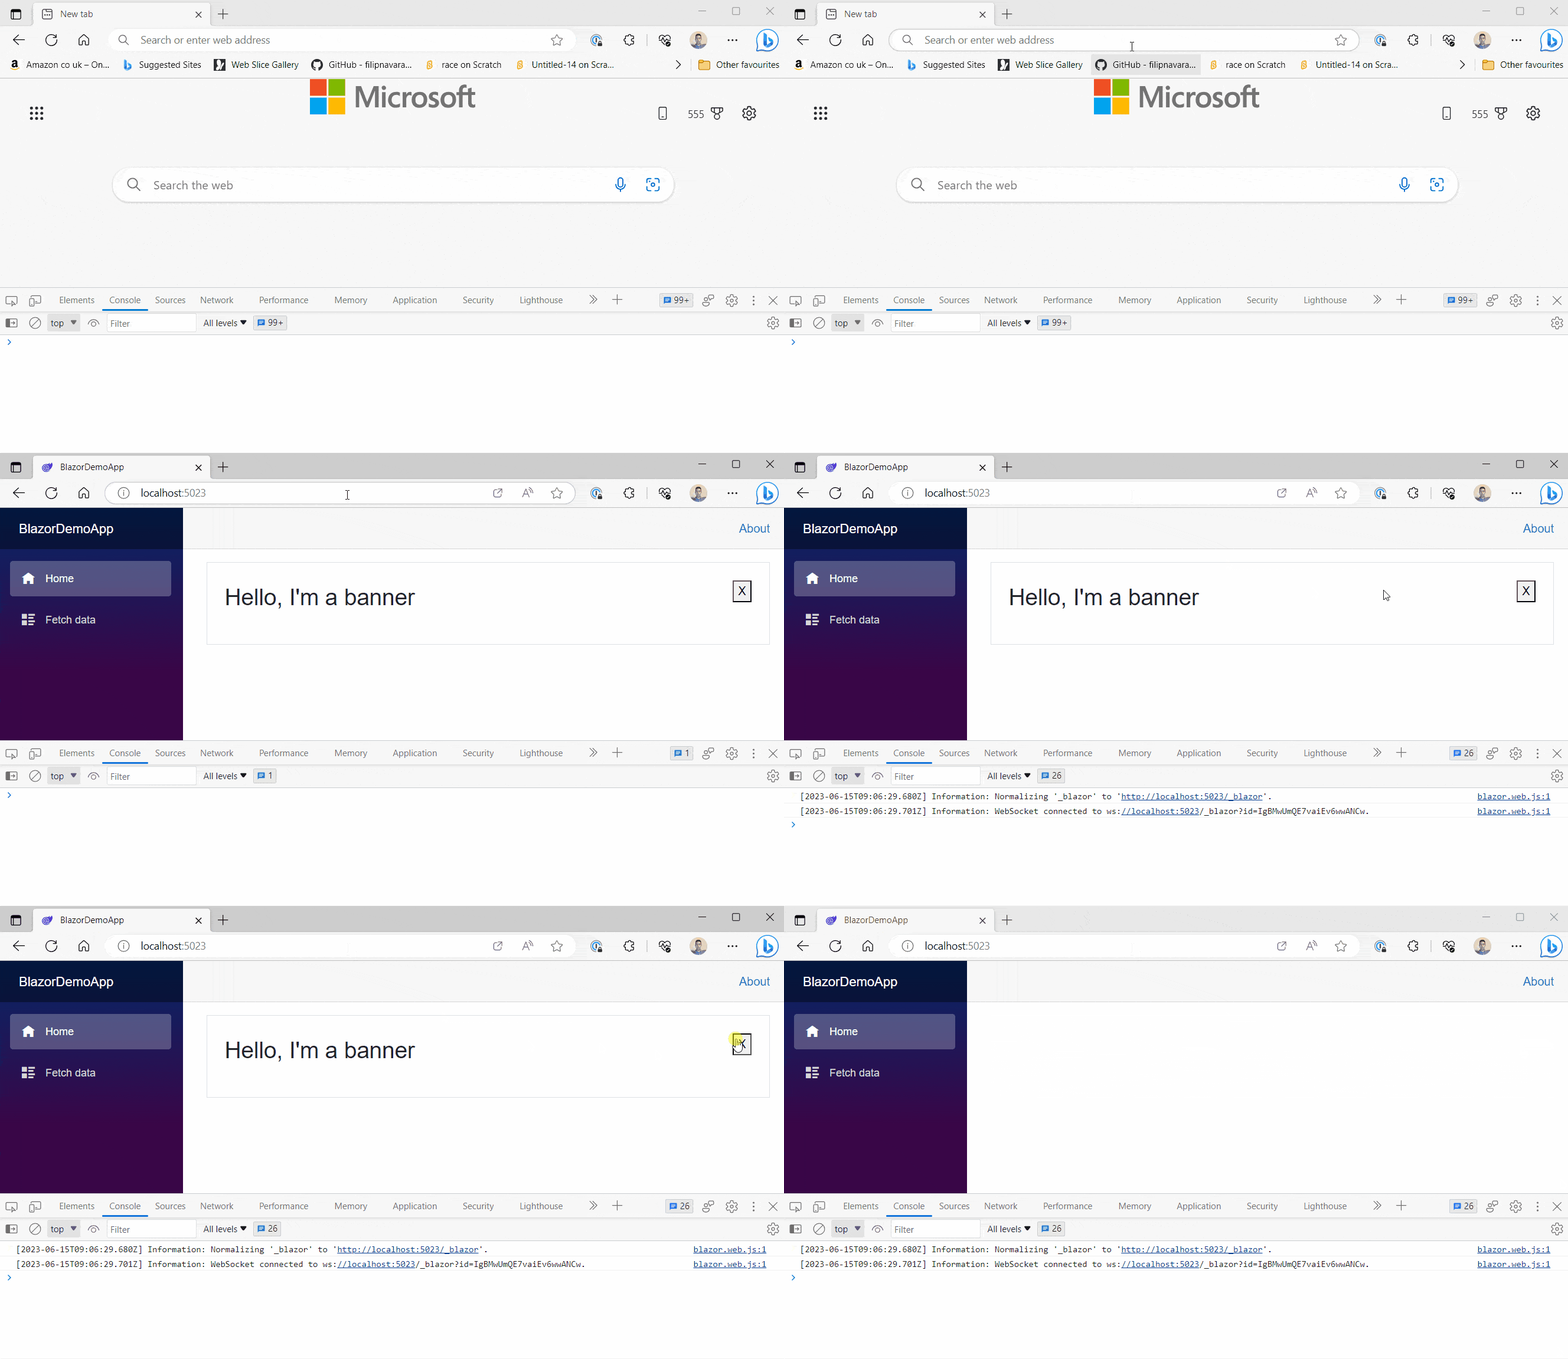
With that, when we view this in the browser, the X button springs into life:

This makes for a super fast initial load, with plain HTML being returned from the server (and rendered in the browser).
Once that initial HTML response has been rendered a socket connection is opened, and all interactions with the component are sent via the socket connection and handled on the server (just like Blazor Server web apps today).
As of Preview 5, the socket connection (and circuit it establishes) stick around, even when you leave the page.
Microsoft expects to improve this, and how the lifetime of circuits are managed in a future update.
Blazor WASM support is also coming (so you can make your components interactive using Blazor WASM, as well as Blazor Server).
Other Improvements
Finally in this release, MS has improved the packaging of Webcil files.
This is a new web-friendly way of packaging .NET assemblies to try and ensure Blazor WebAssembly can work in restrictive network environments (without falling foul of corporate VPNs, virus checkers etc.)
In this release, the Webcil format has been tweaked to use a standard WebAssembly wrapper.
This means your Blazor app is shipped to the browser as standard WebAssembly files (with a .wasm extension) and this is now the default packaging format when you publish your Blazor WebAssembly app.
Should you wish, you can disable Webcil using this setting in your project file:
<WasmEnableWebcil>false</WasmEnableWebcil>
In Summary
With this release, we can really begin to see how future Blazor apps will be able to combine server-side, streaming rendering and islands of interactivity to make compelling modern web apps.
Server-side rendering to make pages load fast.
Streaming rendering to ensure your users aren’t left in the dark waiting for data to load.
Interactivity on a component-by-component basis so you can tap into Blazor’s powerful component model and create highly interactive areas of your app (without having to use Blazor Server/WASM for your entire app).

Jon Hilton
Jon spends his days building applications using Microsoft technologies (plus, whisper it quietly, a little bit of JavaScript) and his spare time helping developers level up their skills and knowledge via his blog, courses and books. He's especially passionate about enabling developers to build better web applications by mastering the tools available to them. Follow him on Twitter here.

