WebPack For Visual Studio Developers

Summarize with AI:
One of the things that I've always loved about Visual Studio is how it extracts the tedium of builds. Someone once told me, "You should understand how MSBuild works." Should I? Isn't that what I have Visual Studio for? So I don't have to look at that XML file? Pass on that. When I'm coding, I want to be able to File / New Project / ROCK AND ROLL!
Unfortunately, the lack of an abstracted build system is still a problem that plagues web developers to this day. Most of us are using transpilers, concatenation, uglification, directory watching, module systems and more. Honestly, the amount of tooling that exists around just JavaScript and web development is hilariously out of control. Yeoman tried very hard to solve this problem, and did the best job of it so far, but I still want to punch myself in the throat every time I have to setup a new Grunt or Gulp file. Which packages do I add? What was that syntax again? Is this repo's documentation out of date? LIFE HAS NO MEANING.
Folks - it shouldn't be this way.
Unfortunately, this is where we are right now. Some decent amount of knowledge around task runners (Grunt/Gulp) is required to do modern web development. The other unfortunate thing is that Visual Studio hasn't really released anything to help with this, outside of a Task Runner Explorer package that is just an interface for the manual process. This is mostly because task runners execute on Node, and Visual Studio is more or less agnostic of Node. Everyone's setup differs. Where is your Node executable? Where are your npm packages?
To make matters worse, there is the issue of modules. What I mean by that, is that once you have your task runner setup and actually working (a feat in and of itself), you then need to decide on some sort of module system for your JavaScript. No matter what you choose, you are steeped in more configuration. I feel like we're converging on Java where success in a web development project is 90% configuration and 10% dumb luck. The only difference is that we're doing it with JavaScript instead of XML, which makes us somehow more evolved.
So if we must exist in this world and this is the state of web tooling, I want to do as little configuration as is humanly possible. I mean not a single line more than is absolutely required. This is why I have recently become a huge fan of WebPack.
Setting Up WebPack
WebPack calls itself a "Module Bundler". We tend to think of modules in terms of JavaScript, but WebPack thinks of them in terms of any assets that you might want to transpile, minify and pipe to the browser. JavaScript, TypeScript, CoffeeScript, CSS, SASS, images - it doesn't matter to WebPack. But this is not the reason why I love it. The reason why WebPack is my tool of choice, is that it bridges the gap between AMD and CommonJS.
For instance, Kendo UI contains AMD definitions in every widget. I used to be a big fan of RequireJS, but as the years have progressed, I found myself strongly in the CommonJS camp. That meant that my options were pretty much down to Browserify. I don't want to have to do custom builds of Kendo UI. What I want to do is specify that I need a Kendo UI DropDownList, and my build tool should automatically go get all of the dependencies (core, data, list, ect) and put them in the right order.
I love WebPack because it allows me to build CommonJS applications and do exactly this. Let's see it in action.
Install Node
First, you're going to need Node installed. If you haven't done that already, do it now. Don't fall into the trap of thinking that Node is only for hipster weirdos who are hell bent on doing things that hard way. I mean, it is for them, but more importantly, Node is a powerful tool for developers that is in no way specific to any single platform. Rolling without it just because you are in Visual Studio is robbing yourself of a better and more productive development experience.
File / New Project
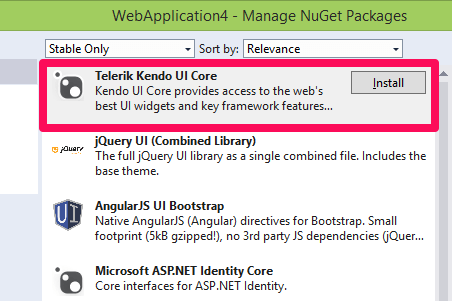
I'm going to setup a new MVC project and pull in the Kendo UI Core NuGet package. That will put the Kendo UI CSS files in Content and the JavaScript in Scripts.
Add A package.json File
Open up a command prompt window and cd into your project directory (not the solution directory).
We need to create a package.json file in the project directory because we are going to be installing some Node modules that are specific to this project. When someone else pulls down this project to get started, they should be able to cd into the project directory and simply run npm install, which will setup their corresponding Node environment for the project. To make that possible, we need to include a package.json file. Fortunately, npm can help us with that by running the npm init command.
npm init
You're now going to be prompted with a lot of questions that you can just take the defaults on. We're not creating an npm library, so we don't really need any of this name, version, description information. I just hit enter until all that stuff goes away. Here is what my package.json file looks like...
{
  "name": "WebApplication4",
  "version": "0.0.0",
  "description": "",
  "main": "index.js",
  "scripts": {
    "test": "echo \"Error: no test specified\" && exit 1"
  },
  "author": "",
  "license": "ISC"
}
Go ahead and add this file to Visual Studio by right-clicking your project and choosing, "Add Existing Item".
Ok, now we're ready to start setting up our project for WebPack.
Install WebPack
This part is easy - just install WebPack from npm as a global package. Note that if you have already done this once before, you do not need to do it again. Global installs (-g) are system level.
npm install -g webpack
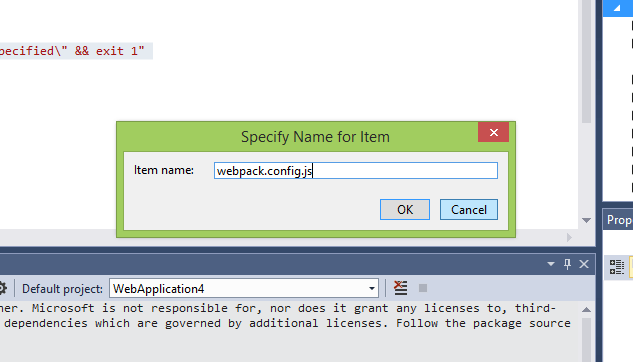
WebPack is installed. We now need to do a little configuration. Right-click your project in Visual Studio and add a webpack.config.js file.
Now let's add the base configuration that we're going to need to make WebPack actually do something.
var path = require('path');

module.exports = {
    context: path.join(__dirname, 'App'),
    entry: './main.js',
    output: {
        path: path.join(__dirname, 'Built'),
        filename: '[name].bundle.js'
    }
};
Alrighty! A confusing block of configuration code in a blog post. Copy and paste and hope it works, right? It's not that bad - let's walk through what's happening here.
- Require in the Node path module (already installed with Node for dealing with file paths)
- context: - Where should WebPack look for files? In this case, we said a folder called 'App' that is at the project level. We haven't created that yet.
- entry - Which file should WebPack read first? We've called it
main.jsand it will be in thatAppfolder that we haven't created yet. - output - Where do we want WebPack to put our file after it builds all of our assets? In this case, We've said a directory called
Built, which coincidentally, we also have not yet created.
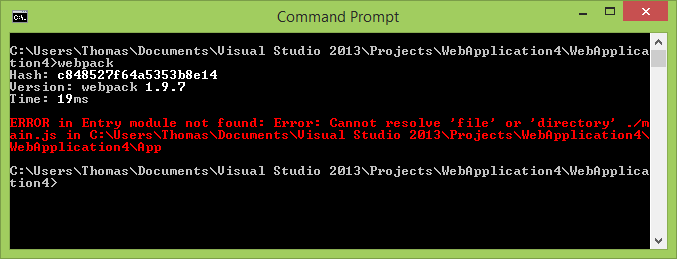
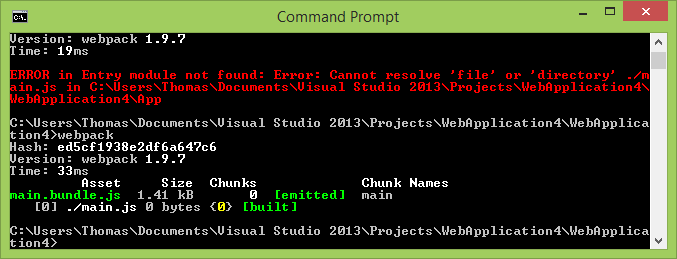
Switch back over to your command prompt and run webpack. Make sure you're still in your project directory. WebPack should throw an error.
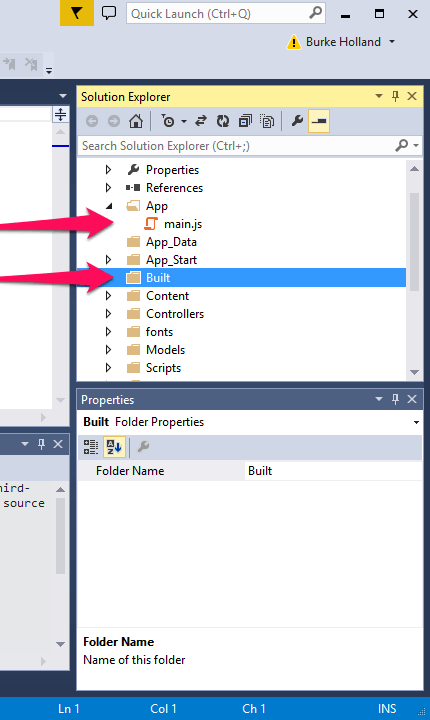
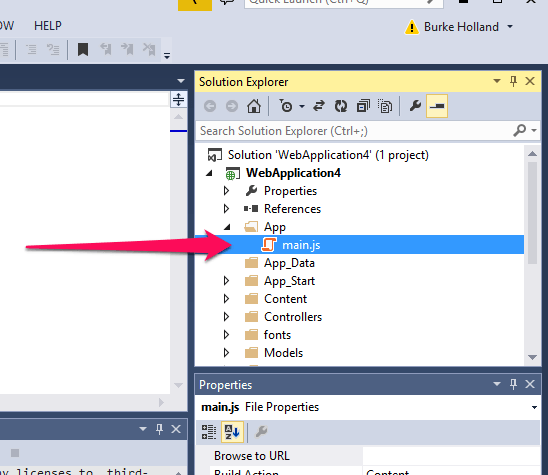
WebPack throws a "file not found" error because it's looking for that main.js file that we said would be in an App folder, neither of which exists. We also told WebPack that we wanted our output in a Built directory. Let's create all of these now.
You may be asking yourself, "Burke! Why aren't you putting your JavaScript in the Scripts folder?" The reason is because that's where NuGet puts all of it's crap (that and the Content). I don't want NuGet mixing it's crap with my crap, so I keep my files separate. I find it cleaner this way.
Just for fun, let's add a little bit of code to our main.js file.
alert("Hello World");
Now switch back to the command prompt and type webpack again.
I see green! Green is good. WebPack is now "bundling" our code. If you look in the Built directory, you will find that the output file is not there - actually, it is, it's just that we need to add it to Visual Studio via "Add Existing Item". It should be called main.bundle.js.
If curiosity gets the better of you, feel free to open this file up and look inside. What you'll find is the code that WebPack needs to work it's magic in the browser. At the bottom, you'll see our nifty little alert. Let's add a reference to this script tag in our page.
I don't use MVC Layouts, so I'm going to delete the "Views/Shared" folder, as well as the template Views/Home/Contact.cshtml and Views/Home/About.cshtml pages that it creates. I also delete the _ViewStart file or else MVC will be looking for a _Layouts page that doesn't exist. In the end, all you should have in "Views" is a "Home" folder with an Index.cshtml and the web.config file. It should look like this:
Now let's add some new HTML to our Index.cshtml page and reference our main.built.js file.
<!DOCTYPE html>
<html>
<head>
    <meta charset="utf-8">
    <meta http-equiv="X-UA-Compatible" content="IE=edge">
    <title>WebPackalackin</title>
    <meta name="description" content="">
    <meta name="viewport" content="width=device-width, initial-scale=1">
    <link href="~/Content/kendo/2015.1.318/kendo.common.min.css" rel="stylesheet" />
    <link href="~/Content/kendo/2015.1.318/kendo.material.min.css" rel="stylesheet" />
</head>
<body>

    <h1>Everyday I'm bundling...</h1>

    <script src="Built/main.bundle.js"></script>
</body>
</html>
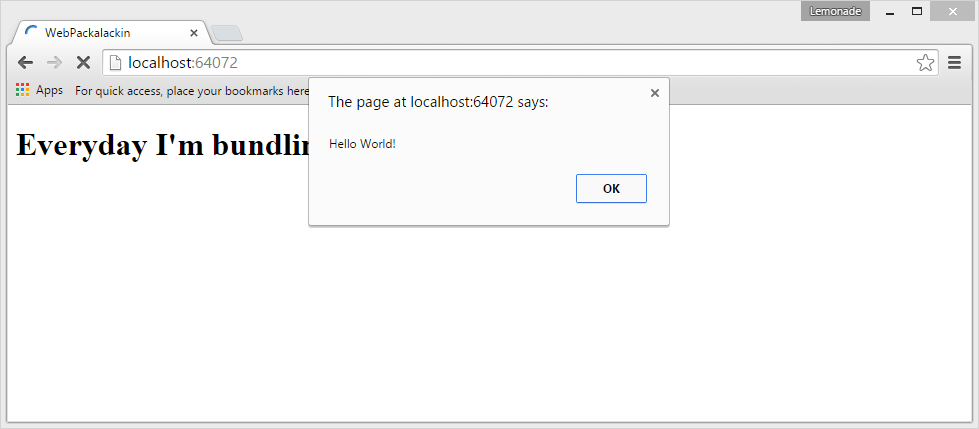
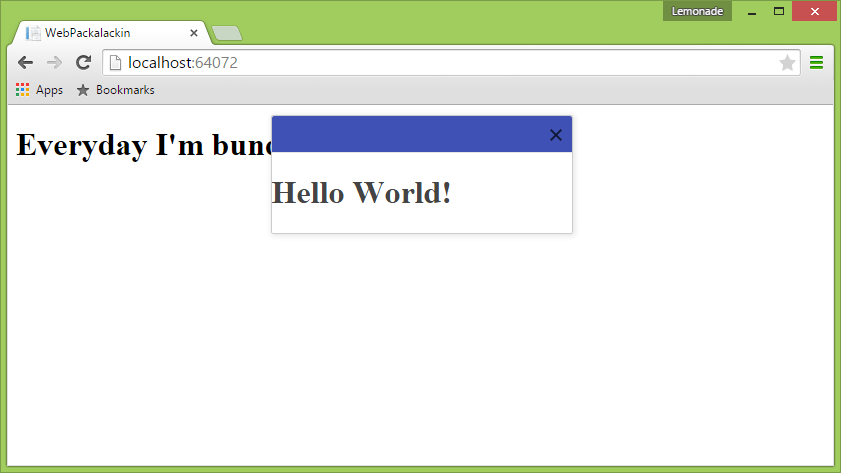
Run the project and check the output.
Wonderful. So far this has been interesting, but not really impressive, so let's go ahead and tackle an incredibly difficult topic that WebPack is going to help us solve immediately: Custom Kendo UI Builds.
Custom Kendo UI Builds
I mentioned that the great thing about WebPack is that it doesn't care which module system you use. Kendo UI Widgets comply with the AMD module spec. Let's take a Kendo UI Window for instance. That Window widget has dependencies, and those dependencies have dependencies. How are you supposed to keep all this straight?
You're not. WebPack is going to do it for you.
All we need to do is to require jQuery and the Kendo UI Window widget in the main.js file. Let's also pretty up our ugly browser alert by turning it into a Kendo UI Window.
require('../Scripts/kendo/2015.1.318/jquery.min');
require('../Scripts/kendo/2015.1.318/kendo.window.min');

var msg = $('Hello World!').appendTo(document.body);

$(msg).kendoWindow({
    width: 300,
    position: {
        top: 10,
        left: ($(window).width() / 2) - 150
    }
});
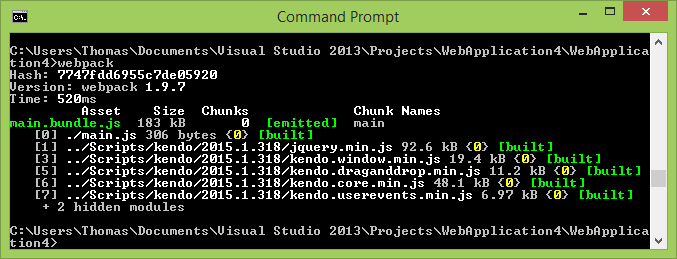
In your command prompt, run webpack. Let's look at the output here.
Notice what happened. We required jQuery and the Kendo UI Window, but WebPack also loaded kendo.dragdrop.min.js, kendo.core.js, and kendo.userevents.js. Why did it do this? Because those are the files that are required to make a Kendo UI Window widget. How did it know this?!
Each Kendo UI widget defines it's dependencies at the top of the file in AMD format. This allows an AMD module system to pick up and resolve dependencies for you. WebPack doesn't care which module system you use, so while you're using CommonJS to build your app, you can require AMD modules and it just works! How awesome is that?
Note that there is no animation with the Kendo UI Window as is. This is because the Window widget does not require animation to make it work. If you add in a reference to
kendo.fx.js, you will get animations.
But WAIT...there's more.
Loading CSS With WebPack
WebPack will allow you to require in CSS as well. Out of the box, WebPack only handles JavaScript. It uses loaders to handle other file formats. This is where WebPack starts to get a bit tricky for me, but don't fret because I've sorted it all out and I'm just going to give it to you in working format.
Install CSS Loaders
Drop into your command prompt and install the CSS and style loaders.
npm install css-loader style-loader --save-dev
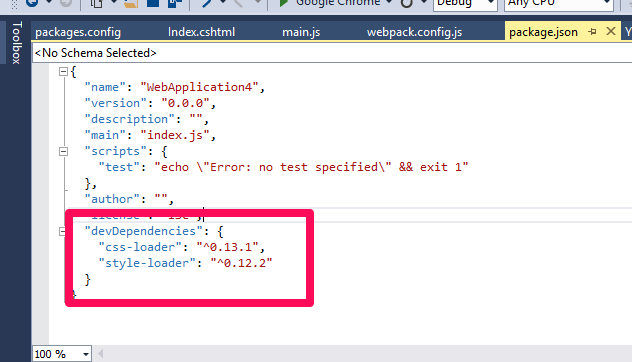
Remember that package.json file we created? This is where it's going to finally be used. If you check it, you'll see that you now have a "devDependencies" node. This is how npm install knows which packages to pull into your project if you are trying to set it up in a different environment.
Before we can use this loader, we need to specify it in the configuration file. Unfortunately, WebPack uses RegEx to match file extensions to loaders - rolls eyes - but there are plenty of good examples on how to set this up if you're willing to traipse around the internet enough. Your webpack.config.js file should now look like this…
var path = require('path');

module.exports = {
    context: path.join(__dirname, 'App'),
    entry: './main.js',
    output: {
        path: path.join(__dirname, 'Built'),
        filename: '[name].bundle.js'
    },
    module: {
        loaders: [
            { test: /\.css$/, loader: "style!css" }
        ]
    }
};
Now we can require the style sheets just as if they were another JavaScript module. Here is what your main file should look like.
require('../Scripts/kendo/2015.1.318/jquery.min');
require('../Scripts/kendo/2015.1.318/kendo.window.min');

// Kendo UI CSS
require('../Content/kendo/2015.1.318/kendo.common.min.css');
require('../Content/kendo/2015.1.318/kendo.material.min.css');

var msg = $('<h1>Hello World!</h1>').appendTo(document.body);

$(msg).kendoWindow({
    width: 300,
    position: {
        top: 10,
        left: ($(window).width() / 2) - 150
    }
});
What's awesome about this is that you can include styles alongside your HTML and just require in small stylesheets per page. WebPack will automatically pick them up and won't duplicate rules. This makes structuring your project so very, very nice. Instead of one monolithic CSS file that lives in it's own directory where it can't hurt anyone else, you can have small, manageable CSS files that live alongside the markup they style - what a concept.
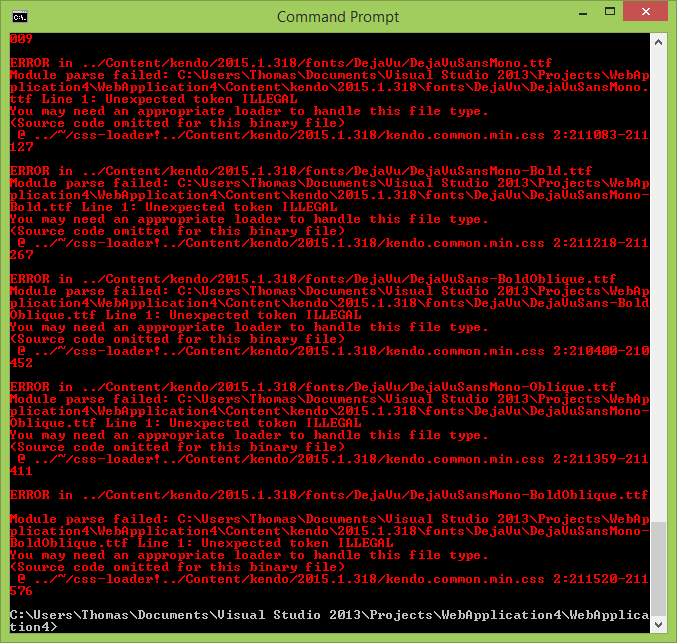
Let's webpack again from the command line. When you do, you'll notice that we throw some pretty nasty errors.
This is where I lost about 3 hours to WebPack. As it turns out, if you reference an asset from a stylesheet by url (e.g. url('/some_sprites.png')), then WebPack will parse that and try to load it. We already said that WebPack only understands how to load JavaScript. We've taught it how to load CSS, but it doesn't know how to load URL's. This is crazy to me. Why doesn't WebPack just leave that alone? The browser knows how to load the URL, so just leave it be!
Well, my pain is your gain because here is the fix for this. We simply need to install the url-loader package…
npm install url-loader --save-dev
…and add in a line that tells WebPack to use this loader for images and fonts.
var path = require('path');

module.exports = {
    context: path.join(__dirname, 'App'),
    entry: './main.js',
    output: {
        path: path.join(__dirname, 'Built'),
        filename: '[name].bundle.js'
    },
    module: {
        loaders: [
            { test: /\.css$/, loader: "style!css" },
            { test: /\.jpe?g$|\.gif$|\.png$|\.svg$|\.woff$|\.ttf$|\.eot$/, loader: "url" }
        ]
    }
};
Note that WebPack can also turn your images into inline base 64 encoded assets. This is good for images that are less than 100kb. It is accomplished with the file loader, which is coincidentally installed when you install the url loader plugin. I don't use base 64 images, but the option is there if you wish them to be encoded.
Now run webpack again. This time everything builds. You can now remove the style links from the head of the index.cshtml page.
Automatic WebPacking
You may have noticed that it's kind of annoying to jump over to the command prompt, back to Visual Studio and then back to the command prompt. Totally agreed. That's dumb.
If you add a -w on the end of the webpack command, it will watch the dependencies of the main.js file (essentially all our JavaScript files) and then re-pack them automatically.
webpack -w
Now you can make all the changes you want to your JavaScript, and you don't need to keep on running the WebPack command. Hit ctrl-c to stop the watch process.
While this is great and all, it has a major flaw: if you have an error and WebPack croaks, you will be blissfully unaware as you hum along with a smile on your face and a completely busted build system. You can't constantly be jumping back to check your errors. That won't suit. What you need instead is for WebPack to tell you when the build failed.
WebPack Notify
The WebPack Notifier Plugin (based on Node Notifier), is a nifty plugin that will toast you whenever the build fails. On the command line, run…
npm install webpack-notifier --save-dev
Now require the plugin in your webpack.config.js file…
var path = require('path');
var WebpackNotifierPlugin = require('webpack-notifier');

module.exports = {
    context: path.join(__dirname, 'App'),
    entry: './main.js',
    output: {
        path: path.join(__dirname, 'Built'),
        filename: '[name].bundle.js'
    },
    plugins: [
      new WebpackNotifierPlugin()
    ],
    module: {
        loaders: [
            { test: /\.css$/, loader: "style!css" },
            { test: /\.jpe?g$|\.gif$|\.png$|\.svg$|\.woff$|\.ttf$|\.eot$/, loader: "url" }
        ]
    }
};
When you run webpack -w. you will get a little Toast telling you that WebPack built successfully.
Tweak some of the code in the main.js file so that you have an error. Watch what happens.
You get the exact error and line number. Now that we have a useful build system on our hands, let's address two items that may still be outstanding in your brain.
What About The ASP.NET Bundler?
Delete it. You don't need it anymore. All the ASP.NET Bundler really does is concatenate and minify your code. It can't handle code that has already been minified (Kendo UI in our case) and things like Source Maps.
Where Is the Visual Studio Integration?
I may have stretched the truth here just a smidge. There is no integration other than using Visual Studio to edit the configuration files. But, listen, that's totally fine. Yes, you can add Build actions or you can use the Task Runner Explorer to kick off that dinky little WebPack command. Even WebPack itself offers you a guide. By the time you get done configuring all your toolbarz, you could have setup WebPack already.
This is how most web developers roll - one window for the terminal/command line and one for the IDE. Your developer counterparts on Macs have been living in this world for quite some time and the reason that it hasn't been integrated into an IDE, is that once you get comfortable on that command line, you would rather just stay there.
One Last Thing
So all of this configuration has landed you with a world class module and bundling system. If you've made it this far, then I have one last WebPack goody for you.
WebPack === ES6
That's right, if you've been able to get WebPack working in your project, you are now also almost completely ready to start writing ES6. The good Dr. Axel Rauschmayer has you covered with a short and concise article on writing ES6 with WebPack.
Also, check out Cody Lindley's article on how to adopt ES6 modules. He's got a lot of jspm.io setup in there that you don't even have to do because you're already webpackin' baby!
There's a lot of new sugar and goodness in the next iteration of JavaScript, and it's coming fast. You can be ahead of the curve today though, by getting up and running with WebPack. Also, be check out Kendo UI - quite possibly the largest open source jQuery user interface library.
Lastly, I have kicked a sample SPA application up to GitHub that uses Kendo UI and WebPack.

Burke Holland
Burke Holland is a web developer living in Nashville, TN and was the Director of Developer Relations at Progress. He enjoys working with and meeting developers who are building mobile apps with jQuery / HTML5 and loves to hack on social API's. Burke worked for Progress as a Developer Advocate focusing on Kendo UI.


