
Create Neat and Effective Schedules with the .NET MAUI Scheduler Component

Summarize with AI:
Bring your bravest scheduling scenarios to life in no time. Get to know the .NET MAUI Scheduler and experience its highly customizable built-in views and the ability to adjust them to the tiniest details—current time, visible hours and dates, time ruler, special time slots and much, much more.
Hey-yo! I am on a tight schedule, but I cannot keep you in the dark about one of the latest (and greatest) additions to the Progress Telerik UI for .NET MAUI suite—the RadScheduler component. The brightest star of the DevTools R3 2023 Release is so ready to start shining in your apps, and I am here to show you how quick and easy it is to get started with it.
Bring your bravest scheduling scenarios to life in no time with me. Prepare yourselves to experience the Scheduler's highly customizable built-in views and the ability to adjust them to the tiniest bits—current time, visible hours and dates, time ruler, special time slots and much, much more.
Fasten your seatbelts as we are about to take off!
Tabula Rasa (A Clean Slate)
Bringing the Scheduler component into a fresh .NET MAUI app is as brief as a single line of code (considering you already have the Telerik.UI.for.Maui NuGet, too). XAML or code-behind? It is up to you, or me, and I choose XAML.
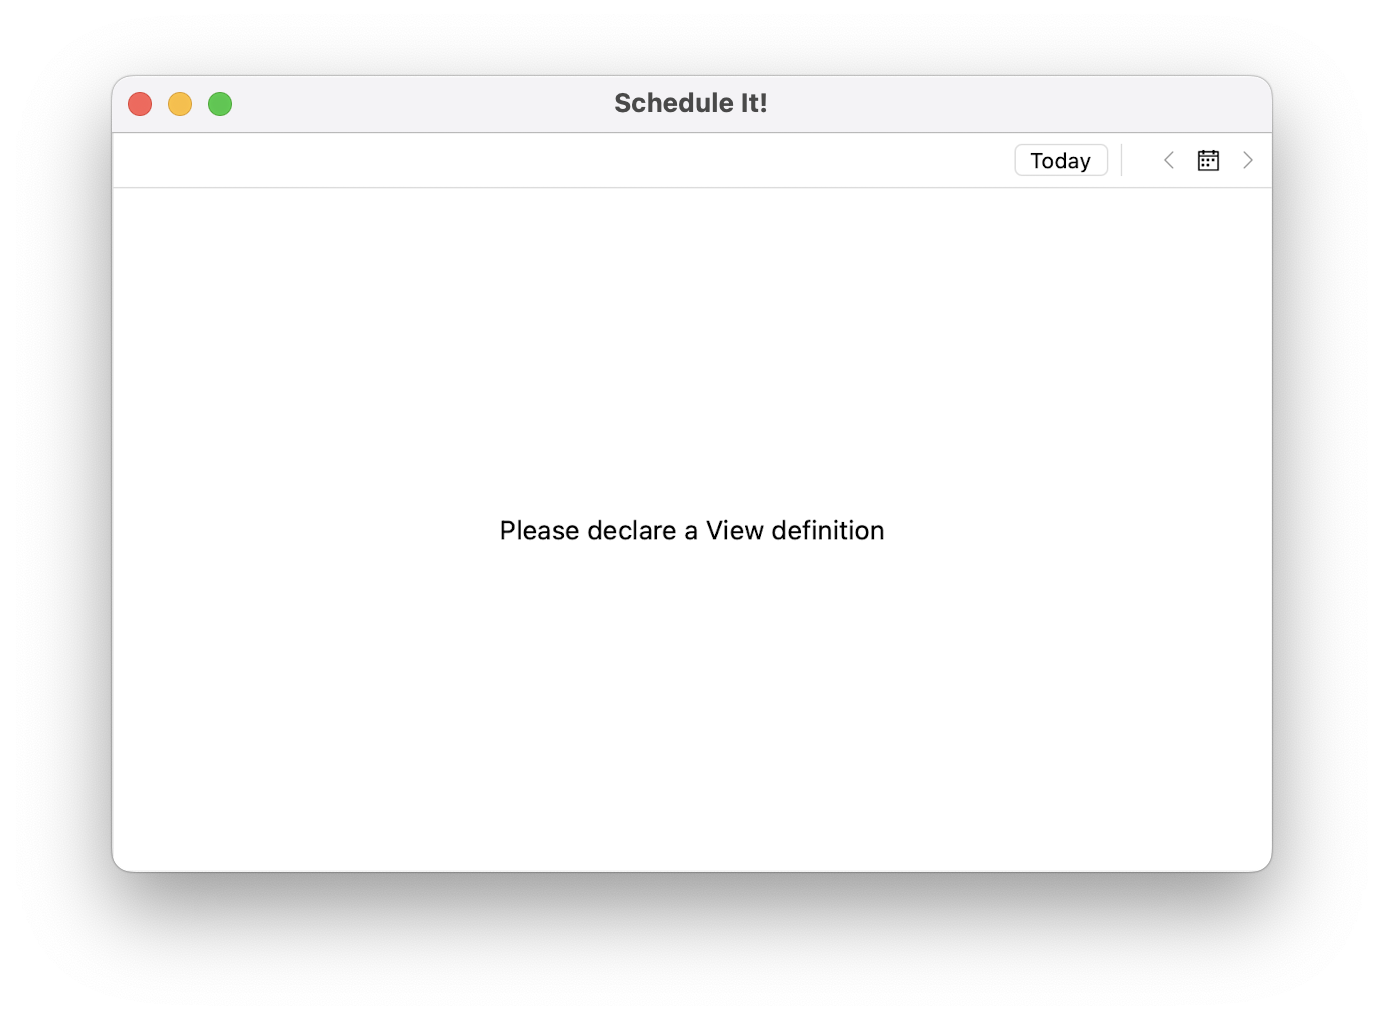
<telerik:RadScheduler x:Name="scheduler" />With this, however, the only thing you will get is an empty schedule—a non-existent thing in real life (or at least mine).
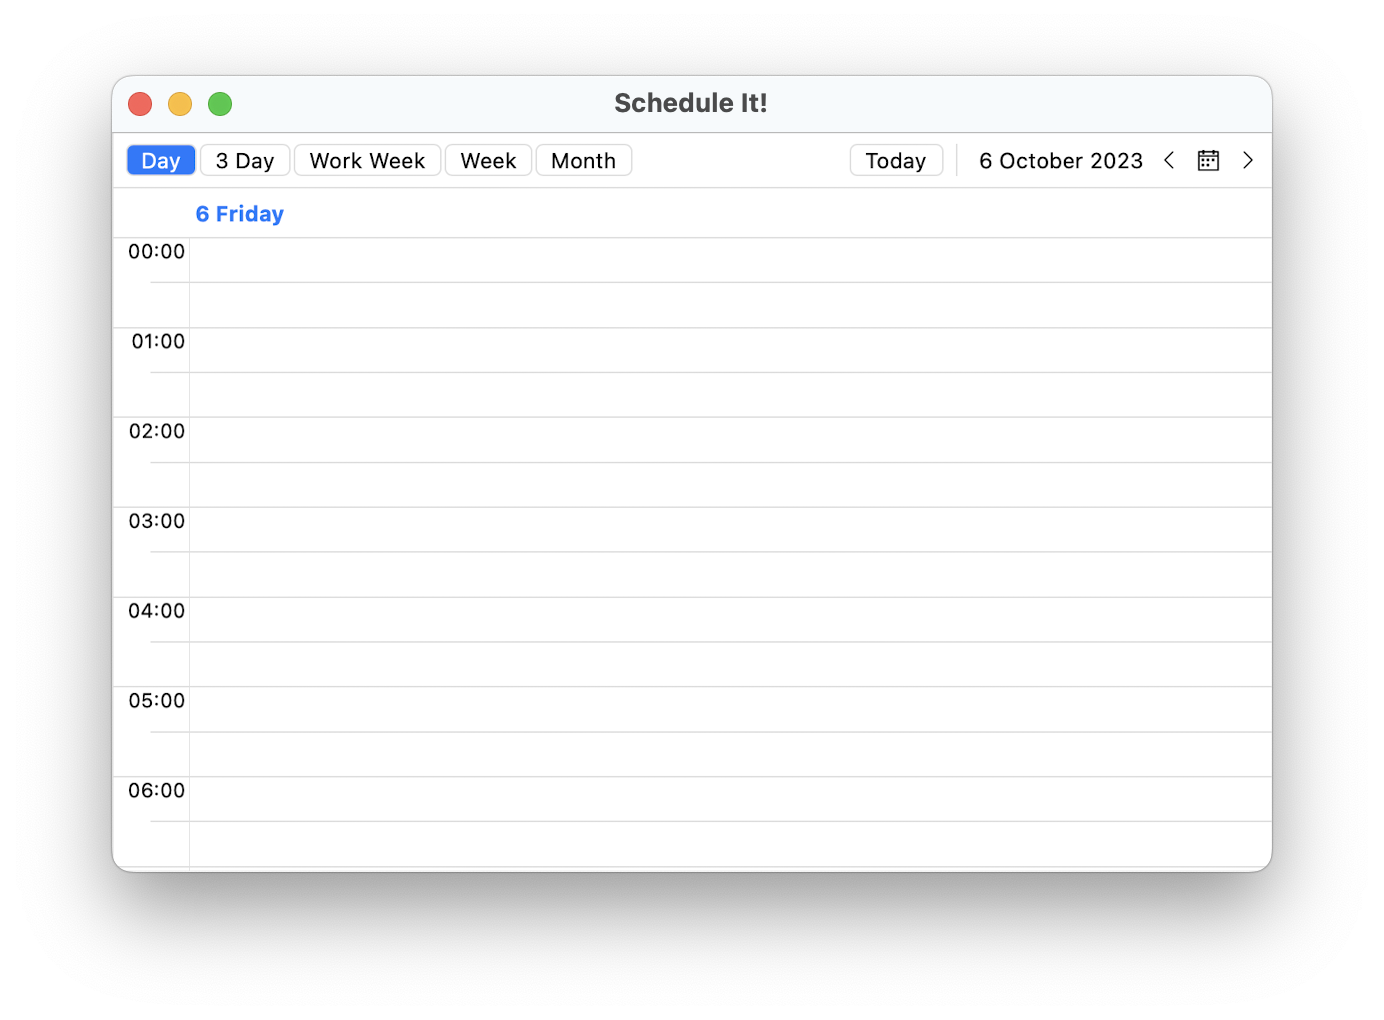
Better do what we are told and declare some view definitions, shall we? A little clarification would not hurt, so here it is—RadScheduler has four types of predefined views, representing the way in which your data will be displayed.
<telerik:RadScheduler x:Name="scheduler">
    <telerik:RadScheduler.ViewDefinitions>
        <telerik:DayViewDefinition />
        <telerik:MultidayViewDefinition VisibleDays="3" Title="3 Day" />
        <telerik:WeekViewDefinition Title="Work Week" IsWeekendVisible="False" />
        <telerik:WeekViewDefinition />
        <telerik:MonthViewDefinition />
    </telerik:RadScheduler.ViewDefinitions>
</telerik:RadScheduler>
As you may guess, the DayViewDefinition represents a day view that shows a single day. 💡 The same logic applies to the rest. The MultiDayViewDefinition shows the number of days you specify
through its VisibleDays property. The week view shows an entire week, or just the work week if you set its IsWeekendVisible property to false. The month view definition is a slight
exception to the rule as it shows more than a single month—to be exact, it shows 42 days.
Let’s see if our tabula is no longer rasa. 😂
Yay, it is slowly upgrading, yet something is still missing. Do you know what? Appointments, of course! I will take things to next level with them in the next sections, but for now, I think a simple view model with a collection of Appointments will do the trick:
// First, create the view model
public ViewModel()
{
    var date = DateTime.Today;

    this.Appointments = new ObservableCollection<Appointment>
    {
        new Appointment { Subject = "Meeting with Alex", Start = date.AddHours(10).AddMinutes(30), End = date.AddHours(11) },
        new Appointment { Subject = "Lunch break", Start = date.AddHours(12).AddMinutes(30), End = date.AddHours(13).AddMinutes(30) },
        new Appointment { Subject = "Scheduler Introduction Blog", Start = date, End = date.AddHours(11), IsAllDay = true }
    };
}

public ObservableCollection<Appointment> Appointments { get; set; }

// And then, do not forget to set it as a BindingContext
this.BindingContext = new ViewModel();
Binding them to the Scheduler’s AppointmentsSource property will do the trick:
<telerik:RadScheduler x:Name="scheduler" AppointmentsSource="{Binding Appointments}" ... />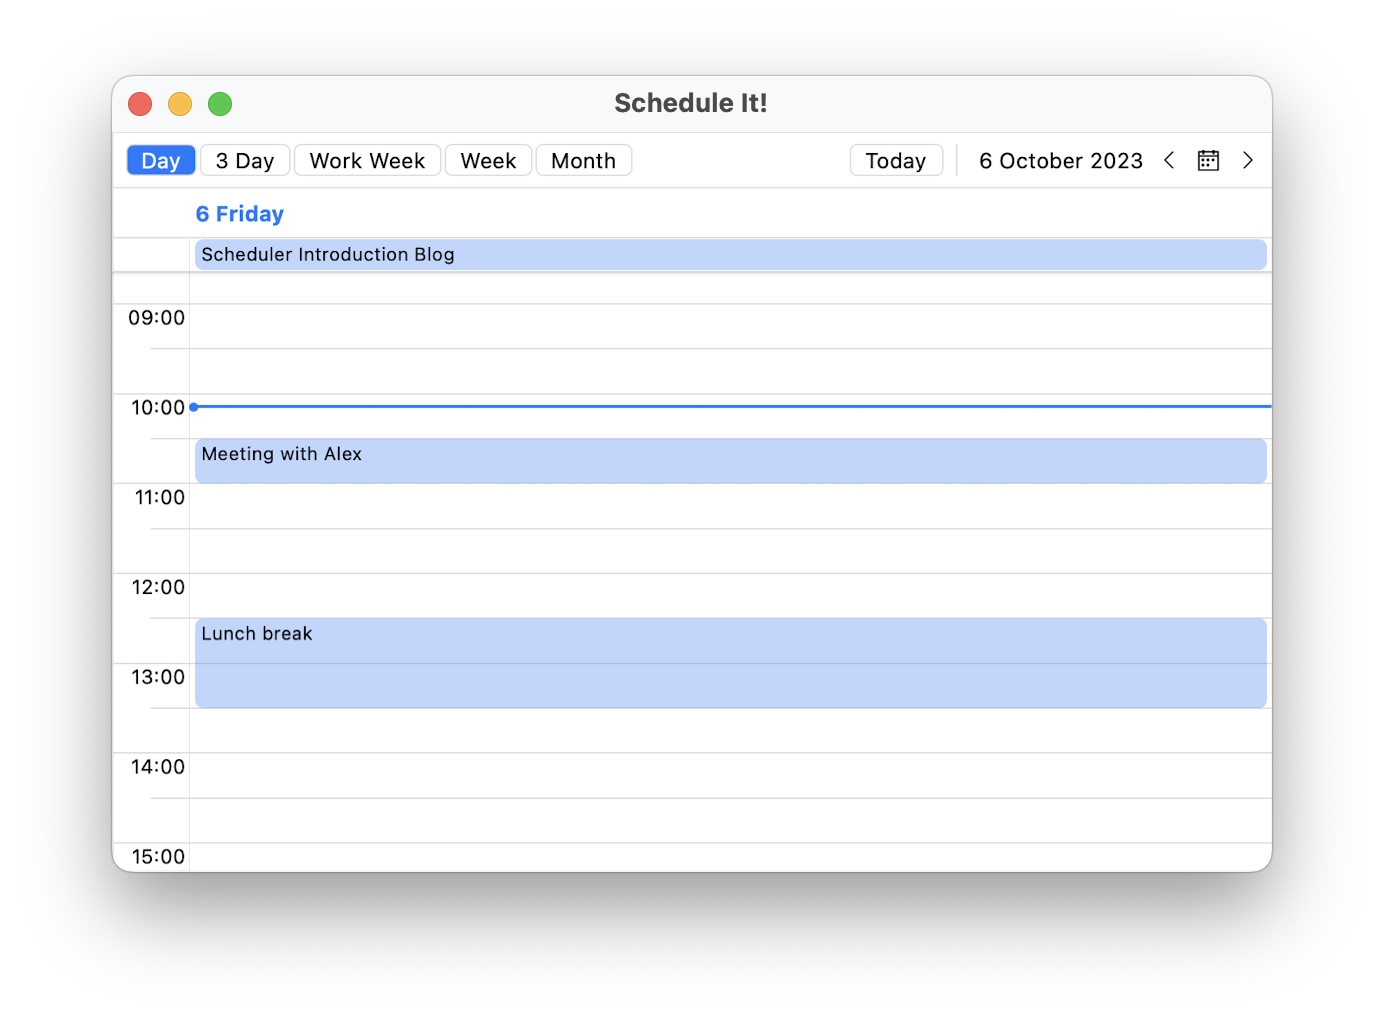
We are now ready to get to the next level.
Master the Appointments
As we learned in the previous section, for the Scheduler to display appointments, its AppointmentSource property should be set, and it should be a collection of Appointment objects.
Each Appointment defines the following properties:
Start– the value that specifies the start date and time of the AppointmentEnd– the value that specifies the end date and time of the AppointmentSubject– the value that indicate the subject of the AppointmentIsAllDay– indicates whether the appointment will take all dayRecurrenceRule– defines basic properties of the recurrence rule of the appointment
If you look at the screenshot at the very end of the previous section, you can see an all-day appointment which is displayed in the all-day area of the scheduler just below the current day.
A few words about the last property—it enables you to configure repeating appointments. Possible recurring scheduling patterns are on a daily, weekly, monthly or yearly basis, or you can also set a range of recurrence from date to date. The flexible rule mechanism covers all recurrence scenarios. Furthermore, you also have the option to handle the exceptions to this rule.
I suggest we add a recurring appointment and an exception to the recurrence rule, but if you feel like diving even deeper into the recurrence feature of the RadScheduler, be sure to check out the Recurrence Pattern and Recurrence Rule topics of the online documentation.
Since one of the worst-case scenarios would be to miss your daily sync meeting with the team, it is best to add it to the schedule. Follow me.
var dailySyncPattern = new RecurrencePattern()
{
    Frequency = RecurrenceFrequency.Daily,
    MaxOccurrences = 90,
    DaysOfWeekMask = RecurrenceDays.WeekDays
};
var dailySyncRecurrenceRule = new RecurrenceRule(dailySyncPattern);
var dailySyncAppointment = new Appointment()
{
    Start = date.AddMonths(-1).AddHours(10),
    End = date.AddMonths(-1).AddHours(10).AddMinutes(20),
    Subject = "Maui Team Sync",
    RecurrenceRule = dailySyncRecurrenceRule
};

this.Appointments.Add(dailySyncAppointment);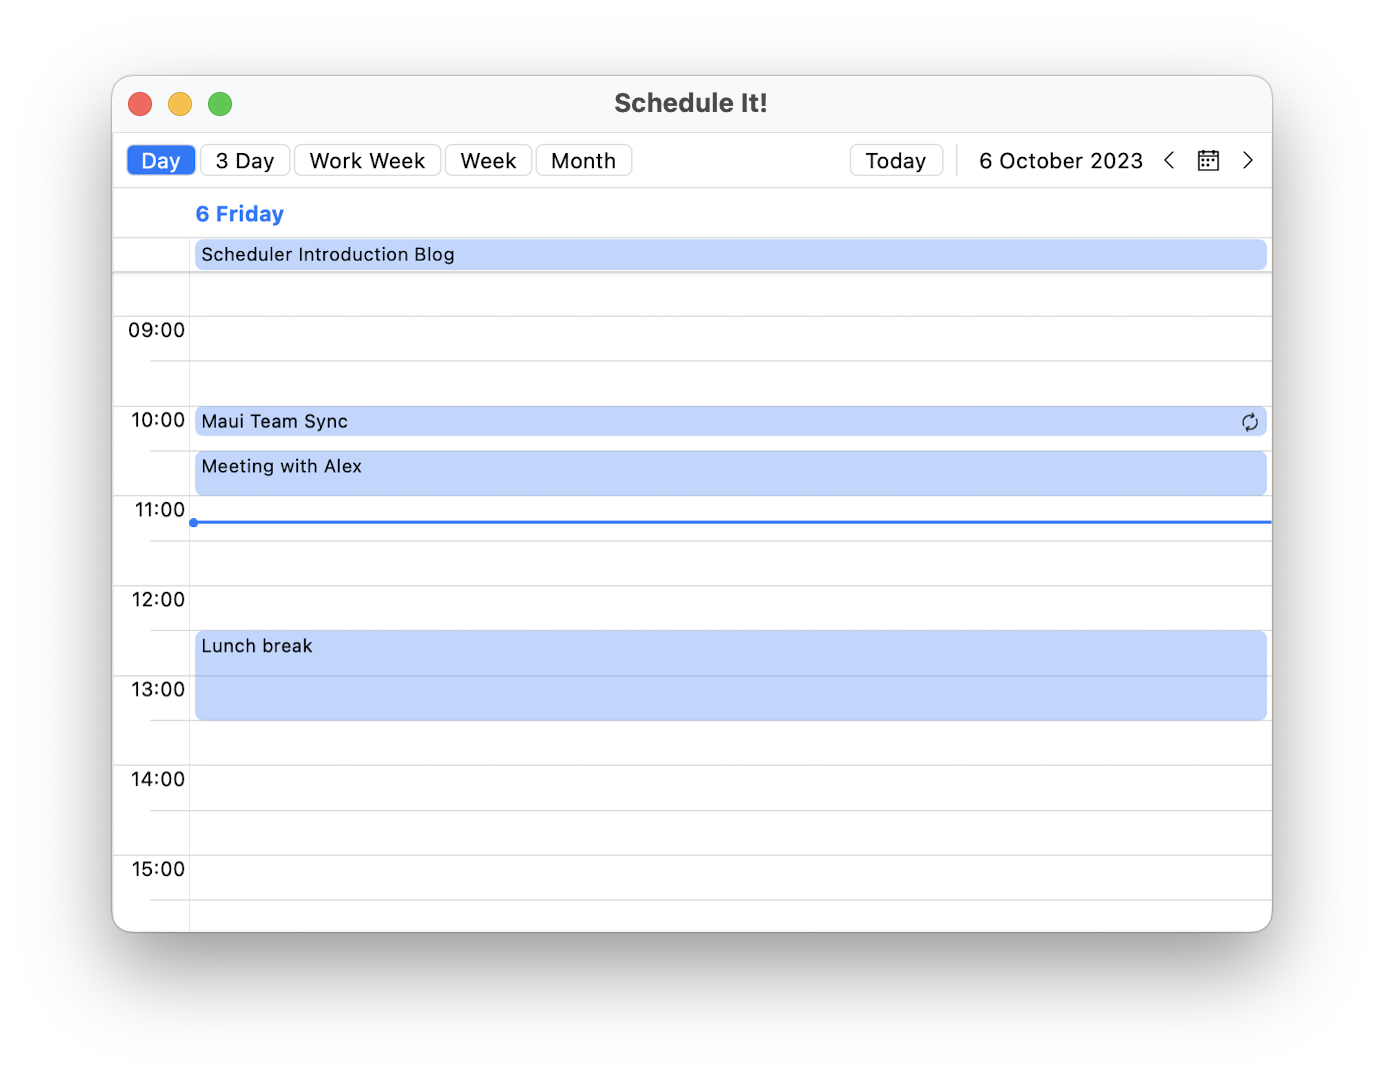
Now, imagine we all have a teammate who likes to sleep in and tends to come late for the sync meeting. It is not supposed to happen, but only this single day, let’s say it does. What do you do? You move the daily sync an hour and a half to give them some time to show up. You can call that an exception, right? Let’s do it.
List<ExceptionOccurrence> exceptions = new()
{
    new ExceptionOccurrence
    {
        ExceptionDate = date,
        Appointment = new Appointment()
        {
            Start = date.AddHours(11).AddMinutes(30),
            End = date.AddHours(11).AddMinutes(50),
            Subject = "Exceptional Maui Team Sync",
        }
    }
};

dailySyncRecurrenceRule.Exceptions.Add(exceptions[0]);
dailySyncAppointment.RecurrenceRule = dailySyncRecurrenceRule;
You know what else is exceptional about the scheduler—its ability to define special time slots. Let’s get to the bottom of this in the next section.
Add Special Time Regions
The Telerik UI for .NET MAUI Scheduler control exposes an option to define special and read-only slots, as well as apply different styles to them. What is needed is a collection of Slot objects, which should be assigned to the SpecialSlotsSource property of any view definition instance that you would like it to apply to.
I think it would be cool to quickly show you how to mark the non-working hours of a work week.
date = date.AddYears(-1);

this.SpecialSlotsSource = new ObservableCollection<Slot>()
{
    new Slot(date.AddHours(17), date.AddDays(1).AddHours(9))
    {
        RecurrencePattern = new RecurrencePattern
        {
            DaysOfWeekMask = RecurrenceDays.Monday | RecurrenceDays.Tuesday | RecurrenceDays.Wednesday | RecurrenceDays.Thursday,
            Frequency = RecurrenceFrequency.Weekly
        }
    },
    new Slot(date.AddHours(17), date.AddDays(3).AddHours(9))
    {
        RecurrencePattern = new RecurrencePattern()
        {
            DaysOfWeekMask = RecurrenceDays.Friday,
            Frequency = RecurrenceFrequency.Weekly
        }
    }
};

// Given the SpecialSlotsSource is the following:
public ObservableCollection<Slot> SpecialSlotsSource { get; set; }
This is our special slots source and now the only thing we must do is assign it to our WeekViewDefinition
<telerik:WeekViewDefinition Title="Work Week" IsWeekendVisible="False" SpecialSlotsSource="{Binding SpecialSlotsSource}" />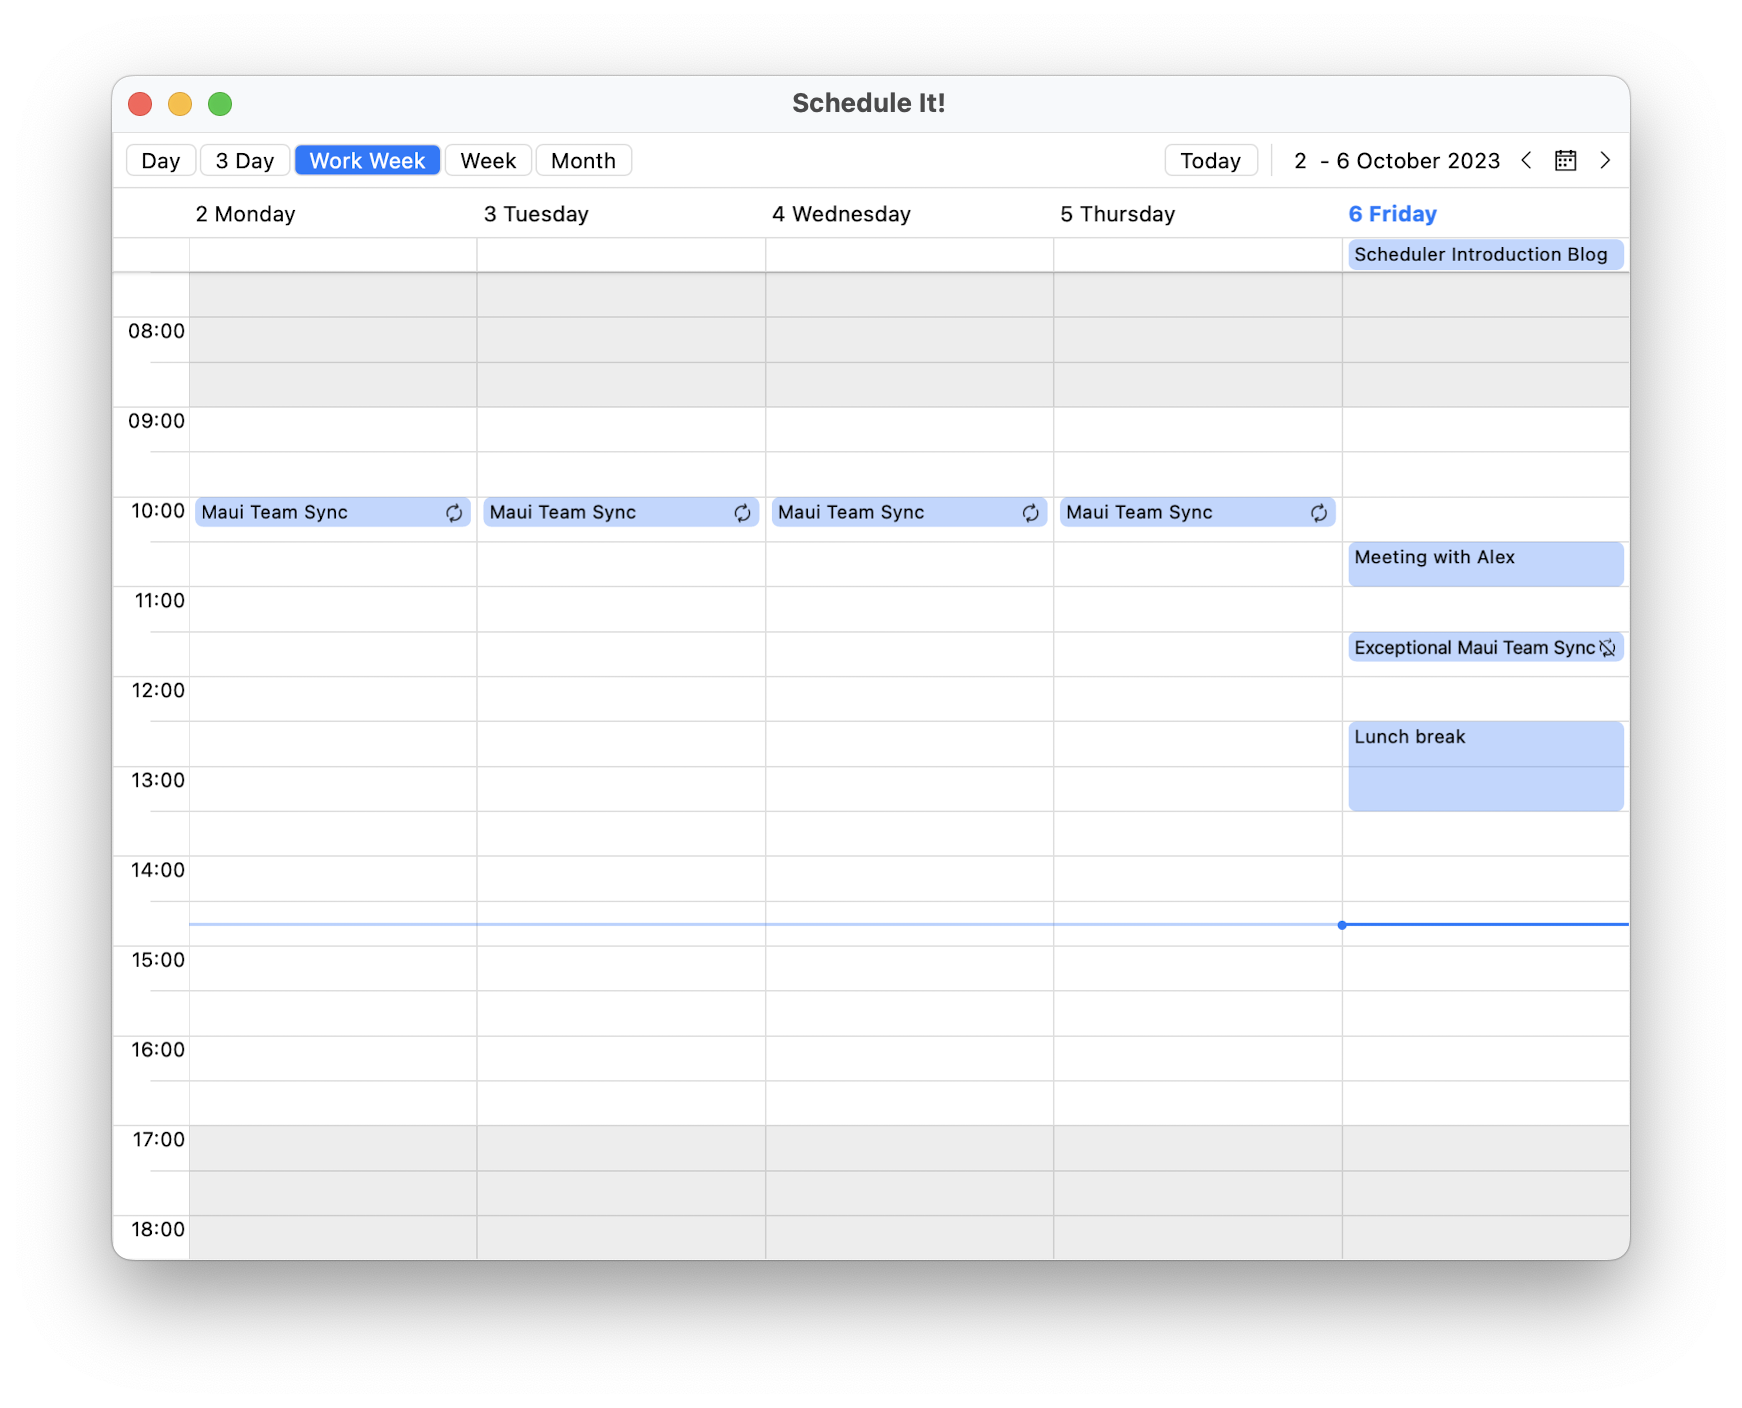
I don’t want to bore you with work related appointments, so it is time to show you something cool that demonstrates a tiny yet essential part of the Scheduler’s customization capabilities.
But while we are still on the special slots topic, I forgot to tell you that they can be customized, too. As you can see from the above screenshot, they are marked with a grayish background by default, so that they are easily noticeable across the view.
You can also add whatever your imagination sparks inside the special slots using the SpecialSlotTemplate property of a view definition.
Tailor Your Events
Your Scheduler events deserve the ability to be provided a unique look. And I will show you how you can do that. Appointment appearance customization can be done by using either the AppointmentTemplate or the
AppointmentStyleSelector property of RadScheduler.
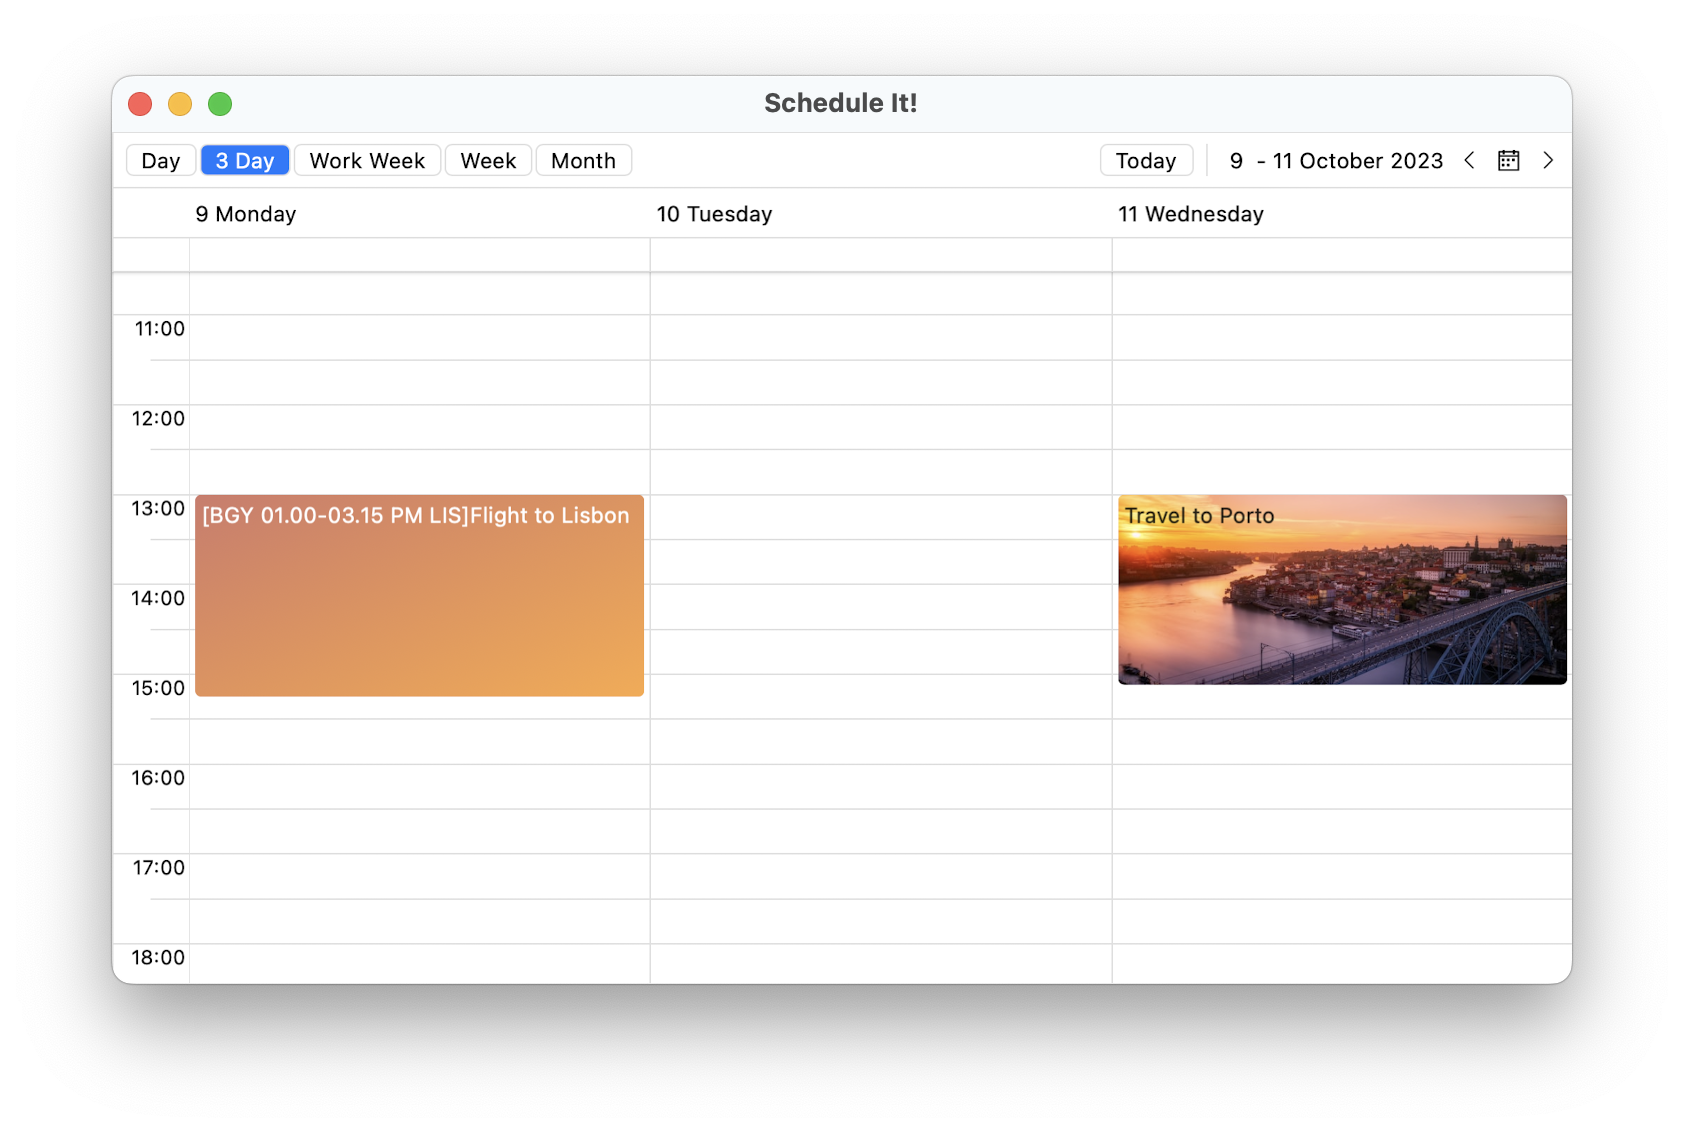
Since I promised non-work-related appointments at the end of the previous section, I will add two now. And they will be related to one of my personal favorites—traveling. After all, jobs fill your pocket, but adventures fill your soul. You need them both.
Which will be my next discovered piece of the world? We will find out in the code lines that follow:
public class CustomAppointmentDataTemplateSelector : DataTemplateSelector
{
    public DataTemplate LisbonAppointmentTemplate { get; set; }
    public DataTemplate PortoAppointmentTemplate { get; set; }

    protected override DataTemplate OnSelectTemplate(object item, BindableObject container)
    {
        var appointment = (item as AppointmentNode).Occurrence.Appointment;
        var subject = appointment.Subject;

        if (subject.Contains("Lisbon"))
        {
            return this.LisbonAppointmentTemplate;
        }
        else if(subject.Contains("Porto"))
        {
            return this.PortoAppointmentTemplate;
        }
        else
        {
            return null;
        }
    }
}
<local:CustomAppointmentDataTemplateSelector x:Key="CustomAppointmentDataTemplateSelector">
    <local:CustomAppointmentDataTemplateSelector.LisbonAppointmentTemplate>
        <DataTemplate>
            <telerik:RadBorder x:Name="rootVisual" CornerRadius="4" Padding="4" IsClippedToBounds="True">
                <telerik:RadBorder.Background>
                    <LinearGradientBrush StartPoint="0, 0" EndPoint="1, 1">
                        <GradientStop Offset="0.0" Color="#D2796A" />
                        <GradientStop Offset="1.0" Color="#FCA845" />
                    </LinearGradientBrush>
                </telerik:RadBorder.Background>
                <Label LineBreakMode="WordWrap" MaximumWidthRequest="{Binding Width, Source={x:Reference rootVisual}}" TextColor="White">
                    <Label.FormattedText>
                        <FormattedString>
                            <FormattedString.Spans>
                                <Span Text="{Binding Occurrence.Appointment.Start, StringFormat='{}[BGY {0:hh.mm}-'}" />
                                <Span Text="{Binding Occurrence.Appointment.End, StringFormat='{}{0:hh.mm tt} LIS]'}" />
                                <Span Text="{Binding Occurrence.Appointment.Subject, StringFormat='{} {0}}'}" />
                            </FormattedString.Spans>
                        </FormattedString>
                    </Label.FormattedText>
                </Label>
            </telerik:RadBorder>
        </DataTemplate>
    </local:CustomAppointmentDataTemplateSelector.LisbonAppointmentTemplate>
    <local:CustomAppointmentDataTemplateSelector.PortoAppointmentTemplate>
        <DataTemplate>
            <telerik:RadBorder CornerRadius="4" IsClippedToBounds="True">
                <Grid>
                    <Image Source="porto.jpg" Aspect="AspectFill" />
                    <Label Text="{Binding Occurrence.Appointment.Subject}" Margin="4" />
                </Grid>
            </telerik:RadBorder>
        </DataTemplate>
    </local:CustomAppointmentDataTemplateSelector.PortoAppointmentTemplate>
</local:CustomAppointmentDataTemplateSelector>
So, this was long, I know, but necessary and worth it, I promise. I prepared a custom DataTemplateSelector and defined the data templates.
Then, I assigned the selector to the AppointmentTemplate of the Scheduler:
<telerik:RadScheduler x:Name="scheduler" AppointmentsSource="{Binding Appointments}" AppointmentTemplate="{StaticResource CustomAppointmentDataTemplateSelector}" ... />And, of course, I added the appointments:
var tripDate = new DateTime(2023, 10, 9, 0, 0, 0);
this.Appointments.Add(new Appointment { Subject = "Flight to Lisbon", Start = tripDate.AddHours(13), End = tripDate.AddHours(15).AddMinutes(15)  });
this.Appointments.Add(new Appointment { Subject = "Travel to Porto", Start = tripDate.AddDays(2).AddHours(13), End = tripDate.AddDays(2).AddHours(15).AddMinutes(7)  });
And the result is this—one appointment with a gradient background, and one with an image!
Appointments are not the only thing that can be customized. Even the tiniest bits of the .NET MAUI Scheduler can be tailored to your needs. The header area (with all its buttons, labels, etc.), the header item of the view definition, the special slots, the lines (major, minor, horizontal, vertical, the ones in the time ruler), the current time and more appointments indicators and so on, and so forth.
This, of course, is related to visual appearance customization. You can also control the type of calendar that will be used by the scheduler. Learn how in the next mini section.
G11N & L10N
Whoa, if I show this section title to my grandpa, he will 100% ask for a translation. But you are most probably aware that we will be talking about globalization and localization support of the .NET MAUI Scheduler.
How is this related to the type of calendar I mentioned? Well, the Scheduler exposes a Culture property, which, of course, will result in changes not only to the calendar type you will see, but also in its day names and
first day of week.
For example, we can have a Japanese calendar with this single line of code:
this.scheduler.Culture = new System.Globalization.CultureInfo("ja"); 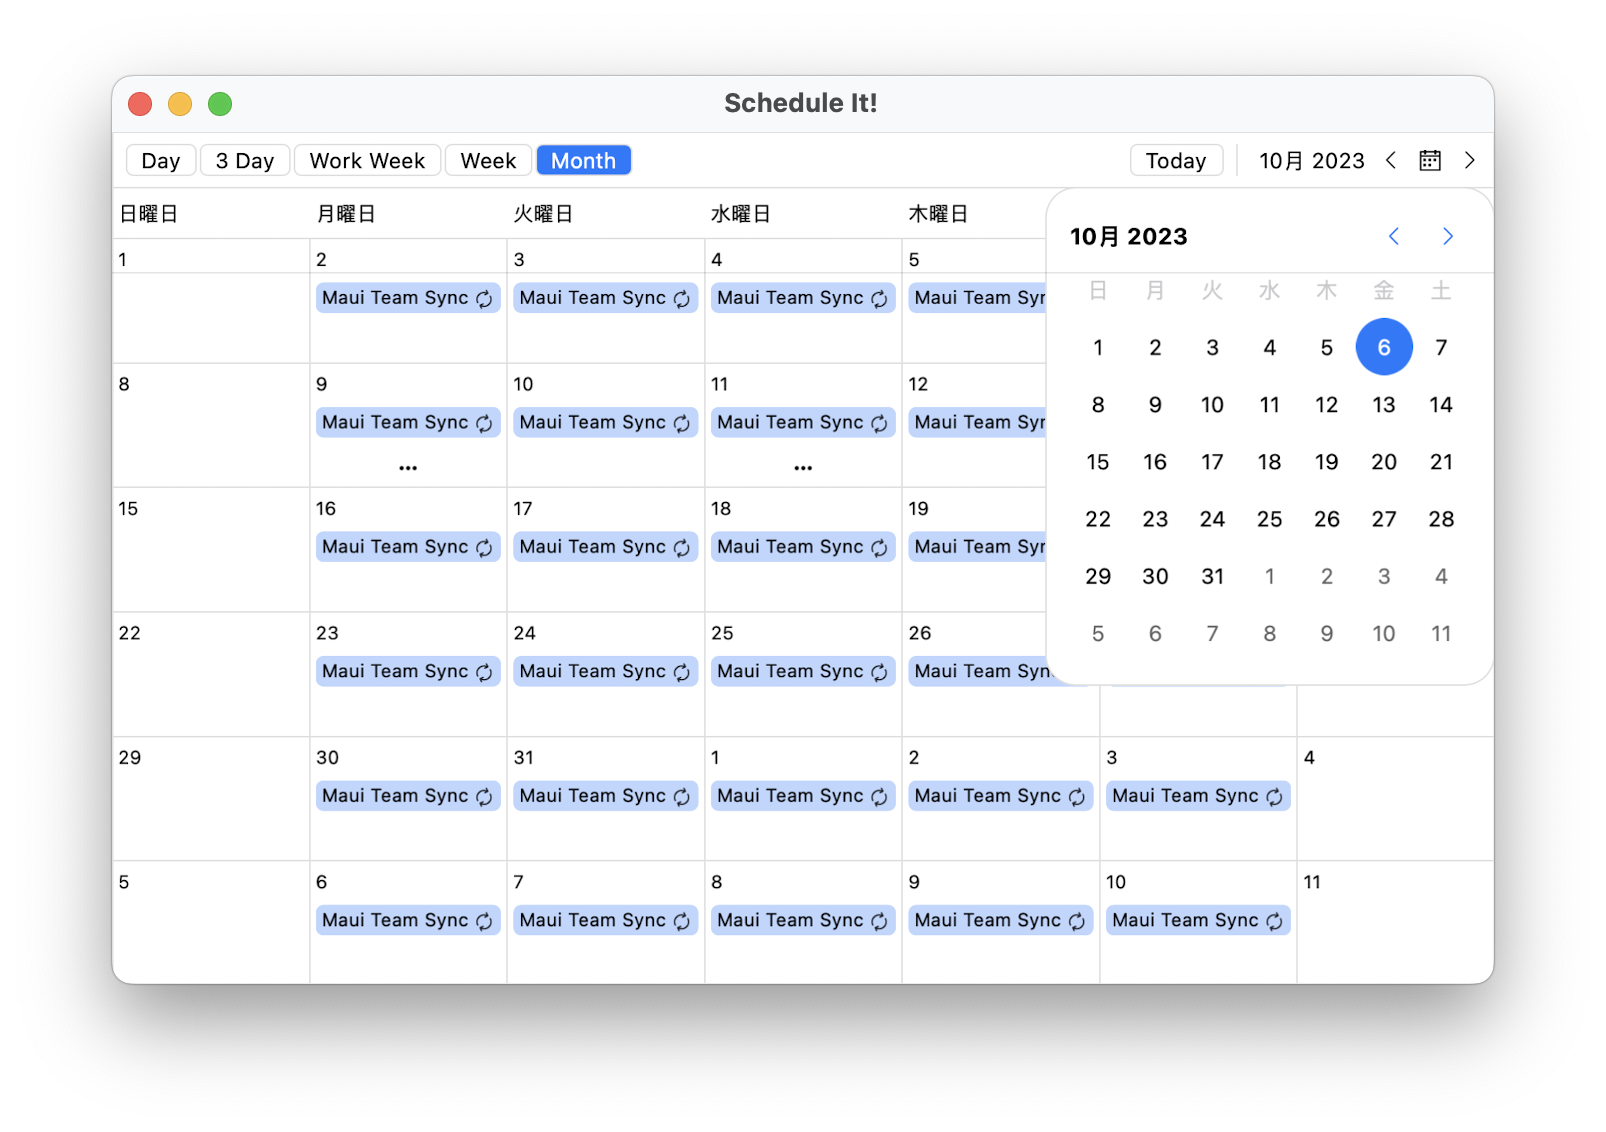
In addition to the above, the Telerik UI for .NET MAUI Scheduler also provides localization support. The things you can localize are the titles of each view definition, the today header, and the empty view definition text we saw at the very beginning of this blog.
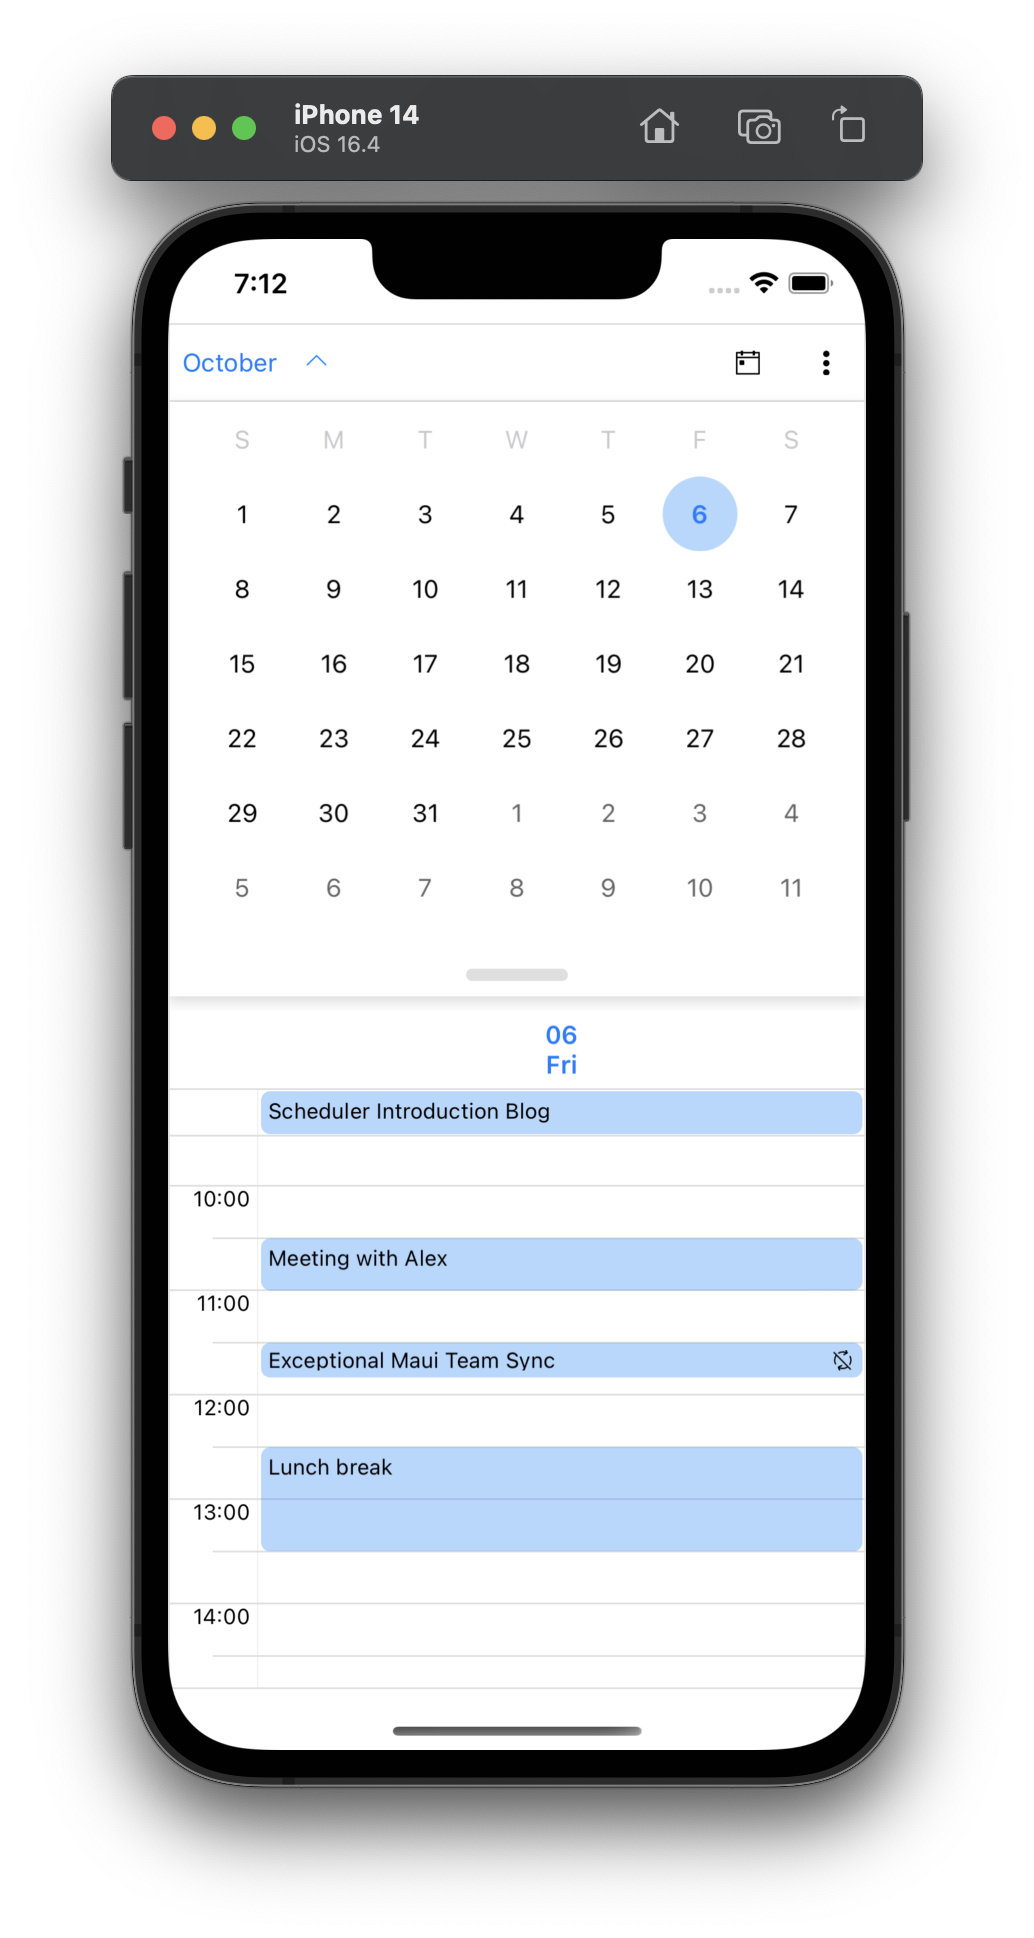
Over a thousand words and not a single glance at the mobile appearance of this beauty! Let me make it up to you right away.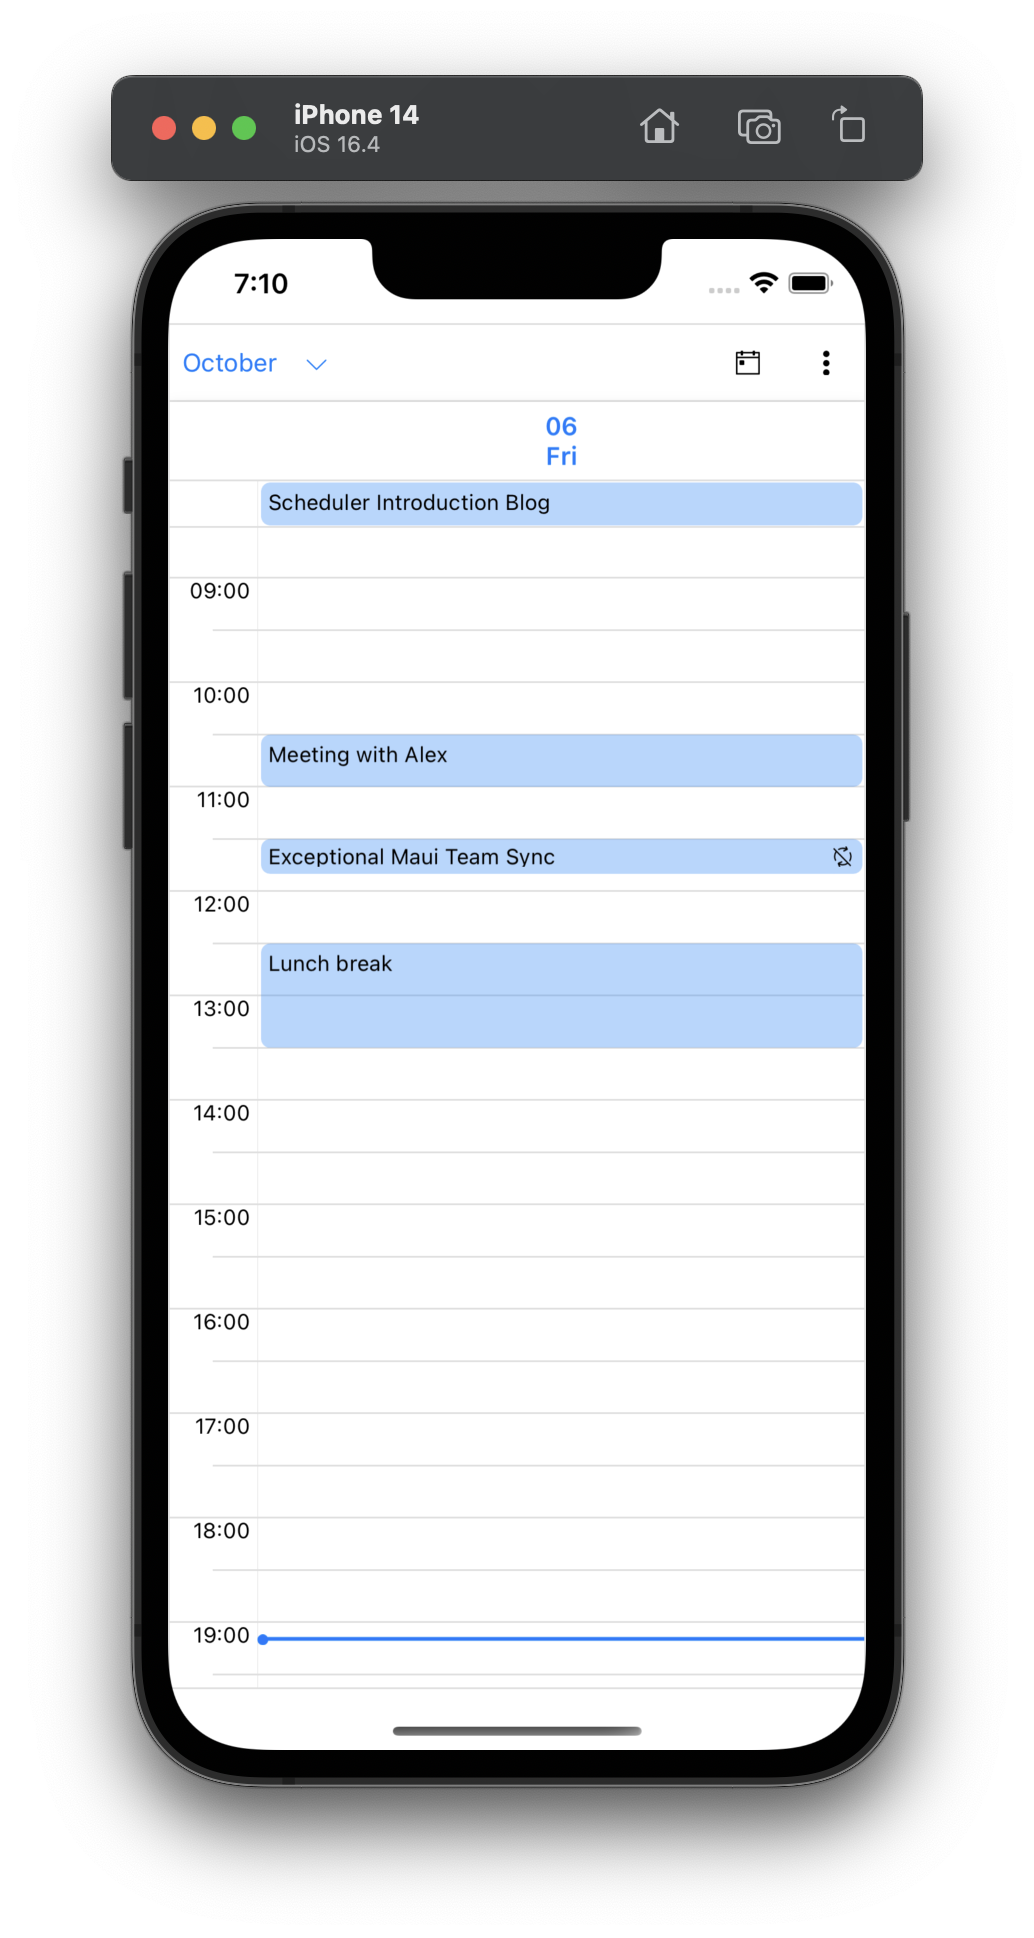
The calendar here is shown by tapping the chevron next to the month name in the header, and the view definitions can be switched by tapping the three dots at the very right in the header area.
Continue Exploring
Oooh, this scheduler is huge! 😅 No wonder it was the most voted component in the Feedback Portal! 🔝 This point is a good one to stop and leave the rest to explore by yourselves. I am sure I caught your interest enough to get the latest bits now and bring the .NET MAUI Scheduler to your apps.
If by some chance you are not already using the Telerik UI for .NET MAUI library, try it out for 30 days at zero cost. Give it a shot and enjoy just how easy and fast it makes it to develop stunning Maui apps. And don’t forget to explore the rest of the new goodies that DevTools R3 release brought.
And stay tuned as there is more and as always, the best is yet to come. 💫

Viktoria Grozdancheva
Viktoria is a Senior Front-end Developer with 5+ years of experience designing and building modern UI for desktop and mobile platforms on Microsoft/Telerik technology stacks. Her spare time is dedicated to friends and family and discovering new pieces of the world. Find her on Twitter and LinkedIn.
Related Posts
Comments
All articles
Topics
Web MobileMobile
Desktop
Design
Productivity
People
