ASP.NET Core Basics: Tag Helpers

Summarize with AI:
Tag Helpers are a great feature of ASP.NET Core and provide an easier and more intuitive way to add dynamic behavior to webpages. Check out in this post how Tag Helpers can make your development more accessible and more productive.
ASP.NET Core Tag Helpers allow developers to add server-side logic to a Razor page template, allowing the development of complex functionality, such as data entry validation, page navigation and form management directly in HTML—no external classes are required, and they also work faster than other alternatives, such as traditional ASP.NET Helpers that dynamically generate HTML output.
In this article, we will cover several topics related to Tag Helpers and see how they work in practice.
What Are Tag Helpers in ASP.NET Core?
ASP.NET Core Tag Helpers are a tagging tool that allow you to dynamically add behaviors and attributes to HTML elements in an ASP.NET Core MVC application. They are an extension of the concept of Razor Views, which allow the creation of dynamic webpages using an HTML-like syntax.
Tag Helpers are written as .NET classes and implement the ITagHelper interface. They have access to the page’s execution context and can interact with data models, services, and other application components. They are registered in an application configuration file and can be used in any Razor Page template.
We can use Tag Helpers as an alternative to traditional ASP.NET Helpers that generate HTML output dynamically. But it is important to remember that Tag Helpers do not replace Html Helpers—rather they provide an easier and more intuitive way to add dynamic behavior to ASP.NET Core webpages, reducing the amount of C# code needed to create dynamic webpages and improving the readability of the page code.
Types of ASP.NET Core Tag Helpers
There are three types of ASP.NET Core Tag Helpers: built-in Tag Helpers, custom Tag Helpers and third-party Tag Helpers.
Below we will see each of the three types of Tag Helpers in ASP.NET Core with practical examples of each one.
1. Built-in Tag Helpers
These are native ASP.NET Core Tag Helpers that help generate cleaner and more readable HTML. Some examples of built-in Tag Helpers include form, input, img,
a and select.
Next, we are going to create an ASP.NET Core application in the MVC model and implement a page to display the details of a record in the database using the ASP.NET built-in Tag Helpers.
You can access the project’s source code here:
Contact Manager source coode.
Prerequisites:
- Visual Studio
- .NET 7
In Visual Studio, click “Create a new project” choose “ASP.NET Core Web App (Model-View-Controller),” then choose .NET 7 and click “Create.”
Creating the Contact Entity
To create the main entity of the app inside the “Models” folder, create the class below:
- Contact
namespace ContactManager.Models;
public class Contact
{
    public Contact(Guid id, string? name, string? email, string? phone, string? address)
    {
        Id = id;
        Name = name;
        Email = email;
        Phone = phone;
        Address = address;
    }

    public Guid Id { get; set; }
    public string? Name { get; set; }
    public string? Email { get; set; }
    public string? Phone { get; set; }
    public string? Address { get; set; }
}
Adding Data
To keep things simple, we are not going to use a traditional database. Instead we are going to create a JSON file with the data that will be used to visualize the pages.
In the root of the project, create a new folder called “Data” and inside it add a file with the name “collection.json.” In it, place the code below:
[
  {
    "Id": "93bcab15-2ebb-4070-a9a7-1f071725d9d3",
    "Name": "John Smith",
    "Email": "jsmith@mymail.com",
    "Phone": "2025550136",
    "Address": "2336 Jack Warren Rd Delta Junction Alaska (AK)"
  },
  {
    "Id": "cf55ff33-c79e-4fc1-860c-b80b2c554fe1",
    "Name": "Shirley Gale",
    "Email": "shirleygale@mymail.com",
    "Phone": "5598719650",
    "Address": "9153 Jerry Dr, Juneau, Alaska 99801, USA"
  },
  {
    "Id": "65ed423c-ce55-4ab7-bb69-1caa5854690b",
    "Name": "Velda Yonker",
    "Email": "veldajyonker@mymail.com",
    "Phone": "907897623",
    "Address": "1105 Aztec Rd, North Pole, Alaska 99705, USA"
  }
]
Creating the Contact Controller
Now let’s create a new controller that will access the pages we’ll use to create the ASP.NET Core Tag Helpers. Then, inside the “Controllers” folder, right-click and choose the option “Add New Controller (Empty),” put the name “ContactController,” and then in the created file, replace the existing code with the code below:
using System;
using System.Text.Json;
using ContactManager.Models;
using Microsoft.AspNetCore.Mvc;

namespace ContactManager.Controllers;

public class ContactController : Controller
{
    private readonly ILogger<ContactController> _logger;

    public ContactController(ILogger<ContactController> logger)
    {
        _logger = logger;
    }

    public IActionResult Index()
    {
        string pathData = "Data/collection.json";

        using var jsonFile = System.IO.File.OpenRead(pathData);

        var contacts = JsonSerializer.Deserialize<List<Contact>>(jsonFile);

        if (contacts == null)
        {
            return NotFound();
        }

        return View(contacts);

    }

    public IActionResult Detail(Guid? id)
    {
        string pathData = "Data/collection.json";

        using var jsonFile = System.IO.File.OpenRead(pathData);

        var contacts = JsonSerializer.Deserialize<List<Contact>>(jsonFile);

        if (id == null || contacts == null)
        {
            return NotFound();
        }

        var contact = contacts.FirstOrDefault(x => x.Id == id);
        if (contact == null)
        {
            return NotFound();
        }
        return View(contact);
    }

}
Note that in the code above we are creating a route (Index) to display a list containing all contacts. For this, the data is retrieved from the JSON file, serialized and converted into a variable. If the search returns null, a “404 – Not Found” message will be displayed. Otherwise the found data will be returned to the View layer.
We are also defining a route (Detail) that will display the details of a selected contact.
Creating the View with Tag Helpers
Finally, let’s create the pages to display the list data and contact details using Tag Helpers in ASP.NET Core. Inside the “Views” folder, create a new folder called “Contact.” Inside it, let’s create two views: Index and Detail.
To create the Index view, right-click on the “Home” folder, choose “Add” and then “View…” Then choose “Razor View – Empty,” click on “Add,” and in the window that opens put the name “Index.cshtml” and click on “Add.”
Then open the file you created and replace the existing code with the code below:
@{
    ViewData["Title"] = "Home Page";
}

@model IEnumerable<ContactManager.Models.Contact>
@{
    ViewBag.Title = "ContactList";
}

<h2>Contact list</h2>
<table class="table">
    <tr>
        <th>@Html.DisplayNameFor(model => model.Id)</th>
        <th>@Html.DisplayNameFor(model => model.Name)</th>
        <th>@Html.DisplayNameFor(model => model.Email)</th>
        <th>@Html.DisplayNameFor(model => model.Phone)</th>
        <th>@Html.DisplayNameFor(model => model.Address)</th>
        <th></th>
    </tr>
    @foreach (var item in Model)
    {
        <tr>
            <td>@Html.DisplayFor(modelItem => item.Id)</td>
            <td>@Html.DisplayFor(modelItem => item.Name)</td>
            <td>@Html.DisplayFor(modelItem => item.Email)</td>
            <td>@Html.DisplayFor(modelItem => item.Phone)</td>
            <td>@Html.DisplayFor(modelItem => item.Address)</td>
        </tr>
    }
</table>
Repeat the same process previously described to create a new view, but now use the name “Detail.cshtml” and replace the new view’s code with the code below:
@model ContactManager.Models.Contact

@{
    ViewData["Title"] = "Detail";
}

<div>
    <h4>Contact Contact</h4>
    <hr />
    <dl class="row">
        <dt class="col-sm-2">
            <label asp-for="@Model.Id"></label>
        </dt>
        <dd class="col-sm-10">
            <label>@Model.Id</label>
        </dd>
        <dt class="col-sm-2">
            <label asp-for="@Model.Name"></label>
        </dt>
        <dd class="col-sm-10">
            <label>@Model.Name</label>
        </dd>
        <dt class="col-sm-2">
            <label asp-for="@Model.Email"></label>
        </dt>
        <dd class="col-sm-10">
            <label>@Model.Email</label>
        </dd>
        <dt class="col-sm-2">
            <label asp-for="@Model.Phone"></label>
        </dt>
        <dd class="col-sm-10">
            <label>@Model.Phone</label>
        </dd>
        <dt class="col-sm-2">
            <label asp-for="@Model.Address"></label>
        </dt>
        <dd class="col-sm-10">
            <label>@Model.Address</label>
        </dd>
     </dl>
        <a asp-controller="Contact" asp-action="Index">All contacts</a>
</div>
Note that in the code above we are defining the tag Anchor: <a asp-controller="Contact" asp-action="Index">All contacts</a>,
which is a native .NET Tag Helper, where we pass in the “asp-controller” property the name of the controller responsible for the page we want to display—very similar to the “href” of the HTML helper.
Now, inside the Views folder in the “_ViewImports.cshtml” file, add the code snippet below. It is used to indicate that we are using Tag Helpers in our pages.
@addTagHelper *, Microsoft.AspNetCore.Mvc.TagHelpers
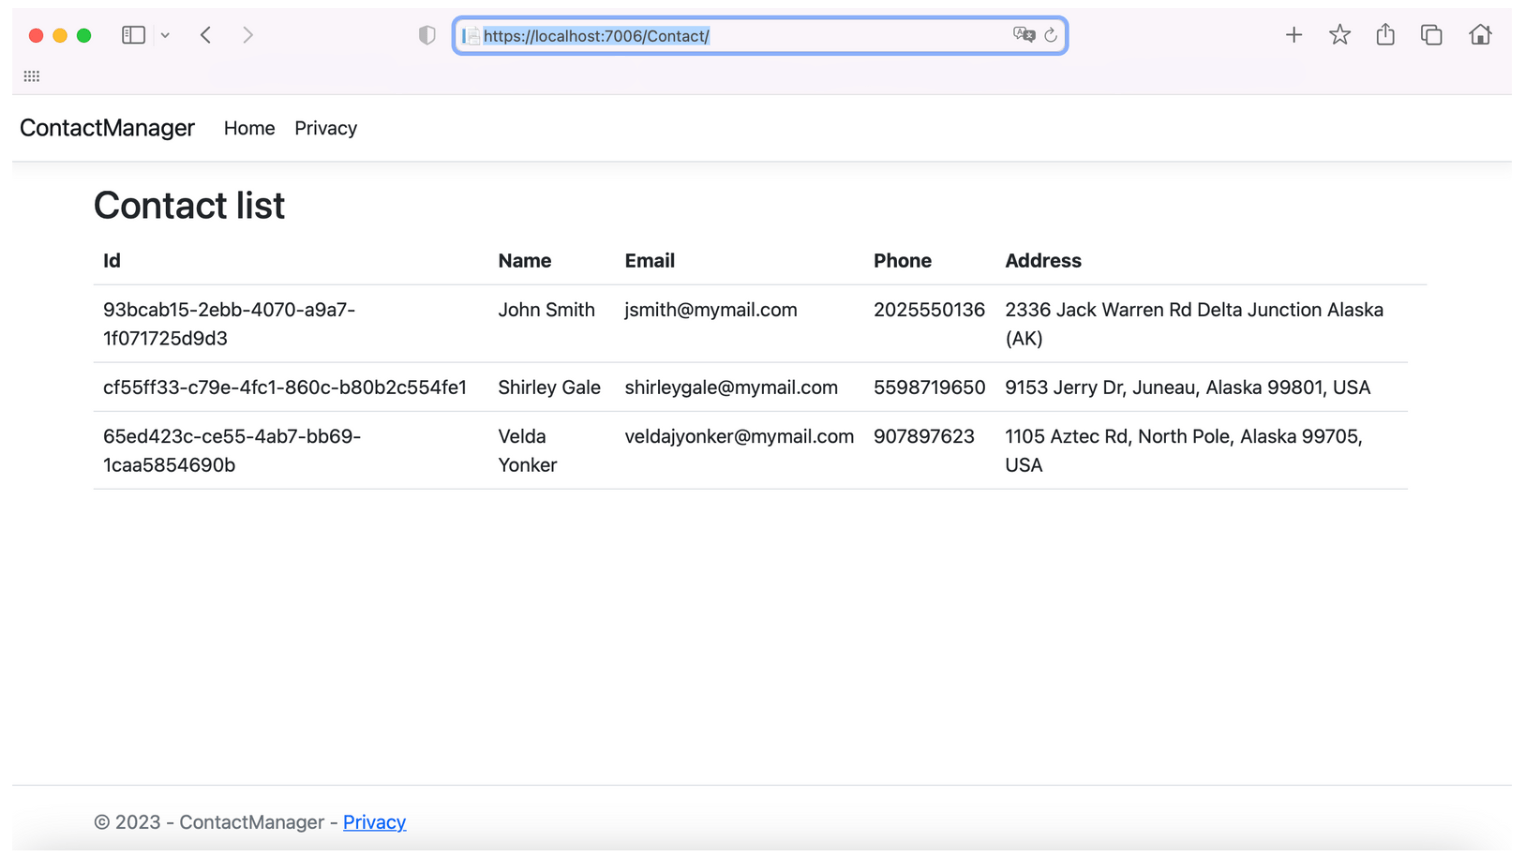
To see the result, just run the application, and a browser window will open. To access the page with the list of contacts, use the address localhost:[PORT]/Contact, which will display a page similar to the image below:

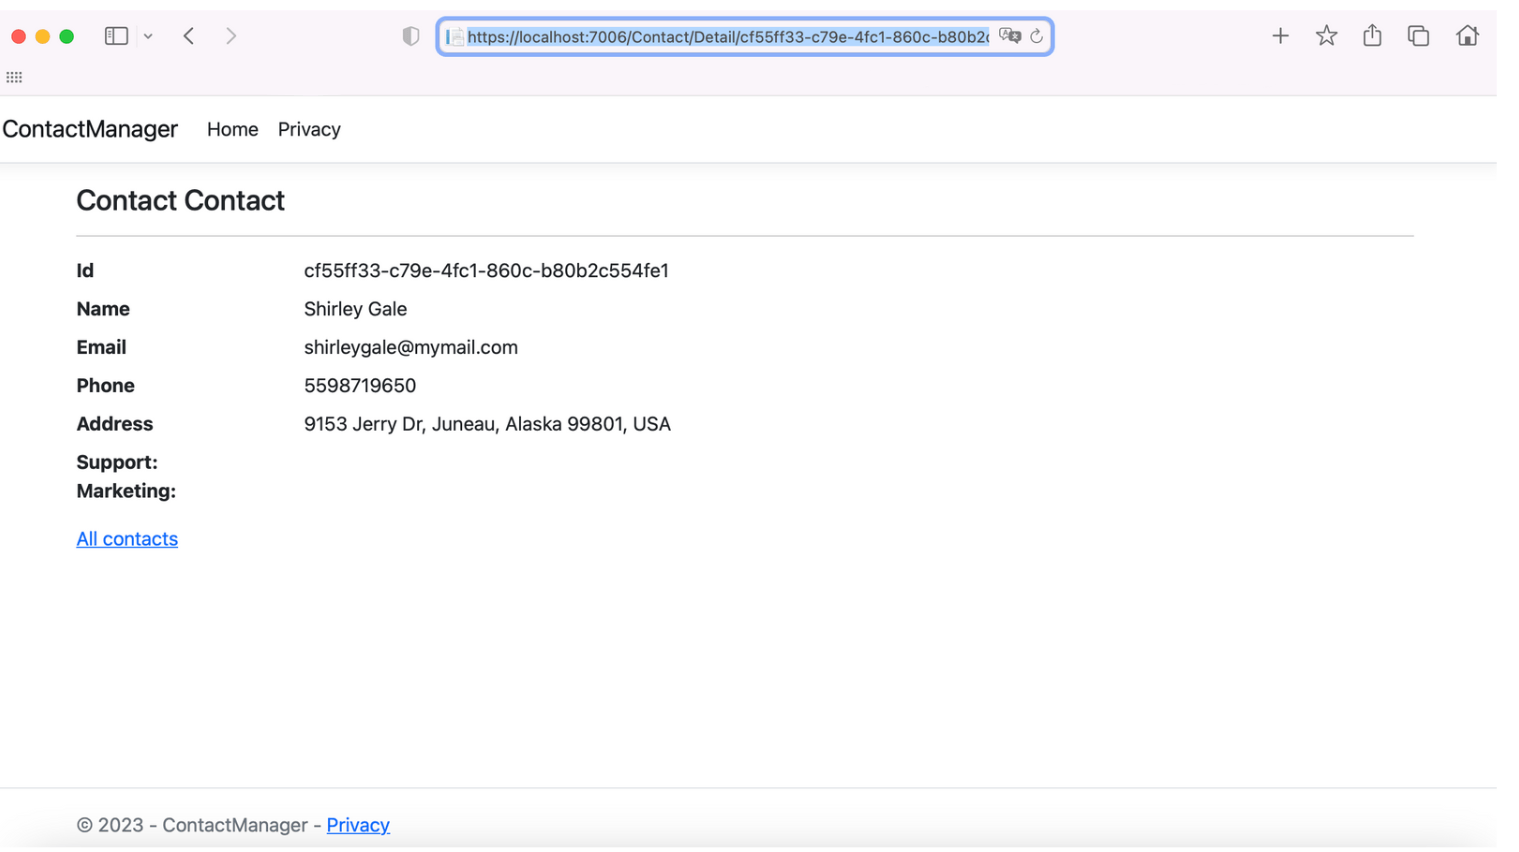
Now in the browser access the address https://localhost:[PORT]/Contact/Detail/cf55ff33-c79e-4fc1-860c-b80b2c554fe1 and you will have the following result:

If you click on the “All contacts” link, you will be redirected to the contact list page because we have added the asp-controller="Contact" property in the Tag Helper Anchor.
There are many other built-in Tag Helpers in ASP.NET Core. You can check the complete list here: ASP.NET Core built-in Tag Helpers.
2. Custom Tag Helpers
Custom Tag Helpers are tags created by the developer to meet specific requirements. Developers can create their Tag Helpers to extend ASP.NET Core functionality as needed.
Next, let’s create an example of a custom Tag Helper that will be a personalized email tag, where we just need to pass the beginning of the email, and the return will be a tag composed of the complete email.
So, create a new folder called “TagHelpers” and inside it create a class with the name “EmailTagHelper” and replace the generated code with the one below:
using System;
using System.Text;
using Microsoft.AspNetCore.Razor.TagHelpers;

namespace ContactManager.TagHelpers;

public class EmailTagHelper : TagHelper
{
    private const string EmailDomain = "mymail.com";
    public string MailTo { get; set; }

    public override void Process(TagHelperContext context, TagHelperOutput output)
    {
        output.TagName = "a";

        var address = MailTo + "@" + EmailDomain;
        output.Attributes.SetAttribute("href", "mailto:" + address);
        output.Content.SetContent(address);
    }
}
Note that in the code above the class we created is implementing the TagHelper class and overriding the Process method, where we define that the value received in the MailTo variable will be concatenated with the domain @mymail.com and finally returns the result to the view.
Now in the “Detail.cshtml” view, add the following code snippet above the code: <a asp-controller="Contact" asp-action="Index">All contacts</a>.
     <strong>Support: </strong><email mail-to="support"></email><br />
     <strong>Marketing: </strong><email mail-to="marketing"></email>
     <br />
Note that in the code above we are defining the custom tag we created (<email>) and passing the values support and marketing to it in the
mail-to property.
The last step is to configure our custom Tag Helper to work. In the “Views” folder, in the “_ViewImports.cshtml” file, add the code below:
@addTagHelper *, ContactManager
Note that we added the name ContactManager, which is the namespace name of the application. If you created the application with another name, you need to put the name you used here.
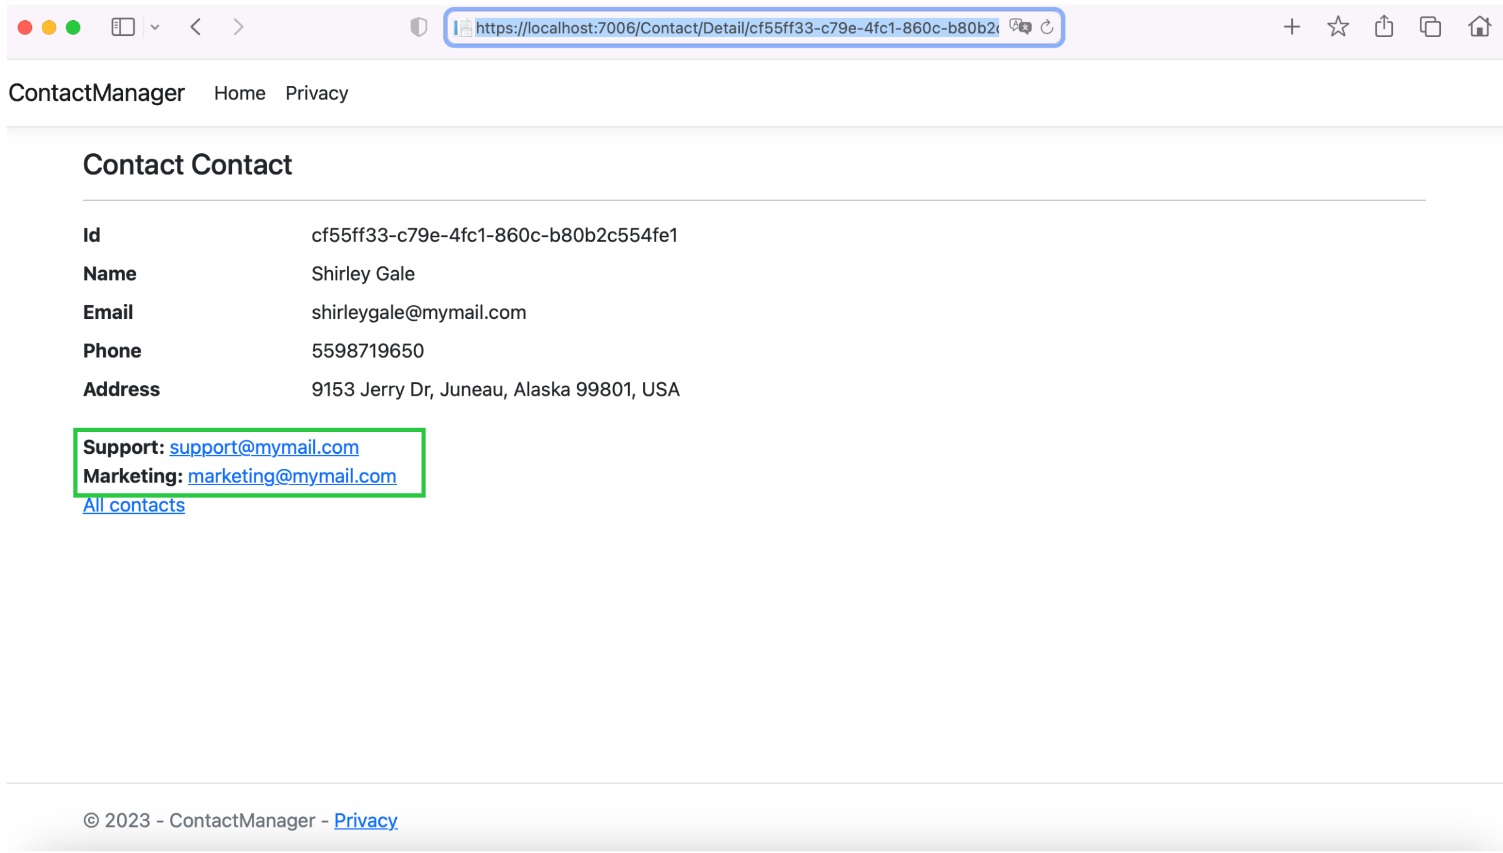
Now just run the application and check the address https://localhost:[PORT]/Contact/Detail/cf55ff33-c79e-4fc1-860c-b80b2c554fe1 and you will have the following result:

Note that both names were displayed in the links in the emails. Thus, if we have more emails to display, just pass the desired name to the email tag, and the complete email will be rendered in the page’s HTML.
3. Third-Party Tag Helpers:
There are Tag Helpers provided by third-party libraries that can be integrated into the ASP.NET Core project.
An excellent example of third-party Tag Helpers is Progress Telerik UI for ASP.NET Core Tag Helpers, which provides several ready-to-use components.
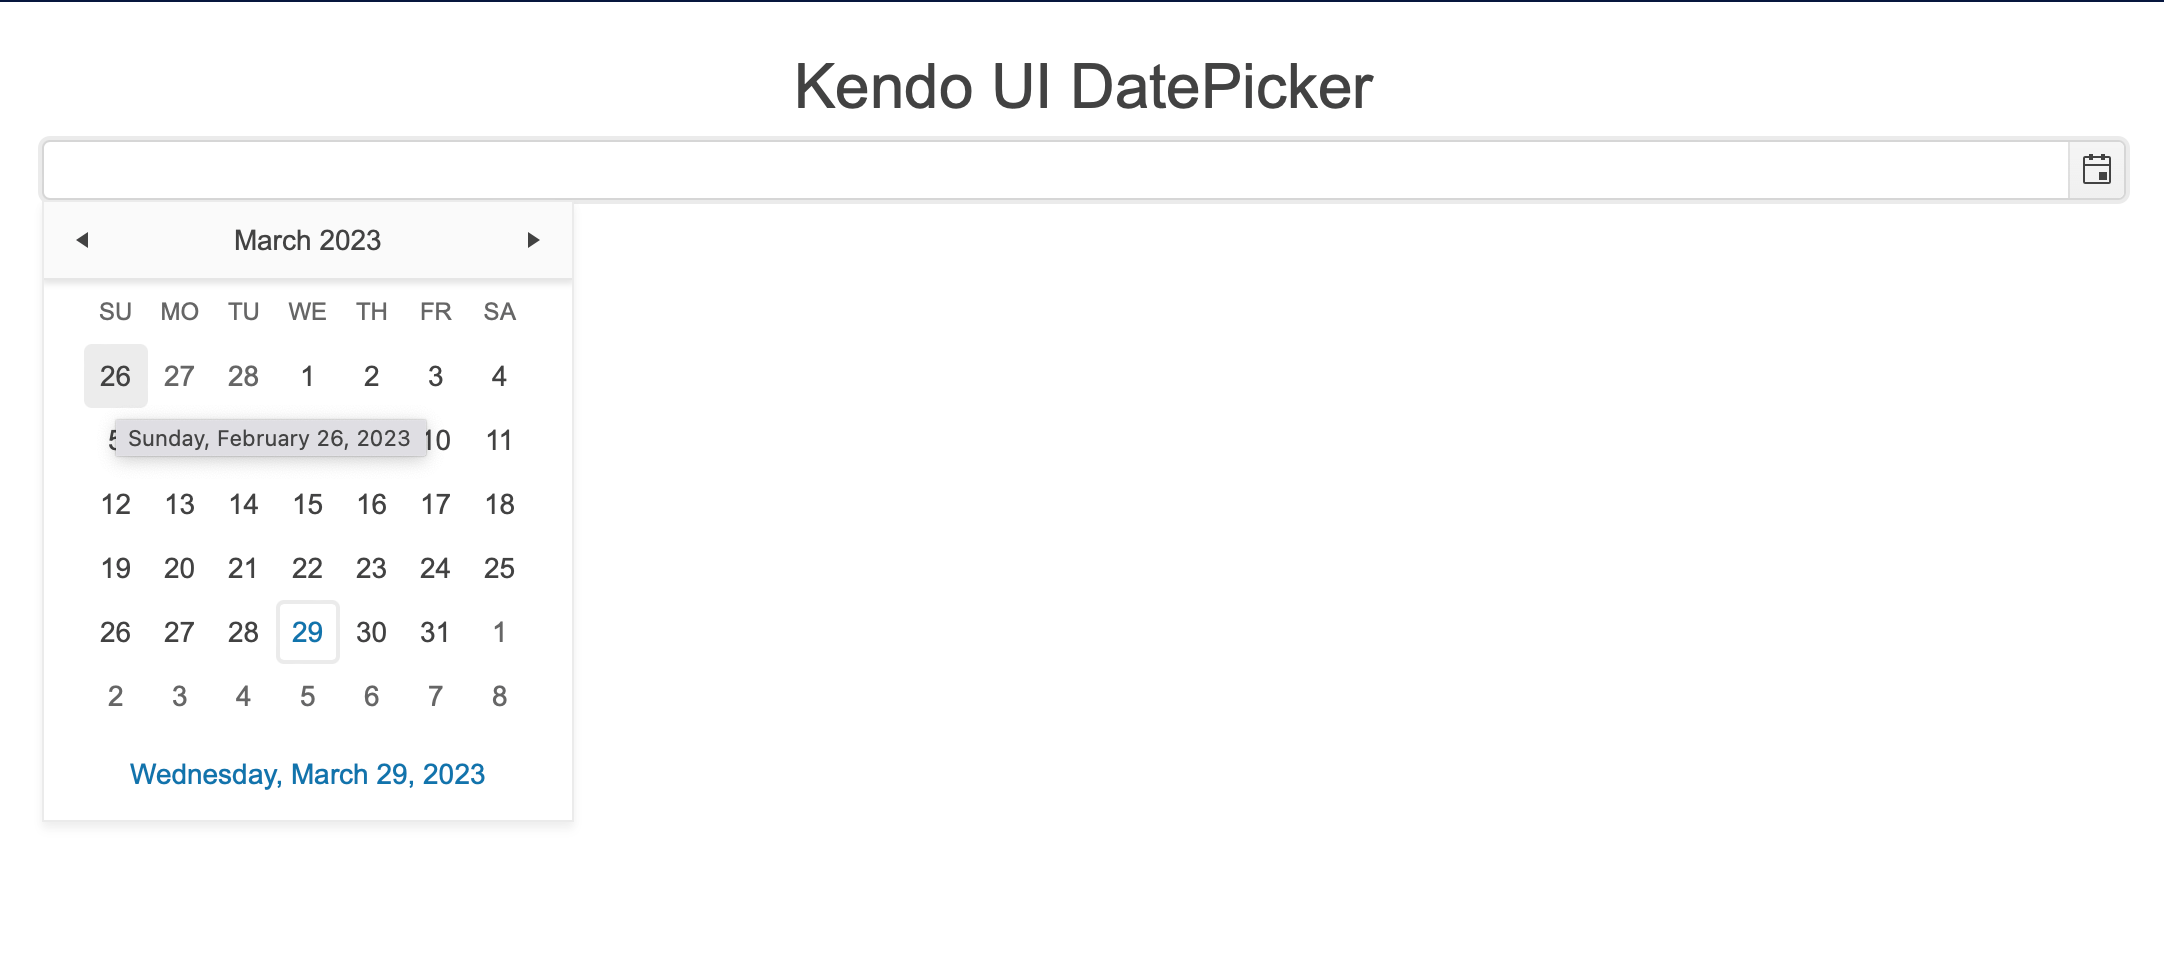
In this example, we are going to use the Telerik UI for ASP.NET Core Tag Helper “kendo-datepicker” which is used to create a date input by selecting a date from a calendar.
With Telerik UI, it is very easy—just add the following code:
@addTagHelper *, Kendo.Mvc

<div class="text-center">
     <h2>Kendo UI DatePicker</h2>
     <kendo-datepicker name="my-picker"/>
</div>
Then we will have the following result:

You can test this code right in your browser, just click here: REPL kendo-datepicker.
Conclusion
In this article, we learned a little about Tag Helpers, which, according to Microsoft itself, do not replace the traditional HTML Helpers. But they can undoubtedly help a lot in development thanks to their wide variety of options, where we can use native, customized and third-party Tag Helpers.
So consider using Tag Helpers and see for yourself all the advantages that are possible when developing applications in ASP.NET Core.


