
Adding Audio Effects to Dynamic Websites

Summarize with AI:
When we create dynamic websites, we may need to add audio. HTML5 allows us to do this with the magic of the <audio /> component.
TL;DR
These demos use Vue and Nuxt to present audio files with default controls, auto-play and customizable actions for your own app’s needs. The concept should work in any JavaScript framework.
Display Sound with Controls
To add a sound into our app, we must use the <audio /> element with the src pointing to our filename.
<template>
    <div>
        <h2 class="text-2xl my-3">Let's go Mario!</h2>
        <audio autoplay src="/mario.wav" preload="auto" controls />
    </div>
</template>
By adding controls, the browser will display the default control options.
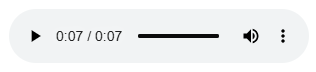
You will have options to download the audio file, change the playback speed, play and pause, and modify the volume.
Preloading
We can preload the audio file by adding preload="auto" and even earlier in the header if we want.
<link rel="preload" as="audio" href="/mario.wav" type="audio/wav">
The link tag will pre-download the file as soon as the HTML is parsed in the header, but the audio tag will preload the file.
Multiple Sources
If we have multiple versions of the file and we want to make sure our browser supports it, we could use the source tag as well, but I do not use it in our example.
<audio controls preload="auto">
  <source src="/audio/mario.mp3" type="audio/mpeg">
  <source src="/audio/mario.wav" type="audio/wav">
  Your browser does not support the audio element.
</audio>
Autoplay
If we add autoplay to our element, it will automatically play the audio file. However, this is ONLY after interaction to the webpage. You can see this in action by changing routes and clicking back home.
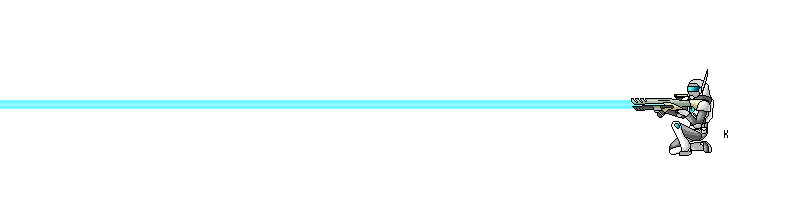
Laser Looping
Our laser gun example will loop the file over and over. We add the loop attribute if we want to repeat the sound. Again, this will only start playing after the page had had interaction.
Custom Controls
If you’re building a game or dynamic website, you’re going to want to customize your controls.
Audio Hook
We also need an audio hook to control our audio element.
export const useAudio = (filename: string) => {

    const audio = ref<HTMLAudioElement | null>(null)

    const isPlaying = ref<boolean>(false)
    const currentTime = ref<number>(0)
    const duration = ref<number>(0)

    const seek = () => {
        if (audio.value) audio.value.currentTime = currentTime.value
    }

    const updateTime = () => {
        if (audio.value) currentTime.value = audio.value.currentTime
    }

    const pause = () => {
        if (!audio.value) {
            return
        }
        if (audio.value.paused) {
            audio.value.play()
            return;
        }
        audio.value.pause()
    }

    onMounted(() => {

        if (!audio.value) {
            return
        }

        audio.value.src = filename
        audio.value.autoplay = true
        audio.value.ontimeupdate = updateTime
        audio.value.onplay = () => {
            isPlaying.value = true
        }
        audio.value.onpause = () => {
            isPlaying.value = false
        }
        audio.value.onloadedmetadata = () => {
            duration.value = audio.value!.duration
        }
    })

    return {
        audio,
        pause,
        isPlaying,
        currentTime,
        duration,
        seek
    }
}
Nuxt and other frameworks have libraries for this with many more features, so let’s break down how you can create one.
Signals
Anything that will require the DOM to update dynamically will need a signal.
const isPlaying = ref<boolean>(false)
const currentTime = ref<number>(0)
const duration = ref<number>(0)
Filename
We set our filename by passing it to the hook.
audio.value.src = filename
When the component gets mounted, so does the filename.
Attributes
Our autoplay and loop attributes are equally available.
audio.value.autoplay = true
isPlaying
Notice the isPlaying gets handled using the built-in onpause and onplay.
audio.value.onplay = () => {
    isPlaying.value = true
}
audio.value.onpause = () => {
    isPlaying.value = false
}
audio.value.onloadedmetadata = () => {
    duration.value = audio.value!.duration
}
Duration
We will need to calculate the duration of the audio file as soon as it is available.
audio.value.onloadedmetadata = () => {
    duration.value = audio.value!.duration
}
Play and Pause Button
We will need to toggle the play/pause correctly.
const pause = () => {
    if (!audio.value) {
        return
    }
    if (audio.value.paused) {
        audio.value.play()
        return
    }
    audio.value.pause()
}
If paused, we display play; if playing, we display pause.
Note: We can’t use the audio element until the reference is correctly attached to the hook with audio.value. We do nothing if not attached yet while loading.
Current Play Time
Instead of starting a clock when the audio starts playing, we can watch the ontimeupdate event.
audio.value.ontimeupdate = updateTime
We update our signal based on that time.
const updateTime = () => {
    if (audio.value) currentTime.value = audio.value.currentTime
}
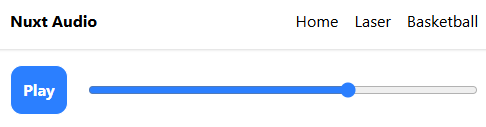
Hook Usage
We call the hook inside our component.
<script setup lang="ts">
const { audio, isPlaying, pause, currentTime, duration, seek } =
  useAudio("/basketball.wav")
</script>

<template>
  <main class="flex items-center justify-center gap-5">
    <button
      type="button"
      class="p-3 border rounded-xl bg-blue-500 text-white font-bold cursor-pointer"
      v-on:click="pause"
    >
      {{ isPlaying ? "Pause" : "Play" }}
    </button>
    <audio ref="audio" preload="auto" />
    <input
      type="range"
      class="w-full accent-blue-500"
      min="0"
      :max="duration"
      step="0.1"
      v-model="currentTime"
      @input="seek"
    />
  </main>
</template>
Attach Element
const { audio, ... } = useAudio('/filename');

...

<audio ref="audio" preload="auto" />
Play Button
Since isPlaying is a signal, we can easily display the proper text.
{{ isPlaying ? "Pause" : "Play" }}
Seek with Input
We use an range input element to seek.
<input
  type="range"
  class="w-full accent-blue-500"
  min="0"
  :max="duration"
  step="0.1"
  v-model="currentTime"
  @input="seek"
/>
We can set our duration and currentTime, and when we change it, this will update the seek function.
This is just the beginning. Now go build something and listen to your sounds!

Jonathan Gamble
Jonathan Gamble has been an avid web programmer for more than 20 years. He has been building web applications as a hobby since he was 16 years old, and he received a post-bachelor’s in Computer Science from Oregon State. His real passions are language learning and playing rock piano, but he never gets away from coding. Read more from him at https://code.build/.
Related Posts
Comments
All articles
Topics
Web MobileMobile
Desktop
Design
Productivity
People
