Add Controls to Column Templates
This tutorial shows how to:
-
Add controls to a RadGrid template column's ItemTemplate and EditItemTemplate.
-
Enable the grid control for editing using automatic updates.
-
Set RadGrid's skin using the Smart Tag.
-
Enable paging for RadGrid and changing its page size with the design editor.
Creating and Binding the Grid
-
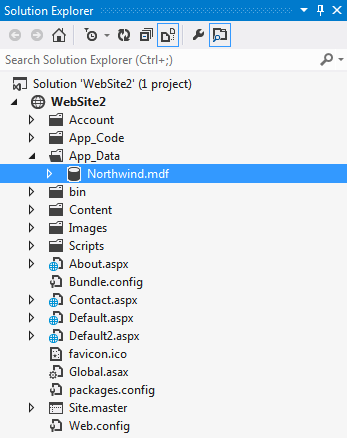
Locate the "..\Live Demos\App_Data" folder underneath the folder where you have installed yourcontrols. In this folder, find the Northwind.mdf file, and copy it into theApp_Data folder of your Web application. The Solution Explorer for you application should look something like the following:
-
Drag and drop a RadGrid control from Visual Studio's toolbox onto your Web page:

-
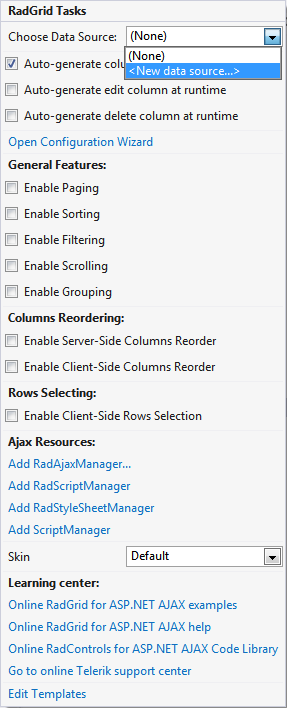
Using the RadGrid's Smart Tag, expand the drop-down listlabelled Choose Data Source and select <New data source...>:
-
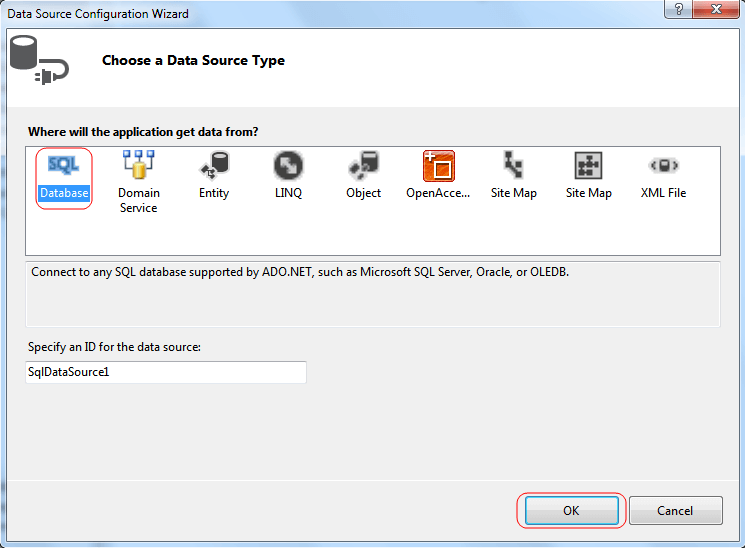
The Data Source Configuration Wizard appears. On the Choose a Data Source Type page, select SQL Database andclick OK:
-
On the Choose Your Data Connection page, expand the drop-down list by clicking the little triangle on the right side and select the Northwind.mdf from the available options. Then click the Next button:

If you happen to encounter a "Database schema could not be retrieved" exception, please follow the guide in this help topic.
-
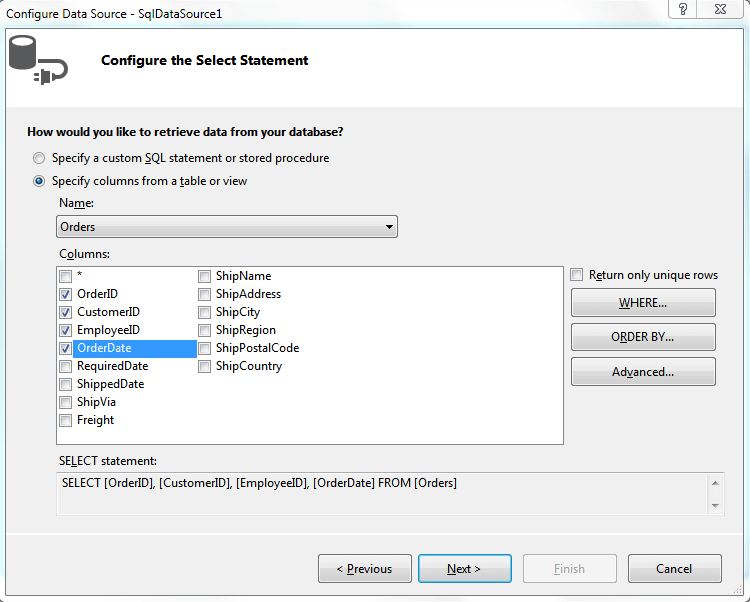
On the Configure Select Statement page, select the Orders table from thedrop-down list, and select theOrderID, CustomerID, EmployeeID, and OrderDate fields and then click Next button:
-
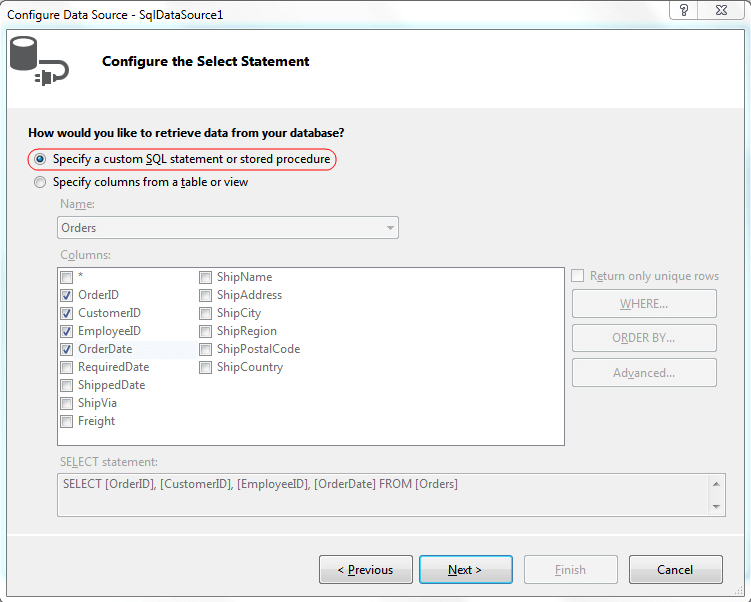
Click the Specify a custom SQL statement or stored procedure radio button.Then choose Next:
-
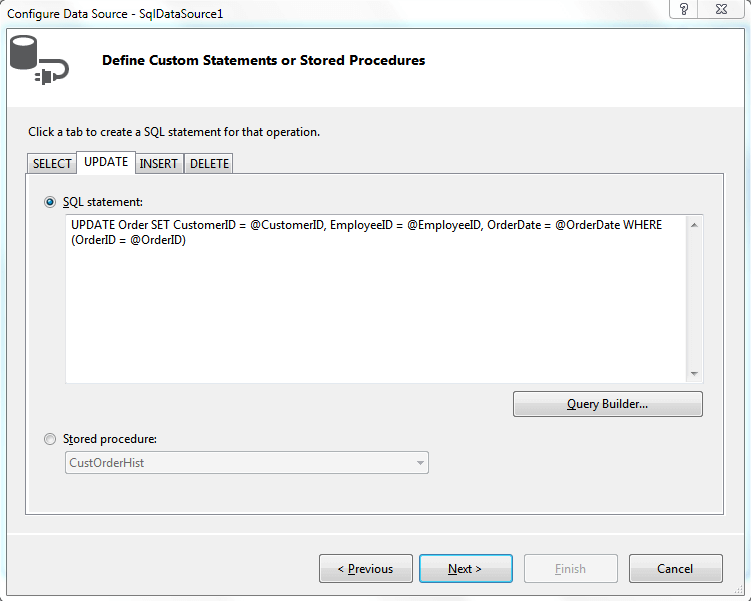
Add an Update statement to the data source:
-
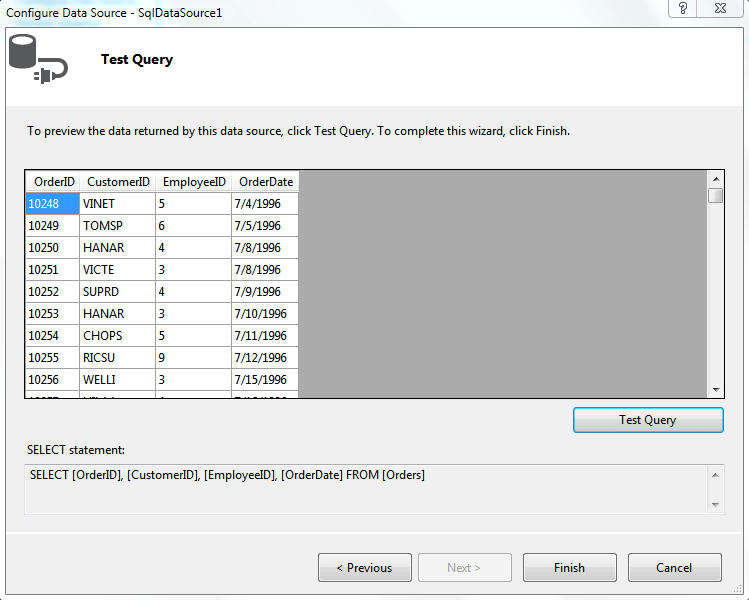
On the Test Query page, click the Test Query button to see the data. Then click Finish, to exit the Configure Data Source wizard:
Adding Template columns
-
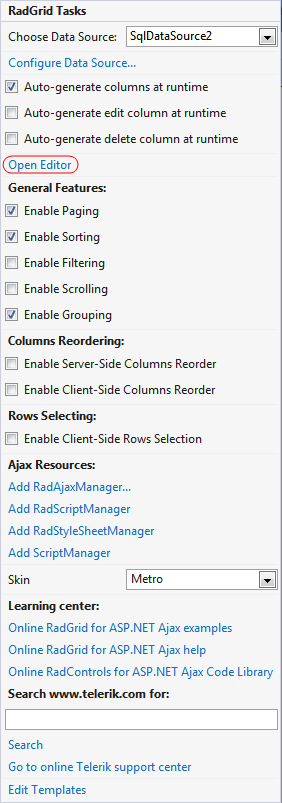
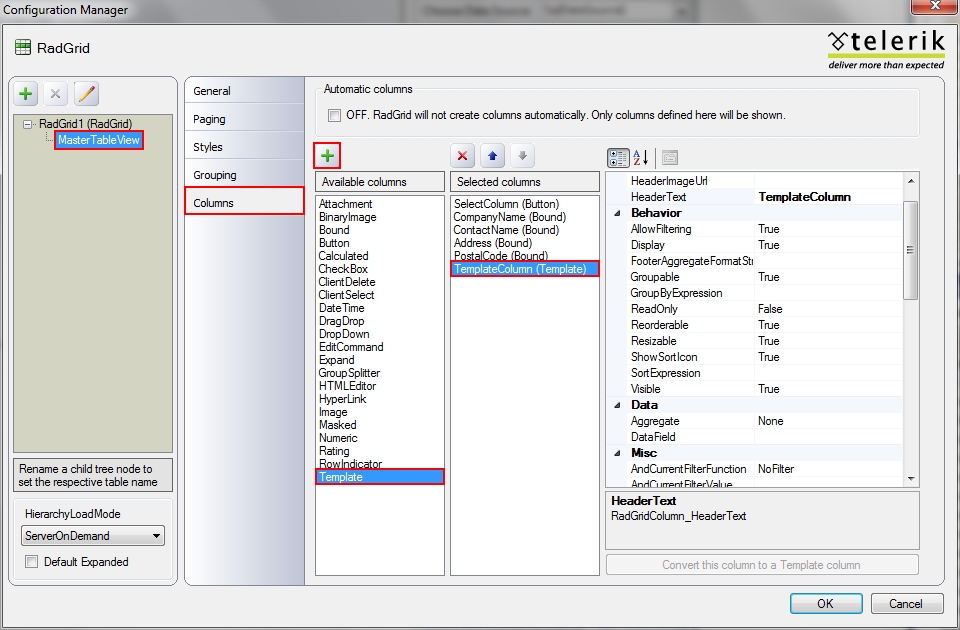
Using the RadGrid's Editor, add a template column to the grid:
-
Open RadGrid's Configuration Wizard from the Smart Tag.
-
Select MasterTableView under RadGrid node.
-
Select Columns tab from the right pane.
-
Select Template column under Available columns.
-
Click the "+" button to add the template column.
-
In the right pane, set the HeaderText property to TemplateColumn.
-
-
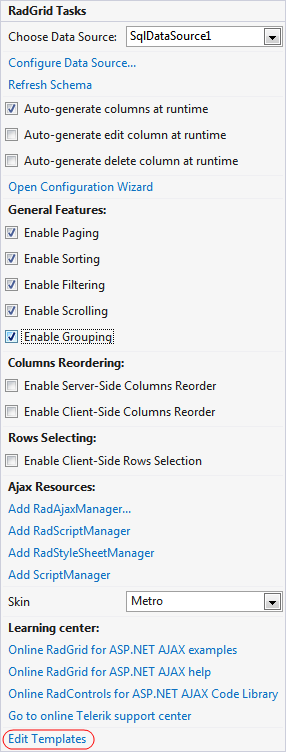
Click Edit Templates from the RadGrid's Smart Tag:
-
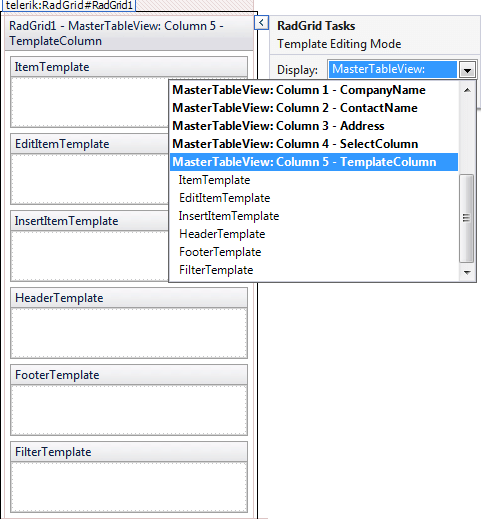
Choose the Template column that you wish to edit:
-
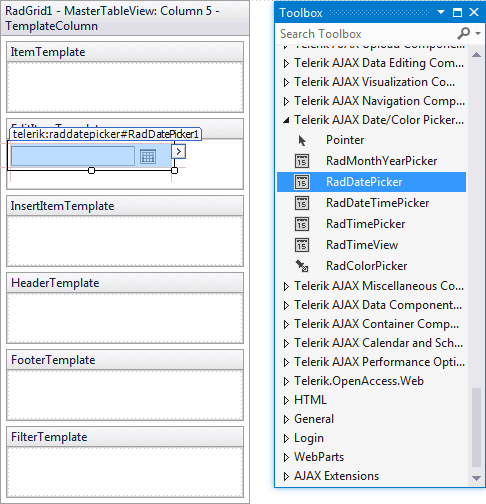
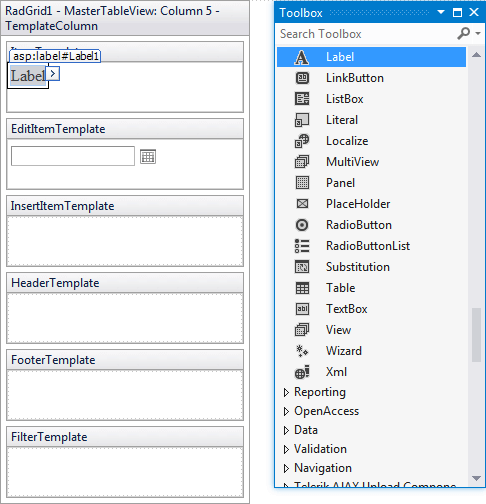
Drag and drop a RadDatePicker control from Visual Studio's toolbox ontothe EditItemTemplate.
-
Now add a Label control to the ItemTemplate.
-
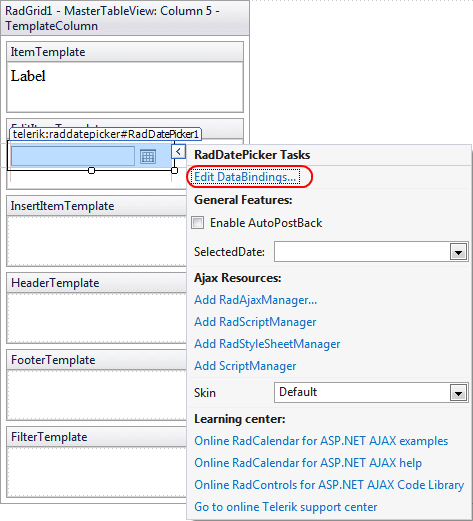
Select Edit DataBindings from the RadDatePicker's Smart Tag:
-
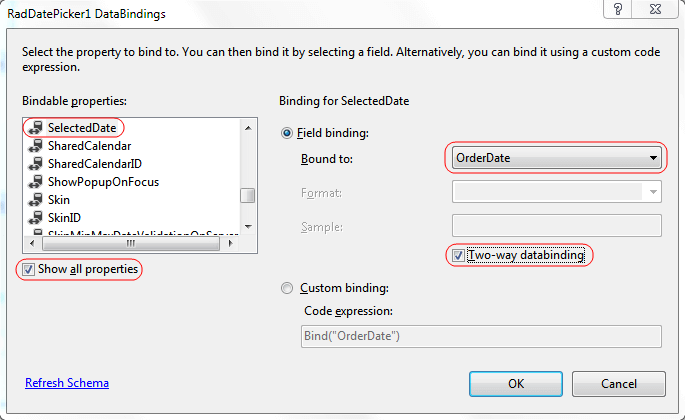
In the DataBindings dialog:
- Check Show all properties to view the properties of the date picker.
- Choose the SelectedDate property as the property to bind.
- Choose the OrderDate field as the Fieldbinding.
- Check the Two-way data binding box to enable the control to update the field value.
-
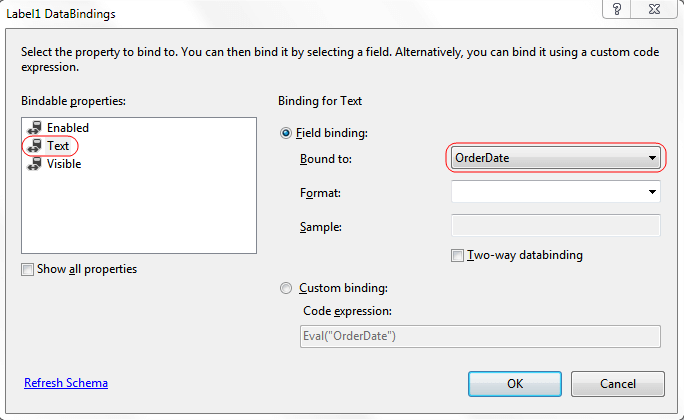
Use a similar technique to bind the Label control:
-
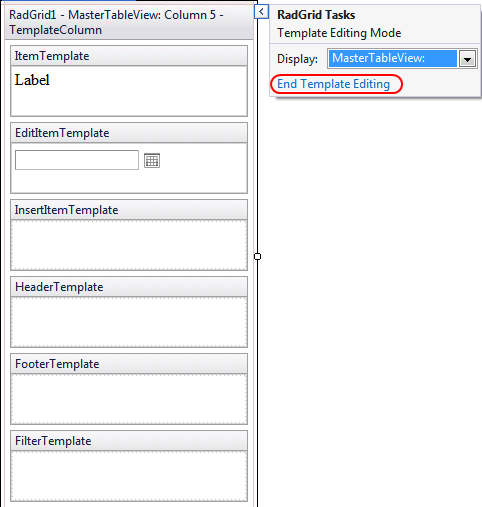
Use the RadGrid's Smart Tag to end template editing:
Enabling editing, paging, and change the Skin
-
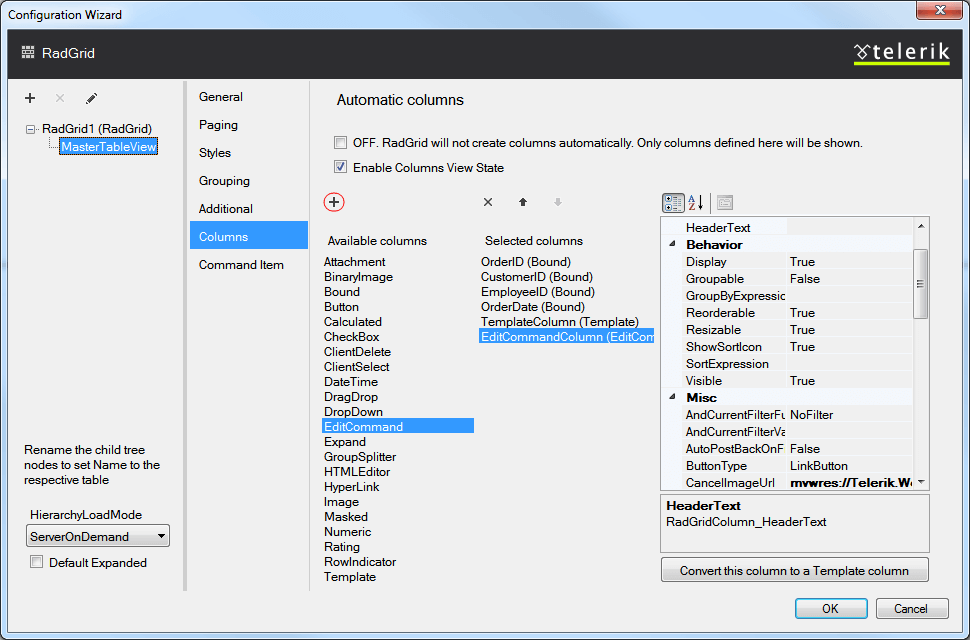
Back in RadGrid's Editor, add an edit command column to the grid:
-
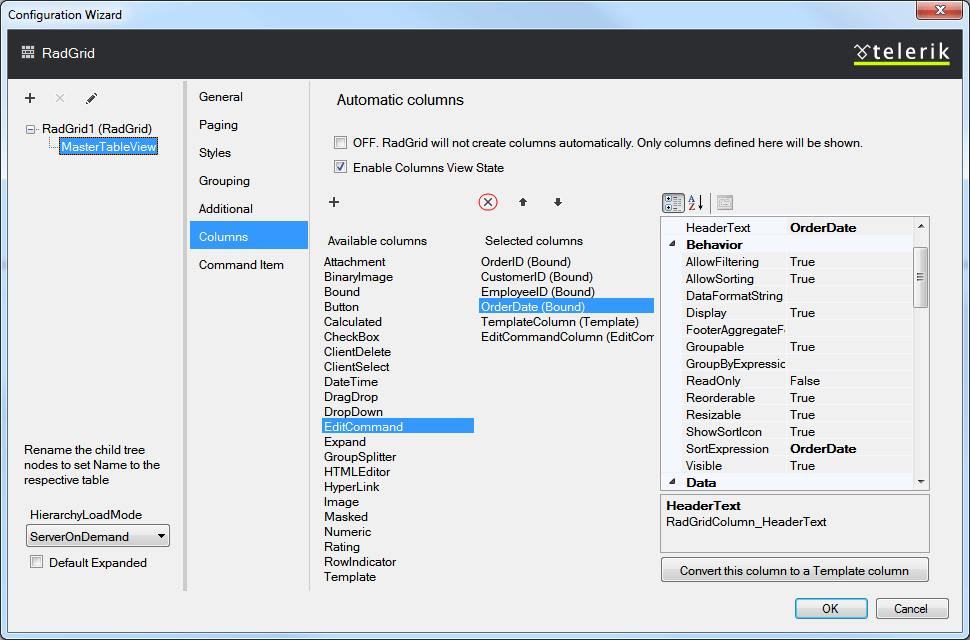
Remove the OrderDate column; the Template column will be used instead:
-
Still in the RadGrid's Editor check the AllowAutomaticUpdates checkbox on the right pane:

-
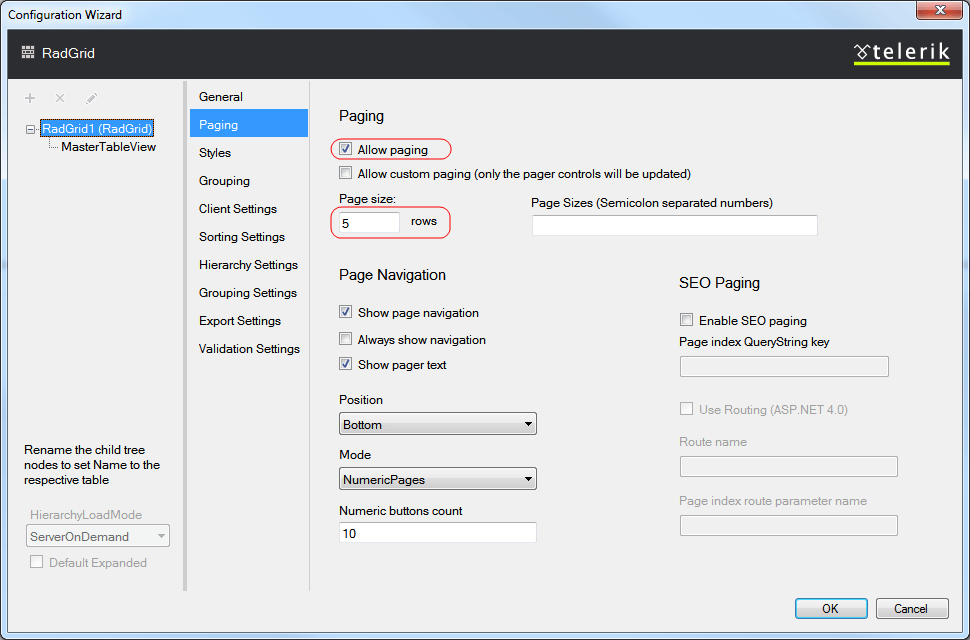
Now select the MasterTableView node, then select Paging tab and change the Page size to 5 rows.
-
From the RadGrid's Smart Tag expand the drop-down list labeled Skin and choose Metro skin.
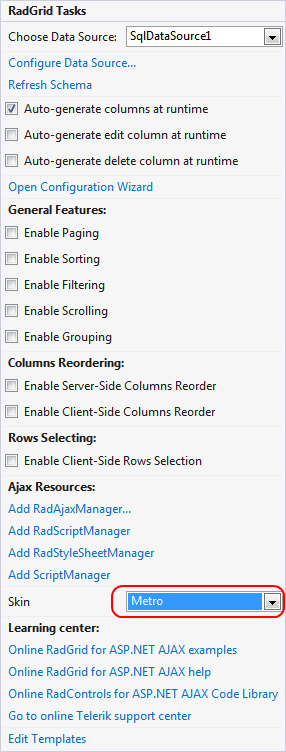
-
Run the application. Click the edit column to see the edit template you added. Note that if you edit a value in the grid, the database is updated:
