The Spooky Angular Standalone Guide

Summarize with AI:
Still confused about what “standalone” means in Angular or unsure if you want to commit to it? This guide explains all the basics and how to start with hybrid, so you can still use modules where they make more sense. Come along for the ride—it’s not really so spooky!
What Is Standalone?
For those of us who have been in the hype, “standalone” in Angular is already becoming an overused buzzword. However, I have been polling audiences at conferences this fall and found that many developers still have not given standalone a try or don’t really understand it fully yet. I thought a guide reviewing the basics of standalone while also talking about the future of Angular applications with regard to standalone would be a prudent recap.
If you are one of those developers who haven’t started using standalone just yet, don’t worry. According to the 2023 Angular Survey, 64% of developers are still primarily using NgModules. It makes sense; modules have been around a long time. They are the tried and true way of creating large, complex Angular applications.
With large applications come large teams of developers, all working on different parts of the same application, NgModules has been our way of keeping these large applications organized for years and years. Like a well-organized library, with your comfortable module system, you can always find what you need, even if there are thousands of books. Plus, migrating a massive code base is no small feat. There is a ton of planning, refactoring and retesting that comes along with an update like this one.
However, standalone does have many benefits, including the fact that it is incredibly flexible. You can mix and match standalone and module-based components, so, as you’ll see later in this guide, testing the waters with standalone is easier than you think.
Have you gotten this far into Angular and still don’t really know about the module? Don’t be spooked, I got you.

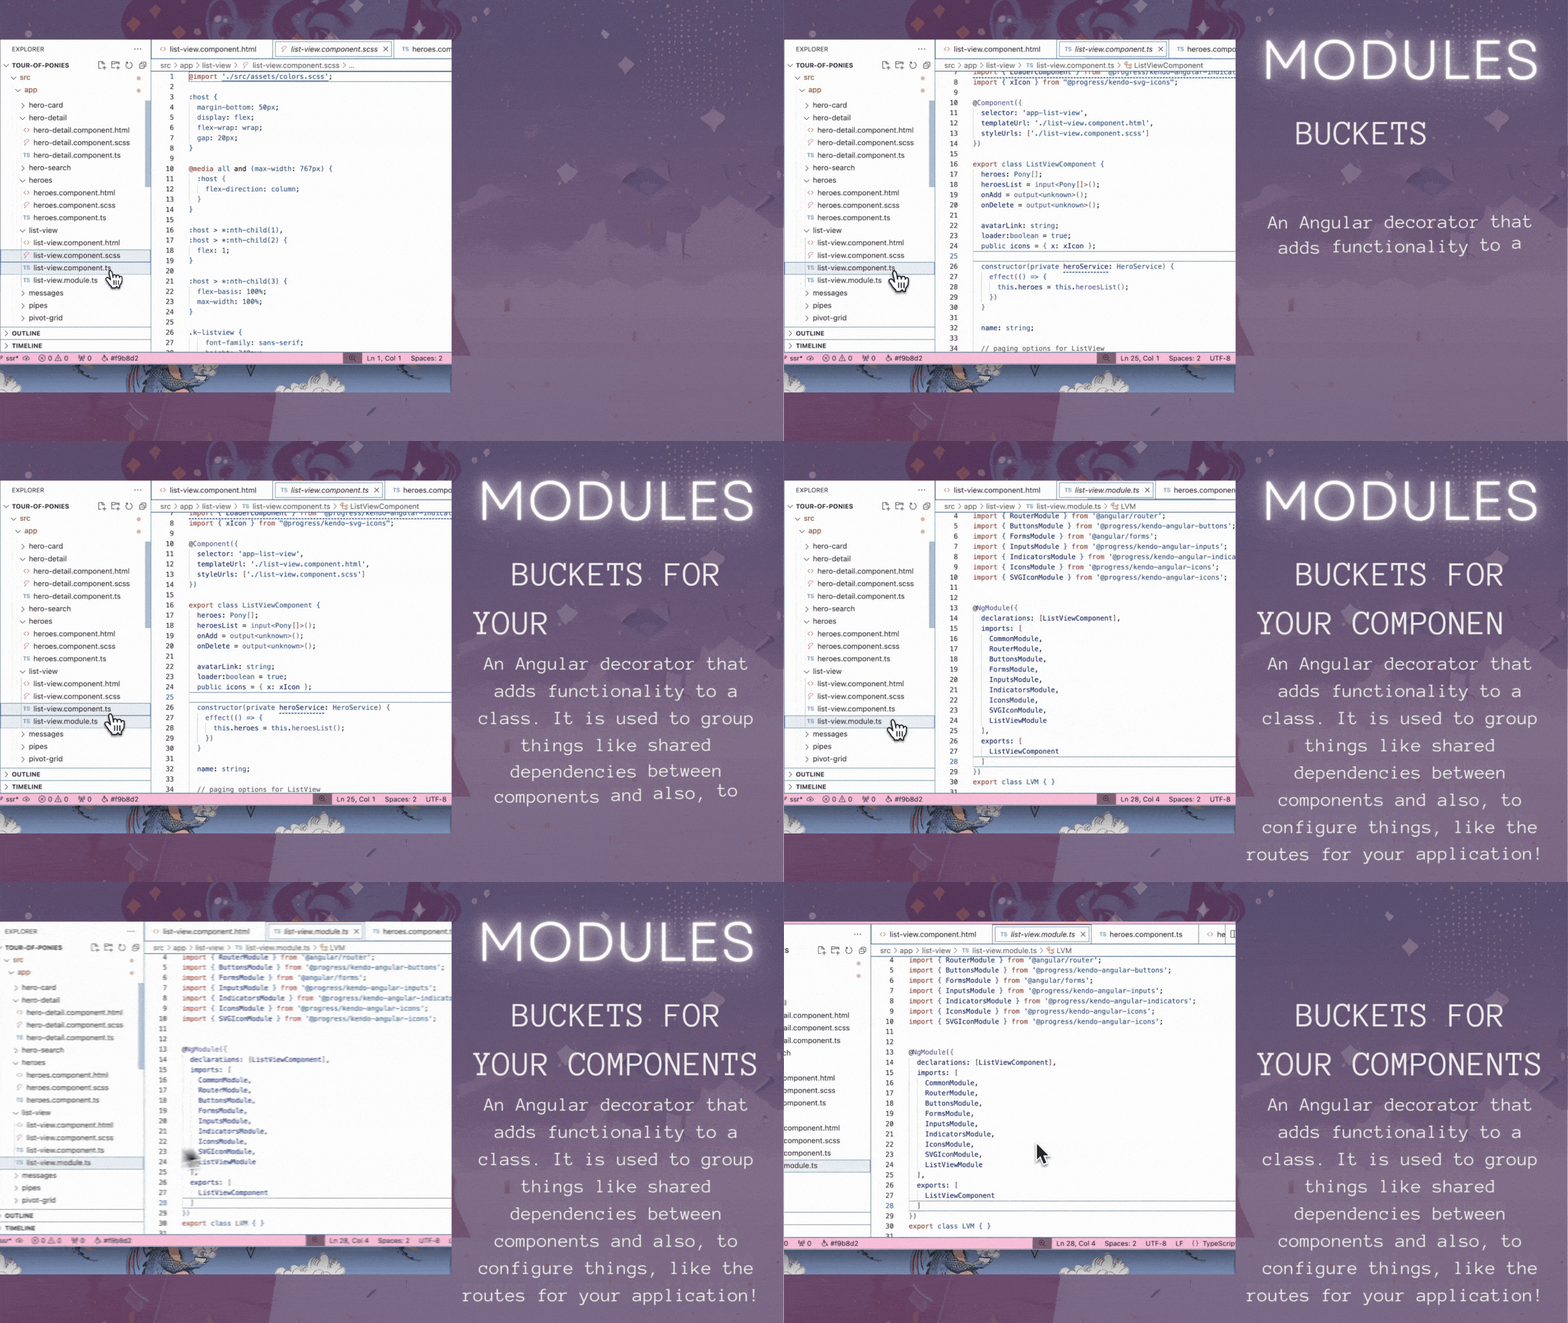
To fully understand standalone, one must understand the module. I like to think of Angular modules as buckets for your components. A great analogy to understand the complex coding construct of modules is the humble bucket or container. Imagine you have a warehouse full of tools—these tools are your Angular components, directives or pipes.
Modules are like the containers that each tool is stored in. Everything has a container, everything is labeled and organized inside a box or bucket.
With standalone, your tools are simple enough that you don’t really need to put them in a bucket—they are self-contained and ready to go. You can just grab them and use them. Standalone means less overhead and less fuss with packaging.

More officially, modules are Angular decorators that add functionality to a class. I call them buckets because they are mainly used to group things like shared dependencies.

Why Standalone? Why Not Modules?
Modules are unique to Angular—no other JS framework has such a concept. Because of their unique-ness in the JavaScript space, they make Angular more difficult to traverse for beginners. They also have been known to frustrate experts in the space.

There are many reasons beyond a potentially frustrating extra abstraction layer, to get rid of modules. Standalone components aim to simplify Angular development by:
- Reducing boilerplate: Eliminating an entire layer in the code architecture, leading to less verbose code.
- Alignment with JavaScript ecosystem: Standalone components align Angular more closely with the broader JavaScript ecosystem, where components are the standard unit of reuse. This makes it easier for developers familiar with other frameworks and libraries to transition to Angular.
- Beginner-friendly: The architecture simplification along with one less unique pain point make Angular easier to pick up for the first time.
- Faster: Angular tooling processes code more efficiently
- Improved performance: Standalone components can be lazily loaded individually, allowing for more fine-grained control over application startup time and runtime performance. This is in contrast to module-based Angular, where larger chunks of the application might be loaded even if they are not immediately needed.
- Testing: A potential for simpler tests with standalone (self-contained) components.
- Simplified lazy loading: Standalone components give Angular more control over what gets loaded when.
Overall, standalone components in Angular prioritize a developer-centered approach. A self-contained component is easier to reuse, package, test and lazy load. The team has not only streamlined the development process with standalone, but also improved application performance. Standalone really is worth the overhaul.
How to Do Standalone
When we talk about standalone, I like to specify that there are levels to which you can take an application standalone. If you are going standalone, you can make the entire app standalone by removing its main application module. Or, you can piecemeal it and simply remove a module here or there off of various components or directives that you think you benefit from being standalone right away.
The Two Sides of Standalone

I recommend, if this is your first time trying Angular, to ignore this whole article and pretend that modules never existed, until such a time that you need to work with them.
If you are already working with Angular modules or about to, let’s talk about how to remove them—for one day, that will be the goal for all modules. One day, perhaps, in the very distant future, but it is the goal, nonetheless.
The Piecemeal (Hybrid) Standalone Approach
You can gradually refactor your existing Angular application to use standalone components by selectively converting individual components and their dependencies to standalone. This approach allows for a smoother transition and minimizes disruption to your codebase.
Converting to a Standalone Component
There are two basic steps to creating a standalone component:
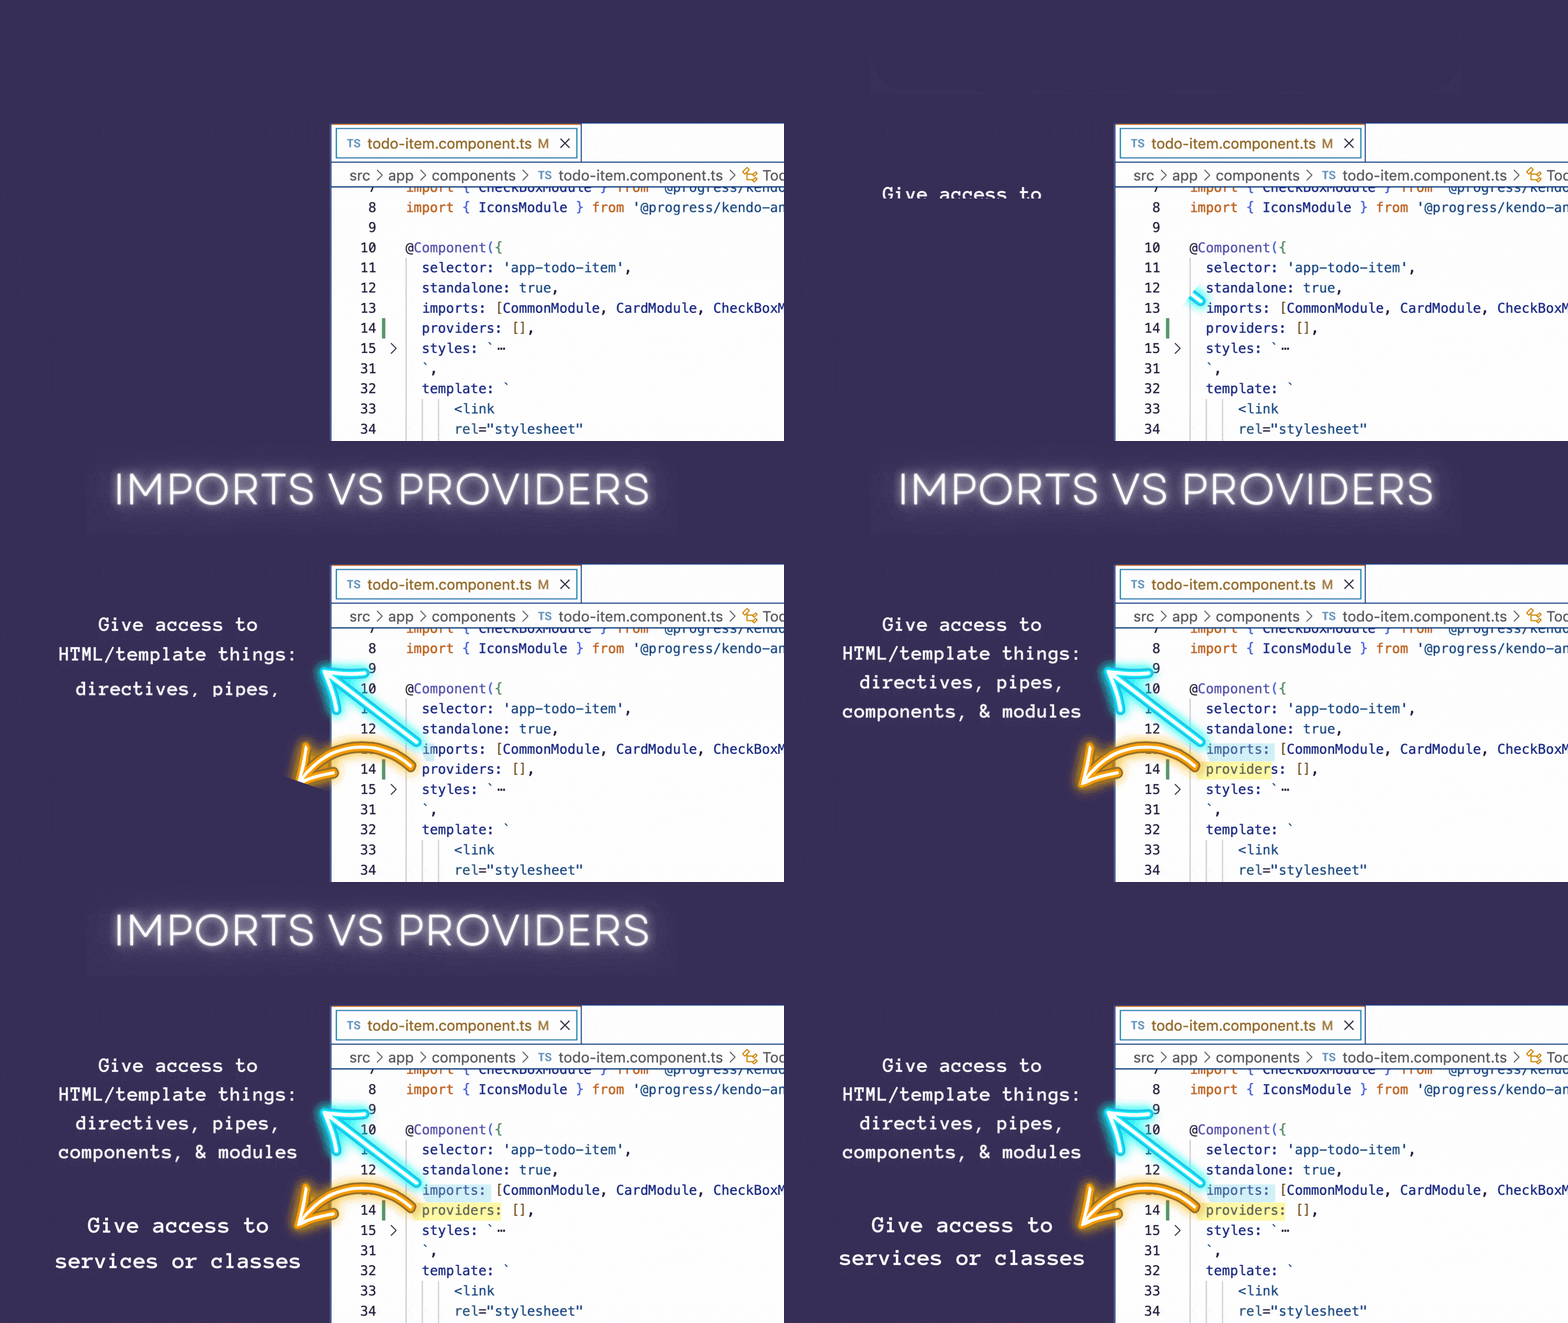
- Add the
standaloneproperty to the component decorator and set it to true. - Import everything the template needs directly into the component using the imports array in the component decorator.
- Import services and classes that were once included in the module to the providers array.

- Remove from application main module. Since your component is now a standalone component, it needs to be removed from the declarations array of the NgModule.
    @NgModule({
        declarations: [
            AppComponent,
            // ... other components
        ],
        // ...
    })
Important Notes When Converting Piecemeal to Standalone
Children first! This is the opposite of the oxygen mask situation. When changing components to standalone components, it’s important to start with child components. Once all child components used by a parent component are standalone, you can convert the parent component to standalone.

Also, this process will not be overnight. Standalone components were released as a developer preview in Angular v14 and marked as stable in Angular v15. This means that many third-party libraries still rely on NgModules. As the ecosystem transitions, using standalone components will become easier. It might seem like a lot to make the switch to standalone, but you might be happy to learn there are CLI commands to speed along this process.
You Can Import a Module into Your Standalone Components?
You can indeed nest a module into your standalone components. As backward as this sounds, this is the flexibleness that is needed in order to support backward compatibility. The same way there is inter-op between signals and observables, Angular also offers the ability to include modules into your standalone application. This is what is known as the “hybrid” method for implementing standalone.
The Hybrid Standalone Approach
“Hybrid standalone” is how developers are referring to applications that have started the process of moving to standalone but not completed it fully. They might still have a main application module and several older components based on modules. However, they also have a new branch of the application that is completely standalone. This is not only all right, but expected.
Refactoring an application to go standalone does have performance benefits, but it is also a cost that many dev teams cannot pay up front. Modules will take years and years to shake their way out of mainstream development, but for those smaller applications or teams willing to take the refactor leap, it is theirs for the taking.
By choosing the hybrid approach, you are able to respect the original structure of the application while also creating any new elements in the latest fashion. I love how Angular was designed to work in this way, very backward-compatible, very demure. You can have standalone components and NgModules in the same application. So teams can transition to standalone components at their own pace, as they need/want the latest features. Like adding an addition to an old house.
Schematic Help for Migrating to Standalone—Angular CLI ❤️
You are not on your own when it comes to removing your modules and going standalone. If you are on version 15.2.0 or higher, you can use the following CLI command to update your application. It isn’t a magic wand, though. You will have to review the changes or make some modifications yourself for more complex architectural situations. However, this is a great starting point.

I believe version 14 was when this dropped in preview. 15.2.0 is for sure stable, though.

ng g @angular/core:standalone
This command is used to migrate existing Angular projects to use standalone components. The schematic offers three modes, which should be executed in order to convert an application to standalone:
- "Convert all components, directives and pipes to standalone": This mode sets the standalone property to true in the component decorator and adds dependencies to the imports array.
- "Remove unnecessary NgModule classes": This mode removes unnecessary NgModule declarations and their references in the application.
- "Bootstrap the project using standalone APIs": This mode changes the bootstrapping method to use bootstrapApplication instead of bootstrapModule and removes the root NgModule.
Check out the ✨new✨ Angular docs at Angular.dev for additional steps post-migration as well as more info on the migration modes themselves.
The Main Application Module Removal 💉
This approach involves removing the main application module and configuring all components, directives and pipes as standalone. Going fully standalone provides the most significant benefits in terms of code simplification and performance but may require more extensive changes to your codebase, especially if you rely heavily on third-party libraries that depend on NgModules.
Creating Standalone From Scratch
Now, let’s actually create a standalone component from the get-go. We’ve got our CLI ready to go, so the first step is generating the component. This is where it gets a little interesting with versions. If you’d like to use the CLI to generate your component, your Angular version and CLI version need to be up to date.

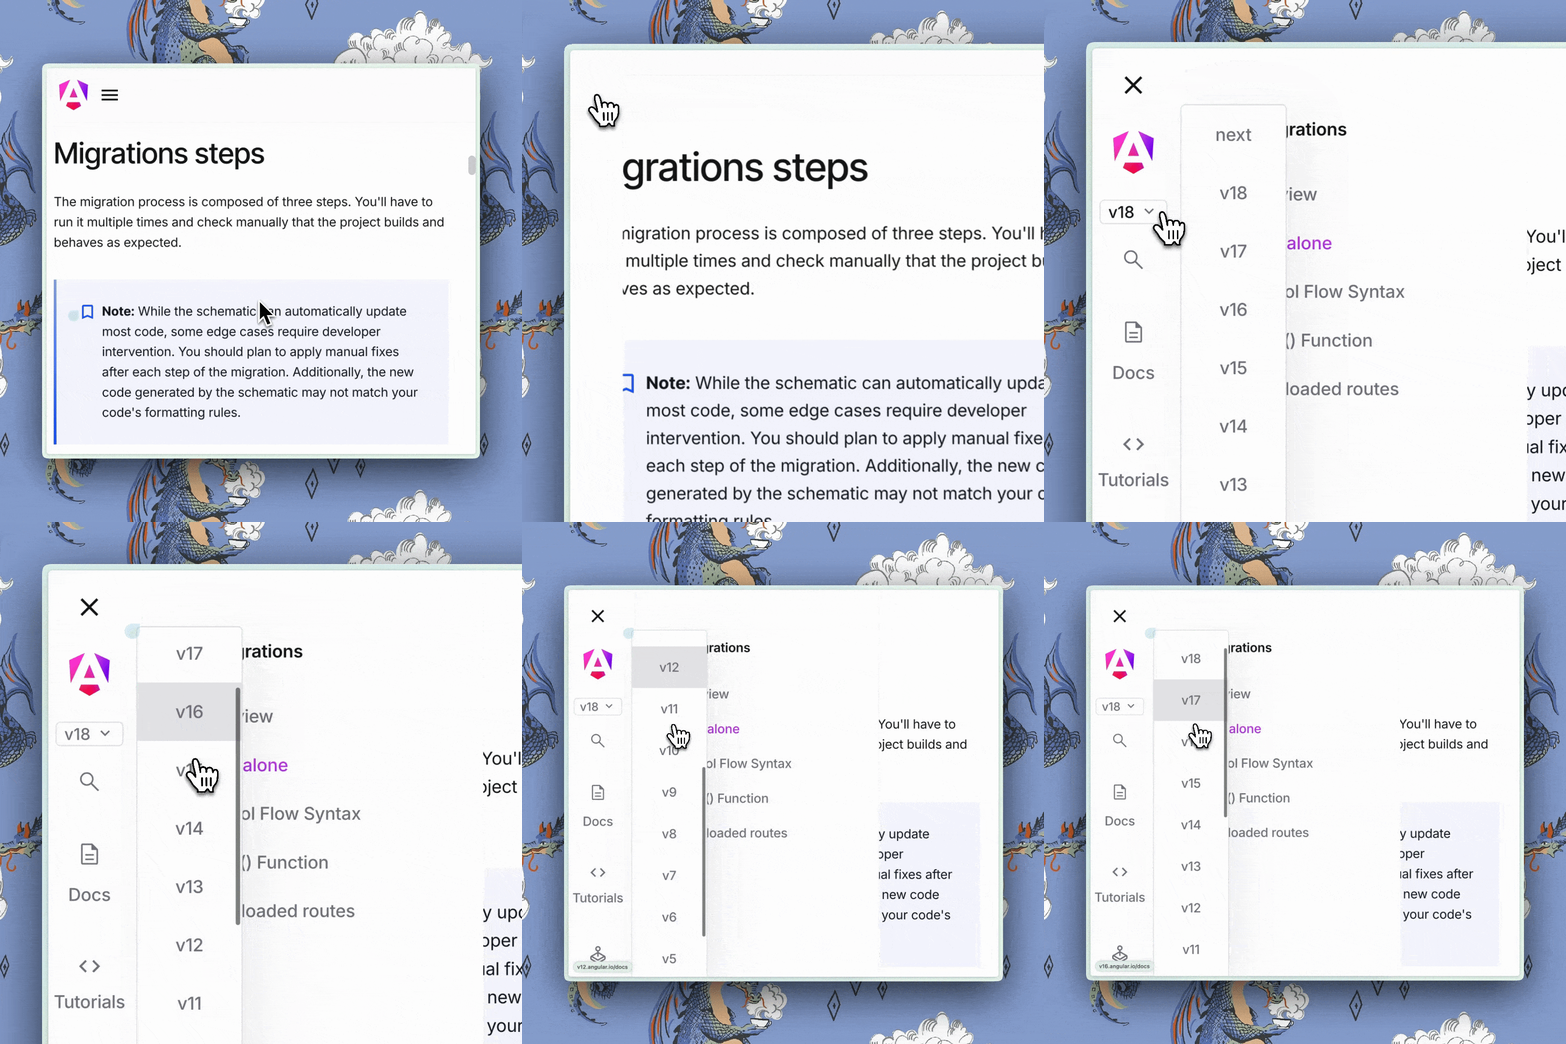
I believe the recommended minimum version for attempting this is 15.2.0, but as you can see in the lovely slide above, it was first available in preview in Angular version 14, stable in version 15 and default in version 17.
If your Angular/CLI version is lower than version 17, you will need the --standalone flag tacked onto your ng generate command. This flag is letting the CLI know: no NgModule necessary, thank you very much!
The Angular docs are searchable by version, so you can look up specific CLI commands per your Angular version. But if you are on version 17 or later, simply generating an Angular component ng g c my-component will create a standalone component by default!

How Progress Is Using Standalone to Ship DevTools 🦾
Here at Progress, we make tools that make developers’ lives easier. As with creating any tooling (for developers or customers), you will always have to make the decision of when to update. Updating, besides the time it takes to update your library and toolkit, also comes at the cost of potential backward-compatibility issues. You never want to move forward too quickly, leaving customers on older versions in the lurch.
Our fearless leader, Stefani Tsolova, the Software Engineering Manager in charge of Progress Kendo UI for Angular, and I believed that we should move forward with standalone in our library, but with a hybrid approach, so that it could be used by up-to-date developers as well as those stuck on v14 or lower.
The specifics of our hybrid approach for Kendo UI for Angular involves exporting our directives twice. First, exporting directives both as constants for standalone usage and as part of traditional modules allows our Kendo UI users to choose their preferred method. Solving the vital issue of needing to move our framework forward while also allowing time for our customers to catch up.
However, while this solves the hiccup for now, we will reach a point that we need to deprecate older versions to truly move forward, with not only standalone but all the amazing features the Angular. Keep an eye on our docs/blogs for deprecation updates to come.
Since we do provide multiple ways to use our Angular component library now, of course, our documentation represents these options.

So, for each of the components, we have two routes (with modules and without) that we will point you to:
Of course, along CLI instructions, we also have the manual setup that will walk you through a finer grain guide.
Hybrid Config Means No More Importing Modules
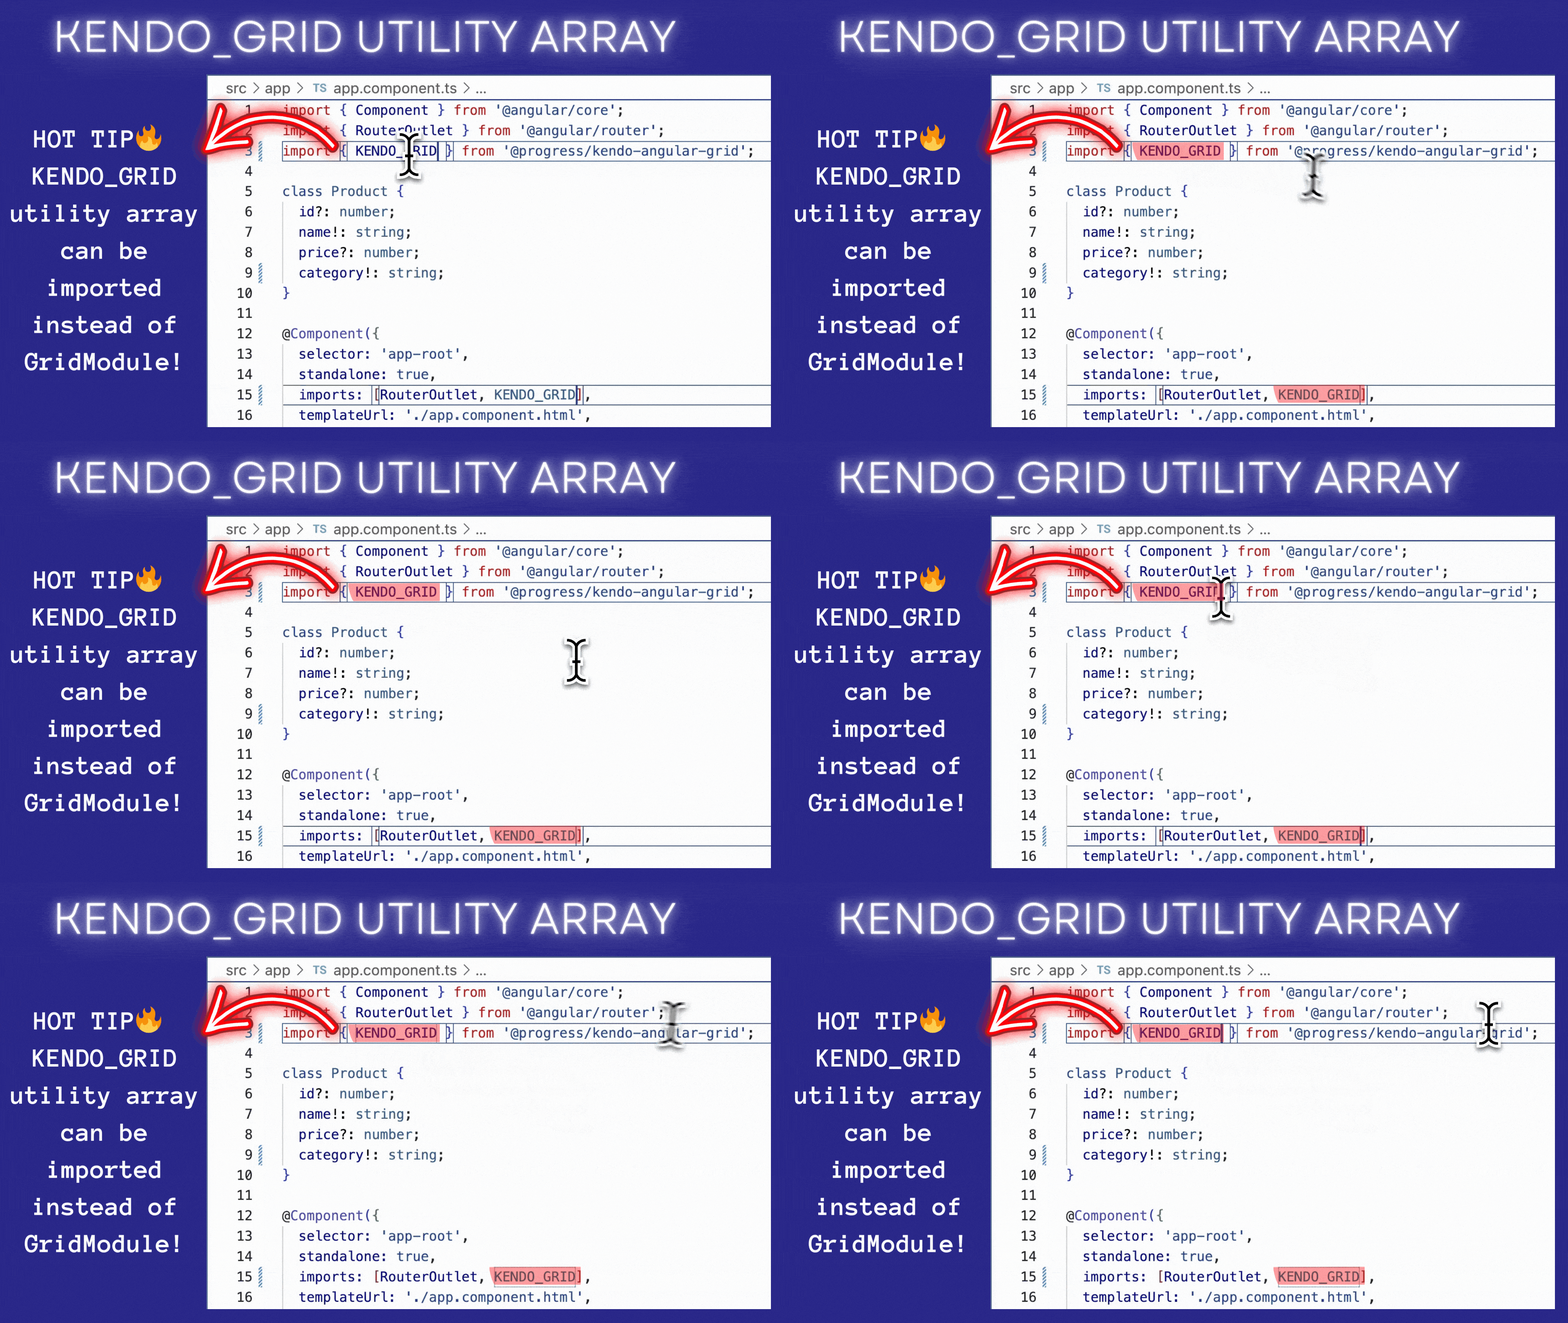
As of version 16.6.0, the Kendo UI Grid offers an alternative utility array to import instead of the modules. So, for instance, when using the Kendo UI for Angular Grid in a standalone component, instead of importing the individual components, directives and pipes that you need along with the Grid, you can now import a single utility array (KENDO_GRID) that logically groups these elements.

So check out the docs for more info on our Kendo UI component utility arrays as well as getting started instructions for your particular applications configuration. And remember, you can use this npx command to quickly identify out-of-date Kendo UI packages and update them with the latest!
npx npm-check-updates --upgrade --filter "/@progress.*/"
Wrap-up
So to recap, standalone in Angular is like a breath of fresh air for developers. We compared standalone components by thinking of them as a big toolbox full of tools. In the past, we used “modules” to organize these tools into different compartments, like having smaller toolboxes within the bigger one. This helped keep things organized, but it could also feel a bit cumbersome, especially for developers new to Angular.

Standalone components are like having those amazing all-in-one tools that don’t need a separate toolbox. They’re self-contained and ready to use, which means less code to write and manage. This makes things easier for everyone, whether you’re a seasoned Angular pro or just starting out.
Standalone components also make Angular more aligned with how components work in other JavaScript frameworks, making it easier for developers from different backgrounds to jump in. And guess what? They can even make your Angular applications faster! Plus, you can choose to switch to standalone components gradually, starting with the components that would benefit the most.
Standalone Feature Flag Flip
In other standalone news, in the upcoming version 19 release, the standalone feature flag will flip (defaulting to true). This means that all Angular components will be considered standalone, unless otherwise stated. There will be a schematic to help migrate components over to this new standalone: true default! It’s not a huge change, but I love what it indicates: that we are settling into the new normal of standalone.
I hope you’ve enjoyed this spooky guide to standalone components. Happy fall, everyone!

Alyssa Nicoll
Alyssa is an Angular Developer Advocate & GDE. Her two degrees (Web Design & Development and Psychology) feed her speaking career. She has spoken at over 30 conferences internationally, specializing in motivational soft talks, enjoys gaming on Xbox and scuba diving in her spare time. Her DM is always open, come talk sometime.

