Sending Emails from Your React App Using EmailJS

Summarize with AI:
The increasing prevalence of email today demonstrates how important it is as a low-cost and efficient communication tool for enterprises. Web application services such as EmailJS simplify incorporating emails into web apps and meet our core business needs.
EmailJS is a backend-as-a-service that gives you the tools to send emails to the users of your application directly from your client or server-side code to fit your business requirements. Client-side use eliminates the expense of maintaining and administering some backend to store and handle any sensitive email provider credentials required to send emails.
Although EmailJS can be integrated into different frontend web technologies through their respective SDKs, this post explains how to set up EmailJS and send emails from a simple React app. This app will be a simple newsletter signup page that accepts the user’s name and email address, after which we will use the Email.js SDK to send an email to the user from our frontend. We’ll also look at how to use this service to manage a contact list.
Prerequisites
It is expected that you have the following to get the most out of this guide:
- An Email.js account—create one here
- Basic knowledge of React and TypeScript
Project Setup
Copy and paste the following command into your terminal to create a TypeScript-powered ReactJS project in the working directory. We named ours frontend.
npx create-react-app frontend --template typescript
Next, let’s install our dependency, which is the EmailJS SDK.
npm install @emailjs/browser
The above code adds the client-side EmailJS SDK; notice the /browser suffix above. If you have an existing backend and want to send emails, you can check out the server-side SDK here.
Setting up EmailJS
This section will go through all the settings we need to make on our EmailJS dashboard before continuing to our React app. We need to do the following:
- Connect with an email service provider.
- Create an email template
Connect an Email Provider
In the introductory section, we described EmailJS as a backend service that assists us in sending emails. However, this is not technically correct—EmailJS must integrate with an email provider or the service that sends emails on our behalf. EmailJS integrates well with a variety of personal (smaller volume of email) and transactional (larger volume and usage) email providers, and you can connect with as many providers as you like. Since we are experimenting with a mini app, we will send a few emails using a personal service here—Gmail. We can set this up via the following steps.
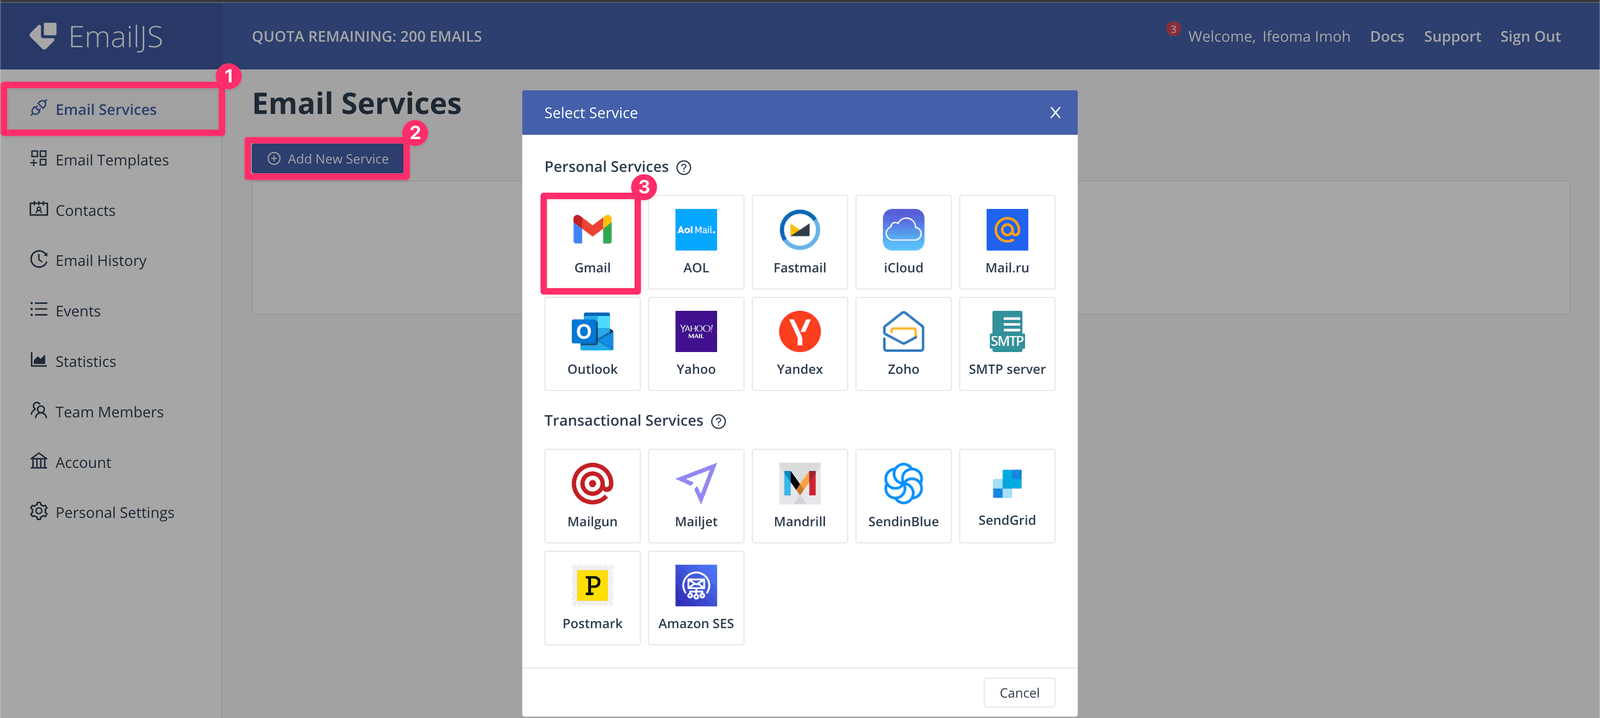
- On your dashboard, locate the Email Services section on the sidebar, next click the Add New Service button, and on the modal that pops up, select the Gmail service.
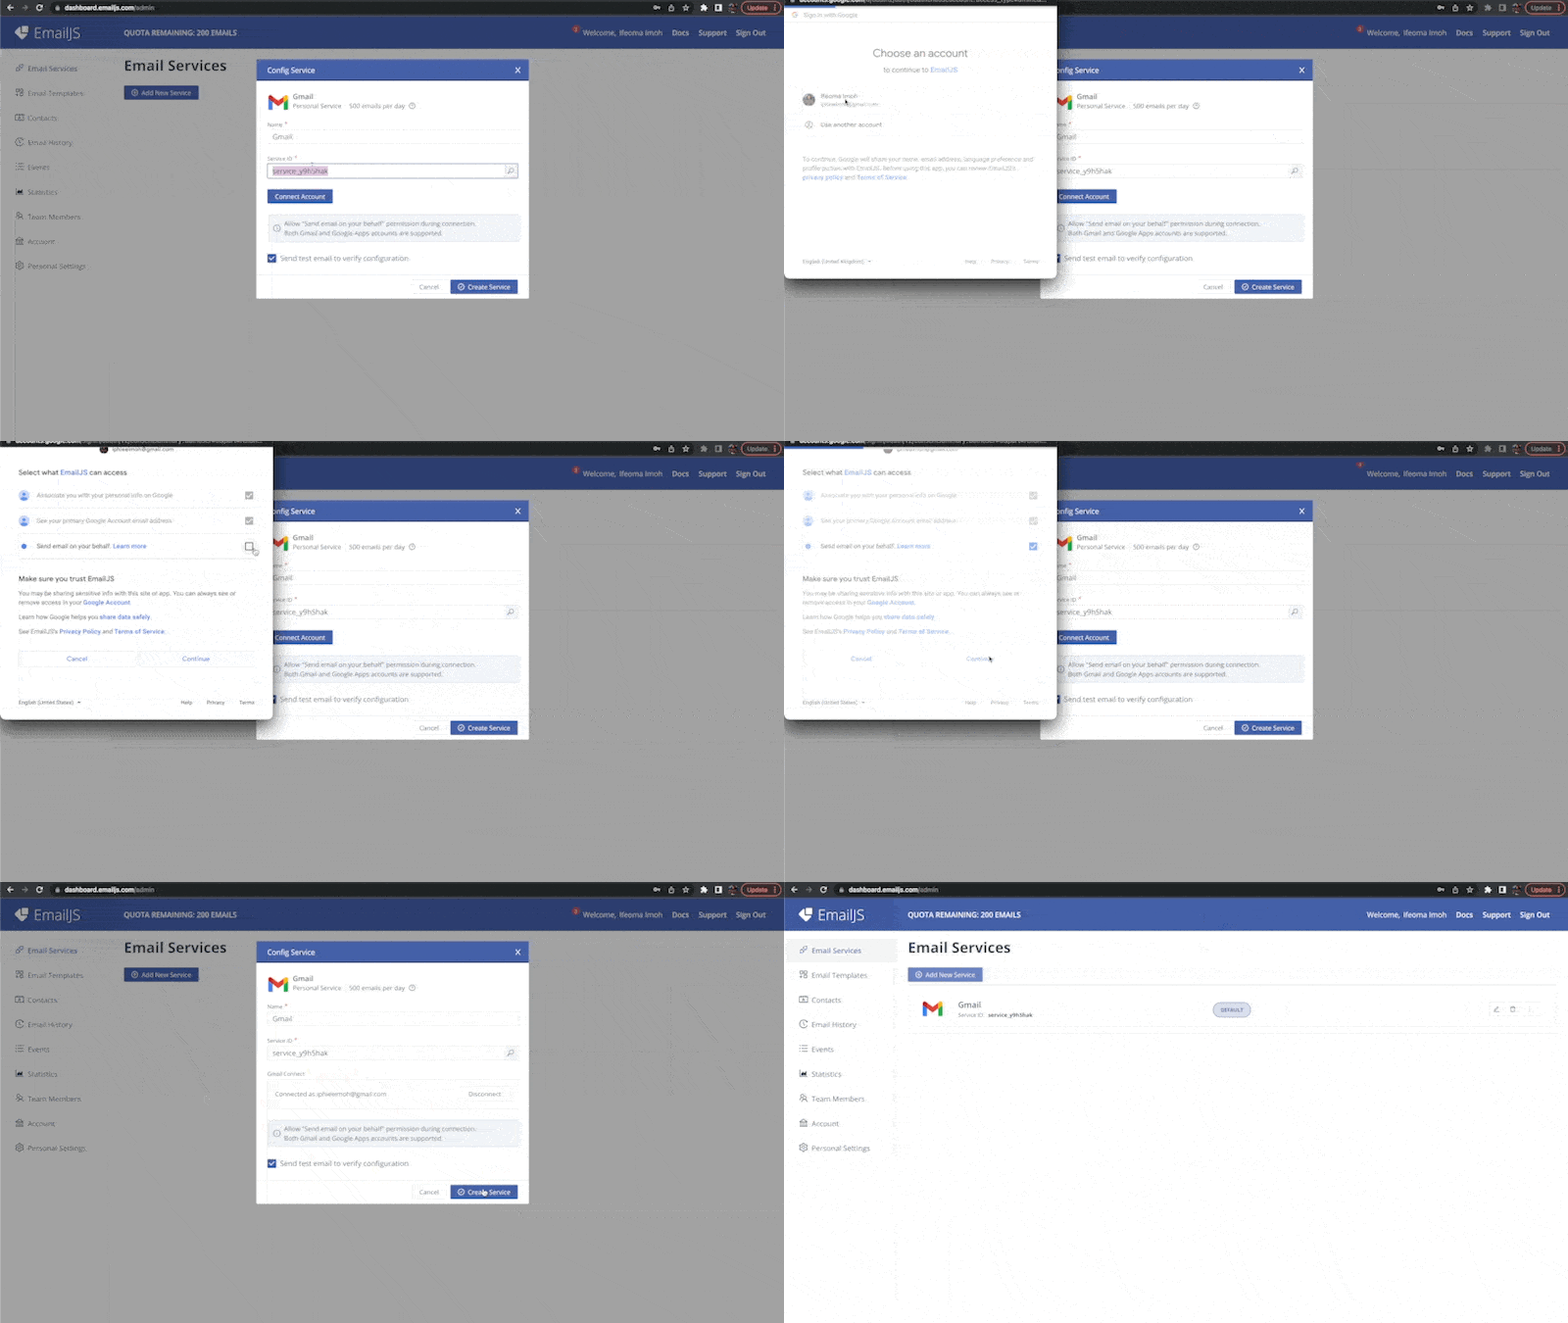
- Next, you will be presented with a form to select the Name and Service ID of your newly included service. Here, we use Gmail and service_y9h5hak. Next, click the Connect Account button to allow EmailJS to send emails on your behalf using OAuth. Once this is done, click Create Service button as shown below.
Note that the contents of this form vary based on the provider you are integrating. For most transactional image providers, you are required to enter your API keys and secret, which will then be verified for you.
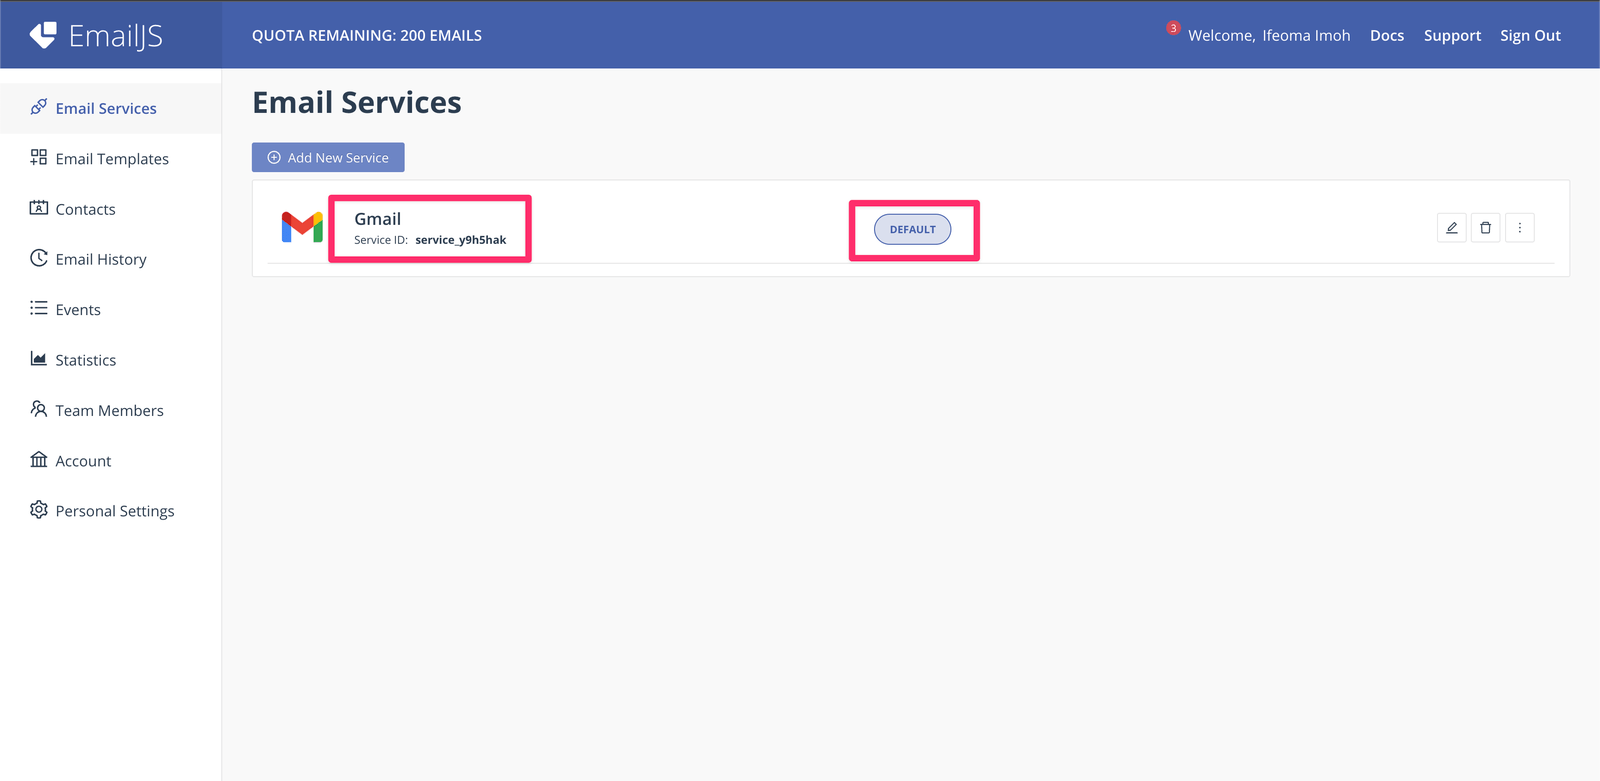
- Notice that in the Email Services section, you have a newly created service, as shown below.
Create an Email Template
Now we will need to create our email template, i.e., the layout of our email, the dynamic parameters it will accept, and all that good stuff. Let’s do that via the following steps.
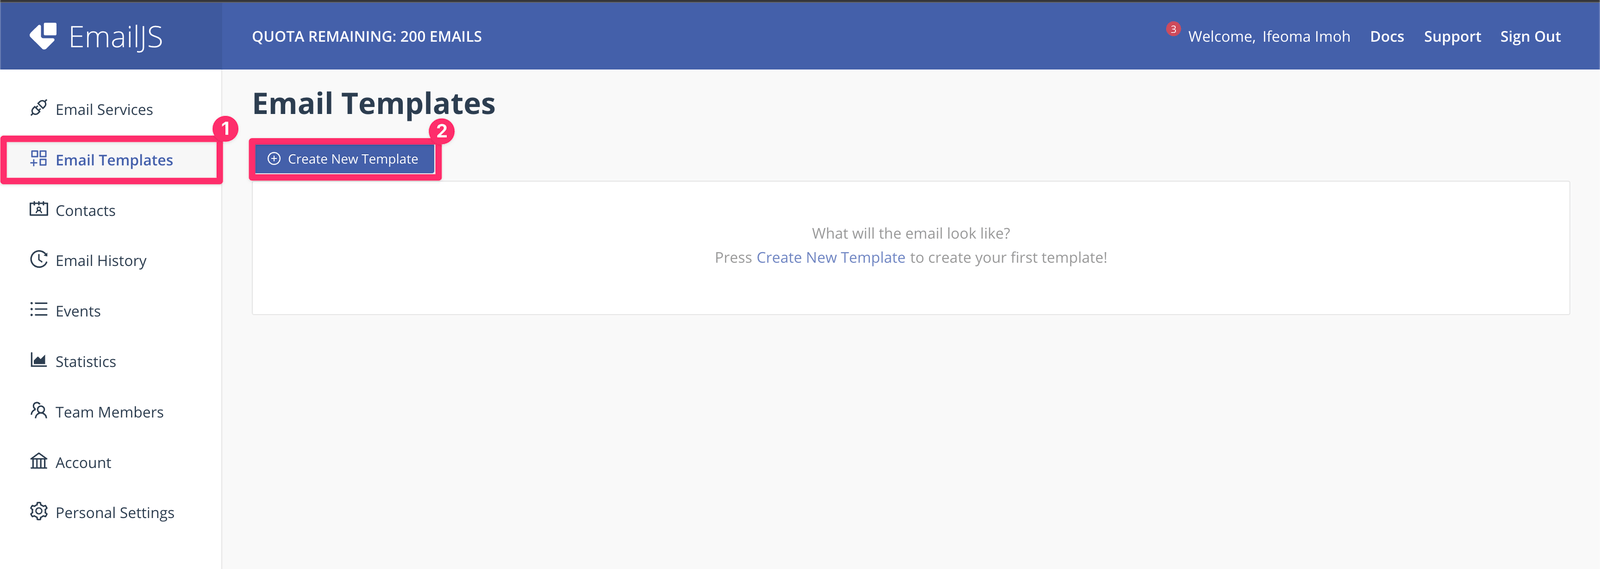
- On your dashboard, locate and click Email Templates on the sidebar and select Create New Template as shown below.
In the new template window, you will be presented with many tabs to customize all the parts of your email template. We will not be visiting all these tabs because there are quite a lot that can be customized.
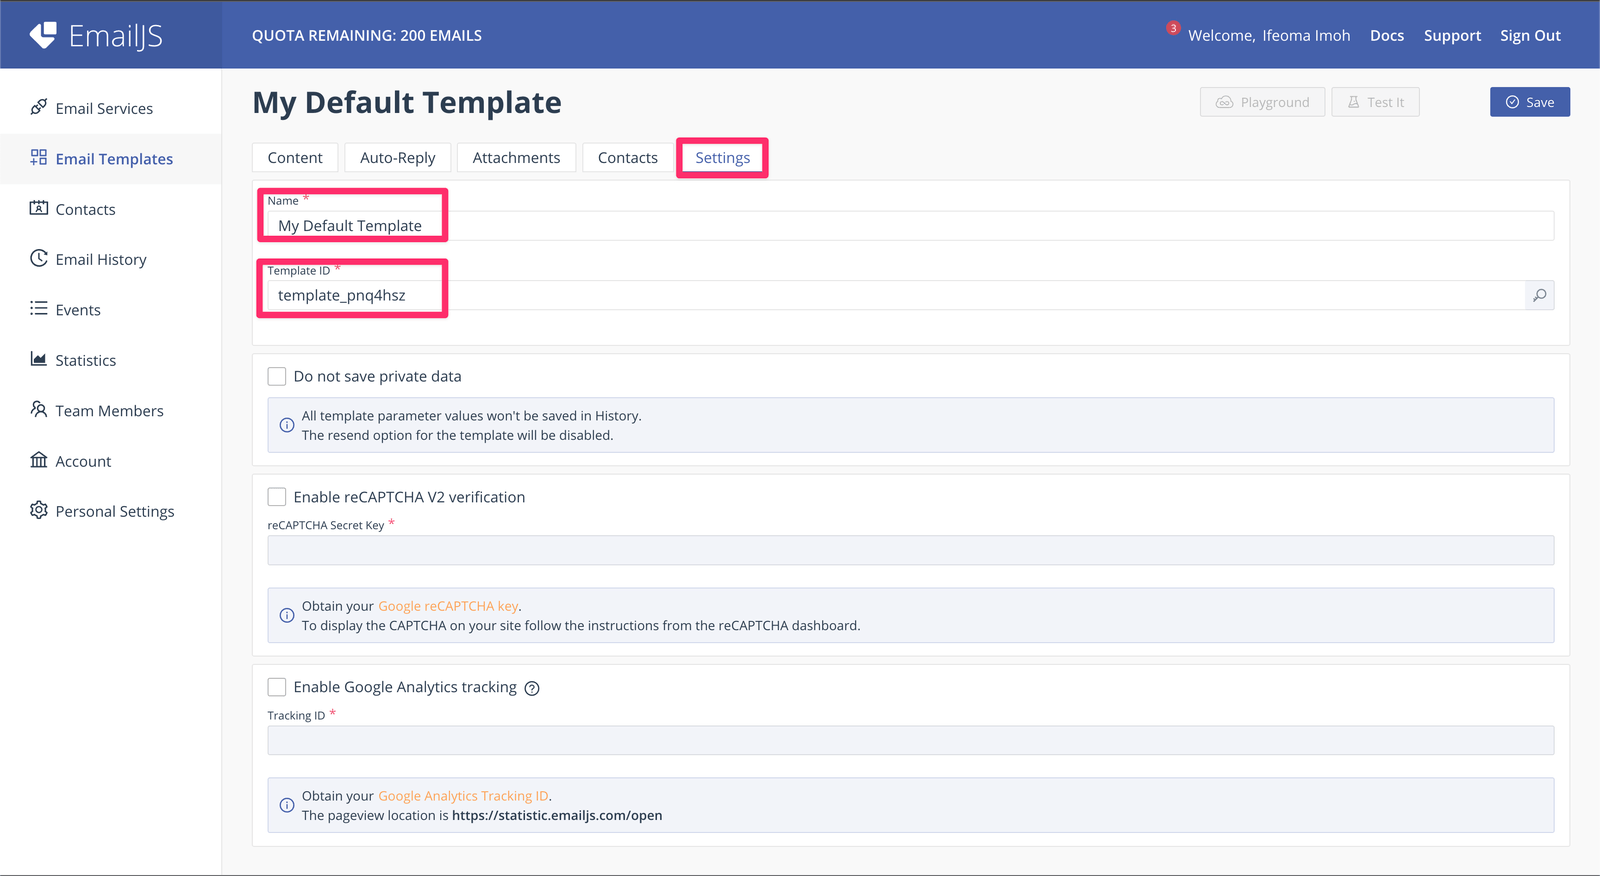
The Settings tab contains the Name and Template ID for our email template. We will go with the default name and Id of My Default Template and template_pnq4hsz. Feel free to customize them to suit your needs.
Now, let’s move to the content tab.
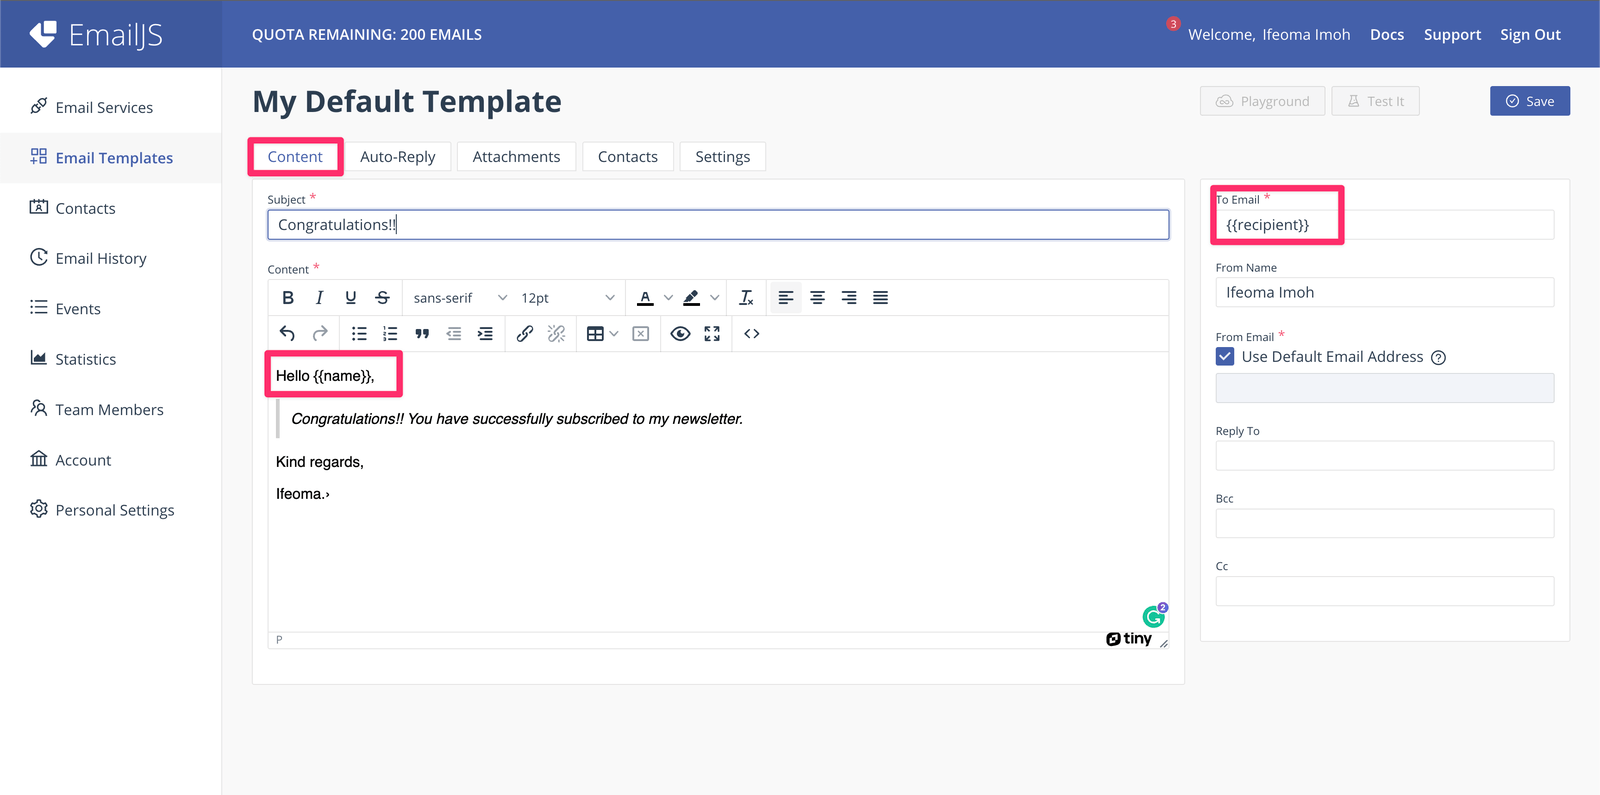
As shown above, the Content tab holds the WYSIWYG (what you see is what you get) editor that allows customizing the contents of the email. It lets you change the font and style of your emails and include custom HTML.
In the React app, which we will create later, we will collect the user’s name and email address via our newsletter form. We included them in the template as dynamic variables, as shown above. We can add dynamic variables via the following syntax
{{ANY_VARIABLE_NAME_YOU_WANT}}, and you can include as many variables as you need.
Here, we identified the name field with the dynamic variable {{name}} and the user’s email with {{recipient}}. This means that later when sending emails, we will include an object
with two properties, "name" and "recipient". We also included some dummy text as the subject and body of the email.
The next two steps are optional as they will focus on some customizations and common needs that individuals may need in their emails. If this does not interest you, feel free to skip to the section where we build the UI that triggers email sending.
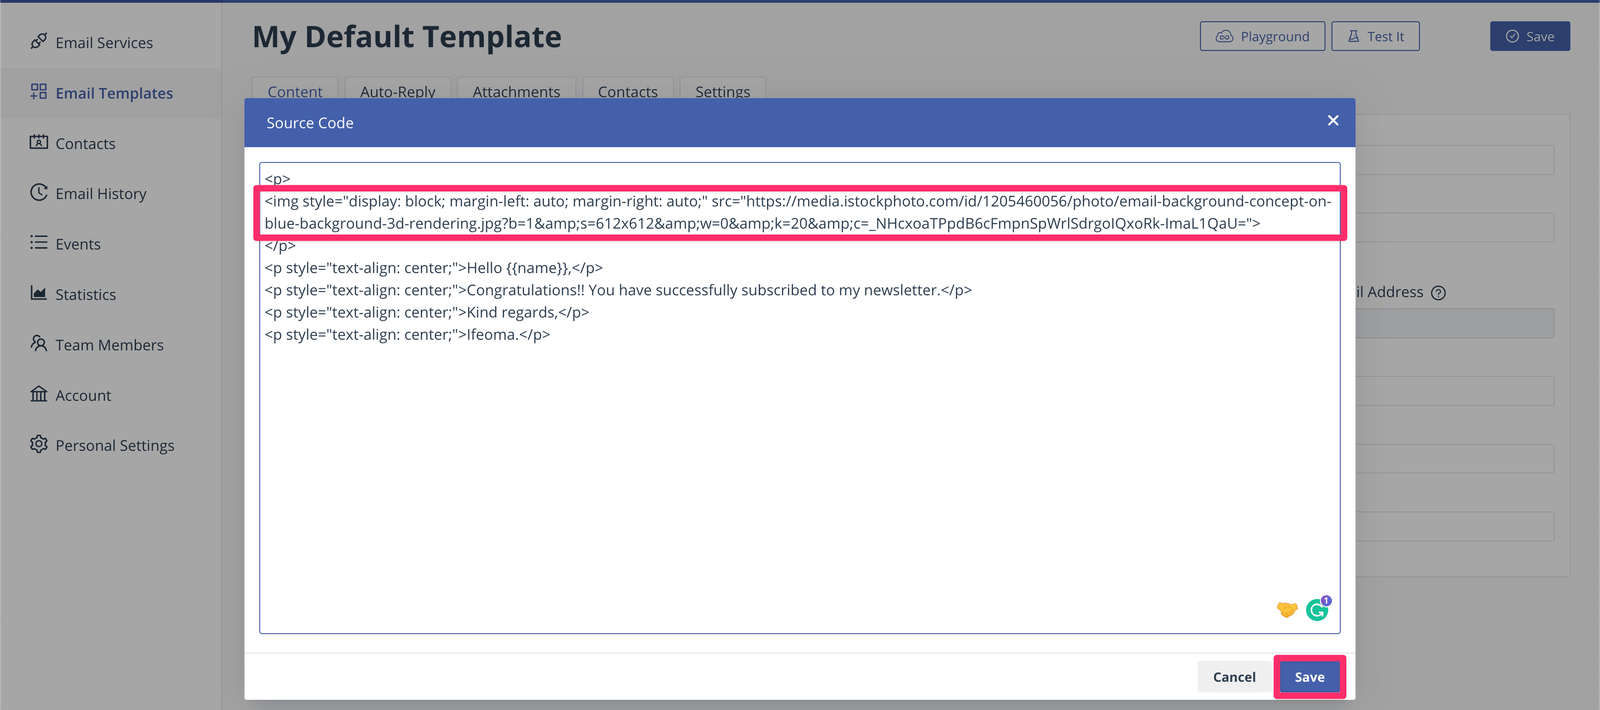
- We can customize our email template to include some HTML to make things more interesting. Here we will add a random image to make our template more appealing, but you can always customize yours with your company logo or something. To do that, click
on the code button (
<>). This will display a popup that shows the HTML generated for the template. Next, to add some HTML, we included an HTML image tag, as shown below. Once you are done, click theSavebutton.
Now, our new template should look like this.
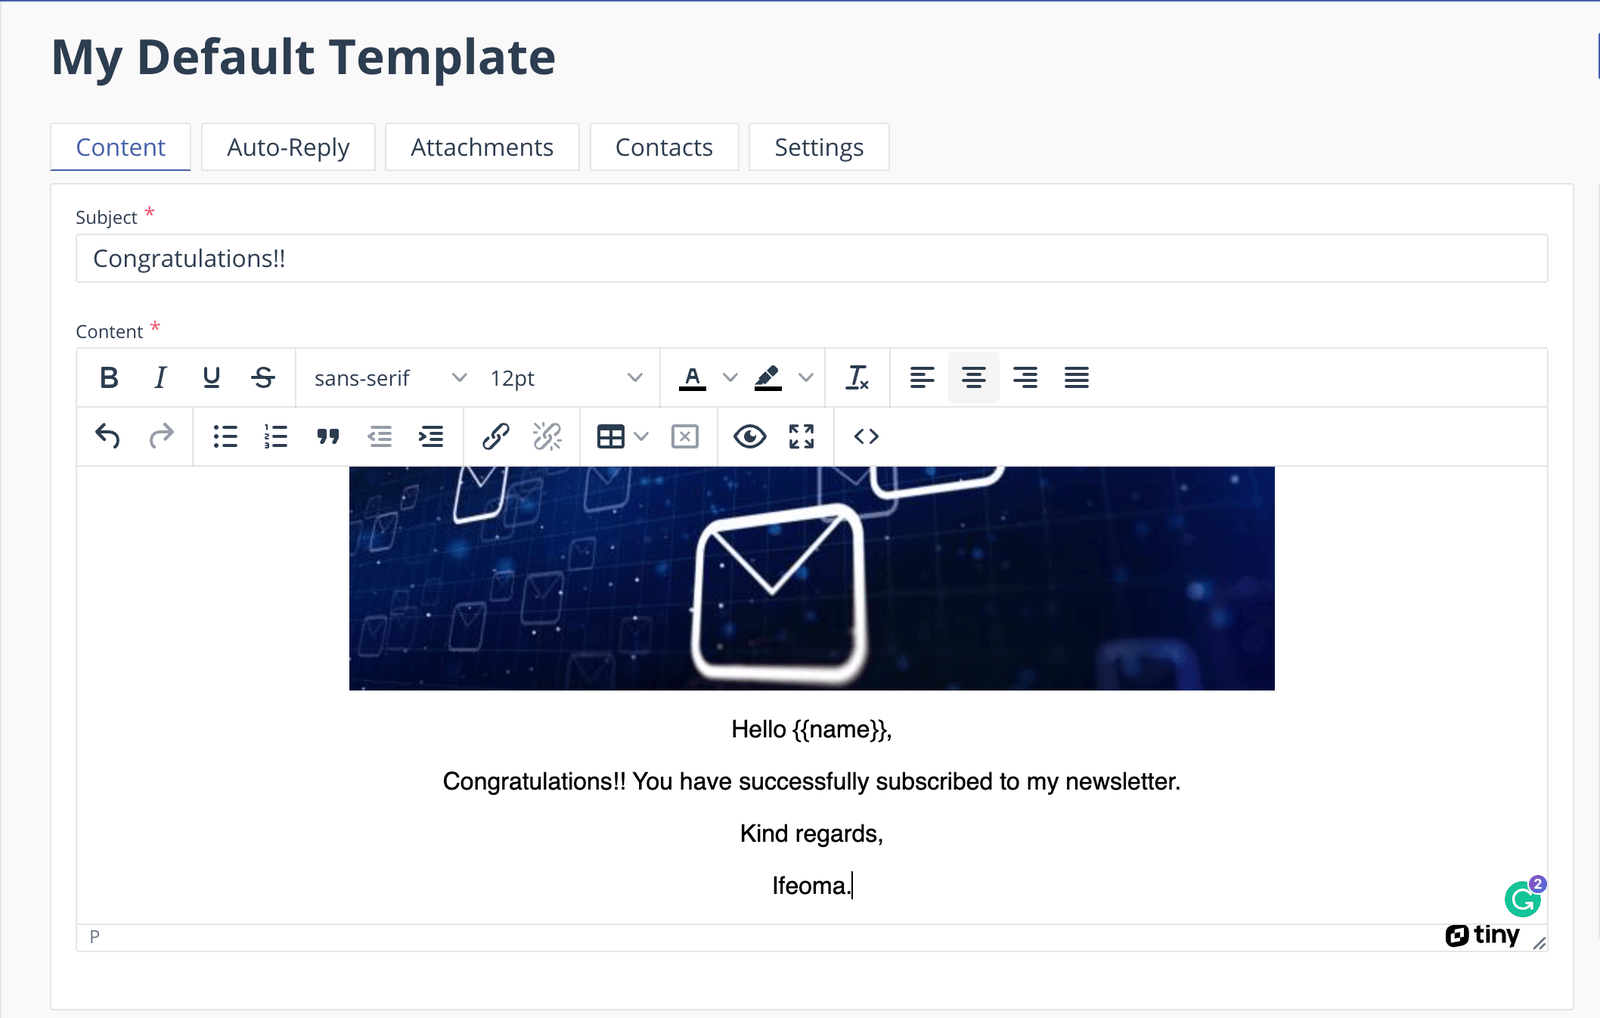
You can add as much markup as you need, but always ensure you make things optimal and test the template on multiple devices to ensure consistency.
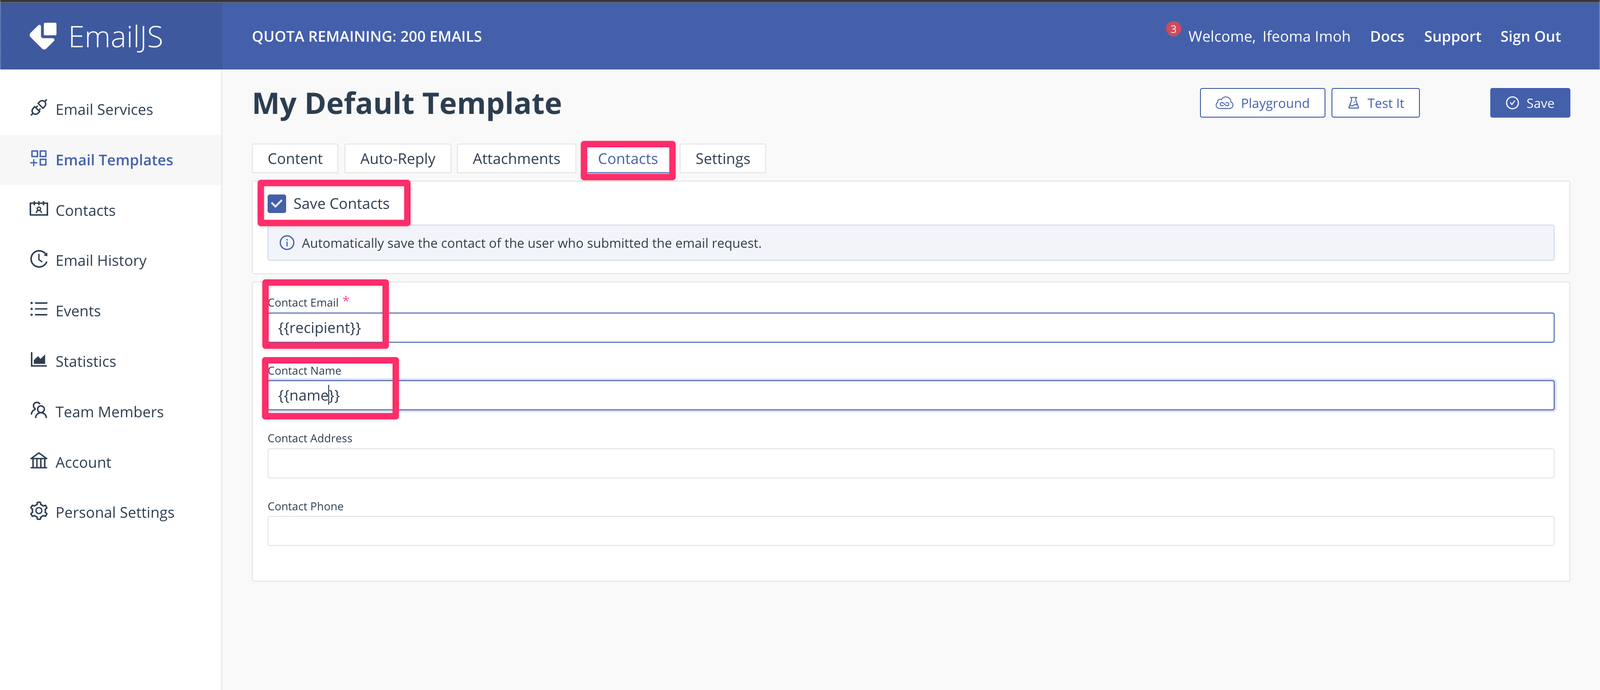
- Maintaining a contact list whenever a new user subscribes is also desirable, and we want this feature in our mini-app. Head to the Contacts tab and check the Save Contacts checkbox. You will be presented with a form that holds the user’s name and email address; again, we use our dynamic parameters to store the details, as shown below.
Building the Frontend
We now have our EmailJS backend setup. Let’s use the SDK to integrate with our frontend. We will need to update our App.tsx file. We will be doing this incrementally and explaining each step as we progress.
Add the following styles to your App.css file:
html {
  font-size: 62.5%;
}
* {
  outline: none;
}
body {
  display: grid;
  place-items: center;
  min-height: 100vh;
  background-color: #f4f4f4;
  font-size: 1.7rem;
  font-family: -apple-system, BlinkMacSystemFont, "Segoe UI", Roboto, Oxygen,
    Ubuntu, Cantarell, "Open Sans", "Helvetica Neue", sans-serif;
}
section {
  display: grid;
  grid-template-columns: repeat(2, 1fr);
  width: 60rem;
  overflow: hidden;
  background-color: #fff;
  min-height: 37rem;
  border-radius: 5px;
}
.form_group {
  display: grid;
  gap: 0.3rem;
}
aside {
  background-image: url(https://media.istockphoto.com/id/1205460056/photo/email-background-concept-on-blue-background-3d-rendering.jpg?b=1&s=612x612&w=0&k=20&c=_NHcxoaTPpdB6cFmpnSpWrlSdrgoIQxoRk-ImaL1QaU=);
}
form {
  padding: 2rem;
  display: grid;
  gap: 1.5rem;
  align-items: end;
  align-content: center;
}
input {
  border: 2px solid #ecebf3;
  padding: 12px 8px;
}
label {
  text-transform: capitalize;
  color: #666;
}
input,
button {
  border-radius: 5px;
}
.btn {
  background-color: #090817;
  color: #dcdbe4;
  padding: 1.3rem;
  font-family: inherit;
  border: none;
  margin-top: 1.3rem;
  font-size: 0.9em;
}
h2 {
  text-align: center;
}
Open your App.tsx file and update its content as shown below. First, let’s update it with the imports we will be needing.
import "./App.css";
import { useRef, useEffect, useState } from "react";
import emailjs from "@emailjs/browser";
Nothing new here. We import the styles we will need for our app’s UI, some React hooks, and the EmailJS SDK.
Next, let’s define our component function and initialize the EmailJS SDK with our public key from the EmailJS backend. Our Public Key can be found in the Account section of our dashboard, as seen below.

export default function App() {
  useEffect(() => emailjs.init("YOUR-PUBLIC-KEY-HERE"), []);
  //...
}
The above code initializes the EmailJS SDK when the component mounts.
Next, we will need some states to hold the user’s email and name and manage the app’s loading states.
Add the following to the top of your app component.
const emailRef = useRef<HTMLInputElement>();
const nameRef = useRef<HTMLInputElement>();
const [loading, setLoading] = useState(false);
Next, we will add the function that handles email sending and the form UI that renders our email and name input fields.
export default function App() {
  // ... state
  useEffect(() => emailjs.init("YOUR-PUBLIC-KEY-HERE"), []);
  // Add these
  const handleSubmit = async (e) => {
    e.preventDefault();
    const serviceId = "YOUR-SERVICE-ID-HERE";
    const templateId = "YOUR-TEMPLATE-ID-HERE"";
    try {
      setLoading(true);
      await emailjs.send(serviceId, templateId, {
       name: nameRef.current.value,
        recipient: emailRef.current.value
      });
      alert("email successfully sent check inbox");
    } catch (error) {
      console.log(error);
    } finally {
      setLoading(false);
    }
  };
  return (
    <section>
      <aside></aside>
      <form className="for" onSubmit={handleSubmit}>
        <div className="form_group">
          <label htmlFor="">name</label>
          <input ref={nameRef} placeholder="enter your name" />
        </div>
        <div className="form_group">
          <label htmlFor="">email</label>
          <input ref={emailRef} type="email" placeholder="enter your email" />
        </div>
        <button className="btn" disabled={loading}>
          subscribe
        </button>
      </form>
    </section>
  );
}
The centerpiece of our App component is the handleSubmit handler bound to our form’s submit event. This function starts by creating variables that
store the ids of the email service and email template we created earlier—be sure to fill in the details for yours.
Next, it toggles the loading state and attempts to send an email using the send method of the EmailJS SDK, which takes three parameters. The first two are our service and template ids,
and the third is an object whose keys map to the dynamic variables we included in our email template.
Since we used name and recipient, we set them with values extracted from our form using the nameRef and emailRef DOM reference
variables bound to the form’s input fields. If the send method resolves successfully, we display an alert on the screen.
To see the running app, open your terminal and run the following command:
npm run start
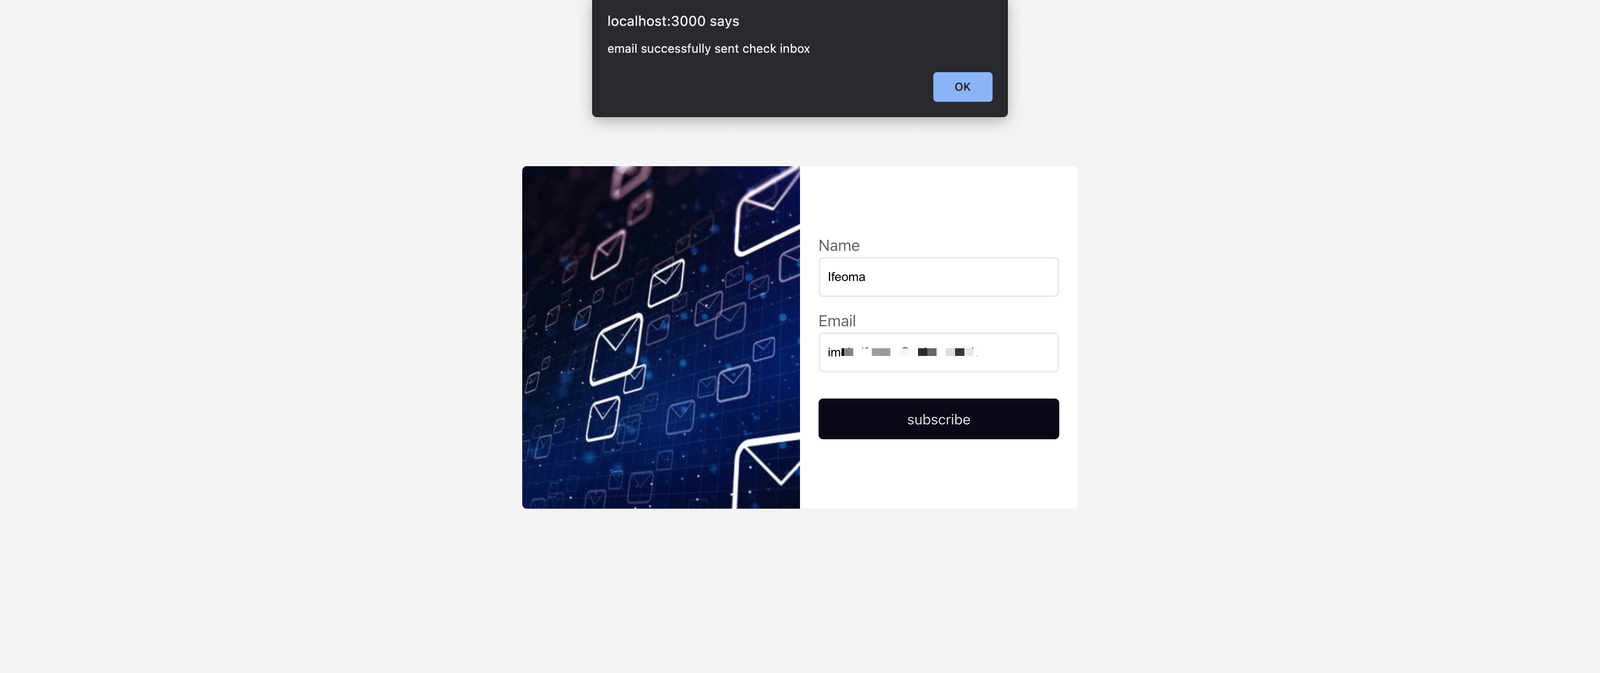
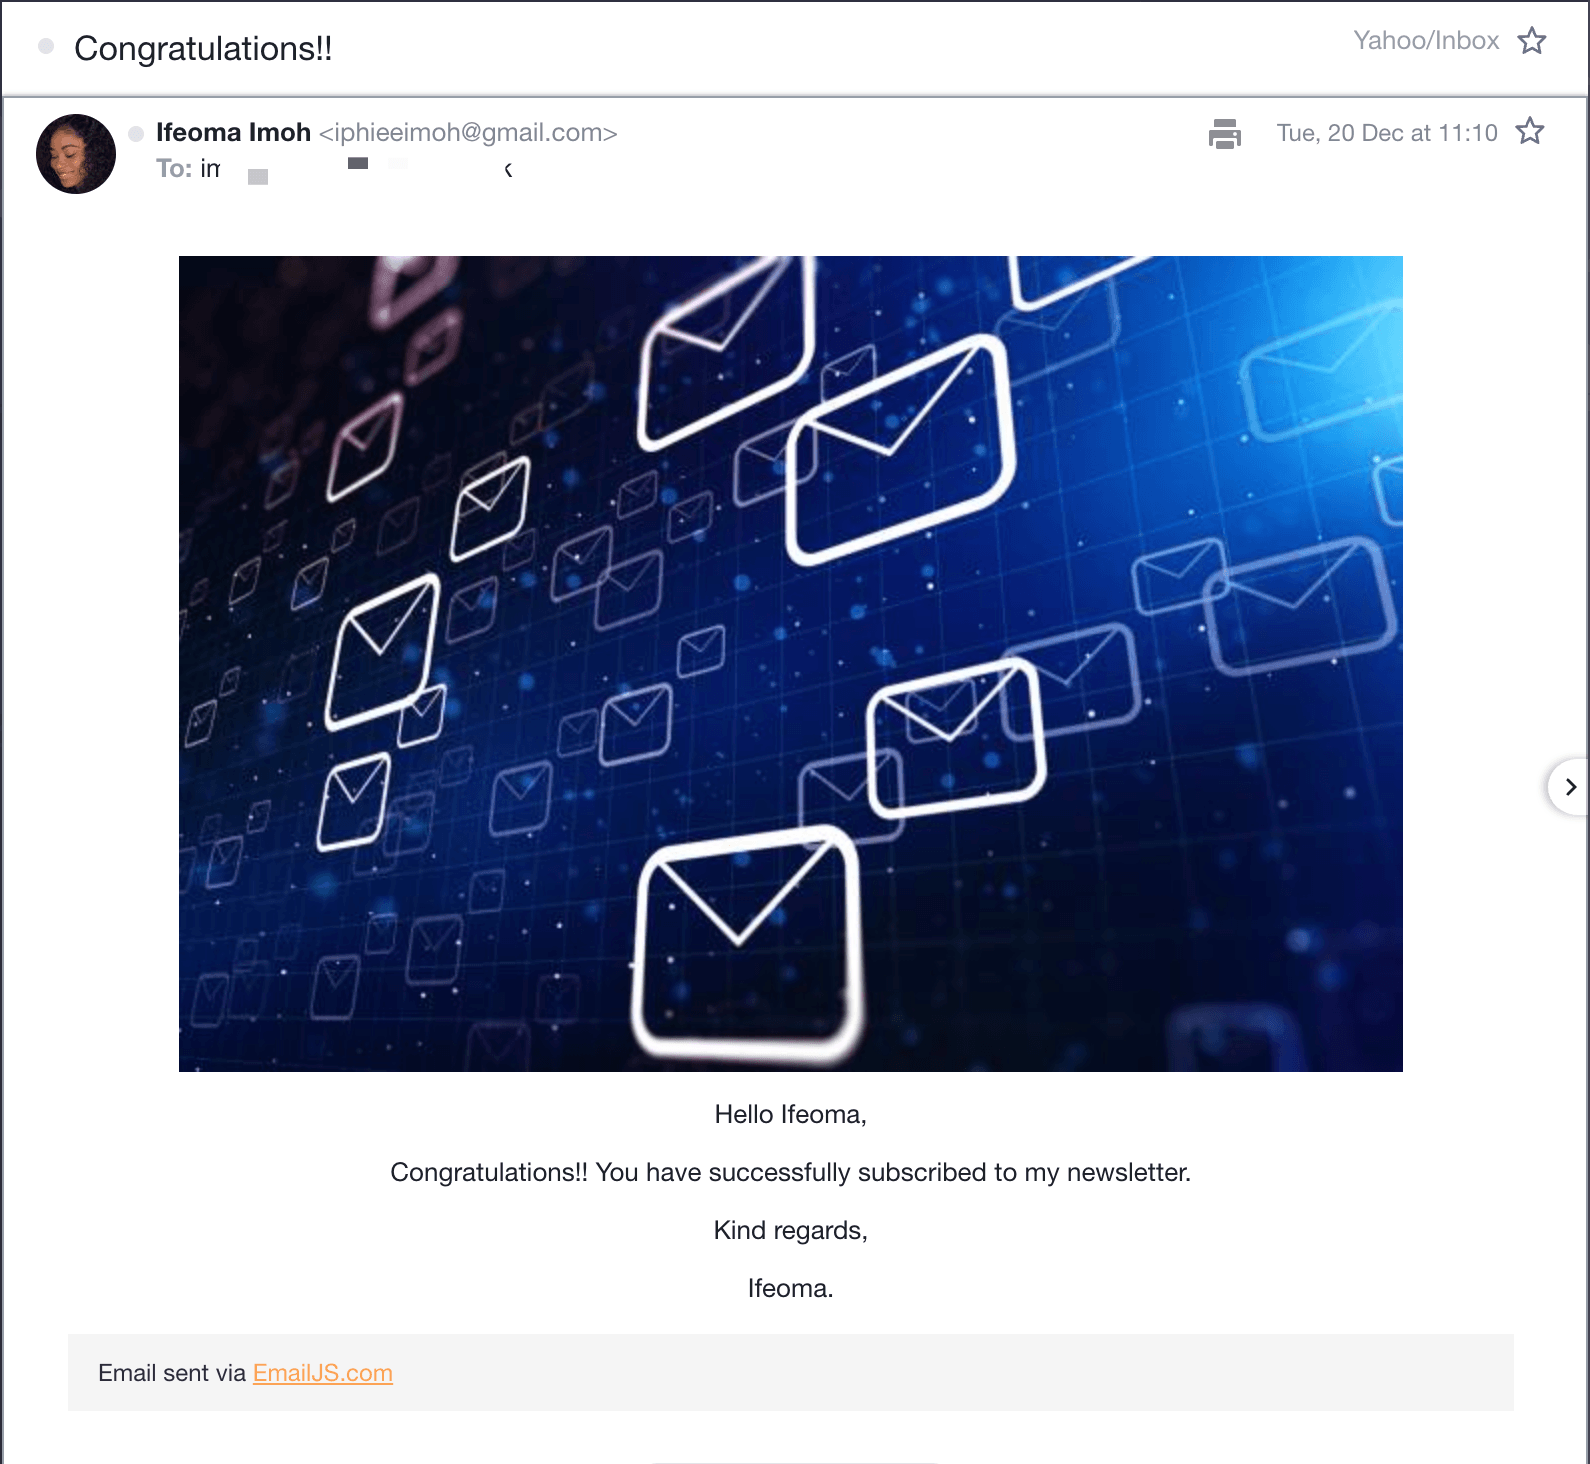
In the running application, we can now send emails and view them in our inbox, as shown below.
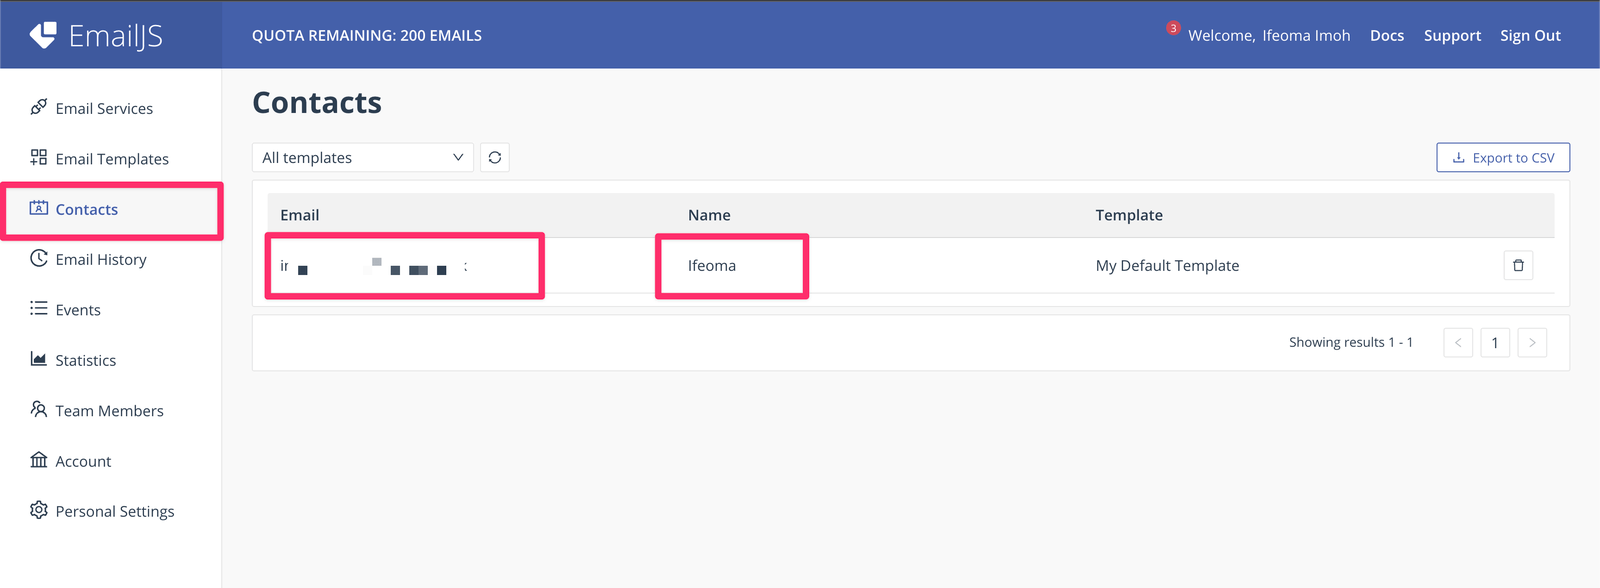
You should also see the newly added contact in your contact list.
Conclusion
Despite security and privacy concerns like spam and viruses, the increasing prevalence of email today demonstrates how important it is as a low-cost and efficient communication tool for enterprises. Web application services such as EmailJS simplify incorporating emails into web applications and meet our core business needs. You may always refer to the documentation to learn about the other services this platform provides that you may need in future projects.


