
Running iOS Simulator from Windows for .NET MAUI

Summarize with AI:
Follow these steps to equip an iOS simulator on your Windows machine to check your .NET MAUI app.
At first glance, running an iOS app from a Windows machine may seem impossible. However, I have good news for you: it is possible. In this article, I will show you a simple way to establish a remote connection from your Windows computer to your Mac, allowing you to run your iOS apps from Windows. Let’s see how to do it!
First of All, What Do I Need?
- Visual Studio 2022: On both your Mac and Windows, you must have Visual Studio 2022 installed.
- Pair your Mac: To access the features of your Mac, you must pair your Windows computer with it. If you don’t know how to do it, you can read the Pairing with Mac to Run iOS Apps in .NET MAUI article.
What is the Remote iOS Simulator for Windows?
The Remote iOS Simulator for Windows allows you to test your applications remotely on Windows in an iOS simulator. This is possible because when you pair with a Mac, you can use its resources.
To take advantage of this functionality on your Windows computer, you need to have Visual Studio 2022 installed. The simulator is automatically installed with .NET MAUI with this one. After installing, open a .NET MAUI application. From now on, you can apply everything you’ll learn below.
Ensure the Remote Simulation Option is Enabled
Remote simulation is an option that is enabled by default. However, you may need to deactivate and reactivate it at some point. To do so, follow these steps:
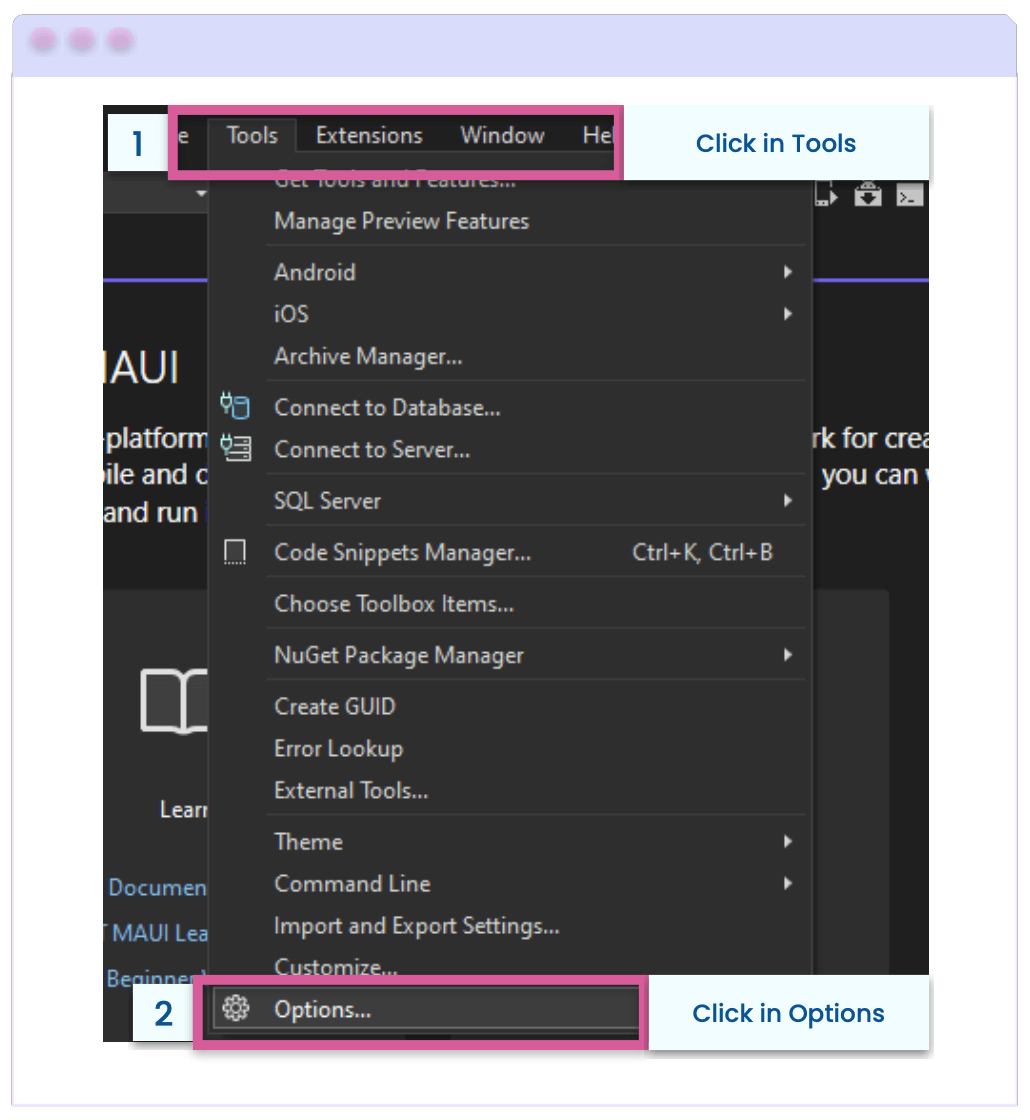
- In Visual Studio, go to the top menu, click on Tools ➡ and then, make in Options.
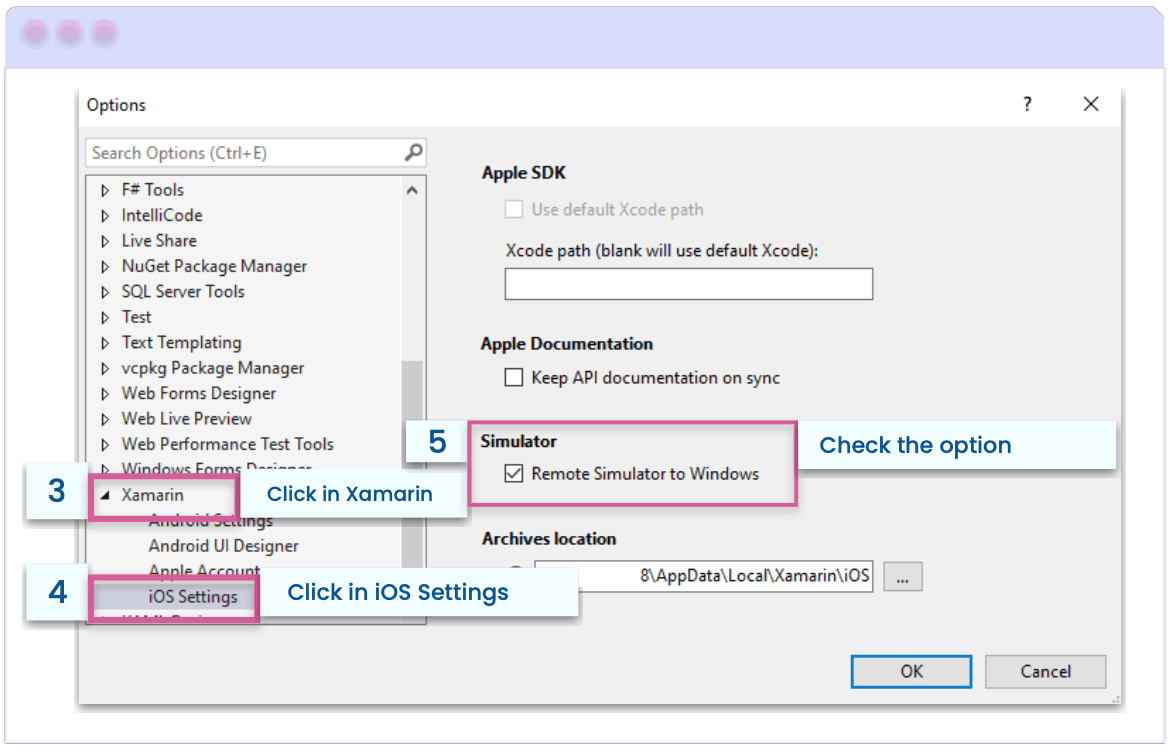
- A dialog box will be displayed, here you must go to the following options: Xamarin ➡ iOS Settings
⚠ If you disable debugging for a .NET MAUI app on iOS, keep in mind that the iOS simulator will open on the connected Mac build host.
Launch the App in the iOS Simulator
Now that you’ve made sure that the option is activated, let’s continue with launching your app!
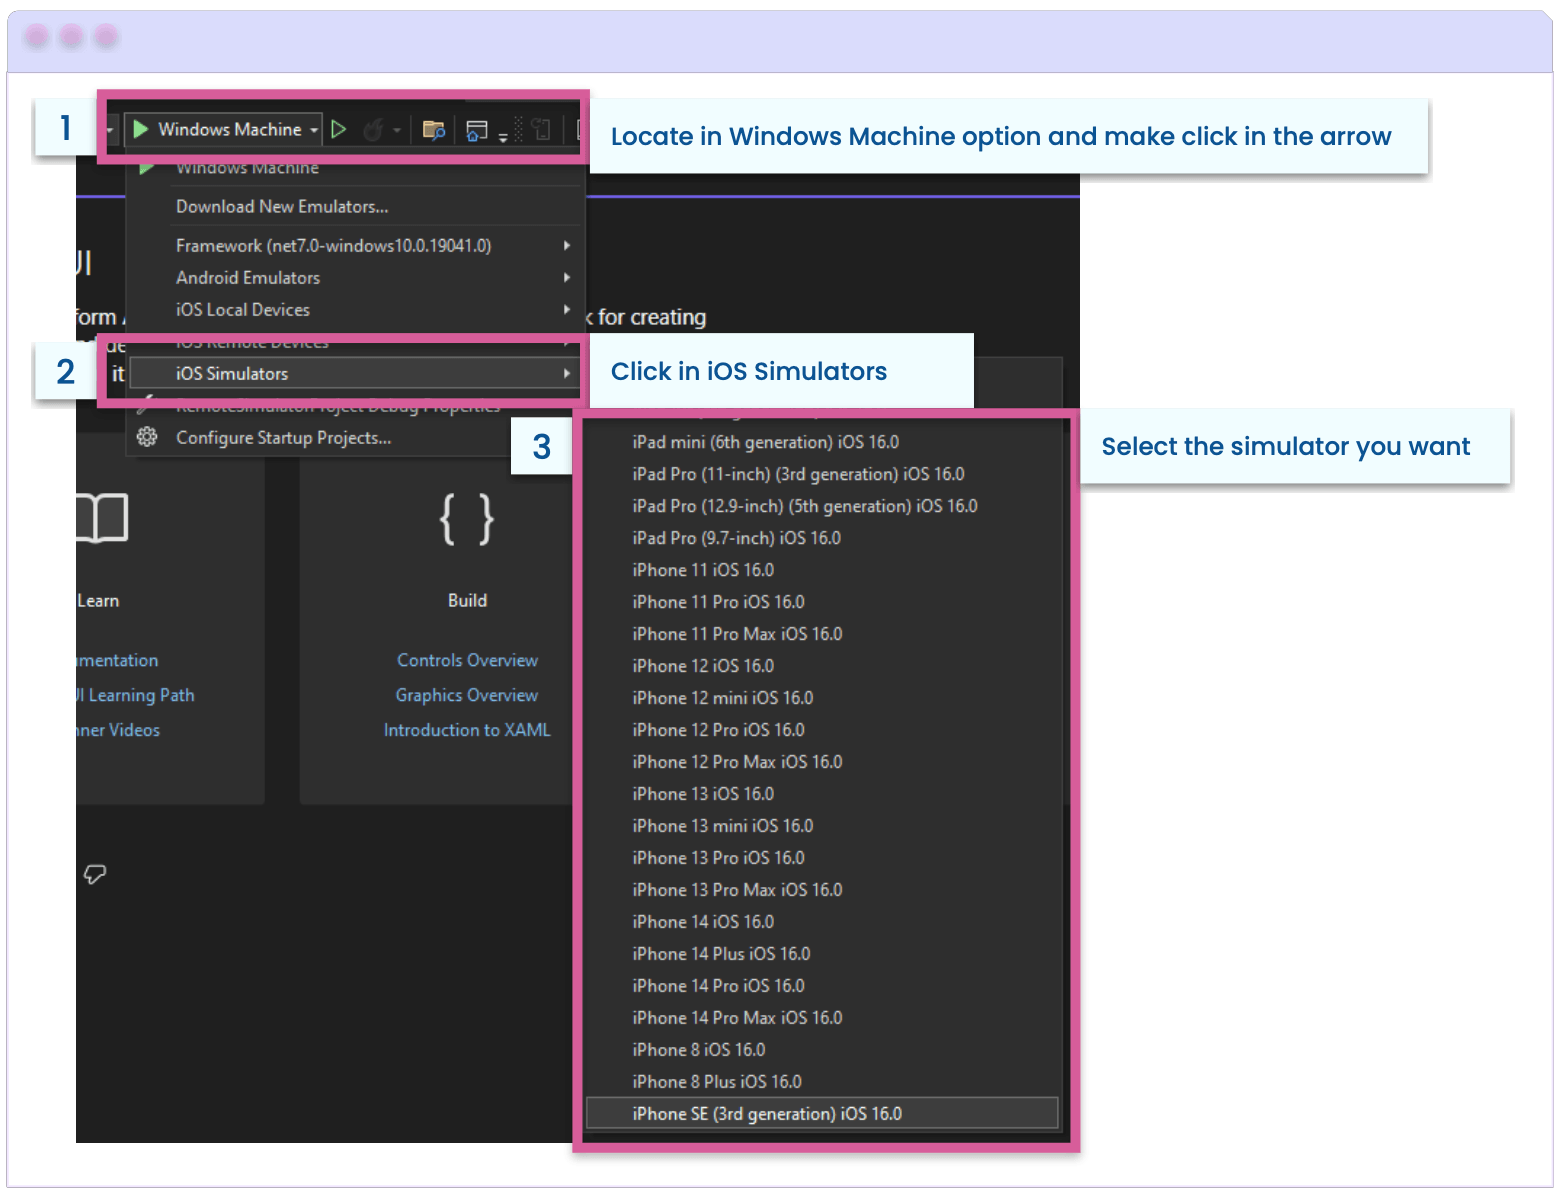
In the Visual Studio toolbar, go to the Debug Target dropdown, click on iOS Simulators, then all the available simulators of the Mac you paired with will appear.
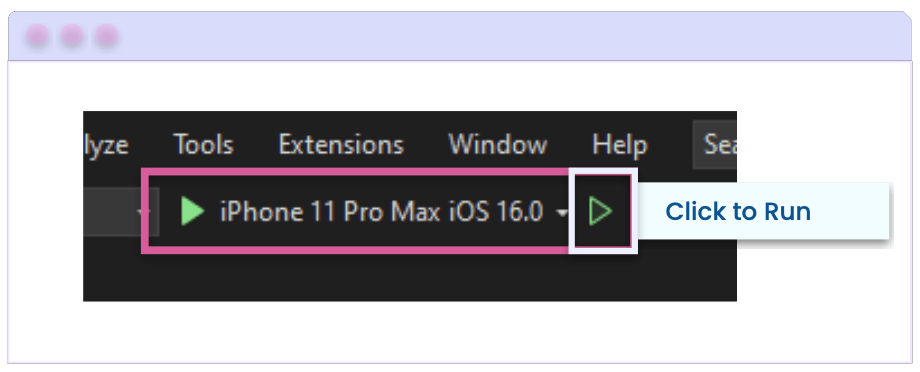
Once you select a simulator, you can visualize it and start running your applications.
Interesting Facts About the Simulator
➖ Five buttons are displayed on the toolbar located at the top of the window simulator:
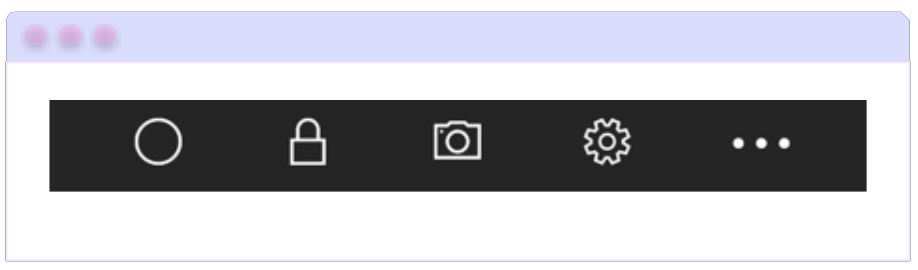
- Home: Simulates the home button on an iOS device.
- Lock: Enables the simulator to be locked, requiring a swipe to unlock for access.
- Screenshot: Saves a screenshot of the simulator to
\Users\{User}\Pictures\Xamarin\iOSSimulator. - Settings: Responsible for displaying keyboard and other settings.
- Other options: Allows us to see various simulator options such as rotation, and shake gesture.
➖ By right-clicking anywhere in the remote iOS simulator window, you can bring up a context menu that displays all toolbar buttons.
Supplementary Topics to Consider
Logs
In case you face any difficulties with the remote iOS simulator, you can access the logs at the following locations:
- Mac:
~/Library/Logs/Xamarin/Simulator.Server - Windows:
%LOCALAPPDATA%\Xamarin\Logs\Xamarin.Simulator
Sounds
If you’re using Windows, you won’t hear iOS sounds. The simulator will play all sounds through the host Mac’s speakers.
Touchscreen
Touch interactions are supported by the iOS Remote Simulator for Windows. If your computer has a touch screen, you can employ the same gestures you would use on physical iOS devices to interact with your app.
Troubleshooting
You may encounter trouble with the iOS Remote Simulator for Windows getting stuck in the following flow:
Connecting to Mac ➡ Checking server ➡ Connected *(and it becomes a loop)*
It could be due to an Xcode configuration issue. To fix this, you just have to delete and restart the simulators on your Mac build host. Apply the following steps:
- Check that neither Xamarin Mac Agent (XMA) nor Xcode are currently in use.
- Delete your
~/Library/Developer/CoreSimulator/Devicesfolder. - Run
killall -9 com.apple.CoreSimulator.CoreSimulatorService. - Run
xcrun simctl list devices.
Wrap-up
That’s all! 🎊 You already know how to start programming your iOS applications in .NET MAUI from Windows!
Thanks for reading this article! 💚💕 See you next time! 💁♀️
References
This article was based on the official documentation:
https://learn.microsoft.com/en-us/dotnet/maui/ios/remote-simulator?view=net-maui-7.0
Use a component library in sync with .NET MAUI’s release cadence. Try Telerik UI for .NET MAUI for free.

Leomaris Reyes
Leomaris Reyes is a software engineer from the Dominican Republic specializing in mobile development. She is a 7-time Microsoft MVP and actively builds mobile applications while sharing practical knowledge through technical articles and developer-focused content.
Through her work, she explains programming concepts, developer tools and real-world development practices to help developers grow in their careers.
You can follow her on Instagram and TikTok at @leomarisreyes.dev, read her articles on AskXammy, and connect with her on LinkedIn, where she shares tutorials, insights and resources for developers.
Related Posts
Comments
All articles
Topics
Web MobileMobile
Desktop
Design
Productivity
People
