Pairing with Mac to Run iOS Apps in .NET MAUI

See how to pair your Windows OS to your Mac for seamless native iOS development.
Do I need a Mac to develop my iOS apps in .NET MAUI? This is one of the most common questions when people start cross-platform development in .NET MAUI.
In this article we will learn about the different answers to this question. And, once you know them, we will be focusing on pairing to Mac from Windows for when you prefer to continue using Windows as your main operating system.
Building Native iOS Apps
Building native iOS apps in .NET MAUI requires access to Apple’s build tools. There are different options to get such access, including:
- Physical Mac: This is the most common option. If you have a physical Mac you can install Visual Studio and XCode and run your applications without problems.
- Virtual Machine: If you don’t have a physical Mac, you can opt for virtual machine services, which will allow you to get access to the Apple tools you need to build your applications.
- Pair to Mac: Do you have a physical Mac but want to continue using Windows as your main operating system? You can use your Mac as a bridge to run your iOS apps through Windows. 📋 In this article we will focus on implementing this third option!
First of All … What Do I Need?
- XCode Installation: Make sure you have XCode installed on your Mac. (I recommend you have the most up-to-date version you can.)
- Visual Studio 2022: On both your Mac and Windows, you must have Visual Studio 2022 installed.
Pairing Your Windows Machine to Your Mac Machine
We have two ways to do this pairing process—automatic or manual. Both ways have most of the steps in common, so I will explain them together. When a step must be done differently for the manual way, I will identify it with the label “If you want to do it manually.”
You will see a set of instructions that will guide you through pairing your Mac with Windows. Each of these instructions will be divided into steps. And it will be structured around the following topics:
- Enabling remote login on your Mac
- Connecting the Mac from Visual Studio 2022
Let’s look at each of these steps!
Step 1: Enabling Remote Login on Your Mac
![]() From your Mac: To set up the Mac build host, you must apply the following instructions:
From your Mac: To set up the Mac build host, you must apply the following instructions:
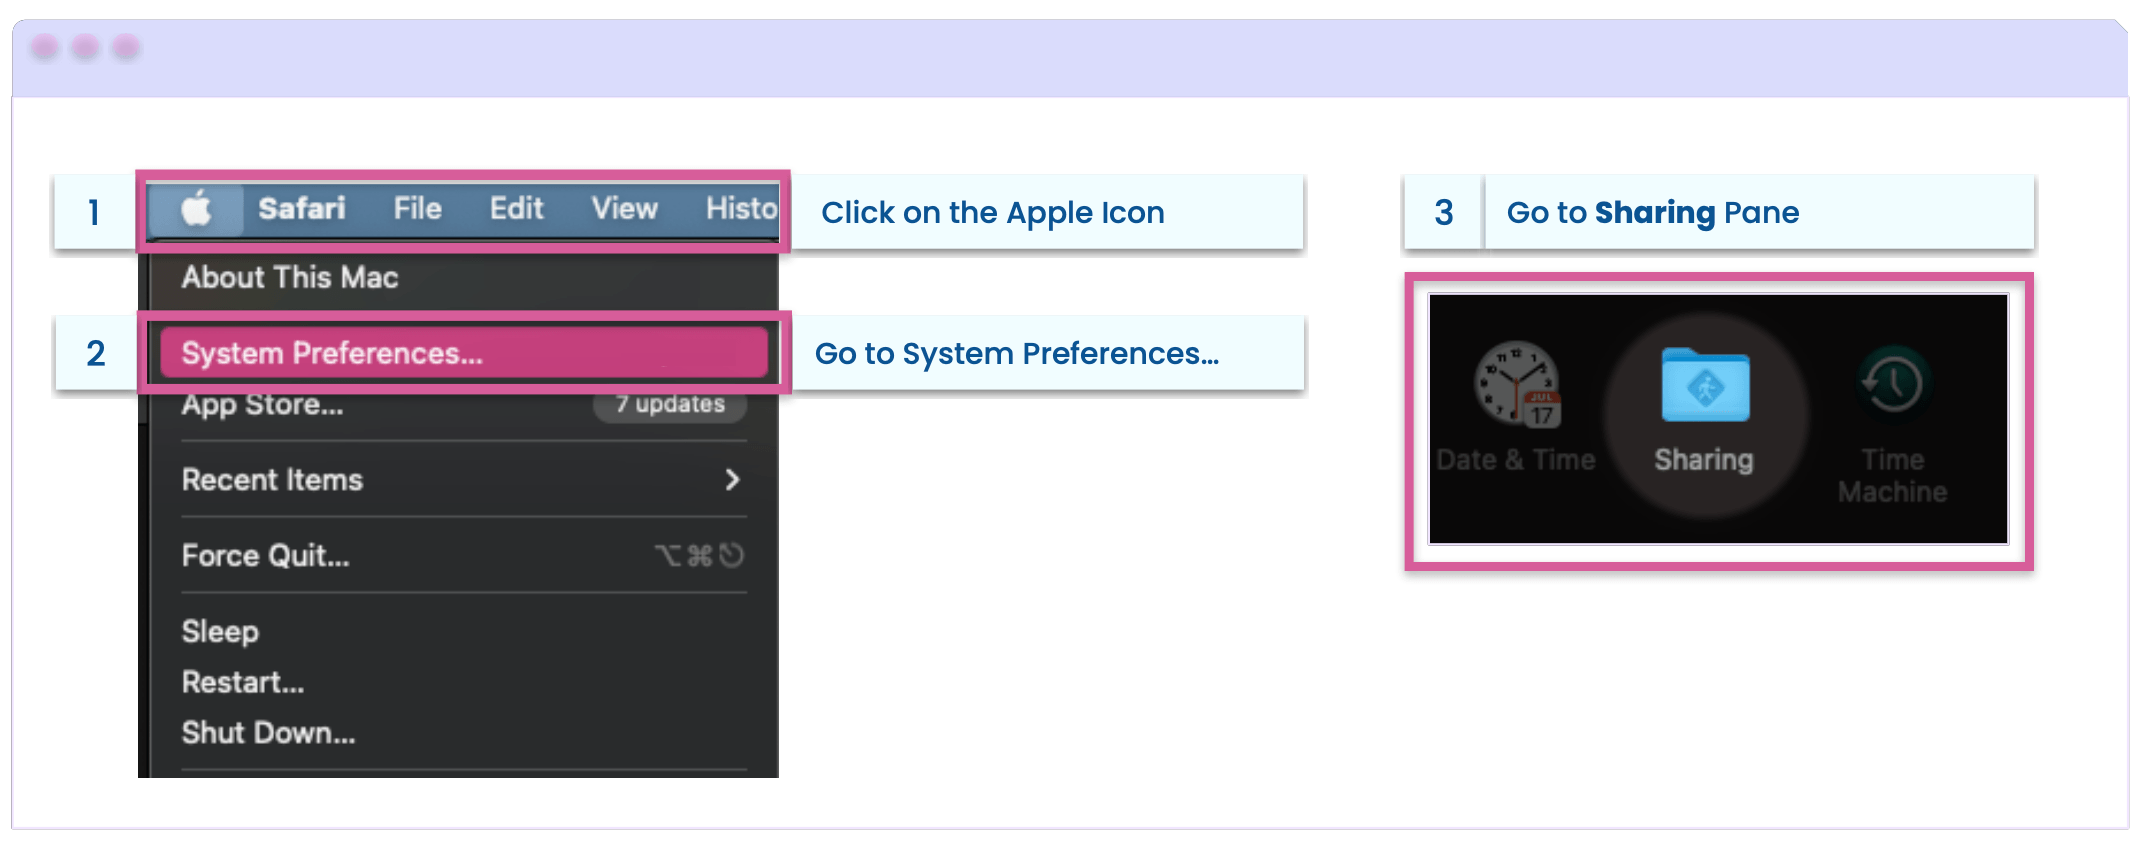
- Click on the Apple icon.
- Go to System Preferences.
- And, go to the Sharing panel.
As I show you in the image below:
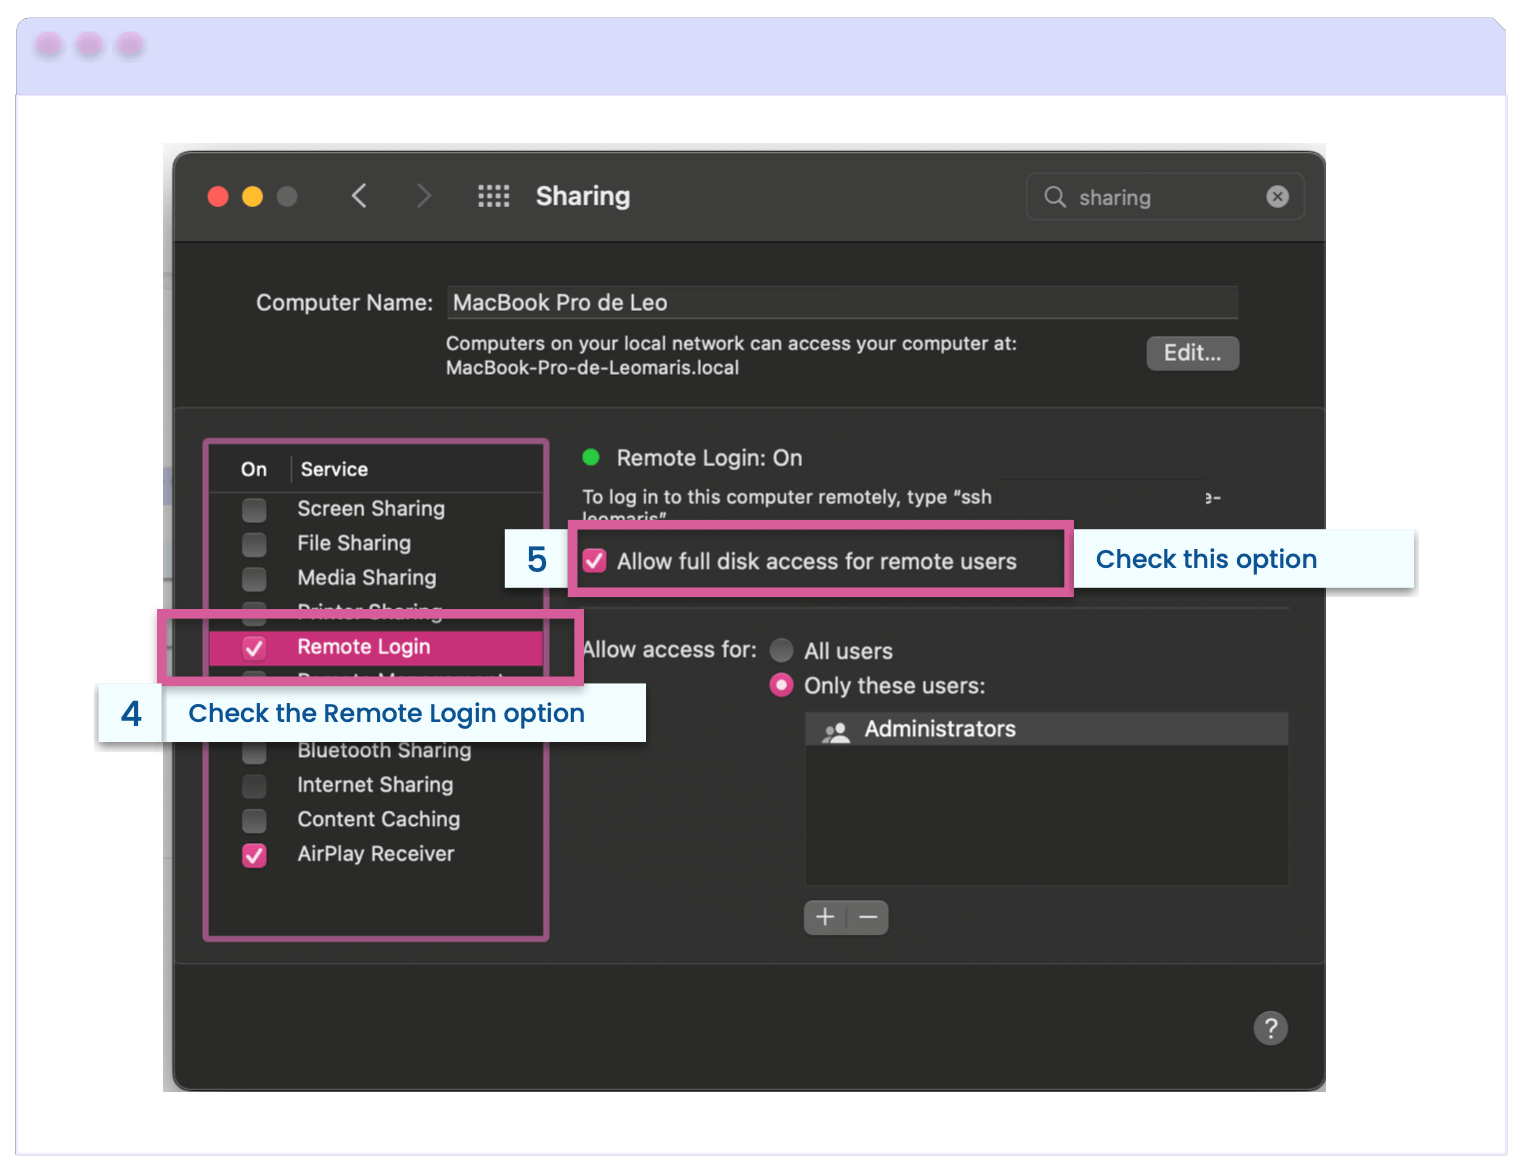
Once you click the Sharing panel, a box with different options will be displayed. You need to apply the following steps:
- Check the Remote Login option.
- Finally, check the “Allow full disk access for remote users” option.
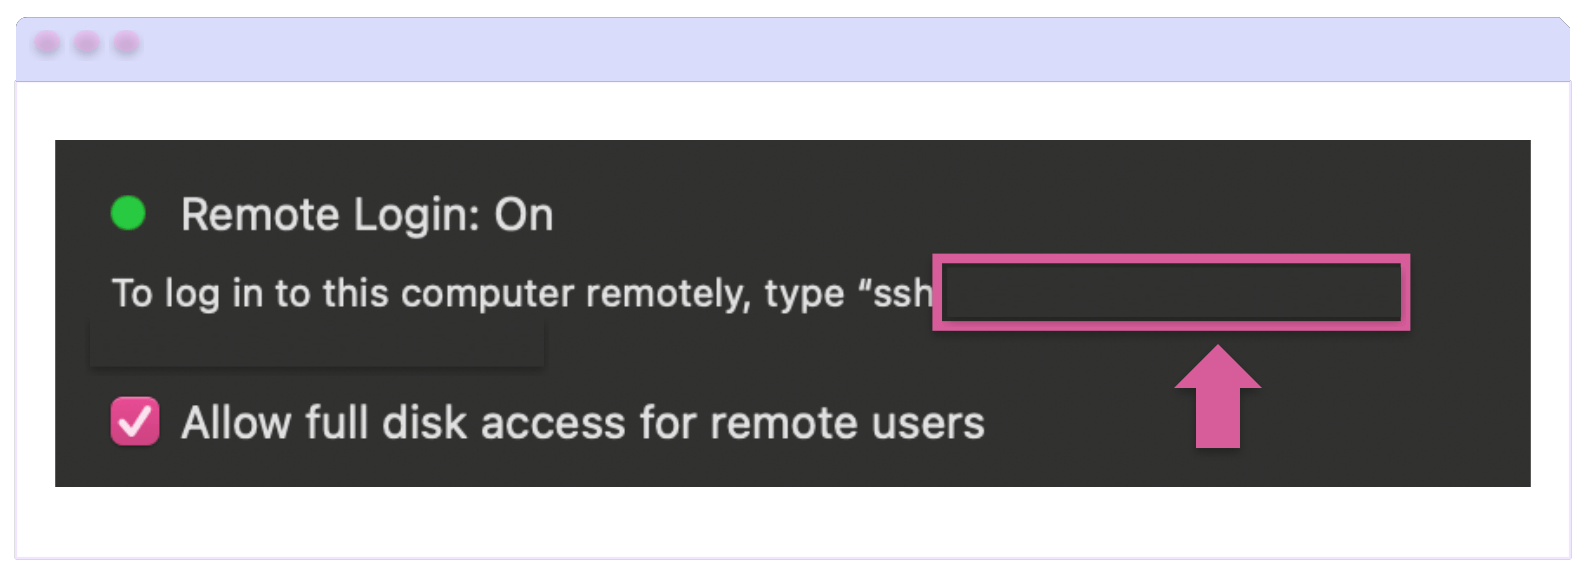
⚠ If you want to do it manually: You only have to obtain your IP or your Mac name, which you can do it in two ways:
- Option 1: In the indicated space, you will see the string you need. (You can’t see mine because it’s hidden.)
- Option 2: In the Terminal, run the following line of code and you will get your IP.
ipconfig getifaddr en0
Step 2: Connecting the Mac from Visual Studio 2022
![]() From your Windows computer: Open a project in your Visual Studio 2022 (it can be a new or existing one), and apply the following steps:
From your Windows computer: Open a project in your Visual Studio 2022 (it can be a new or existing one), and apply the following steps:
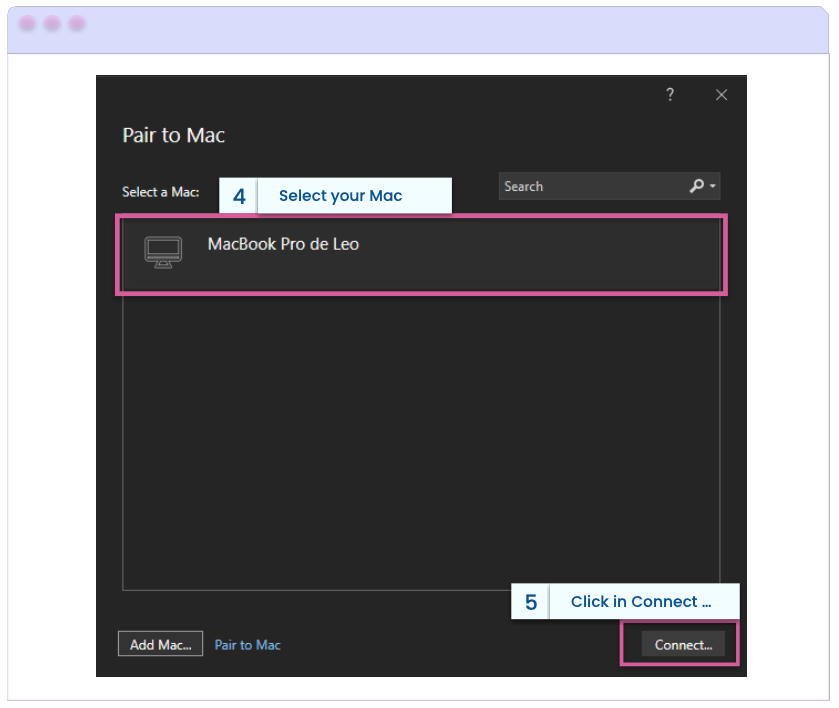
- Go to Tools ➡ iOS ➡ Pair to Mac

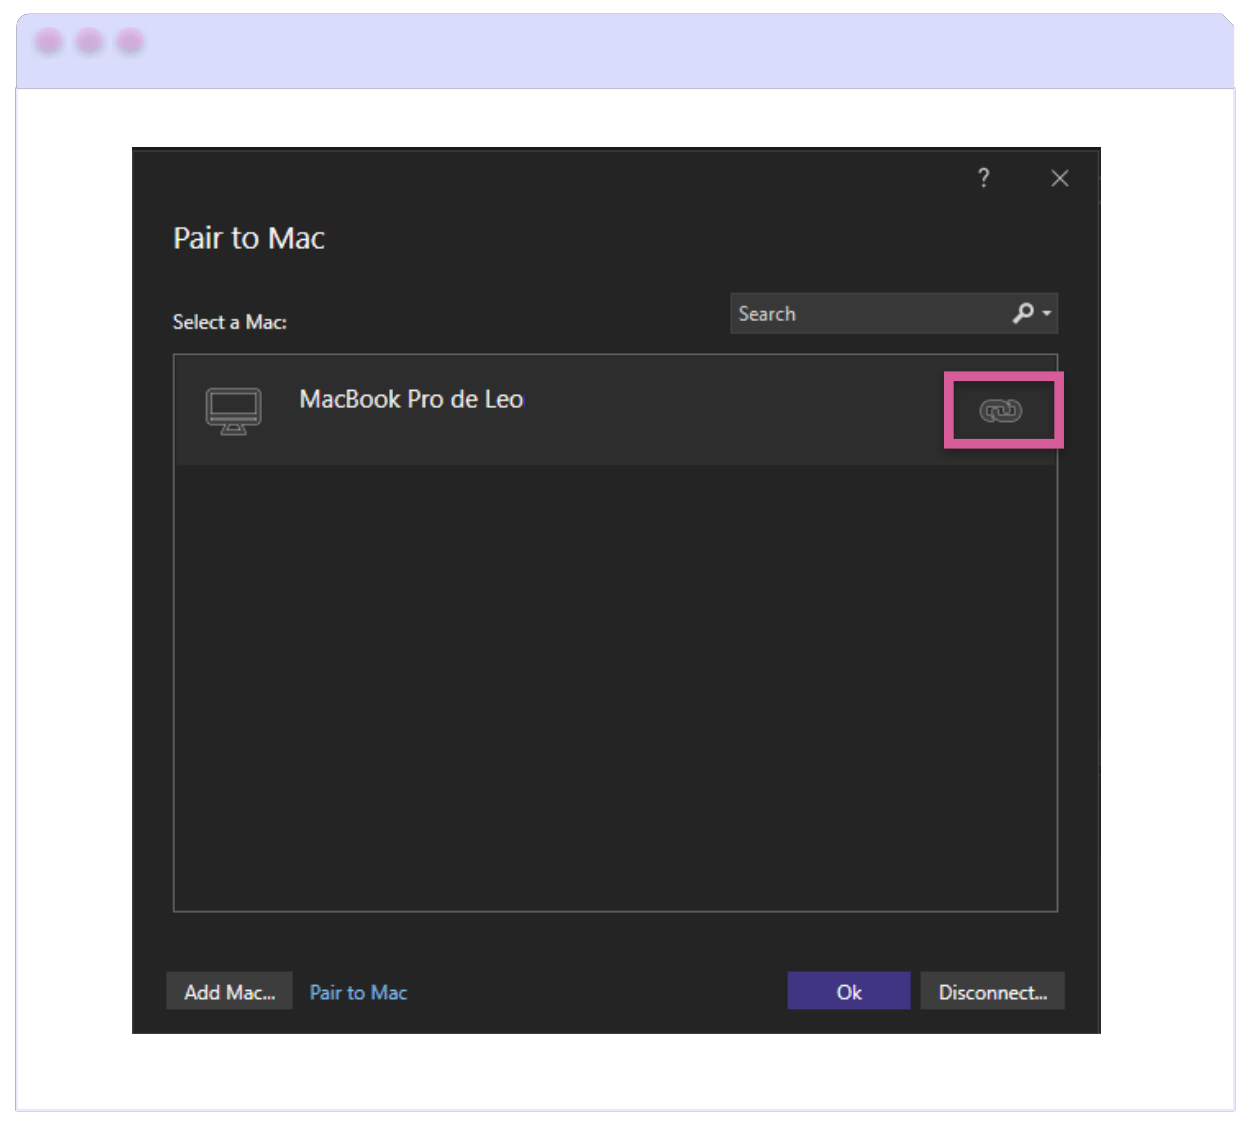
Once you’ve clicked, a list of all previously connected and currently available Mac build hosts will be displayed. Among the available ones you will be able to see your Mac. Select it and then click on the Connect option located in the lower right part of the box as you will see below:
⚠ If you want to do it manually: Click on the Pair Mac button, and add the IP we got earlier in Step One.
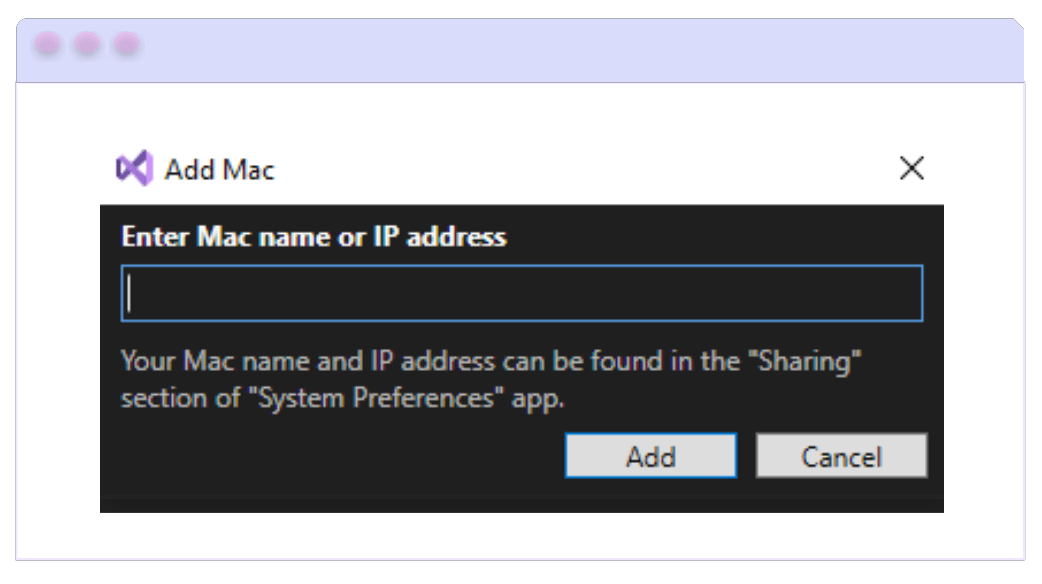
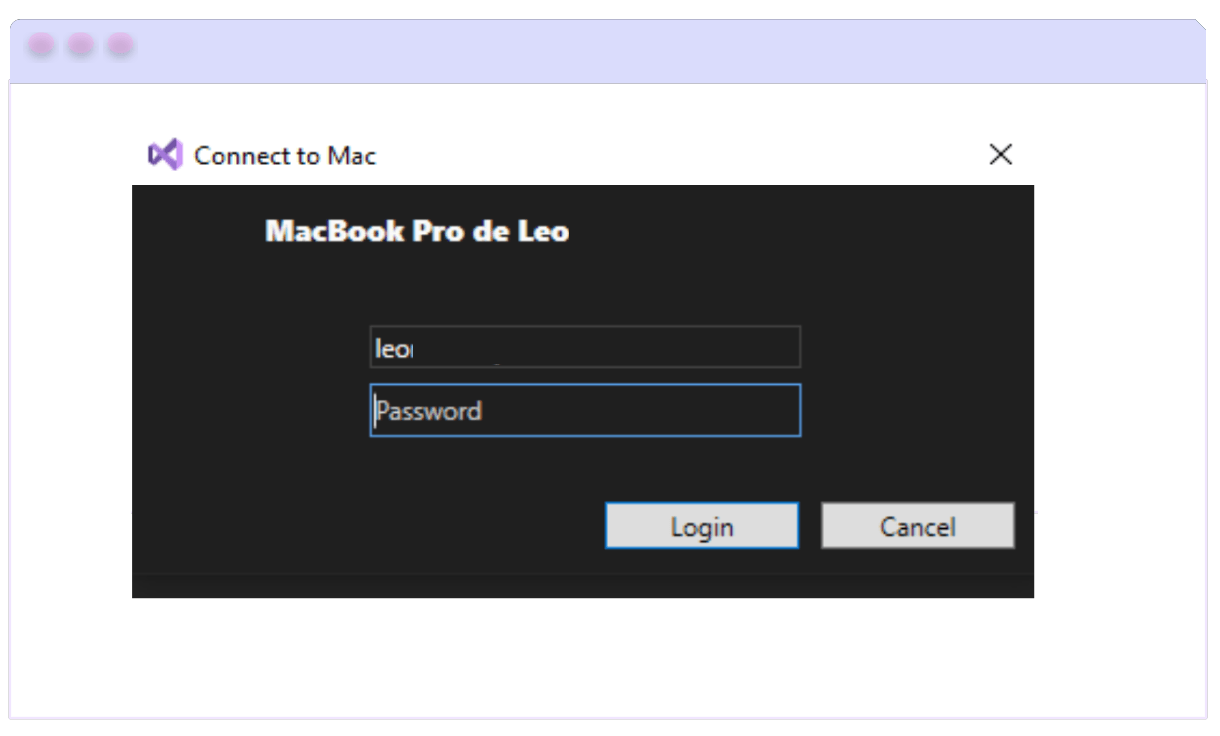
A dialog will be displayed in which you have to enter your username and your password:
Once your Mac is connected, you will identify it with an indicator icon as shown below:
And done! Our pairing process was successful! 🎉 From now on, you can run your iOS apps on Windows without any problems!
📋 Keep in mind the following points:
- You can only be connected to one Mac at a time.
- Once connected, if you right-click, you will find the options to Disconnect and Forget Mac. If you select the Forget option, you must reapply the whole process if you want to connect again.
Building iOS Apps from the Windows Command Line
You can also create applications from the command line. You just have to go to the Terminal and locate in your App folder and execute the following command:
dotnet build -f:net7.0-ios /p:ServerAddress={macOS build host IP address} /p:ServerUser={macOS username} /p:ServerPassword={macOS password} /p:TcpPort=58181 /p:_DotNetRootRemoteDirectory=/Users/{macOS username}/Library/Caches/Xamarin/XMA/SDKs/dotnet/
But what do these parameters mean? Let’s explore them!
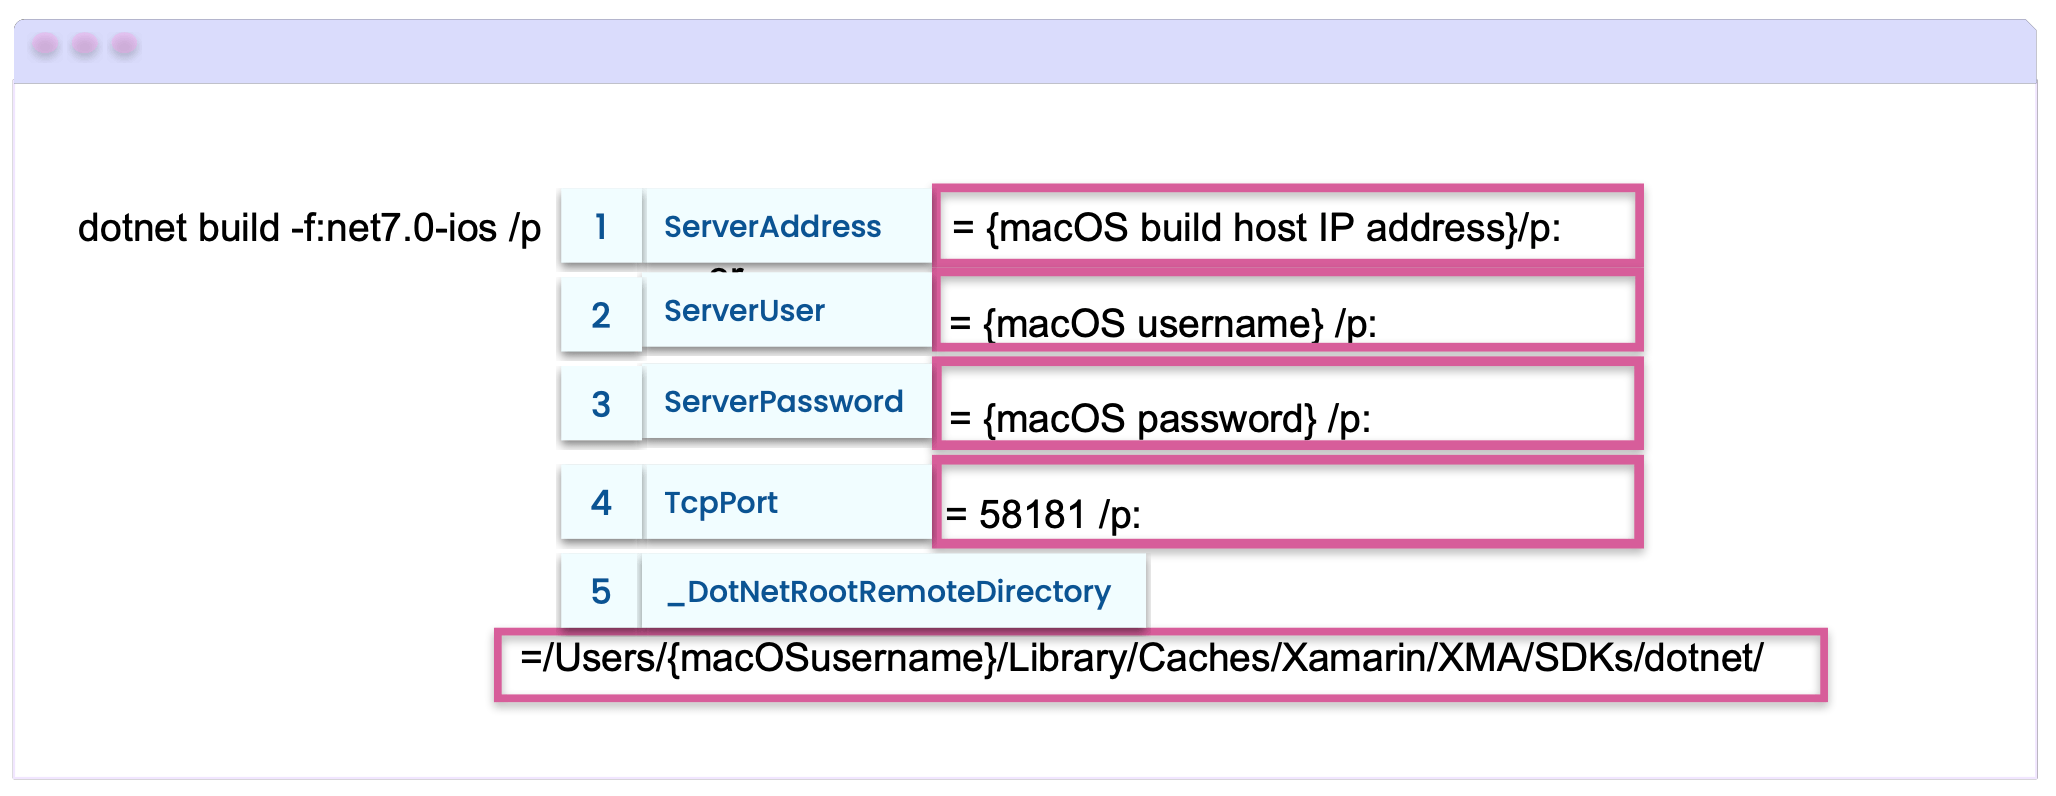
- ServerAddress: This is the IP address of the Mac build host.
- ServerUser: This is the username for logging into the Mac build host.
- ServerPassword: The password for logging in to the Mac build host.
- TcpPort: This is the TCP port.
- _DotNetRootRemoteDirectory: This is the folder that contains the .NET SDK on the Mac build host.
📋 The first time you pair with Mac logs into a Mac build host from Visual Studio 2022 or the command line, it sets up SSH keys. This means that future logins will not require your credentials.
Newly created keys are stored in %LOCALAPPDATA%\Xamarin\MonoTouch path.
Additional Points
- For Mac, it will install or update the necessary packages distributed with Xcode.
- Troubleshooting automatic Mac provisioning: If you’re having trouble auto-provisioning your Mac, one option is to check the Visual Studio 2022 logs contained in the %LOCALAPPDATA%\Xamarin\Logs\17.0 path.
Wrap-up
That’s all! 🎊 You already know how to start programming your iOS applications in .NET MAUI from Windows!
Thanks for reading this article! 💚💕 See you next time! 🙋♀️
Reference: https://learn.microsoft.com/en-us/dotnet/maui/ios/pair-to-mac?view=net-maui-7.0
Use a component library in sync with .NET MAUI’s release cadence. Try Telerik UI for .NET MAUI for free.

Leomaris Reyes
Leomaris Reyes is a Software Engineer from the Dominican Republic, with more than 5 years of experience. A Xamarin Certified Mobile Developer, she is also the founder of Stemelle, an entity that works with software developers, training and mentoring with a main goal of including women in Tech. Leomaris really loves learning new things! 💚💕 You can follow her: Twitter, LinkedIn , AskXammy and Medium.

