Passkey Authentication in Next.js Using Hanko

Summarize with AI:
Learn about Hanko’s simplified authentication solution and integrating passkeys into an existing authentication system within a Next.js application.
Hanko is an authentication provider that allows developers to easily add authentication solutions to their applications. Their solution covers all the factors, from password-based to passwordless, such as one-time passwords (OTP), single sign-on and passkeys.
When passwordless authentication is done using biometrics (Face ID or fingerprint), following FIDO (Fast Identity Online) protocols, passkeys are the generated credentials after authentication, similar to how an email and a password are the credentials we get after some basic authentication.
Understanding the internals of FIDO protocols and interacting with the underlying web APIs can be daunting. However, Hanko has your back!
In this guide, we will take advantage of Hanko’s simplified authentication solution. Our focus will be on passkeys and how we can integrate them into an existing authentication system within a Next.js application.
Project Setup
Run the following command in your terminal to create a Next.js application:
npx create-next-app@latest
After running the command, follow the prompt to create a TypeScript-powered Next.js app in a folder called hanko-auth-passkey.
Next, let’s create the files we will need. Run the following command at the root of your project to create an auth.ts file:
touch auth.ts
This file will represent our fake collection of users and our session store.
Run this command to create an actions/index.ts file:
mkdir actions && touch actions/index.ts
This file will hold all our server-side logic. We will be using Next.js server actions.
mkdir components && touch FormPasskeyLogin.tsx FormRegisterPasskey
Finally, run this command to create two files: FormPasskeyLogin.tsx and FormRegisterPasskey.tsx, which will hold the logic to allow the user to log in and create a passkey, respectively.
mkdir components && touch FormPasskeyLogin.tsx FormRegisterPasskey.tsx
What We Will Build
Ideally, passkeys should only be integrated into an existing authentication system. This is what we will be doing. Let’s set up a simple single-factor authentication system that allows email password authentication and uses session tokens to manage the user session. Update the auth.ts file with the following:
"use server";

// user type
type User = {
  id: string;
  email: string;
  full_name: string;
  password: string;
};

// dummy users table
const users: User[] = [
  {
    id: "1",
    email: "1@yopmail.com",
    full_name: "john bobo",
    passwword: "1234",
  },
];

// dummy session store
const sessionStore: Record<string, User> = {
  jklmn: users[0],
};

// session id
const FAKE_SESSION_ID = "jklmn";

// retrieves the users session
export async function getSession() {
  return sessionStore[FAKE_SESSION_ID];
}

function getUserById(id: string) {
  return users.find((u) => u.id === id);
}
In the code above, we have a user, a simple session store and a function getSession that retrieves the current user’s session. The session store assumes a user with a dummy session id of jklmn. As shown above, most of the data in our existing authentication system is hard coded for brevity.
Our goal is to extend our current auth system by including passkeys to build a two-factor authentication (2FA) app.
Our existing email and password auth system is based on cognition (what you know) as an authentication factor. Passkeys are based on inheritance (what you are), i.e., your biometrics, and possession (what you have), i.e., your device with a touch ID or fingerprint scanner.
It is important to know that Hanko provides several options for integrating passkeys in our app. At the time of writing, we can do one of the following:
- Use our own provided UI to integrate passkeys with other forms of authentication, such as SSO, magic link, regular email password auth, etc.
- Integrate only passkeys in our app. For Next.js, you can use the next Auth library or, in our case, communicate directly with their SDK to add passkeys.
Our choice for this approach not only allows us to focus on the heavy lifting the Hanko library does for us internally when integrating passkeys, but also allows us to see firsthand how passkeys are created and used for authentication without obscuring too many details.
Our App’s UI

Our app will consist of two components. The first is the FormRegisterPasskey.tsx file, which will hold the button to create the passkey represented as “Register” above.
The second is the FormPasskeyLogin.tsx file, which will hold the logic to handle passkey login as indicated by the “Login with passkey” button above.
Setting Up Hanko
Let’s now proceed with setting up a Hanko account. Create an account.
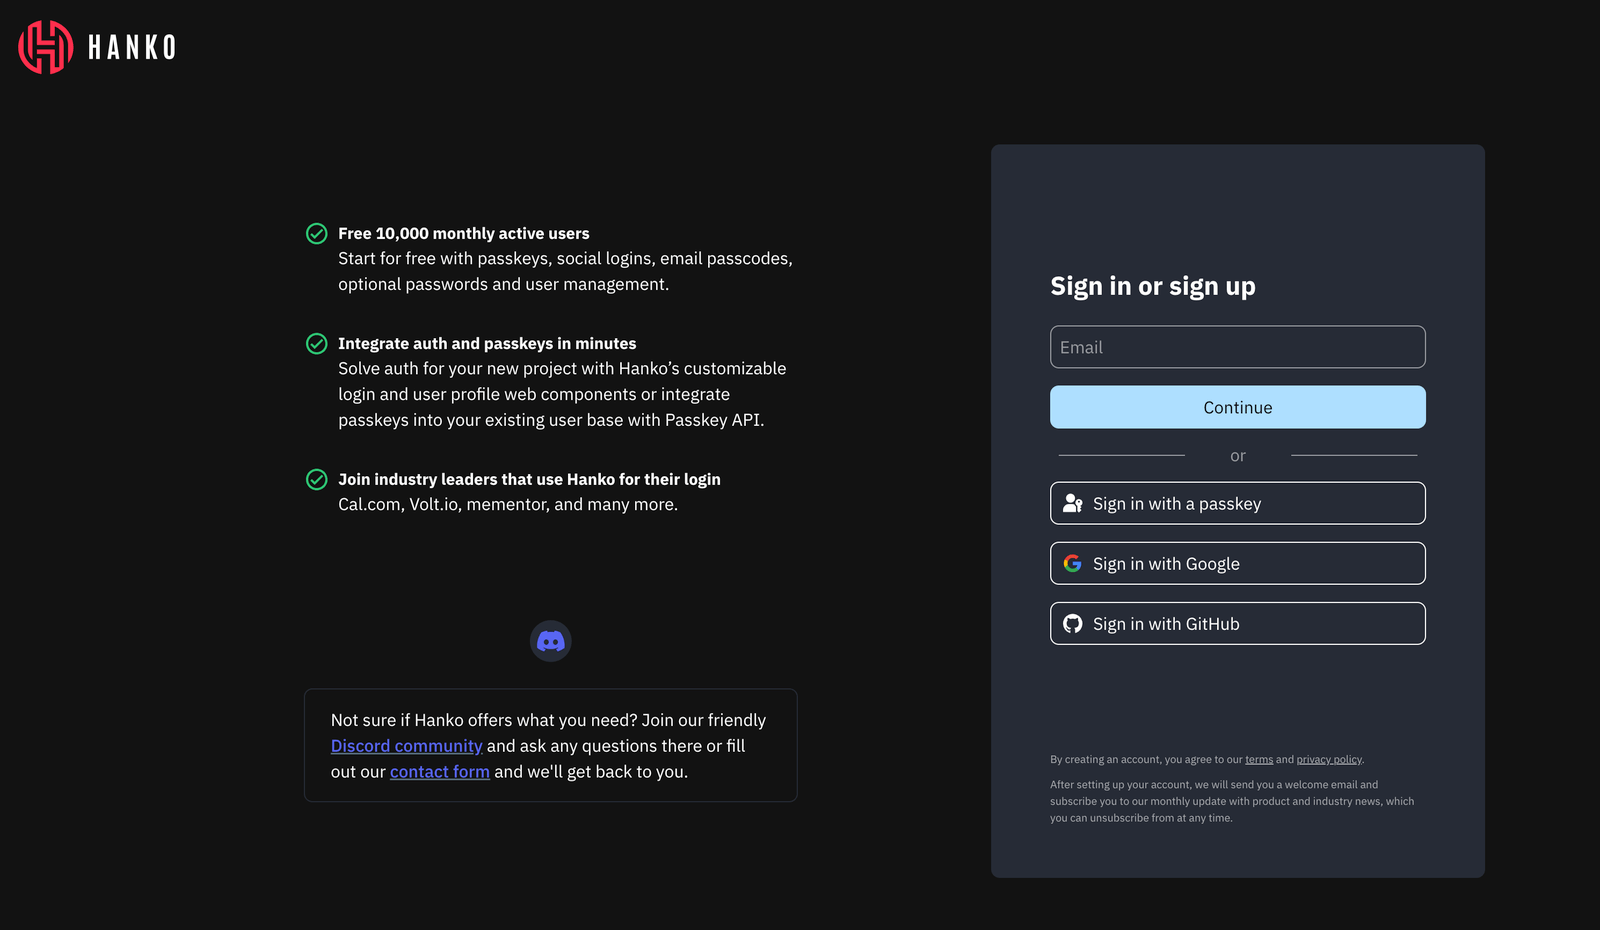
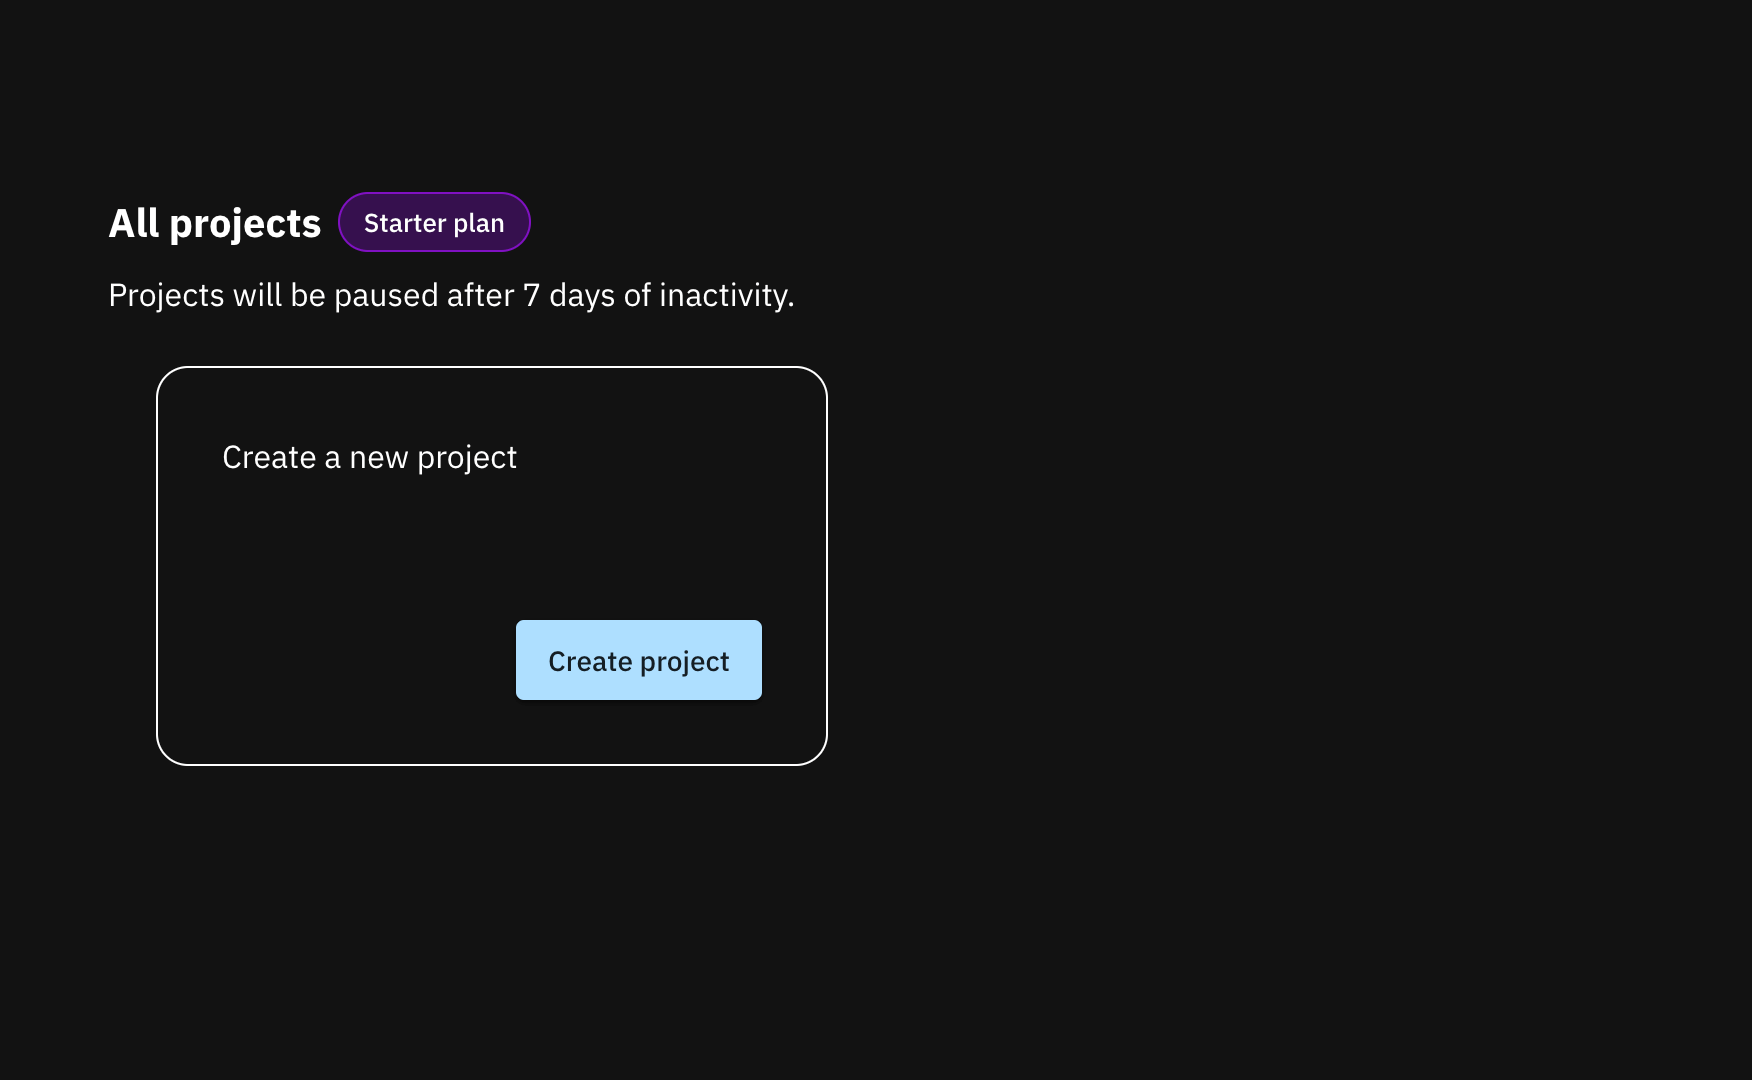
Next, create an app by clicking the button, and you will be presented with a multistep form.
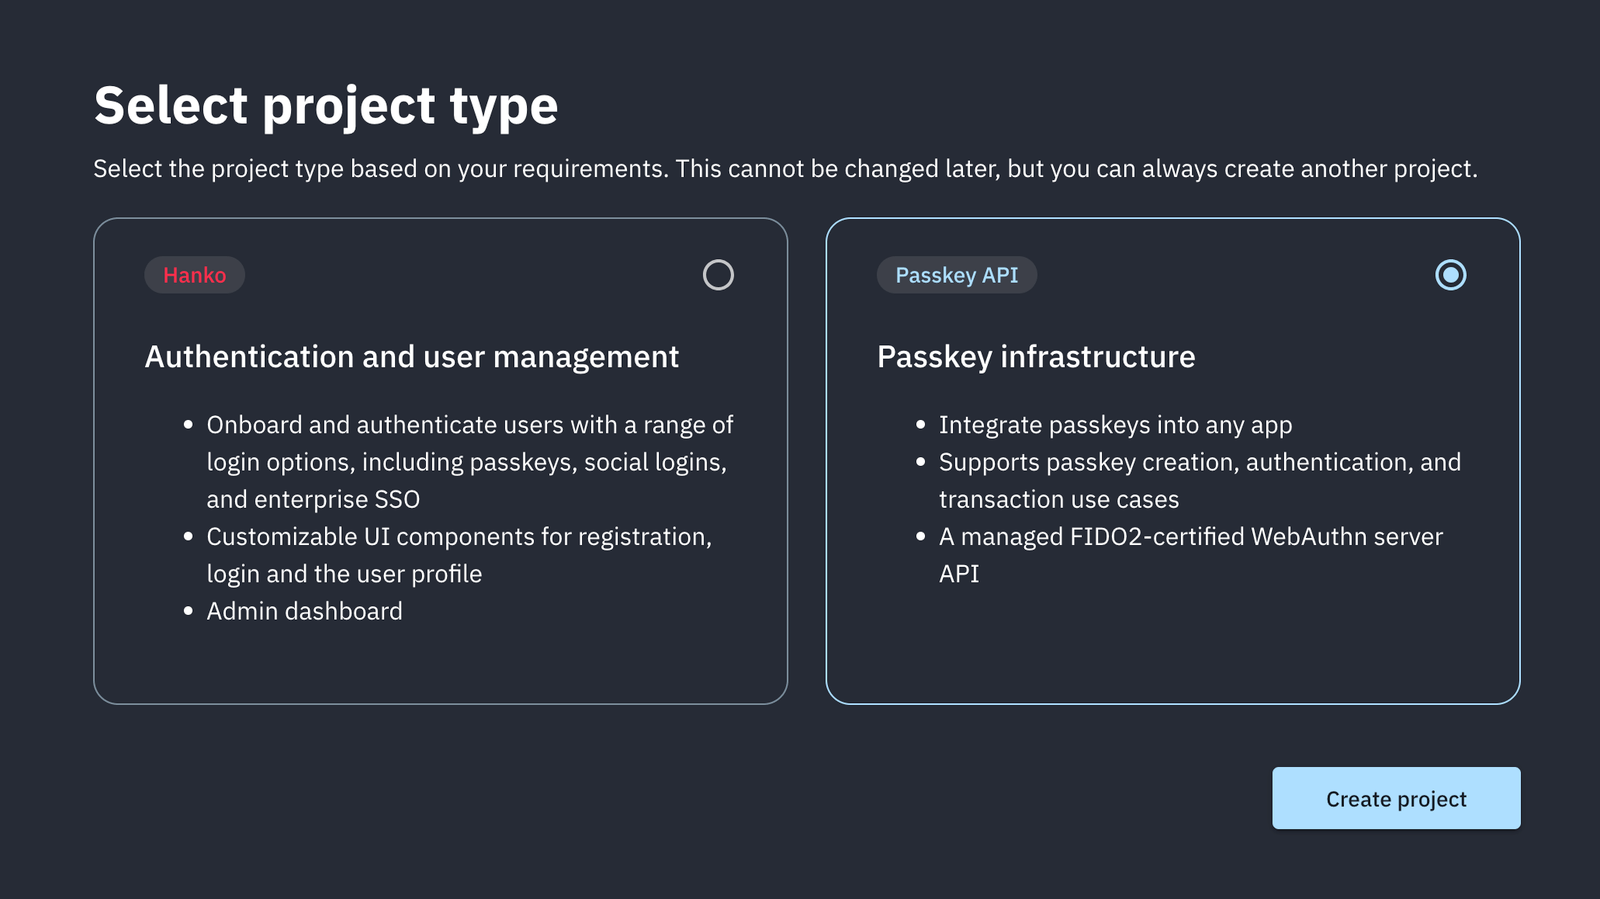
Start by choosing the project type. Select the passkey option since we will be integrating only passkeys.
Next, let’s give our project a name, specify the origin from which users will authenticate, and then click “Create project.”

We named our project my-passkey-app. Since we will be testing locally, we set the authentication origin to localhost:3000.
As a final step, let’s create an API key. The API key is necessary to configure the Hanko SDK in our Next.js app.
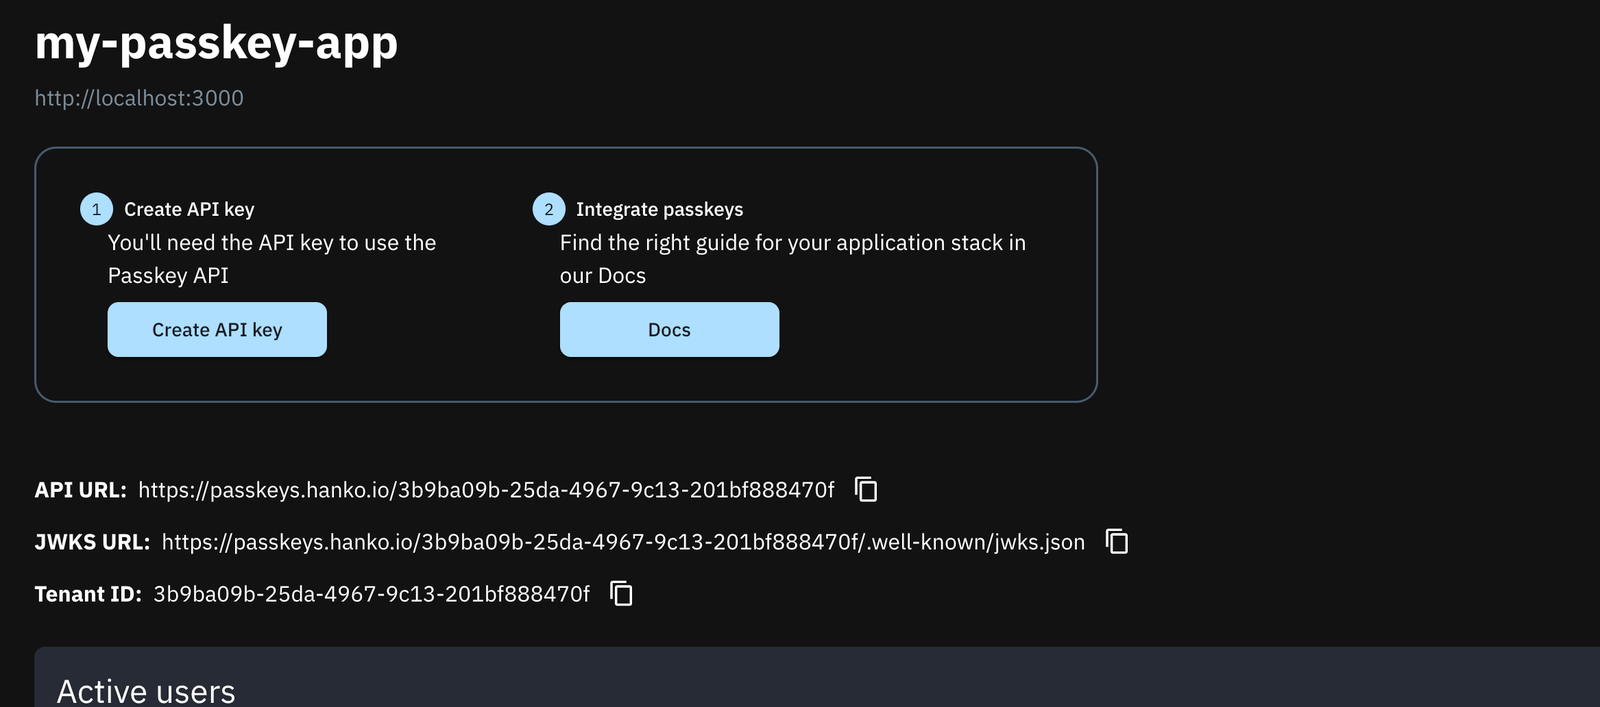
Each API key has an ID and a secret.
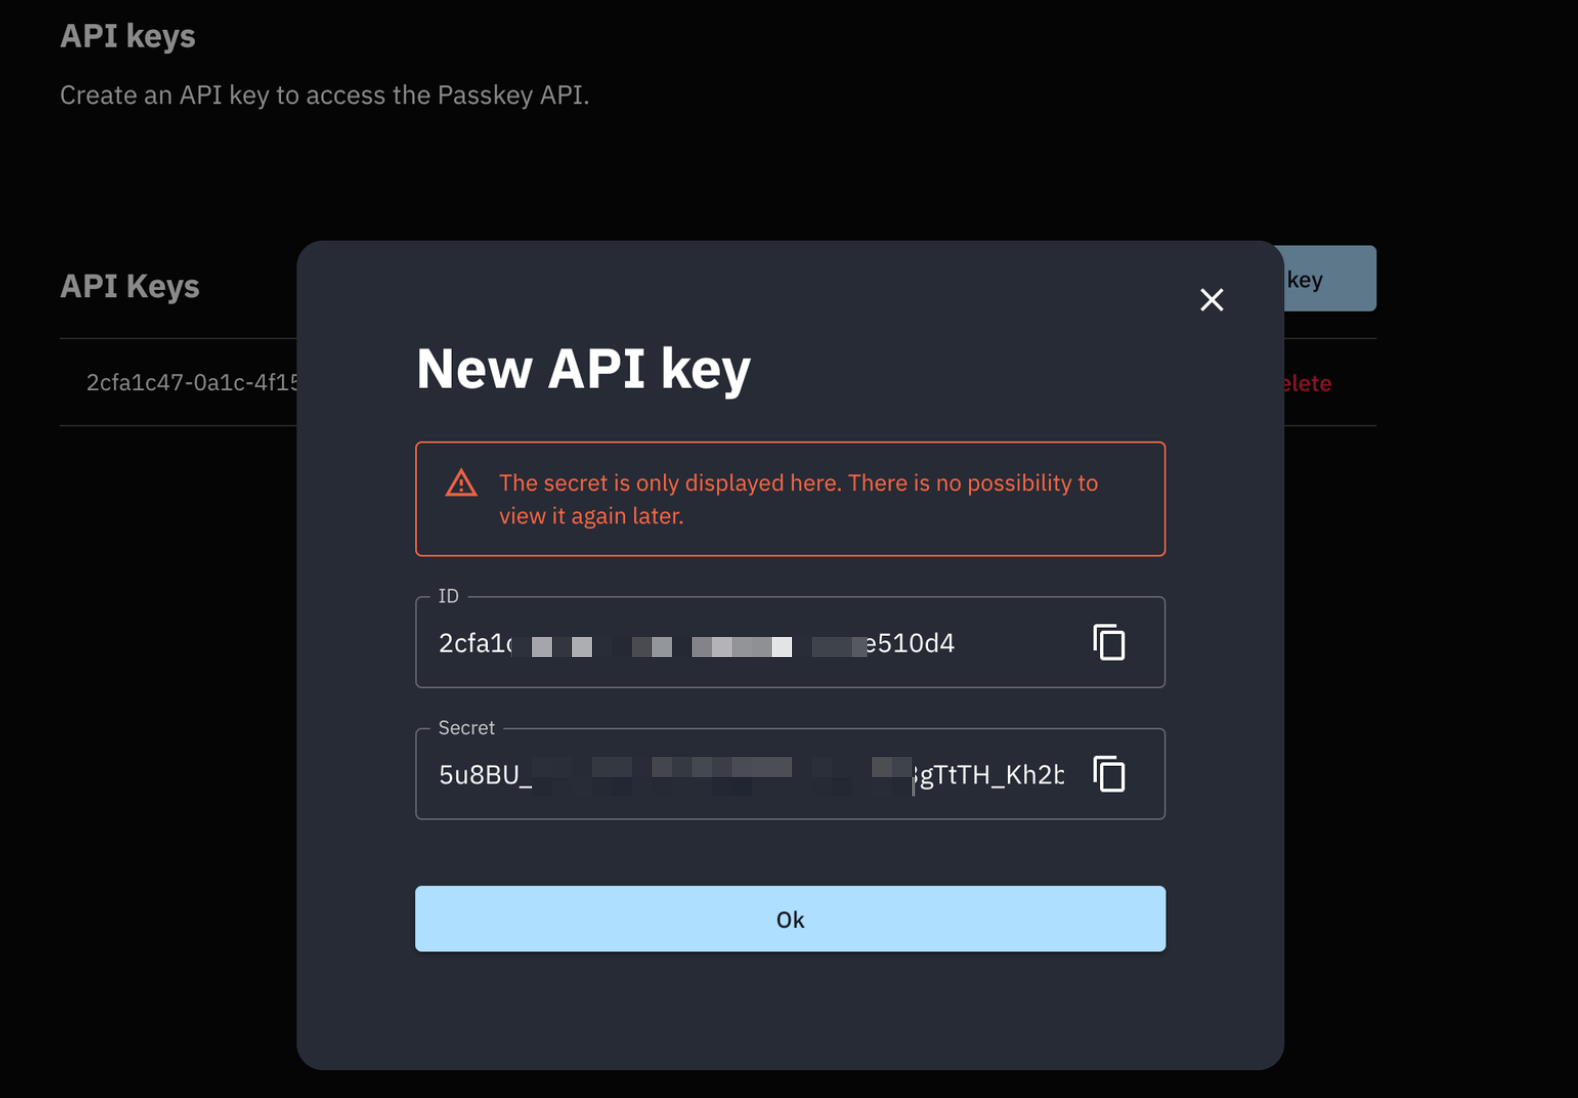
Copy the secret and tenant ID. Then, create a .env file at the root of your project and paste the following in it:
HANKO_TENANT_ID=<INSERT-TENANT-ID-HERE>
HANKO_API_SECRET=<INSERT-API-SECRET-HERE>
We still need to install the dependencies. Before doing that, let’s go over some background knowledge in the next sections.
FIDO Protocols
As mentioned earlier, a passkey consists of a public and private key pair created when a user authenticates following FIDO protocols. This section will just briefly explain the two sub-protocols under FIDO that make the creation and management of passkey possible:
- Client-to-authenticator protocol (CTAP): This protocol is low-level and is concerned with the actual creation of passkeys. Developers don’t directly interact with it.
- Web authentication (WebAuthn): Developers interact with this via the provided browser API, which in turn interacts with the CTAP protocol to create, retrieve and manage passkeys. This is the middleman protocol that interacts with CTAP and the outside world.
Three key entities interact with each other using the protocols above: the client, the authenticator and the relying party, as shown below.
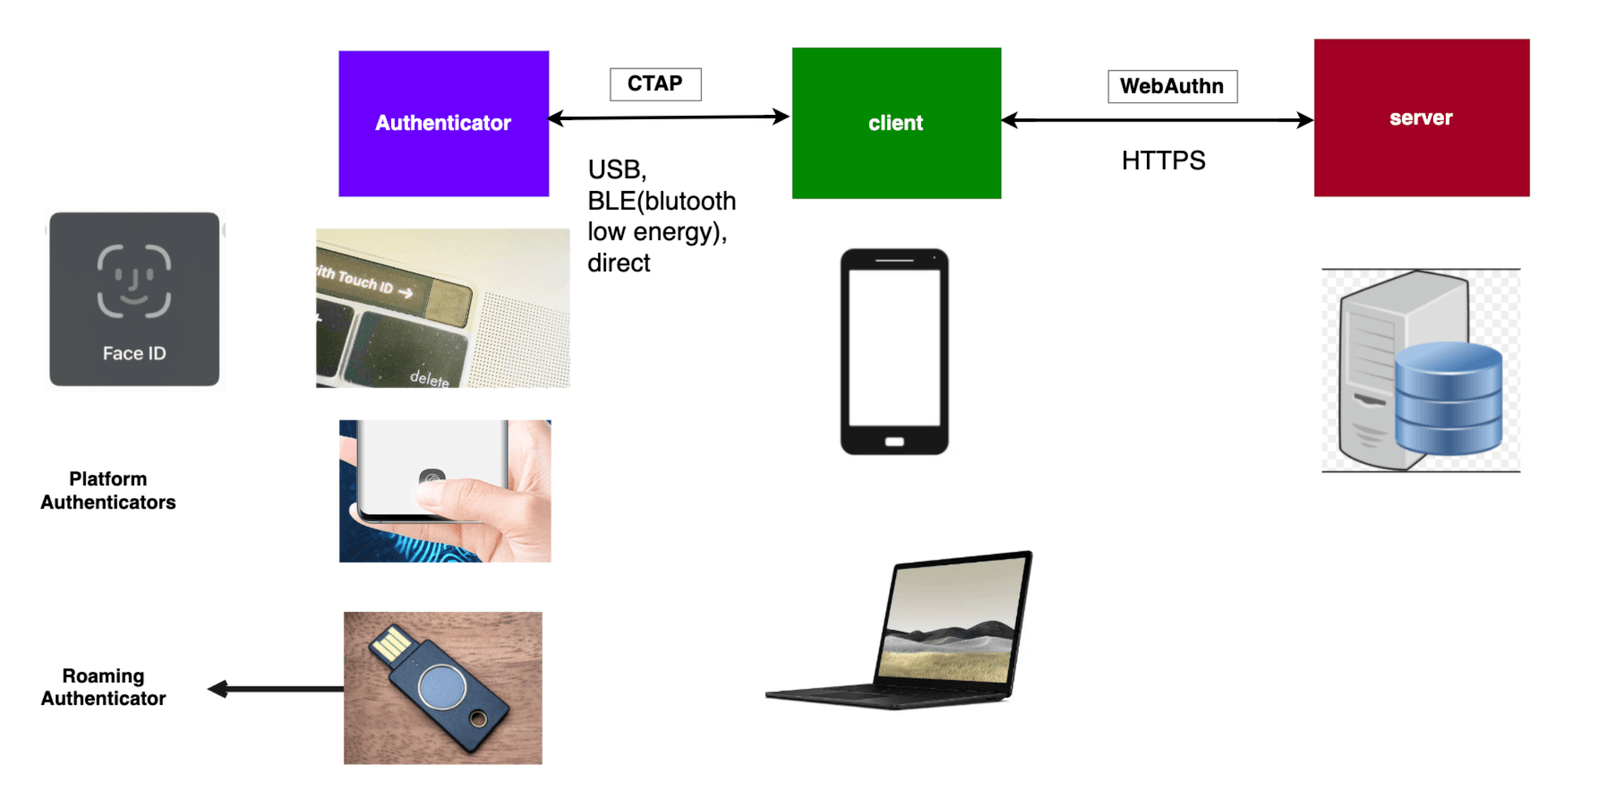
The client refers to the user’s device, operating system and browser that wants to authenticate to the web server/relying party. Communication between these two uses the WebAuthn protocol and has to be over a secure HTTPS connection. Finally, the authenticator is the hardware that generates the passkeys. All the generated passkeys are persisted on a special chip within the authenticator called a trusted platform module (TPM).
As mentioned earlier, a passkey is generated following public key cryptography, so a single passkey consists of a public and private key. Note that only the public key is given to the server. The private key always stays with the authenticator. Think of the authenticator as a mini database of passkeys, where a table exists that holds the ID of the passkey, aka the credential ID, and the private key with some extra information.
Bringing Hanko into the Picture

Where do the Hanko SDKs come into the picture, and what benefits do they offer? We will go through these details below. For our integration, we will use the Hanko SDK on the server side.
- During the webAuthn registration, for example, when the client requests to create a passkey (signup), it will help us retrieve and parse the registration info and securely extract and store the public key.
- During the webAuthn authentication, for example, when the client wants to authenticate with an already existing passkey, it prepares all the necessary things to authenticate and tries to verify possession of the public key retrieved in Step 1 above.
Let’s go ahead and install the Hanko SDK. Run the following command in your terminal:
npm i @teamhanko/passkeys-next-auth-provider
We are not entirely done. We still need to install another package. Remember when we said developers can directly interact with the WebAuthn browser APIs? Unfortunately, these APIs work with array buffers internally to create and retrieve passkeys, making it challenging to work with these structures directly.
We need to install another library that would help us interact with the browser APIs and serialize these array buffers as JSON so that we can easily manipulate and send them over the network.
npm i @github/webauthn-json
We will write the code for passkey creation and authentication in the next two sections. We will assume that the user is already registered in our app, with a basic email and password. Here is our dummy user info:
{
    id: "1",
    email: "1@yopmail.com",
    full_name: "john bobo",
},
WebAuthn Registration
WebAuthn registration is concerned with passkey creation and storage.
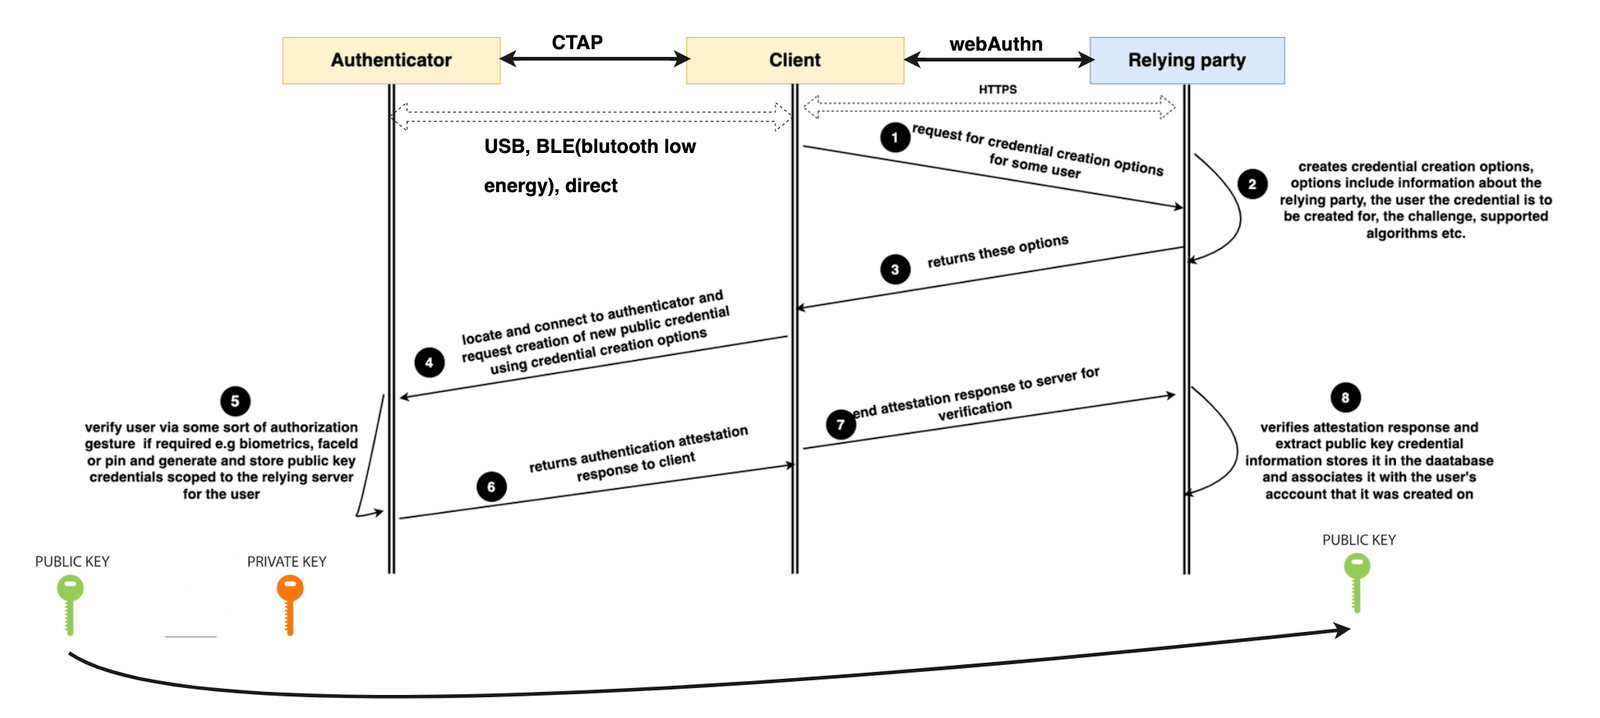
The diagram above shows a detailed WebAuthn registration flow. The code we will write will cover Steps 1, 2, 3, 7 and 8 above. These are the steps that involve interaction with WebAuthn browser APIs on the client and the Hanko API on the server.
Since we won’t directly do any CTAP interaction, we will briefly discuss interactions with the authenticator that occur in Steps 4, 5 and 6. Our code will be split into two. We will first update the server side, and then we will proceed to update the client side.
Update your actions/index.ts file with the following:
"use server";
// Only required because of a NextAuth limitation
import { tenant } from "@teamhanko/passkeys-next-auth-provider";
import { createUserSession, decodeToken, getSession } from "../auth";
import { PublicKeyCredentialWithAttestationJSON } from "@github/webauthn-json";

const passkeyApi = tenant({
  apiKey: process.env.HANKO_API_SECRET || "",
  tenantId: process.env.HANKO_TENANT_ID || "",
});

export async function startServerPasskeyRegistration() {
  const userData = await getSession();
  const createOptions = await passkeyApi.registration.initialize({
    userId: userData.id,
    username: userData.email,
  });
  return createOptions;
}
We start by setting up our Hanko client using the API key and tenant ID. Next, we define a function called startServerPasskeyRegistration. This function represents Step 2 in the diagram above. It retrieves the currently authenticated user by calling the dummy getSession() function.
Next, we invoke the registration.initialize() method to create an object called the publickey credential creation option. This is the option that will be used to create the passkey. When logged to the console, this object looks like the one below.
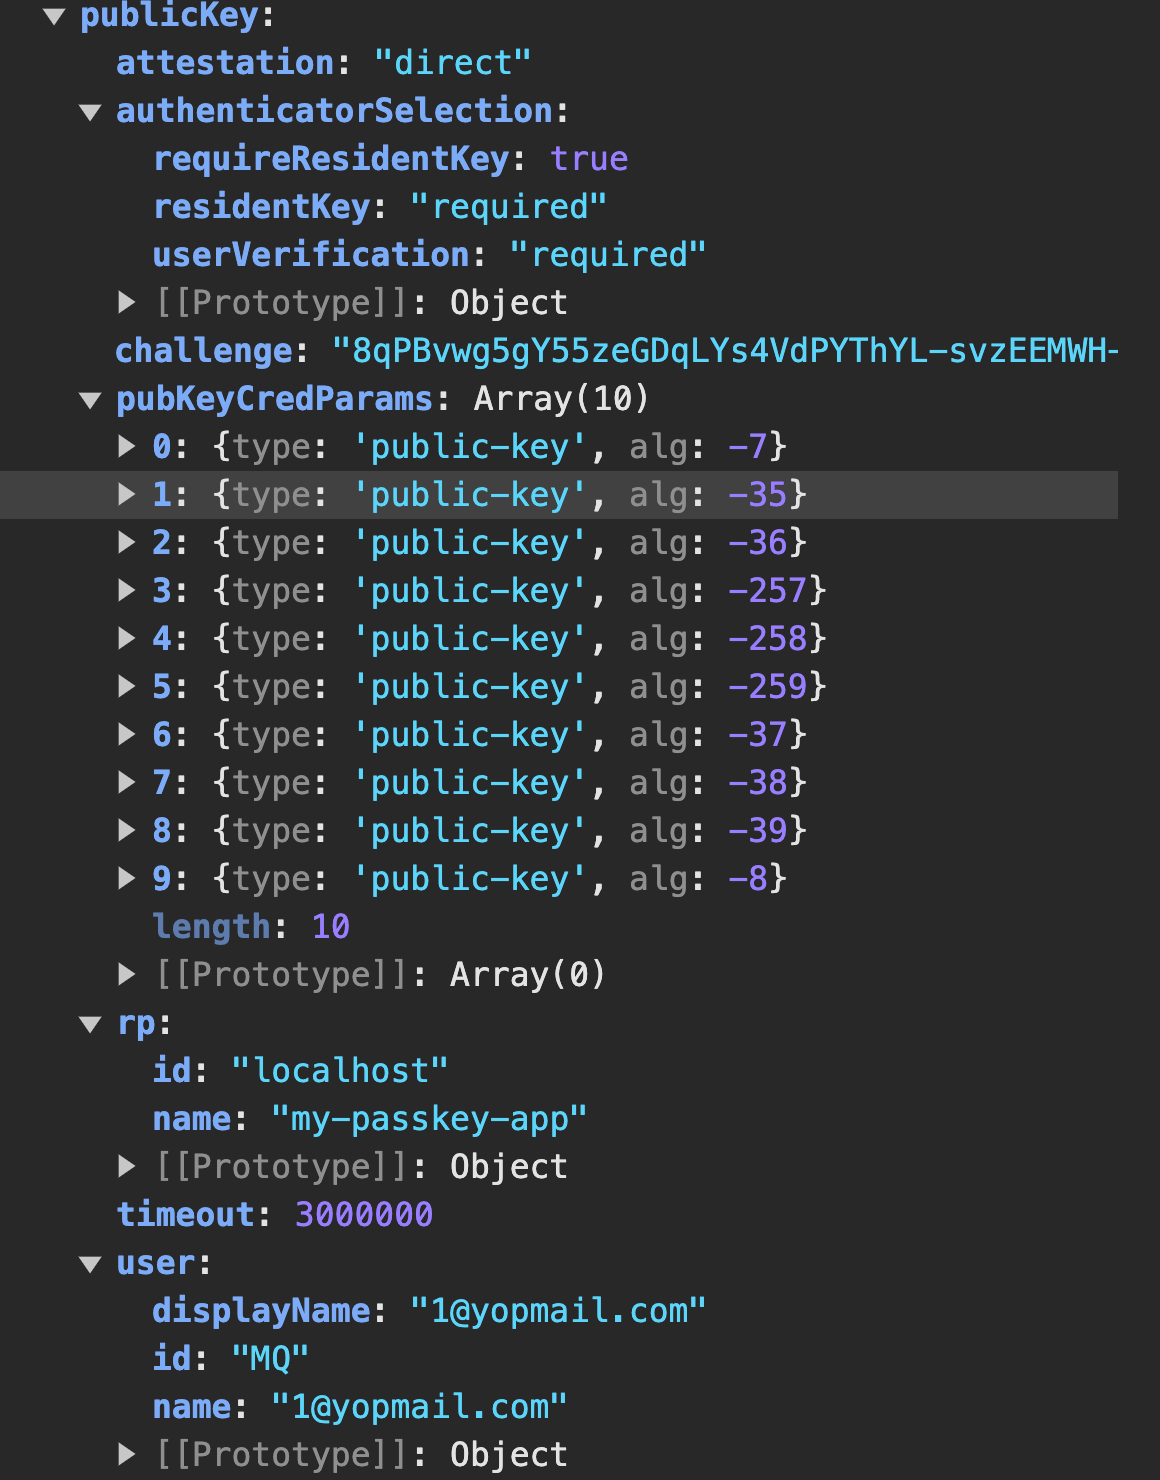
Let’s go over some of the contents of this object:
- user: This holds information about the user for whom the passkey will be created. The most important field here is the
id, aka the user handle. The authenticator uses this to associate it with the newly created passkey. This field will become even more important when we discuss signing in with passkeys. - challenge: The server includes this field so that the object above can only be used once to avoid replay attacks.
- rp: This contains data identifying the server requesting the passkey’s creation.
- publicKeyCredParams: This holds a list of CBOR Object Signing and Encryption (COSE) algorithms that the authenticator should use to create the passkey, ordered from the most preferred to the least preferred.
- authenticatorSelection: This holds information about the type of authenticator to be used, either platform or roaming. One special property here is
residentKeyproperty, which is set to required. Resident keys, also called client-side discoverable keys, allow the authenticator to store user information, such as the user handle, when creating the passkey. This means that when we try to authenticate later, the user won’t need to provide their email again. Once the user provides their biometrics and the authenticator validates them, it automatically logs them in by sending the user details to the server. This gives the illusion of authentication without providing any credentials.
Now, let’s head over to the client side and update the FormRegisterPasskey.tsx file with the following:
"use client";
import React, { useState } from "react";
import { create, get } from "@github/webauthn-json";
import {
  finishServerPasskeyRegistration,
  startServerPasskeyRegistration,
} from "../actions";
function FormRegisterPasskey() {
  const [loading, setLoading] = useState(false);
  async function handlePasskeyRegistration() {
    try {
      setLoading(true);
      const result = await startServerPasskeyRegistration();
      const attestationResponse = await create(result);
      await finishServerPasskeyRegistration(attestationResponse);
    } catch (error) {
      alert("error  occured while handling passskey registration");
    } finally {
      setLoading(false);
    }
  }
  return (
    <button
      disabled={loading}
      className="btn"
      onClick={handlePasskeyRegistration}
    >
      {loading ? "processing..." : "Register"}
    </button>
  );
}
export default FormRegisterPasskey;
This component maintains some loading state. We define a function called handlePasskeyRegistration, which starts by making an API call to the server to get the credential creation options. Next, it calls the create function from the @github/webauthn-json file. This function call interacts with the webAuthn browser APIs and runs Steps 4, 5 and 6. When this function executes, the connection is made to the authenticator, and the user is prompted to provide their device biometrics.
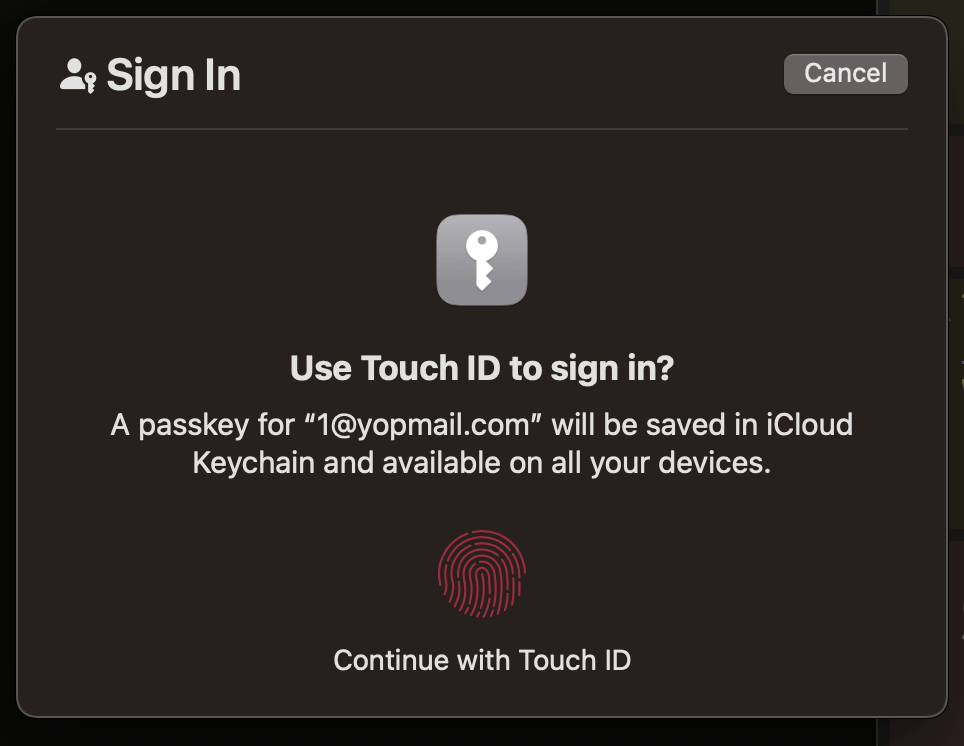
Once this is done, the authenticator creates the passkey, i.e., the public and private key pair, associates it with the user’s information, and returns a special object called an attestation response. This complex object holds a lot of information about the newly created passkey, such as the passkey’s credential ID and the public key.
Next, we send the attestation response to our backend by making an HTTP call to a finishServerPasskeyRegistration function we are yet to define.
Let’s update the actions/index.ts file with the following:
export async function finishServerPasskeyRegistration(
  attestationResponse: PublicKeyCredentialWithAttestationJSON
) {
  const res = await passkeyApi.registration.finalize(attestationResponse);
  return true;
}
This function expects the attestation response and calls the finalize function using the Hanko auth client. Just to brief you, the finalize call does a lot of verification on the attestation response, such as verifying the challenge. If everything is successful, it extracts the public key and the credential ID and securely stores it on our behalf.
The registration.finalize() call returns a JSON Web Token (JWT) whose contents include a base64 representation of the credential ID in the cred field and the ID of the user for whom the credential was created in the subfield, as shown below.
{
    "aud": [
    "localhost"
    ],
    "cred": "OiXn7a4uQuPoICl8lyt6Wi8P3Vw",
    "exp": 1726126199,
    "iat": 1726125899,
    "sub": "1"
}
WebAuthn Authentication
Now, let’s take a look at how the user can log in with an already created passkey. Here is a diagram showing the steps.
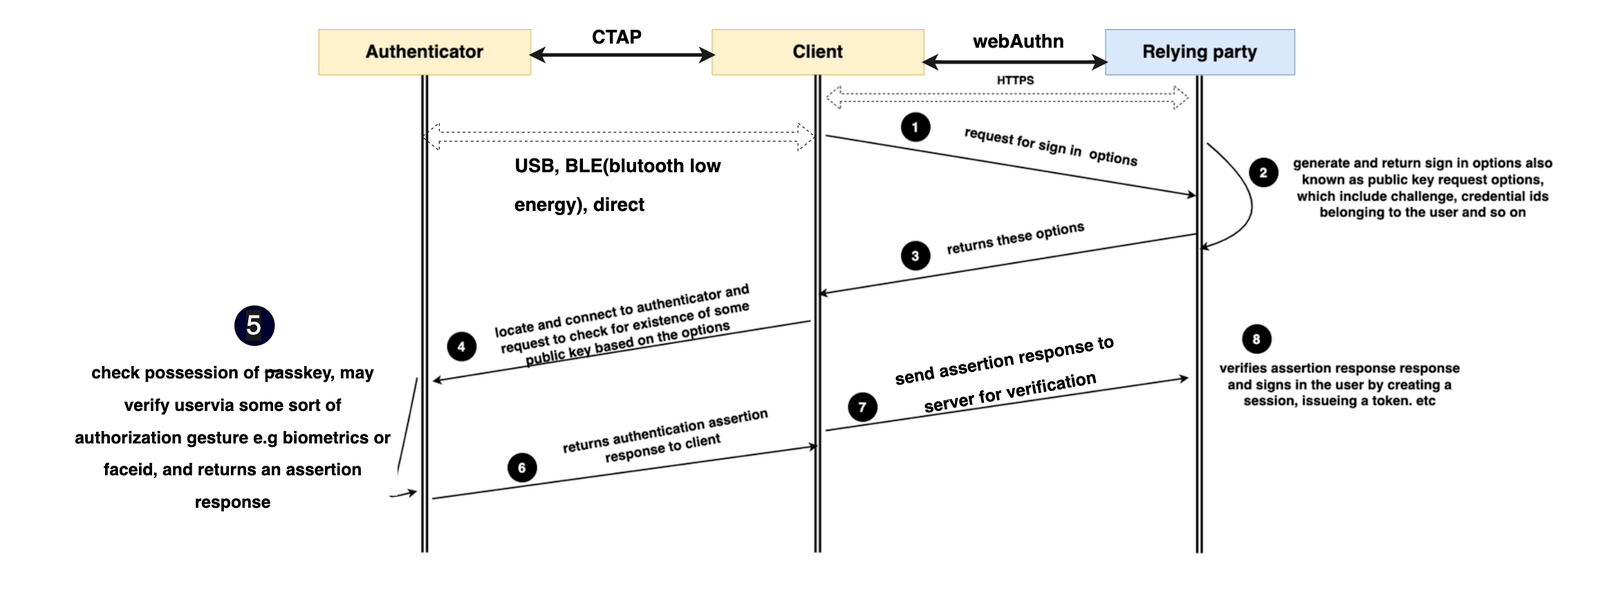
Authentication is quite straightforward. The server returns the options required for the user to log in. This is then fed to the authenticator, which verifies the user via an authorization gesture with their biometrics. If everything is successful, the authenticator sends some data, including a signature, back to the server for verification. If the data is verified successfully, the server may issue a JWT or session ID.
Let’s go ahead and update our client and server-side code as we did previously.
Again, most of the visible code we will see will cover Steps 1, 2, 3, 7 and 8. Let’s start by updating the server code. Update the actions/index.ts file with the following:
export async function startServerPasskeyLogin() {
  const options = await passkeyApi.login.initialize();
  return options;
}
The code above represents Step 2 in our diagram. It sets up and initializes the login options. When printed to the console it looks like this:

Some of the properties in the credential request options have been explained earlier. You may wonder why these options don’t include information about the user needing to authenticate with their passkey. Here is why passkeys can be categorized as client-side or server-side discoverable. Client-side discoverable keys are also called resident keys; this means that the authenticator on the client device will be the one to provide information about the possession of some passkey and some information about the user, precisely the user handle/id, provided. During the registration, we requested client-side discoverable keys, which will help the server retrieve the user’s information.

The essence of client-side discoverable keys is that we can take the user experience to a whole new level because they don’t need to fill out any form to log in. They need to click the button, and the authenticator will take it from there. We will discuss this further as we proceed.
Let’s go ahead and update the FormPasskeyLogin.tsx file with the following:
"use client";
import { get } from "@github/webauthn-json";
import { finishServerPasskeyLogin, startServerPasskeyLogin } from "../actions";
import React from "react";
export default function FormPasskeyLogin() {

    async function signIn() {
        const credentialRequestOptions = await startServerPasskeyLogin();
        const assertion = await get(credentialRequestOptions as any);
        const sessionID = await finishServerPasskeyLogin(assertion);
    }
    return (
        <button className='btn' onClick={signIn}>
            login with passkey
        </button>
    );
}
In the code above, we define a signIn function that starts by getting the credential creation options. Next, we call the get method on the @github/webauthn-json package, and this call connects with the authenticator, and again the user gets a pop-up to provide their biometrics.
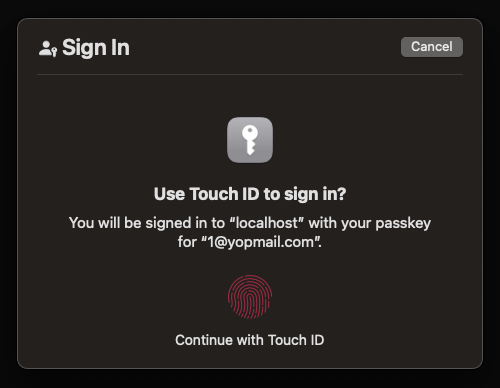
If the sign-in process is successful, it returns an object called the authentication assertion, which looks like this.
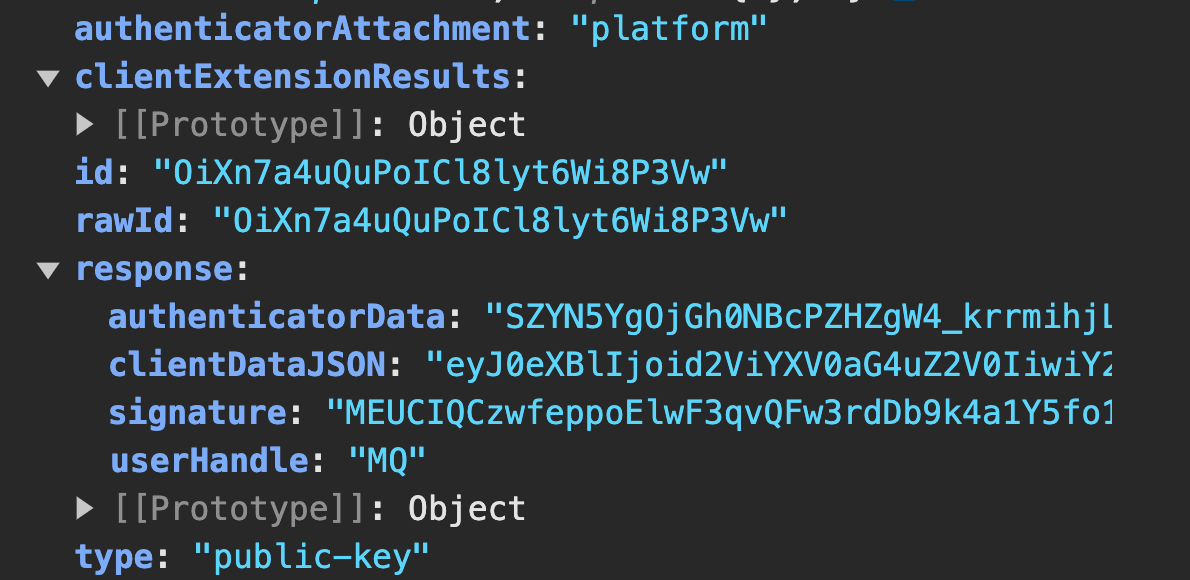
Let’s go over some of the contents of this object:
- autheticatorAttachment: This holds information about the type of authenticator used. It returns “platform” because we used a MacBook’s touch ID.
- clientExtensions: This holds information about the credential ID represented as base64.
- signature: This holds a signature generated by the authenticator using the private key.
- clientDataJSON: This is a base64 string that holds the challenge, information about the origin, and the operation to be performed.
- userHandle: Also called user ID, this is the ID issued by the server during registration. This property helps the server locate the user’s information on the database to complete their authentication.
This object is sent to our yet to be defined function finishServerPasskeyLogin(assertion). Let’s go ahead and define it:
export async function finishServerPasskeyLogin(options: any) {
  const response = await passkeyApi.login.finalize(options);
  if (!response.token) {
    throw new Error("authentication failed");
  }
  const tokenContents = await decodeToken(response.token);
  const sessionId = await createUserSession(tokenContents.sub);
  return sessionId;
  return response;
}
This function expects the authentication assertion options. The call to login.finalize(options) verifies the signature using the public key obtained during the registration, verifies the challenge and then proceeds to use the user handle to retrieve the user’s information. Finally, it returns a JWT similar to the one we got during registration.
We then decode the token by invoking the decodeToken function, create the user session and return the session ID to the client.
Let’s install the jwt-decode package. Run the following command in your terminal:
npm i jwt-decode
Next, we need to update the auth.ts file to include the decodeToken and createUserSession functions:
export async function decodeToken(token: string) {
  const tokenContents = jwtDecode<{ sub: string }>(token);
  return tokenContents;
}
export async function createUserSession(userId: string) {
  const user = getUserById(userId);
  if (!user) {
    throw new Error("user does not exist");
  }
  const sessionID = FAKE_SESSION_ID;
  sessionStore[sessionID] = user;
  return sessionID;
}
Ideally, the create session function should do a database lookup, create the user session and store it in a cookie. However, in our case, we just trivially used a dummy session ID for illustration purposes.
Why Are Passkeys Special?
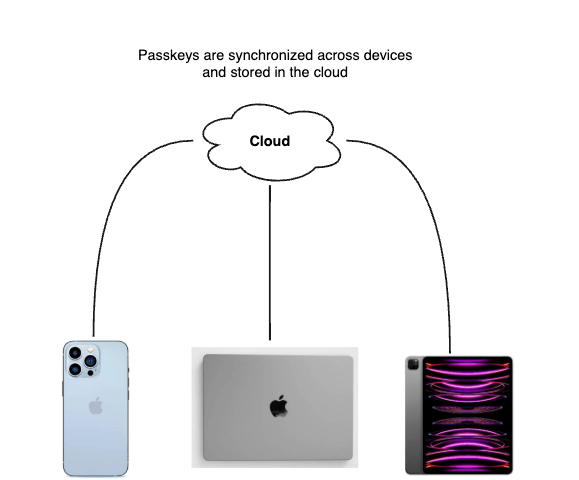
Passkeys can be shared and synchronized across multiple devices using the user’s iCloud, Google and Microsoft accounts. For example, if a user has a MacBook and an iPhone, both of which have their iCloud accounts authenticated, creating a passkey on their iPhone on a website X will securely sync it via the user’s keychain so that they can also log in on their MacBook. This way, losing a device is less of a problem. However, it is always recommended to have an extra authentication method as a backup so that users can always sign in regardless.
Conclusion
Passkeys have seen wide adoption by companies as a more secure option to authenticate users compared to plain passwords. They provide an easy, distributed way for users to authenticate across their devices using secure public key cryptography. This guide gives us the ideas and tools to integrate them more seamlessly into an existing authentication system.

Christian Nwamba
Chris Nwamba is a Senior Developer Advocate at AWS focusing on AWS Amplify. He is also a teacher with years of experience building products and communities.

