How to Implement Google Authentication in a Next.js App Using NextAuth

Summarize with AI:
This article demonstrates how to incorporate single sign-on using OAuth protocol in a Next.js application via the NextAuth module with Google authentication.
NextAuth.js allows developers to painlessly integrate and easily manage battle-tested authentication solutions in Next.js apps, providing support for simple and complex authentication needs.
This article will demonstrate how to incorporate single sign-on using the increasingly popular OAuth protocol into a Next.js application using the NextAuth module. Although there are a lot of authentication providers that NextAuth supports for integration into our apps, we will be using Google as our authentication provider in this instance.
Prerequisites
To follow along with this tutorial, you will need to have the following:
- A Google account
- A basic understanding of the Next.js framework and one of its core features, API routes
- A code editor
Project Setup
To begin, create a basic Next.js application in any directory of our choice (in our case, we will be using one called my-app). Open your terminal and insert the following command:
npx create-next-app my-app
If everything is done correctly, the contents of the working directory should look like so.
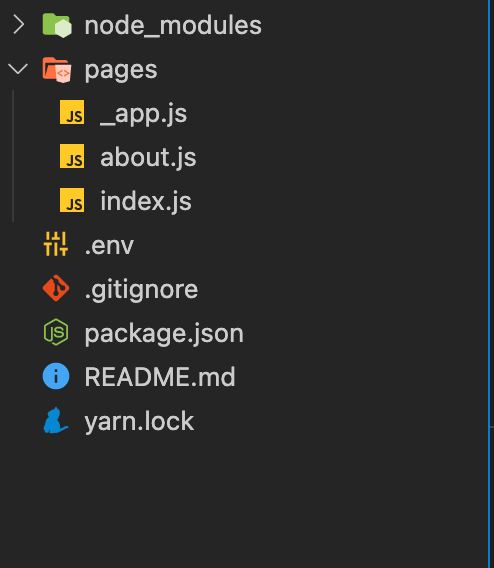
Next, let’s install Next-Auth, the only dependency we will need. Enter the following command into the terminal:
npm install next-auth
Next, we need to create an API route to use the NextAuth package in our app. Assuming you are in the pages/api folder, i.e., where all API route files live, enter the following commands:
mkdir auth
cd auth
touch [...nextauth].js
We created the auth directory, and inside it, we created an API route with a mandatory name called […nxtauth].js.
![API route […nxtauth].js API route […nxtauth].js](https://d585tldpucybw.cloudfront.net/sfimages/default-source/blogs/2022/2022-10/api-route.png?sfvrsn=51a7c888_3)
The OAuth Flow
Next, we will briefly take a look at OAuth Flow. (If you are already familiar with the OAuth flow, you can skip this section.) Understanding this flow is important because:
- This will form the basis of all the decisions that will be made to integrate the OAuth protocol using next-auth in our app.
- We will be able to see clearly what areas of this flow are entirely handled for us by NextAuth.
Below is a typical OAuth authorization code flow for any provider. In our case, our diagram is customized for Google, but it also applies to any other provider. We will reference this diagram throughout this guide to better bolster our understanding.
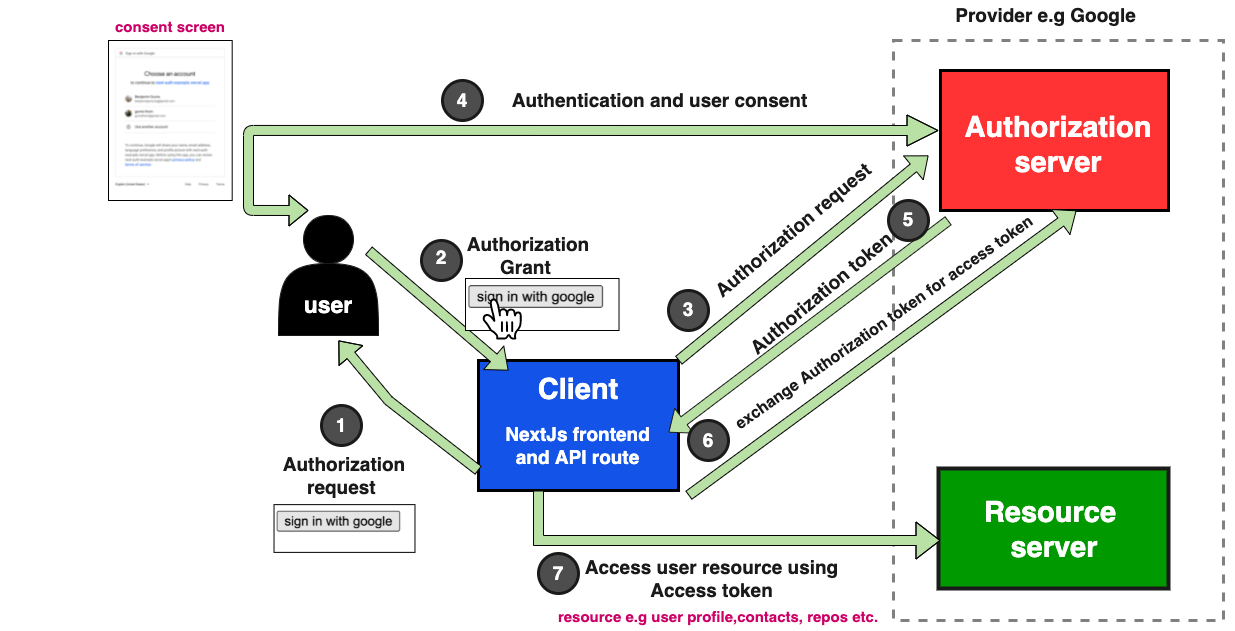
Looking at the diagram above, we need to do the following:
- First, we see many HTTP round trips (Steps 3, 5, 6 and 7) made by the client (our Next.js app) to the authorization server and the resource server. NextAuth will do all of that for us. But to enable our Next.js app interface with the provider (Google), we need to register it with the provider and get credentials (client ID and secret).
- Once we get our credentials, we need to configure the client. Here, we will set up our API route.
- Next, after the client has gotten the user’s data from the resource server (Step 7 above), we will need to manage the user’s session on our frontend. Again, NextAuth generates all the necessary tokens for us and provides us with the required components to integrate into our frontend.
- Finally, we need to create a simple page with which the user can interact to authenticate themselves, beginning the process, i.e., from Step 1. Here, we will implement sign-in and sign-out functionality and essential route protection on our frontend.
Registering Our App and Getting OAuth Credentials
Log in to the Google Cloud Console and do the following:
- Create a project.
- We need to set up our OAuth consent screen in the API and services section. This involves choosing an application name, linking to the homepage of the Next.js app, setting a logo and so on, as shown below:
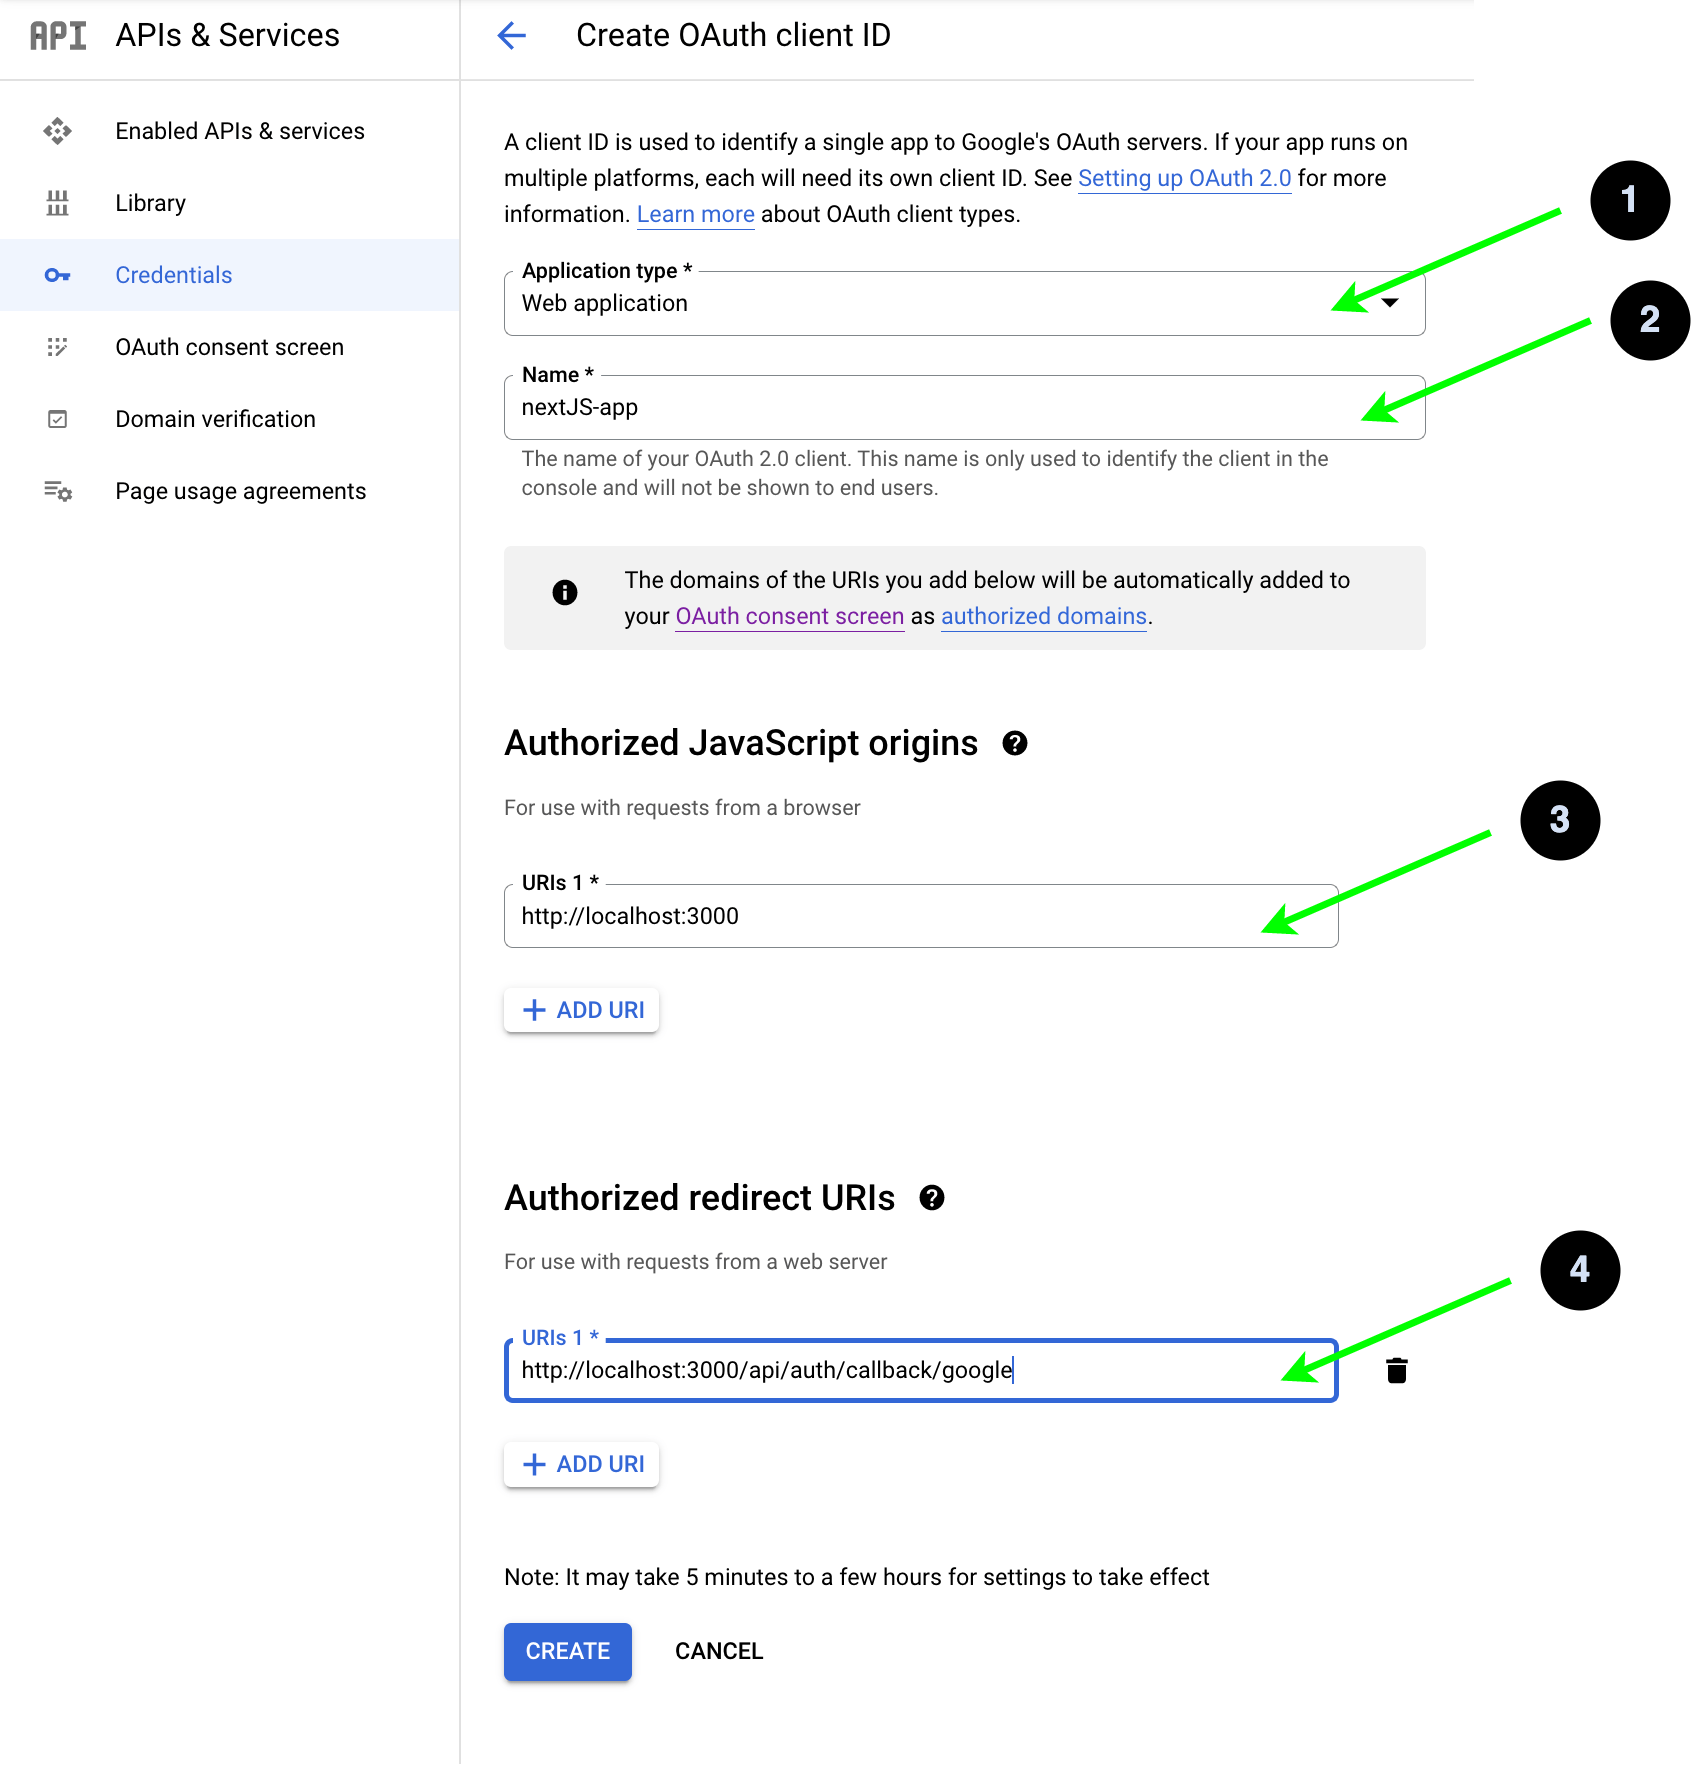
In the dropdown for application type, choose Web Application. Select the authorized origin where the OAuth flow can begin (i.e., where Step 1 can start). We set it to the origin where our Next.js app is running locally, which is localhost.
Note: Apart from the local host, which is an exception, an authorized origin must be running on HTTPS.
- Next, set up the redirect URL. This is the URL used in Step 5 by the authorization server on our OAuth diagram to issue our NextJs API route the authorization token. We set this URL to https://localhost:300/api/auth/callback/google. This URL will invoke the yet-to-be-defined API route in the Next.js app. Once this is done, click save and then you will get your client ID and secret, as shown below.

Setting up the API Route
Open the […nextauth.js file and insert the following code:
import NextAuth from 'next-auth';
import GoogleProvider from 'next-auth/providers/google';
export const authOptions = {
 providers: [
  GoogleProvider({
   clientId: process.env.GOOGLE_ID,
   clientSecret: process.env.GOOGLE_SECRET,
  }),
 ],
 session: {
  strategy: 'jwt',
 },
};
export default NextAuth(authOptions);
In this file, we start by defining the object that holds the Authentication options we want for the app. In the providers’ Array, we set up the GoogleProvider module where we pass our Client ID and Secret we obtained earlier, which we store as environment variables. At the root of your project, you can create a .env file by running this command:
touch .env
Next, update the file with the following:
GOOGLE_ID=<YOUR_CLIENT_ID_HERE>
GOOGLE_SECRET=<YOUR_CLIENT_SECRET_HERE>
The next optional key in our auth options is the one called session, where we specified the strategy property with a value of jwt. Since we are not integrating any database to store and manage the user session in our app, by
default, the next Auth uses JWE (JSON web encryption) tokens to do that for us.
Speaking of JWEs, you might wonder where the secret used to sign and encrypt the token will come from. During development, NextAuth internally computes a hash of our auth options object and uses that if we don’t specify a secret ourselves in the
auth options, in an optional session.secret property or as an environment variable created with the NEXTAUTH_SECRET key.
As a side note, if you are more familiar with the general term JWT (JSON web tokens) and you want to learn more about specific implementations
like JWEs, check here. Also, we don’t need to specify the session property
in our auth options in the code above with a strategy value of jwt for this to work, as this is the default—we did this here for the sake of clarity.
Finally, we invoke and export the nextAuth function imported from the nextAuth module and pass it to the auth options object we defined as an argument. This invocation returns a traditional Next.js API route function configured with all the good stuff that ships with the nextAuth module.
Manage the User’s Session on the Frontend
Open the _app.js file and insert the following code:
function App({ Component, pageProps }) {
 return (
  <SessionProvider session={pageProps.session}>
   <Component {...pageProps} />
  </SessionProvider>
 );
}

export default App;
This common pattern is used to manage the user session in a Next.js app. We start by bringing in the SessionProvider component from the next-auth module, and in the body of the App component, we wrap it around the Component prop;
the Component prop represents the current page.
The SessionProvider is also fed a session prop extracted from the current page props, i.e., pageProps.session. The pageProps.session object is created by the current page if it is server-side rendered—in other
words, a page that fetches the user’s session using getServerSideProps.
// some Page
const somePage=()=>{
 return <> page data</>
}
export getServersideProps(ctx){
 return {
props:{
 session:"// define logic to get user session here, this will be part of pageProps in _app.js"
//...
  }
 }
}
Our app will not be using the server-side approach; instead, we will be getting the users’ session on the client side, as we will see in the next section. So for our app, pageProps.session will always be undefined.
How to Implement Google Authentication in a NextJS App Using Next Auth
Open the pages/index.js file and update its contents to match the following:
import { useSession, signIn, signOut } from 'next-auth/react';
export default function IndexPage() {
  const { data, status } = useSession();
  if (status === 'loading') return <h1> loading... please wait</h1>;
  if (status === 'authenticated') {
    return (
      <div>
        <h1> hi {data.user.name}</h1>
        <img src={data.user.image} alt={data.user.name + ' photo'} />
        <button onClick={signOut}>sign out</button>
      </div>
    );
  }
  return (
    <div>
      <button onClick={() => signIn('google')}>sign in with gooogle</button>
    </div>
  );
}
We start by bringing in the signIn, signOut and useSession hooks. Next, in the body of the IndexPage component, we use the useSession hook to get the current user session; useSession returns an object with two properties data and status.
Data holds information about the authenticated user and the expiry date of the issued JWE token and has null if the user is unauthenticated.
Status is a string that can either be “authenticated,” “unauthenticated” or “loading.” Next, we render different UI pieces depending on the status string’s state. If the status is loading (in cases
where the useSession hook makes API calls to the API route to validate or resolve the user’s session), we render a loading message.

When authenticated, we render data about the authenticated user from the data object. We also render a button that invokes the signOut function when clicked, which will sign out the user. Finally, when the user is unauthenticated, we render
a button that, when clicked, signs in the user.
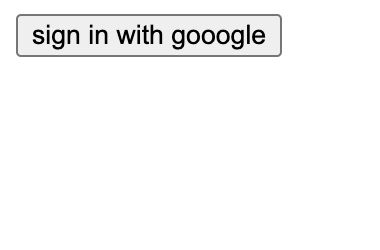
Notice we passed the provider string, i.e., “google,” as an argument to the sign-in function. This is optional, as the sign-in function can be triggered without it, which will take us to a custom page created by nextAuth to choose a provider to sign in with. This page looks like so:
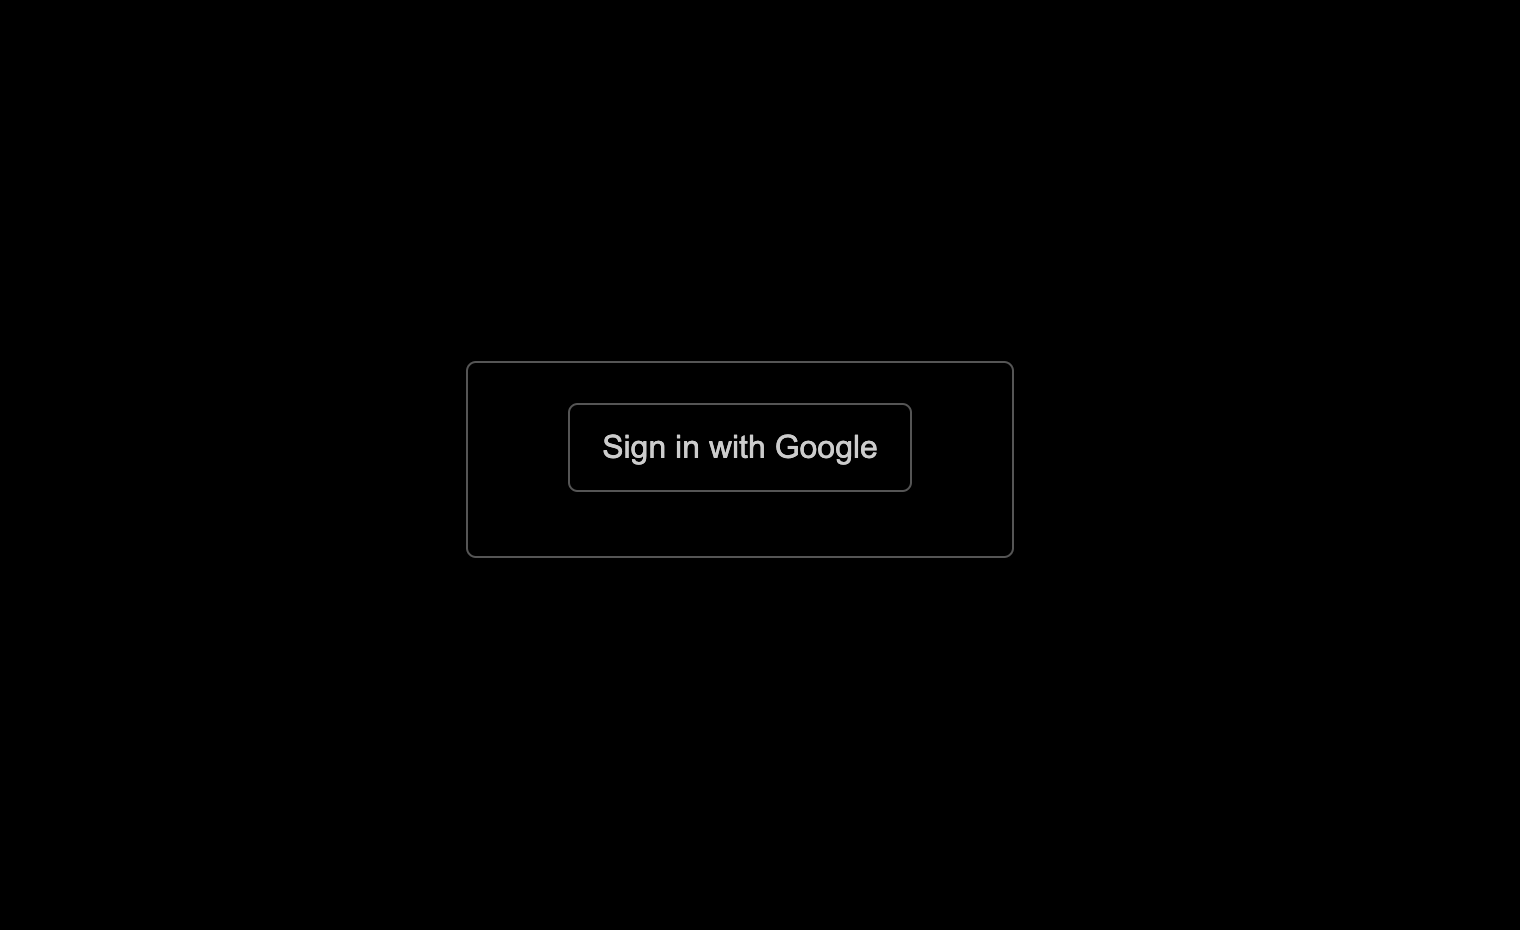
But we don’t want to visit the above page when we sign up—that’s why we triggered signIn with “google” as the provider parameter to skip this screen and proceed directly to the sign-in process.
Either way, invoking the signIn function when the button is clicked will begin the OAuth flow from Step 1 down through Step 7, where
nextAuth gets our user data.
But it doesn’t stop there. The nextAuth module is based on the options specified in the auth options object—in our case, it issues several tokens to us and stores them in a cookie sent to the browser as shown below.

As you might have guessed, the signOut function removes all these tokens and signs out the user. To see the running app, open your terminal and insert the following command:
npm run dev
Conclusion
With NextAuth, building a robust authentication system in a Next.js app is much easier. In this guide, our primary focus was on user OAuth. The NextAuth package provides other authentication mechanisms you can explore to meet the needs of different projects we are working on.

Chinedu Imoh
Chinedu is a tech enthusiast focused on full-stack JavaScript and Infrastructure engineering.

