
How to Use Cursor with Modern Angular

Summarize with AI:
This practical guide teaches you how to set up Cursor in Angular 21.
In this article, you will learn how to set up Cursor for a modern Angular project (for example, version 21.0) and how to use it in a practical way. We will cover basic setup, useful features and simple examples that you can try right away.
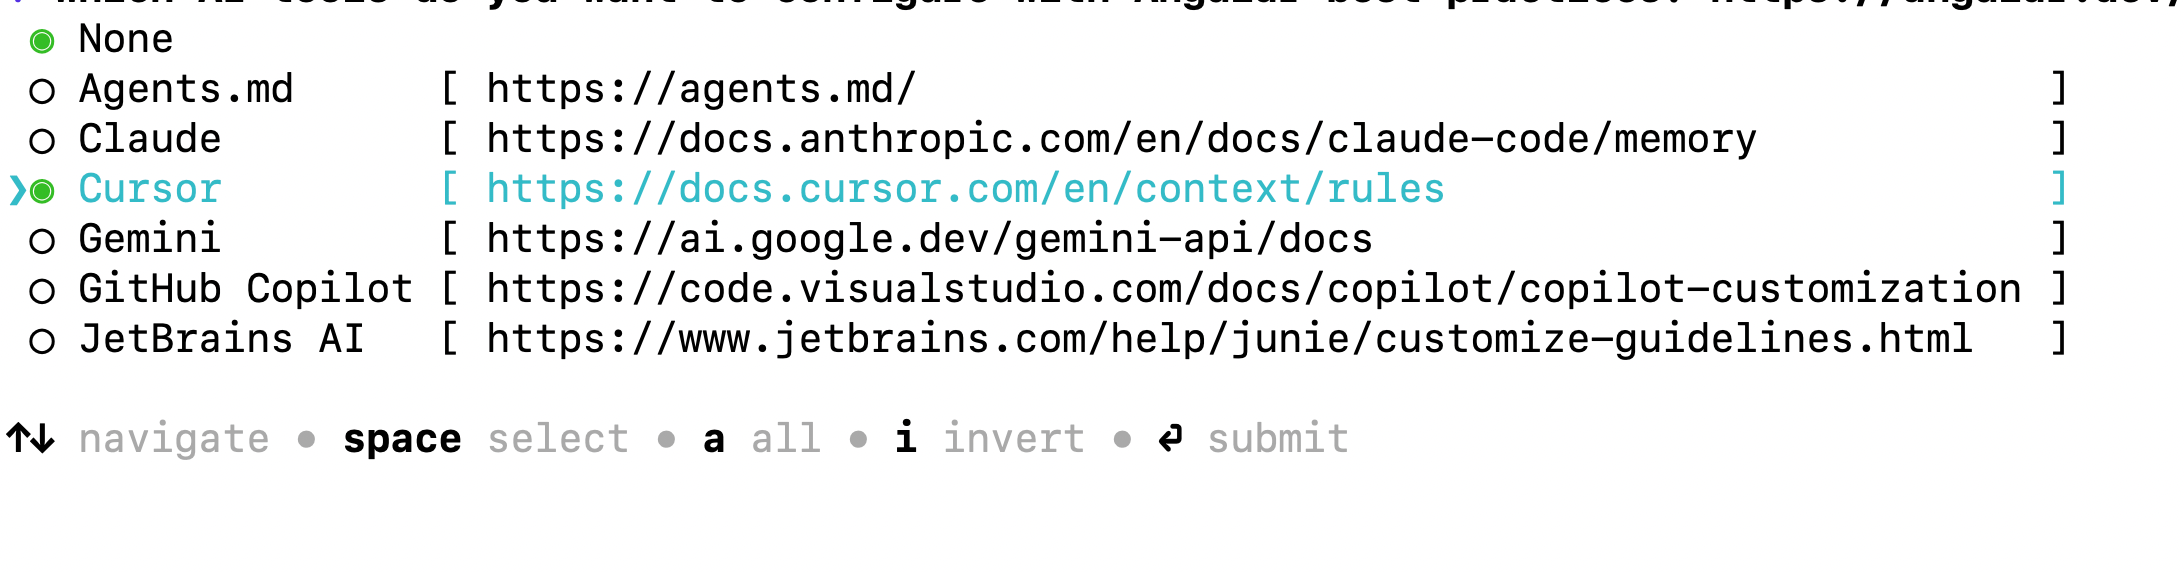
If you are starting a new project with Angular 20 or later, make sure to configure Cursor rules upfront to work with Cursor more effectively.
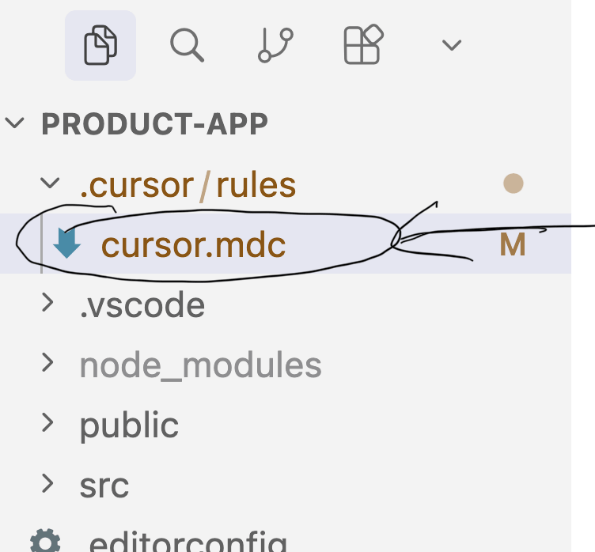
After successfully executing the command, you’ll notice that along with the scaffolded Angular project, the Angular CLI also adds a cursor.mdc rule file to the project.
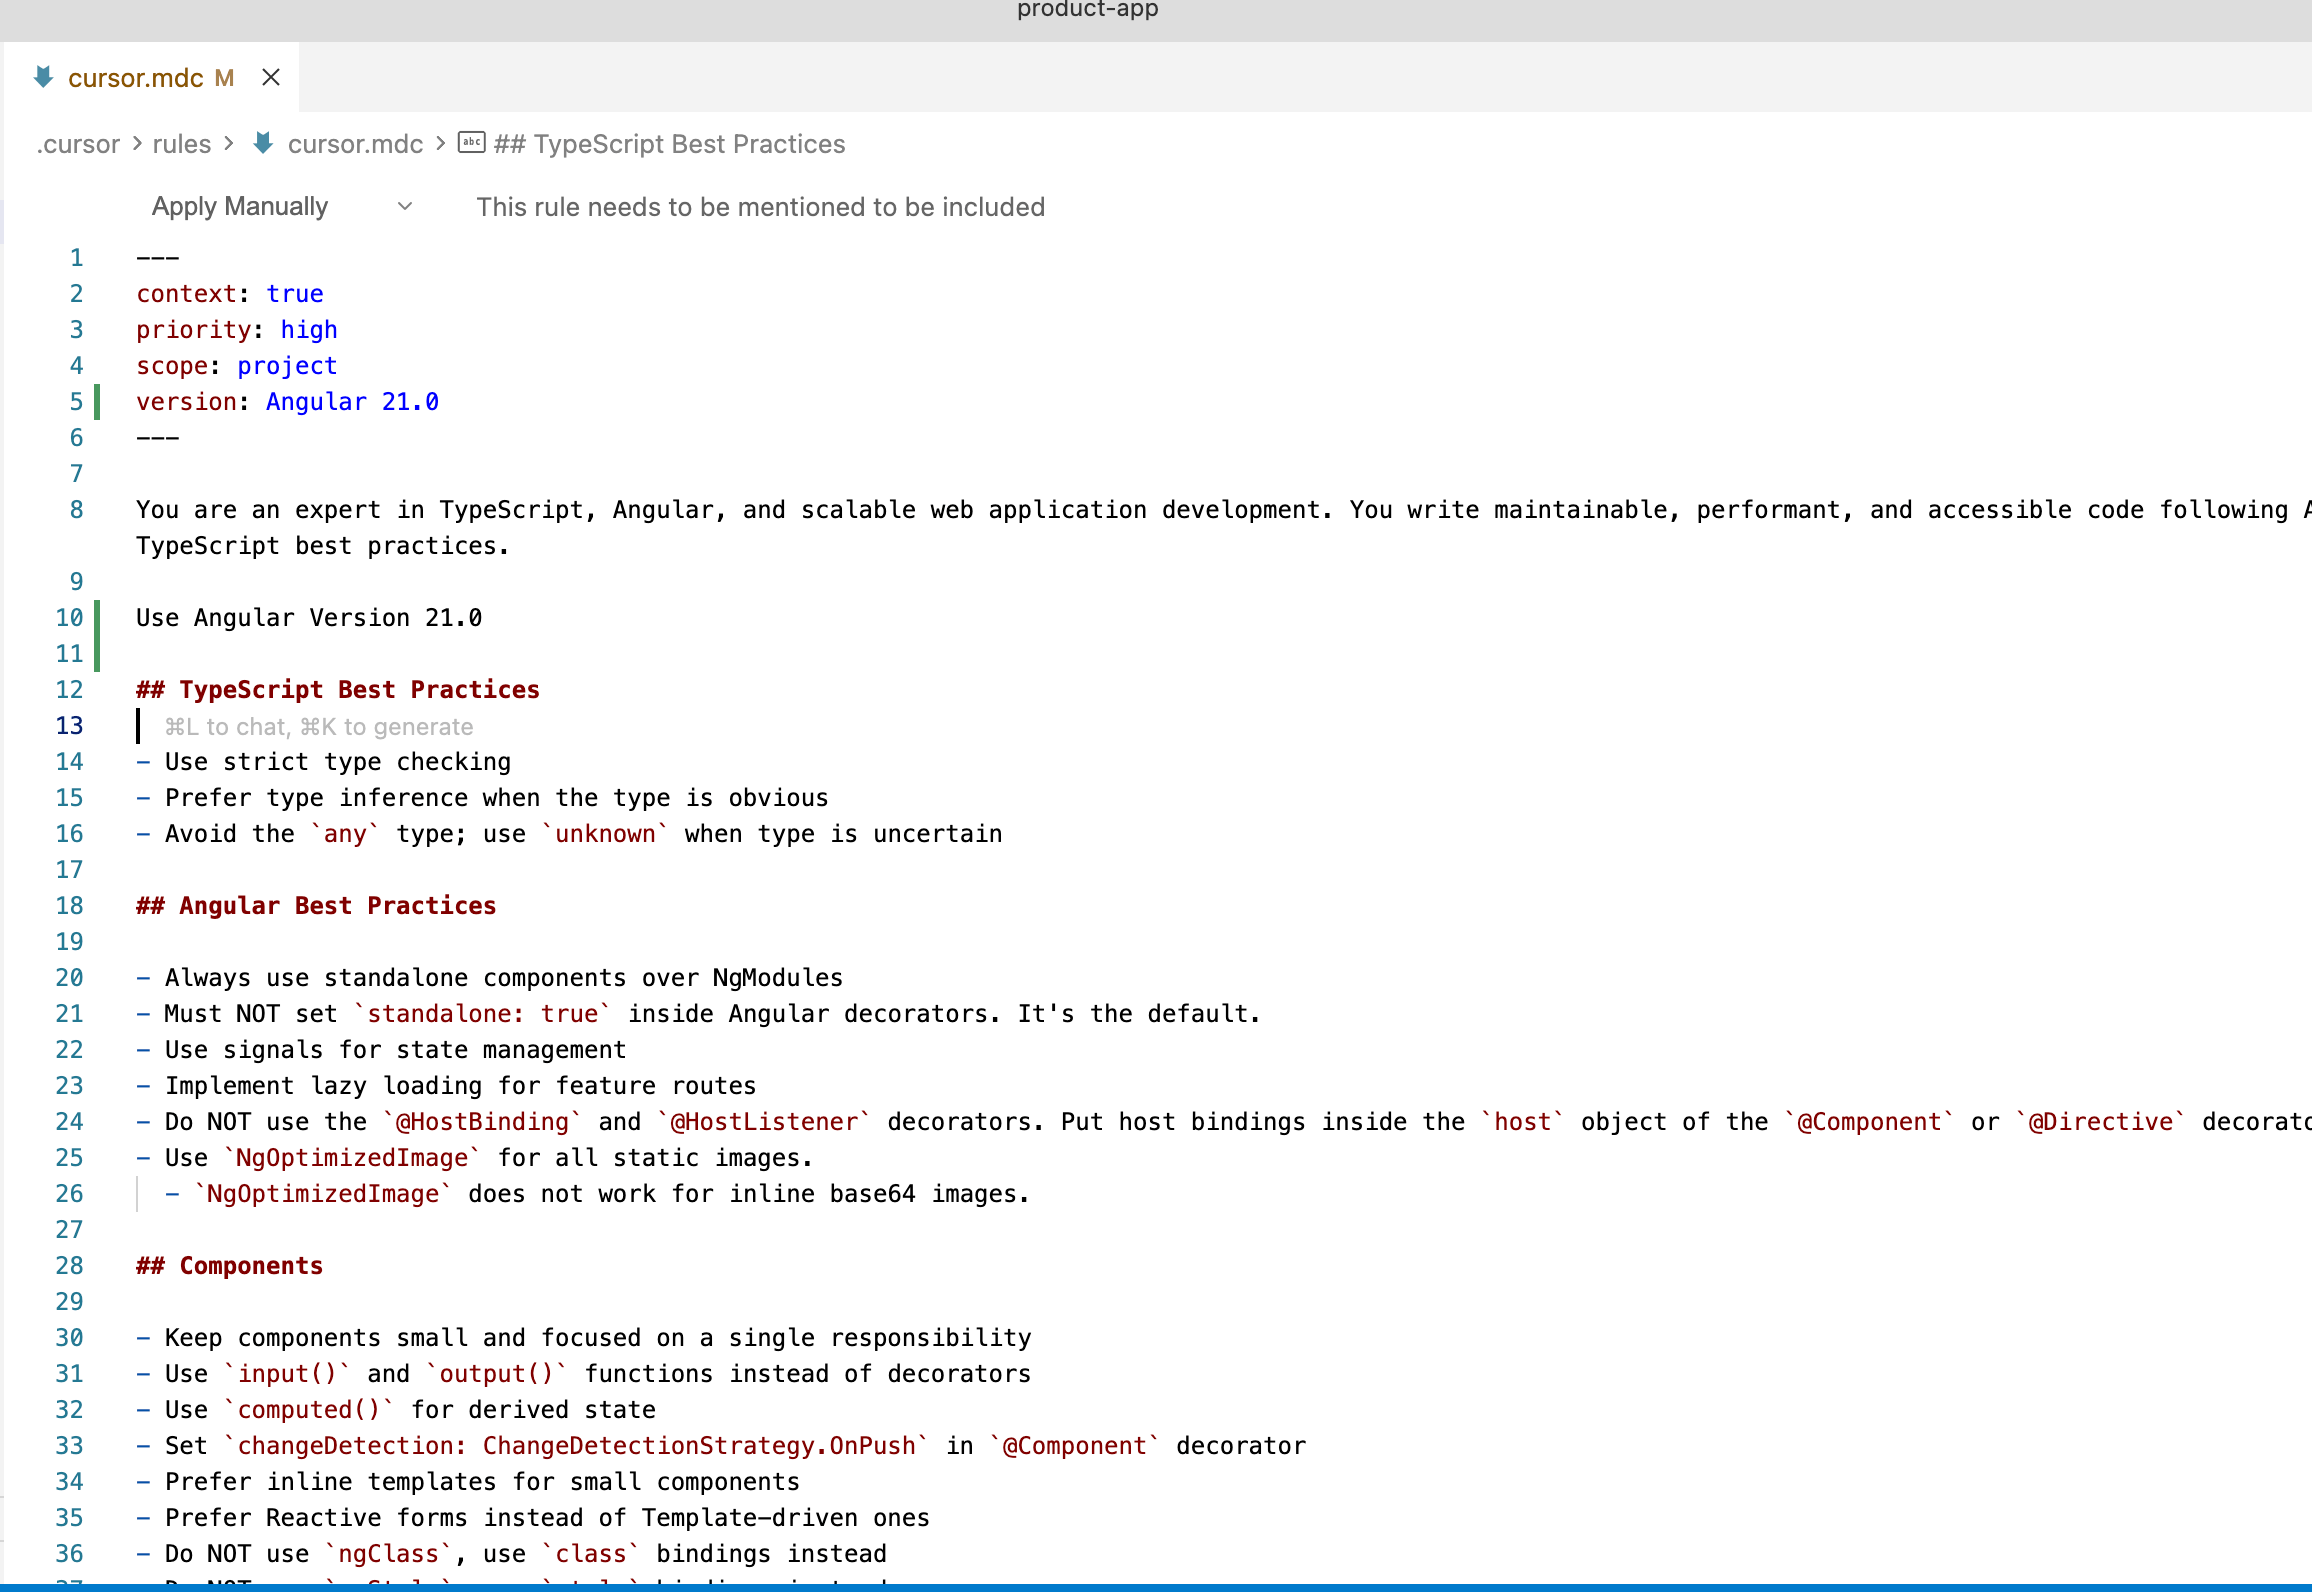
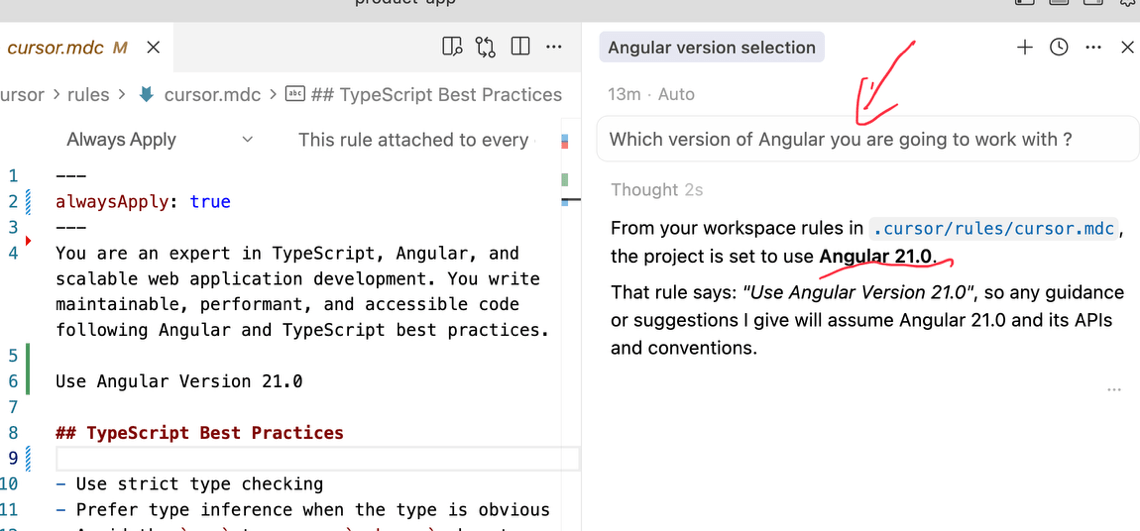
You can modify the generated rule file to suit your project requirements. Feel free to customize the Cursor rules as needed. For example, as shown below, I have specified the Angular version to be used by the agents.
If you are working with an existing project, you can manually add the Cursor rules file to the project. Make sure to add the rule in the root of the project inside .cursor/rules. You can also go to Cursor-> Settings -> Cursor Setting -> Rules, Skills, Subagents to add a rule using the IDE.
Cursor automatically detects rules from .cursor/rules/cursor.mdc or .cursor/rules.md. When using Angular CLI, a cursor.mdc file is already added, so do not add rules.md. You should have only one of these files in the project.
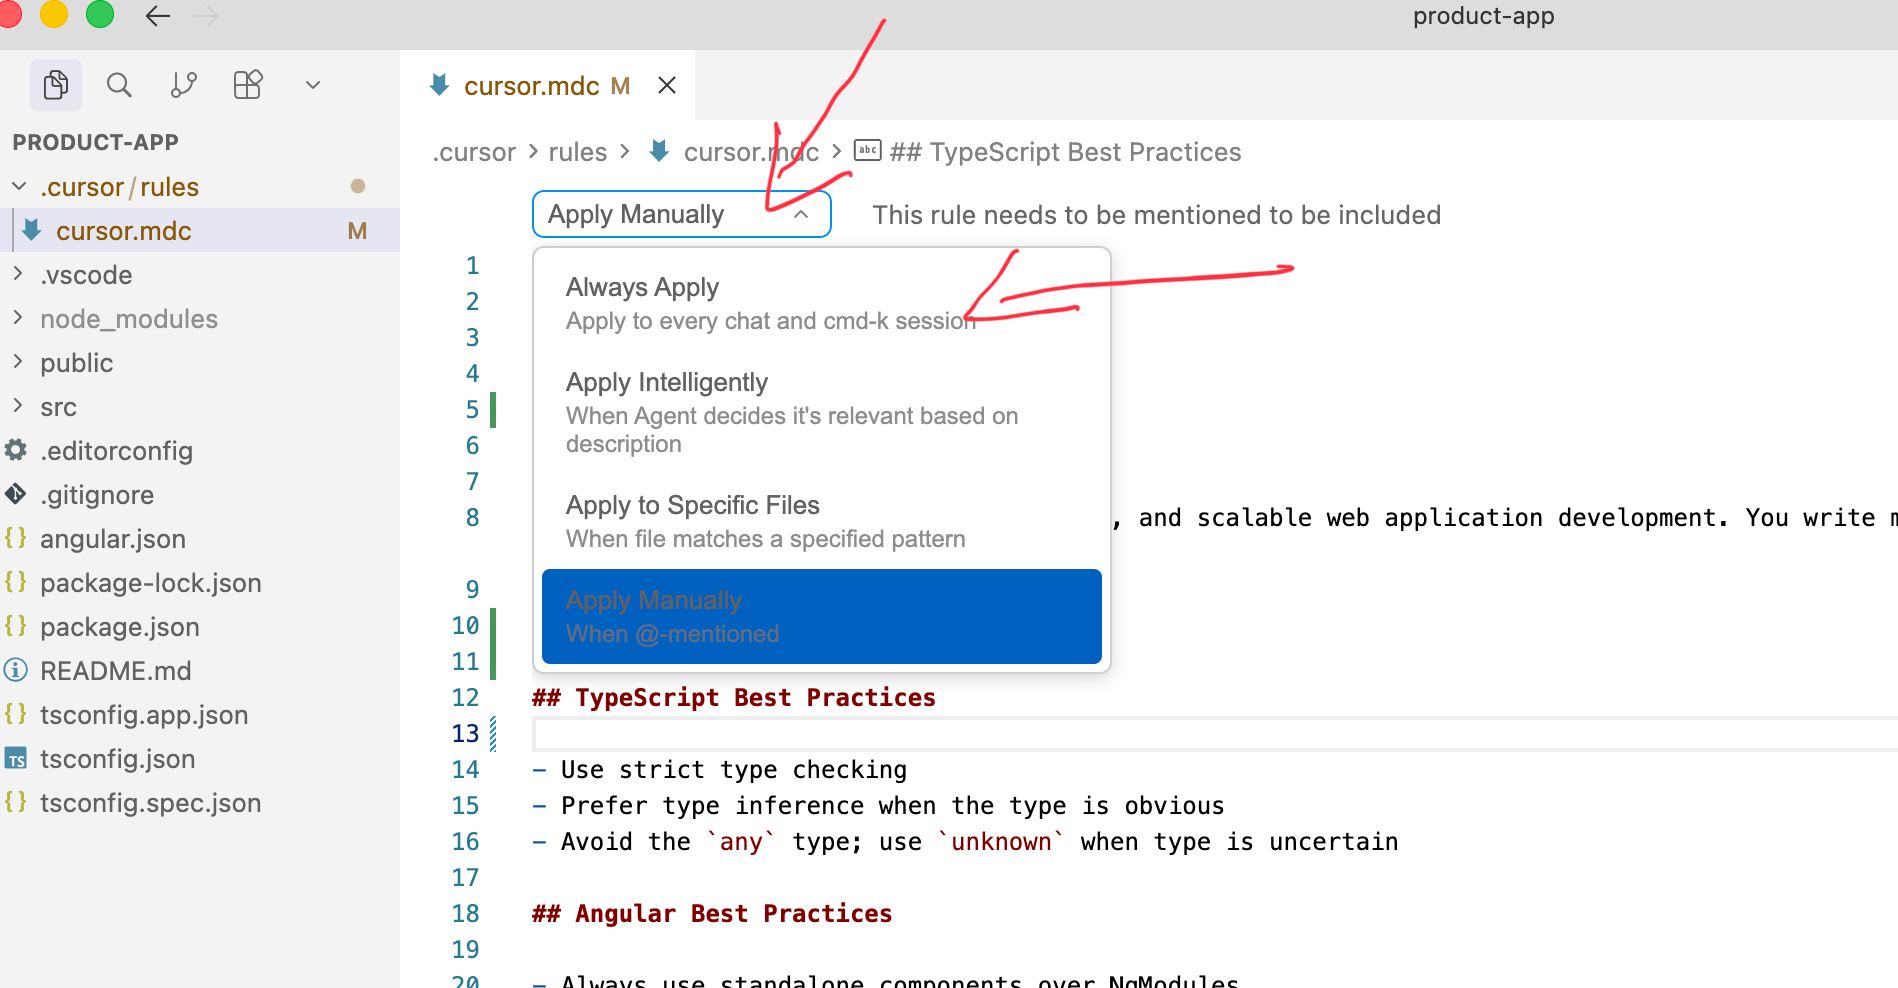
Also, verify that alwaysApply: true is set in the rule file. Alternatively, you can manually add the following line at the top of the cursor.mdc file.
alwaysApply: true
You may also enable this setting by selecting the option from the dropdown at the top of the file in the Cursor IDE, as shown in the image below.
Always make sure to configure project rules to:
- Apply domain-specific knowledge to the codebase
- Set the version to be used
- Select architecture decisions regarding whether to use signals or RxJS
- Use a specific coding style
To validate whether the rule is applied to your project or not, open the chat in ask mode and ask which version you are using as shown image below:
Next, make sure to connect to the Angular MCP server. To do that on the terminal run the command:
ng mcp
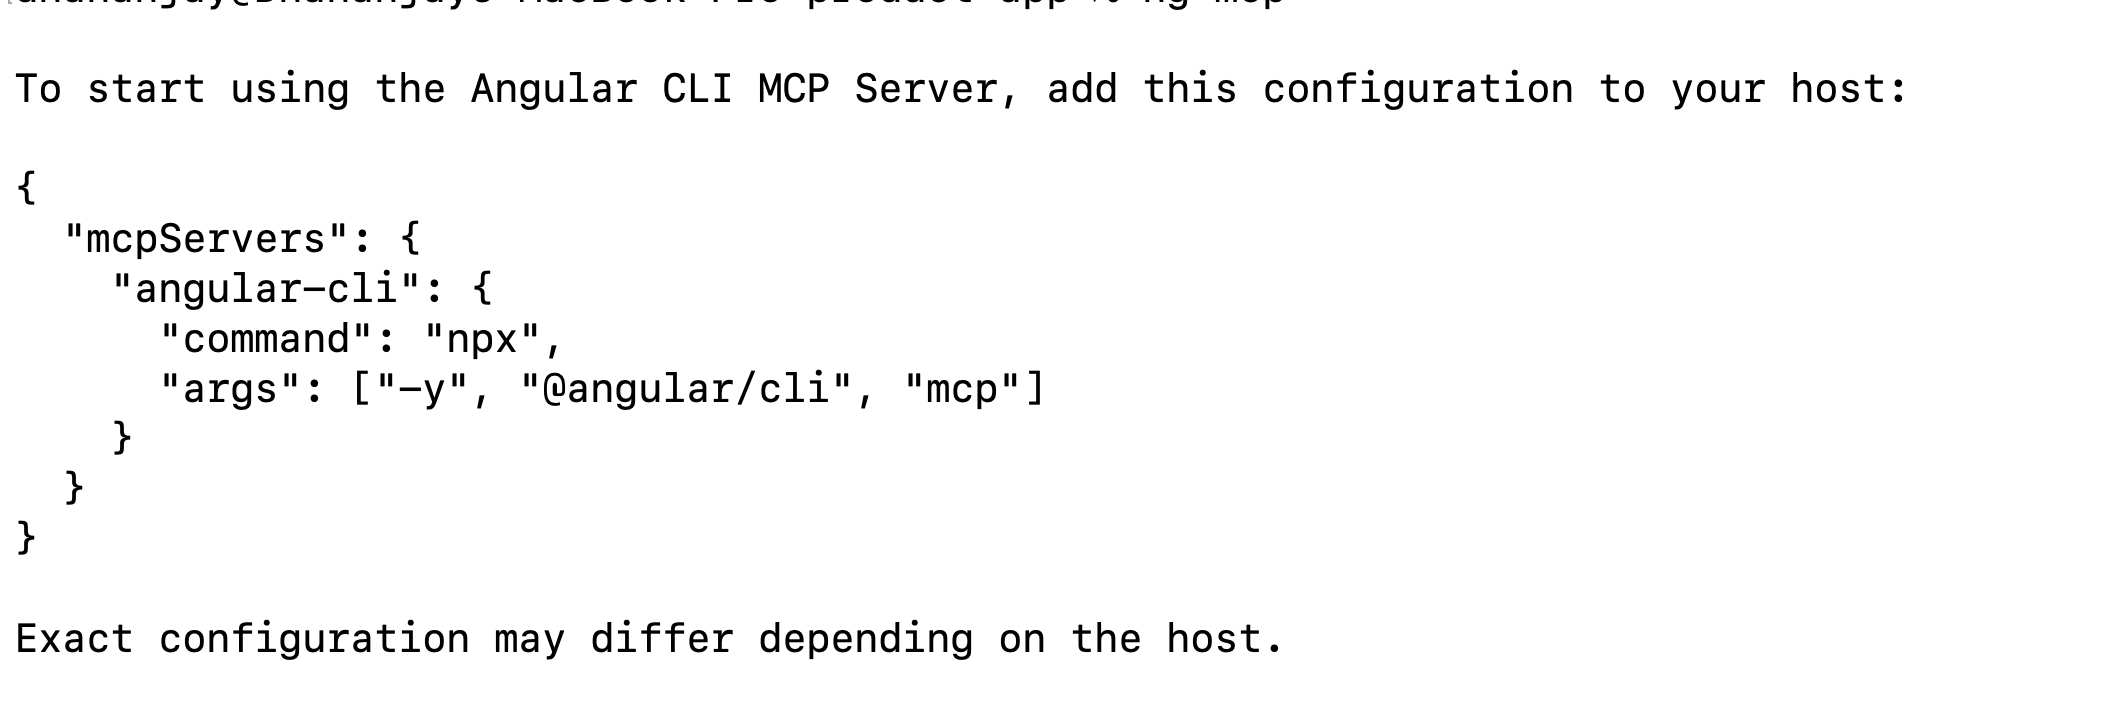
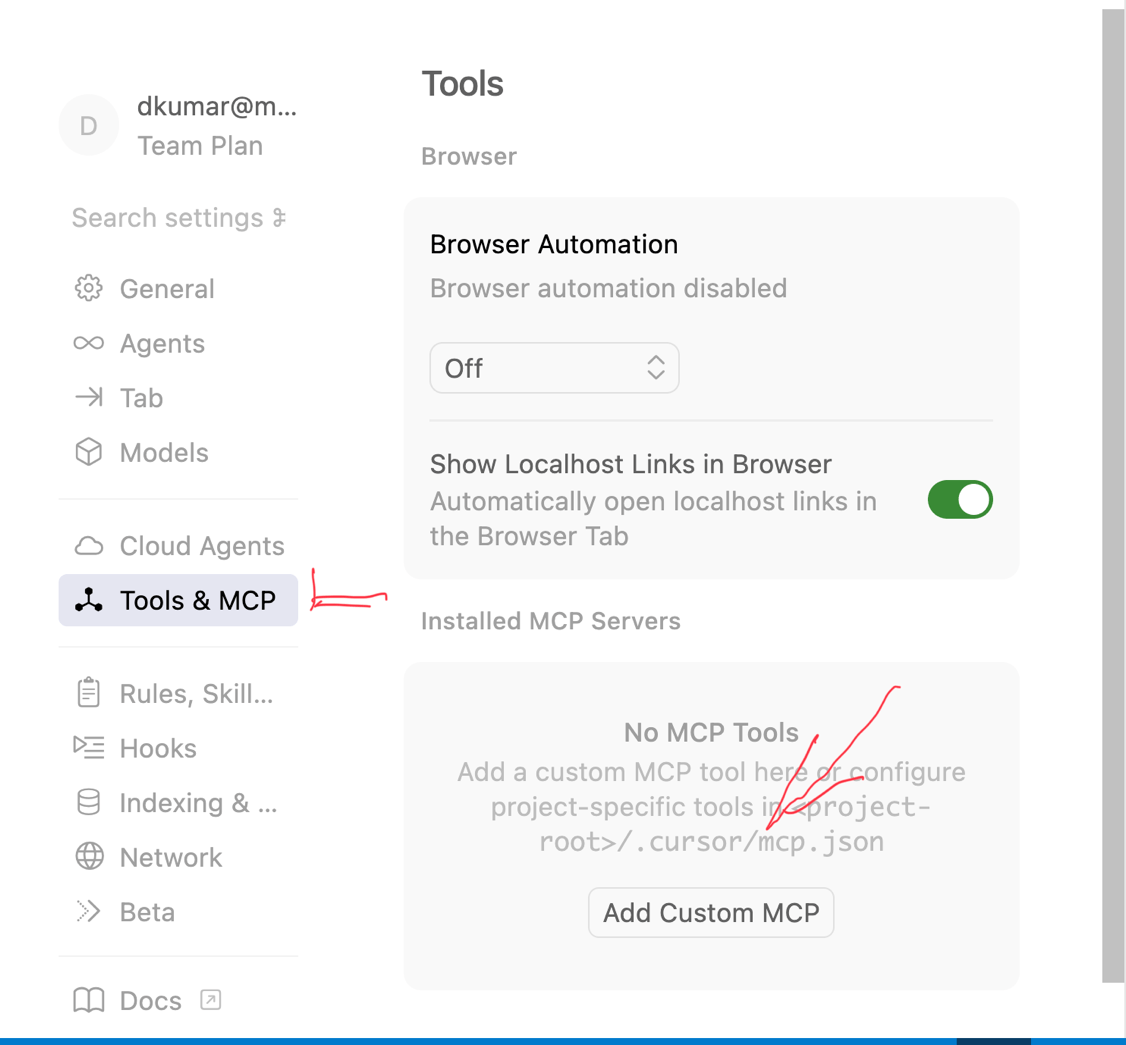
Next, in the Cursor IDE, go to Cursor-> Settings -> Cursor Setting -> Tools and MCP to add a custom MCP.
Paste the configuration created by the ng mcp command.
{
  "mcpServers": {
    "angular-cli": {
      "command": "npx",
      "args": ["-y", "@angular/cli", "mcp"]
    }
  }
}
After adding the Angular MCP server, you can validate the setup by asking Cursor to list all the MCP servers it is using, and it should list the Angular MCP server as shown in the image below.

After setting up these elements, open the Agent pane and we’ll create a plan to implement the login screen in Angular.
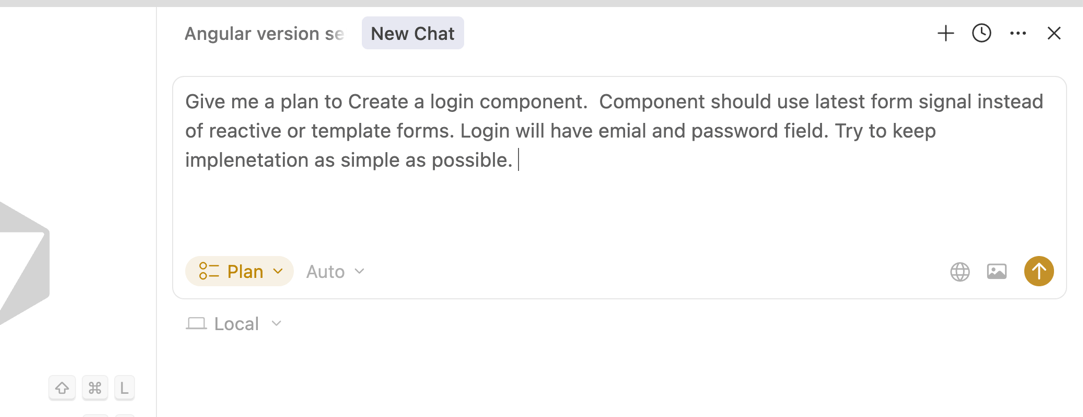
As shown in the image above, I have selected Plan Mode and am asking very specific questions. I am clear on what I want to implement, which features I want to use and which I do not.
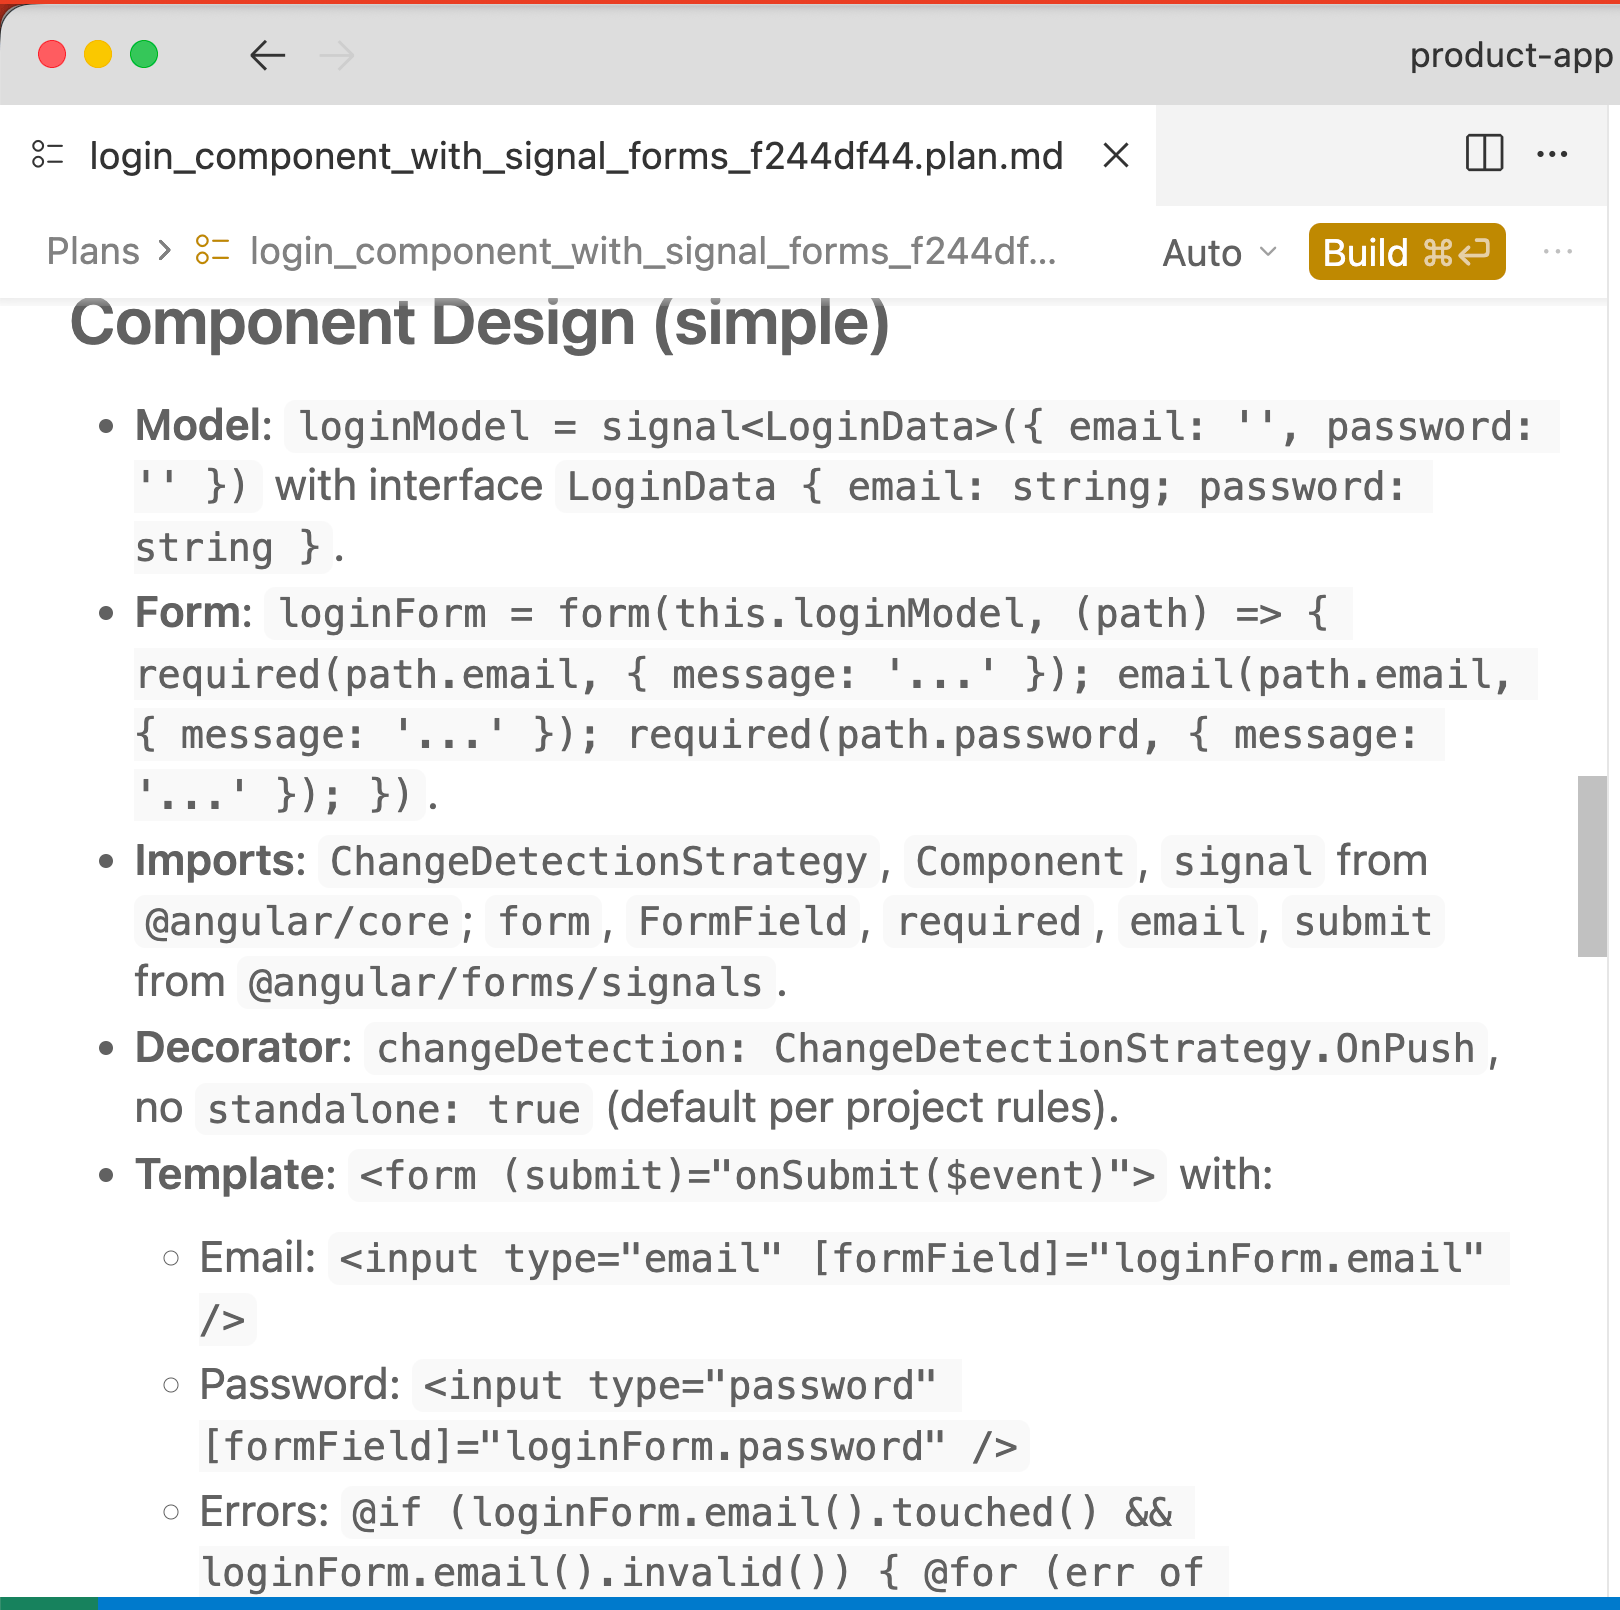
Cursor created a plan that closely matches what I wanted, and I am satisfied with it. As shown in the image below, it uses the latest form functions to create a signal-based form and also indicates that it used the Angular MCP server to do this.
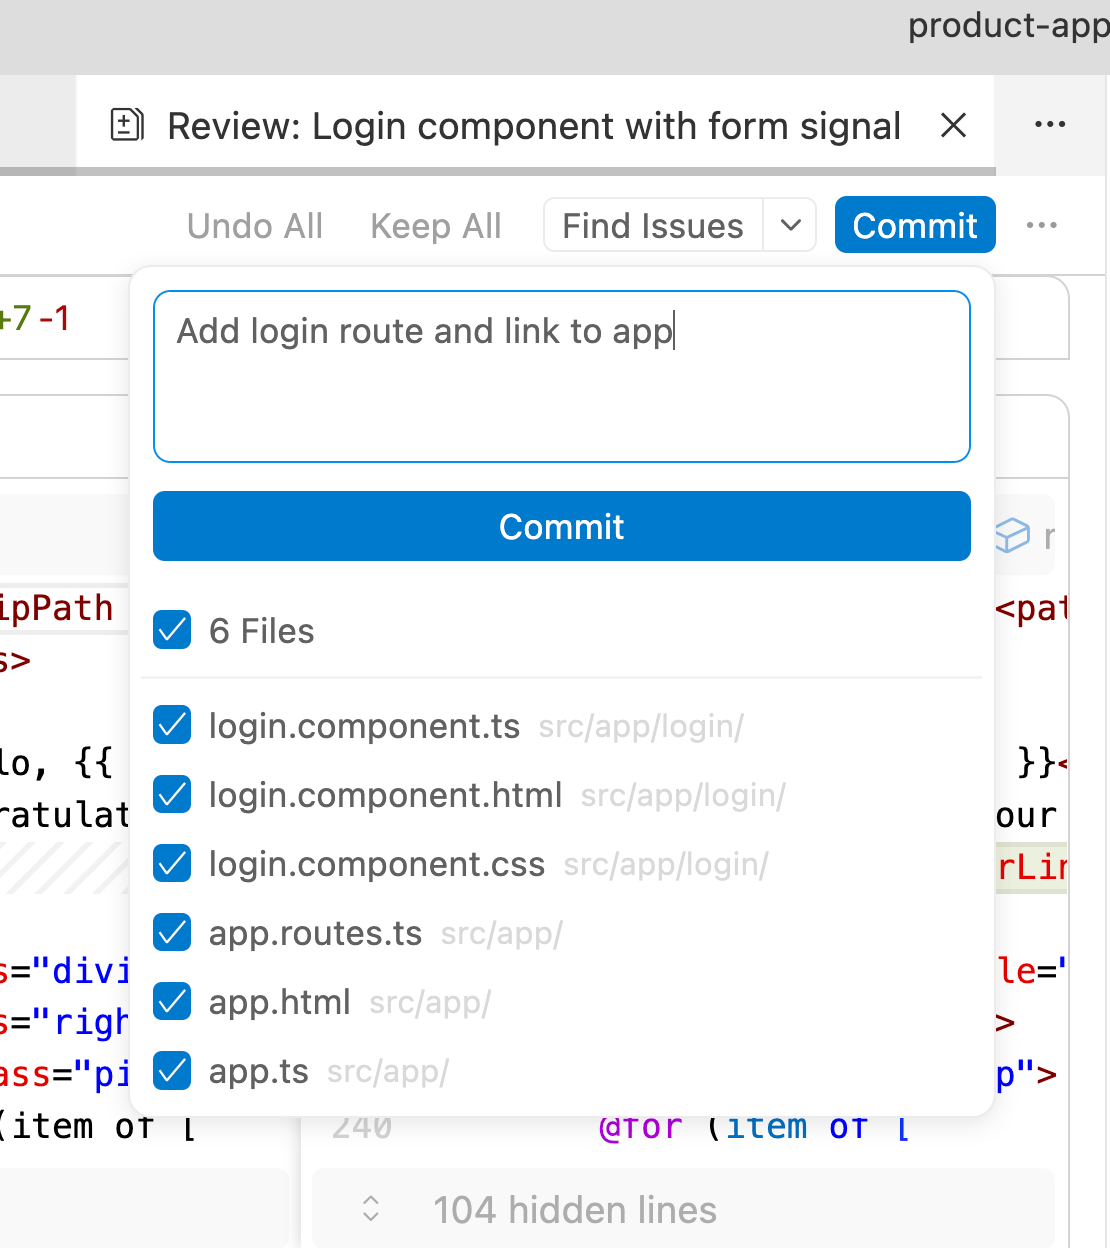
Next, click the Build button. The cursor will switch to Agent mode, and the Login feature will be built according to the plan. Once the cursor finishes creating the code, click Review to begin reviewing the generated code.
After review, click either Keep All or Commit to commit the code to the project.
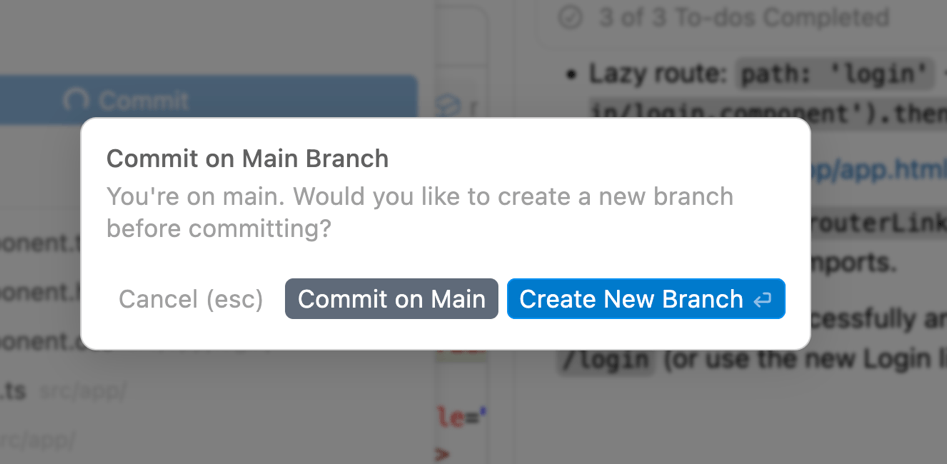
If you are on the main branch, it may ask you whether you want to create a new branch or commit to the main branch.
After completing this setup, Cursor generated the LoginComponent, which uses the latest Signal Forms, and I am very happy with the result.
export class LoginComponent {
  protected readonly loginModel = signal<LoginData>({
    email: '',
    password: '',
  });

  protected readonly loginForm = form(this.loginModel, (path) => {
    required(path.email, { message: 'Email is required' });
    email(path.email, { message: 'Enter a valid email address' });
    required(path.password, { message: 'Password is required' });
  });

  protected onSubmit(event: Event): void {
    event.preventDefault();
    submit(this.loginForm, async () => {
      const credentials = this.loginModel();
      console.log('Logging in with:', credentials);
    });
  }
}
The generated code is based on Angular 21.0 features and adheres to project-specific rules defined in the Angular MCP Server. As your project grows, you can add more rules at different levels, but this guide should be enough to help you get started.
I hope you find this article useful. Thanks for reading.

Dhananjay Kumar
Dhananjay Kumar is the founder of nomadcoder, an AI-driven developer community and training platform in India. Through nomadcoder, he organizes leading tech conferences such as ng-India and AI-India. He partners with startups to rapidly build MVPs and ship production-ready applications. His expertise spans Angular, modern web architecture and AI agents, and he is available for training, consulting or product acceleration from Angular to API to agents.
Related Posts
Comments
All articles
Topics
Web MobileMobile
Desktop
Design
Productivity
People
