ASP.NET Core Basics: Understanding and Practicing SOLID

Summarize with AI:
The application of SOLID principles is essential to promote code modularity, maintainability and scalability. Check out this blog post on understanding each of the SOLID principles and applying them in an ASP.NET Core application.
Understanding SOLID principles and applying them is a decisive factor for any developer who wants to advance their career. After all, SOLID allows the creation of more sustainable and flexible object-oriented systems and this is undoubtedly a requirement found in the vast majority of job market opportunities.
Throughout the post, we will cover the principles that make up SOLID and see how to apply them in practice when building ASP.NET Core applications.
What is SOLID?
SOLID is an acronym created by Robert C. Martin that represents the set of object-oriented design principles that aim to improve maintainability, extensibility and understanding of source code.
Each letter of SOLID represents a principle:
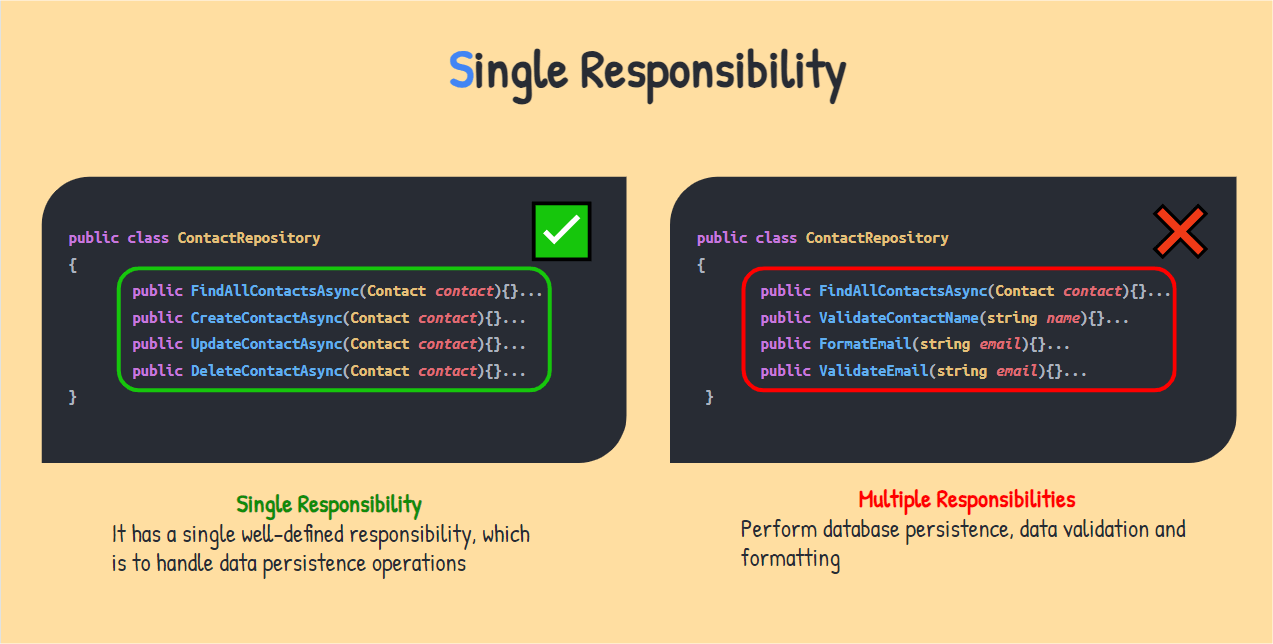
S - Single Responsibility Principle: This principle emphasizes that a class should have only a single responsibility in the system. This results in more cohesive classes and is easier to maintain.
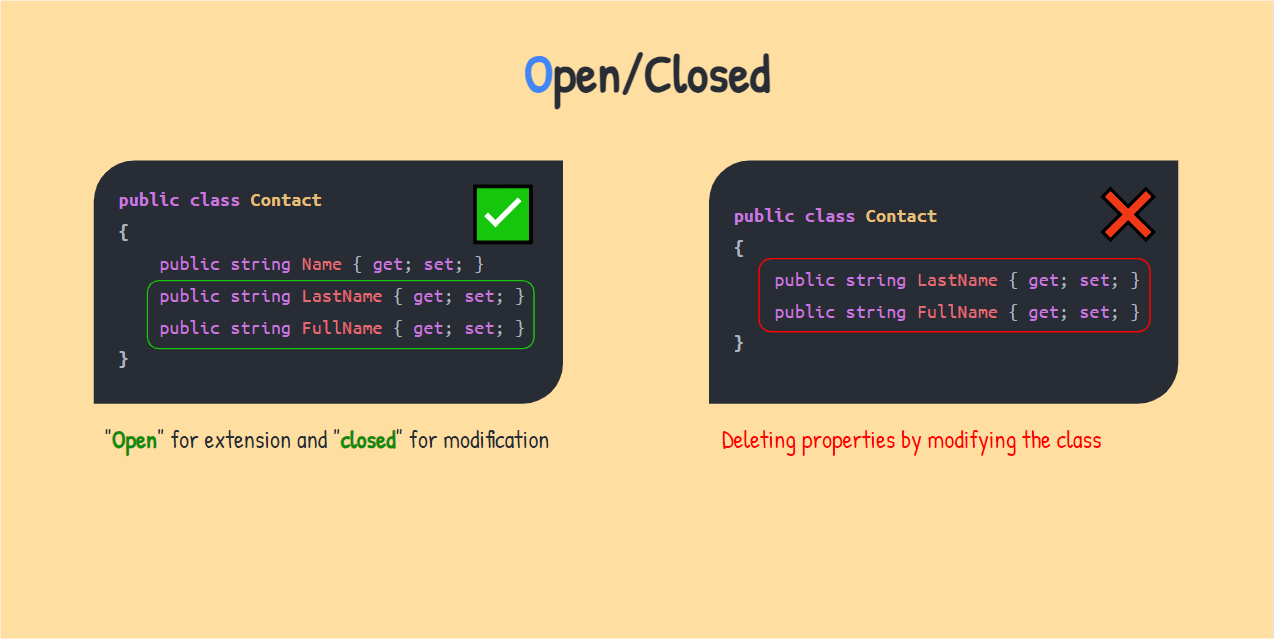
O - Open/Closed Principle: This principle states that software entities, such as classes and modules, should be open for extension, but closed for modification. This means you can add new behaviors or functionality without changing existing code.
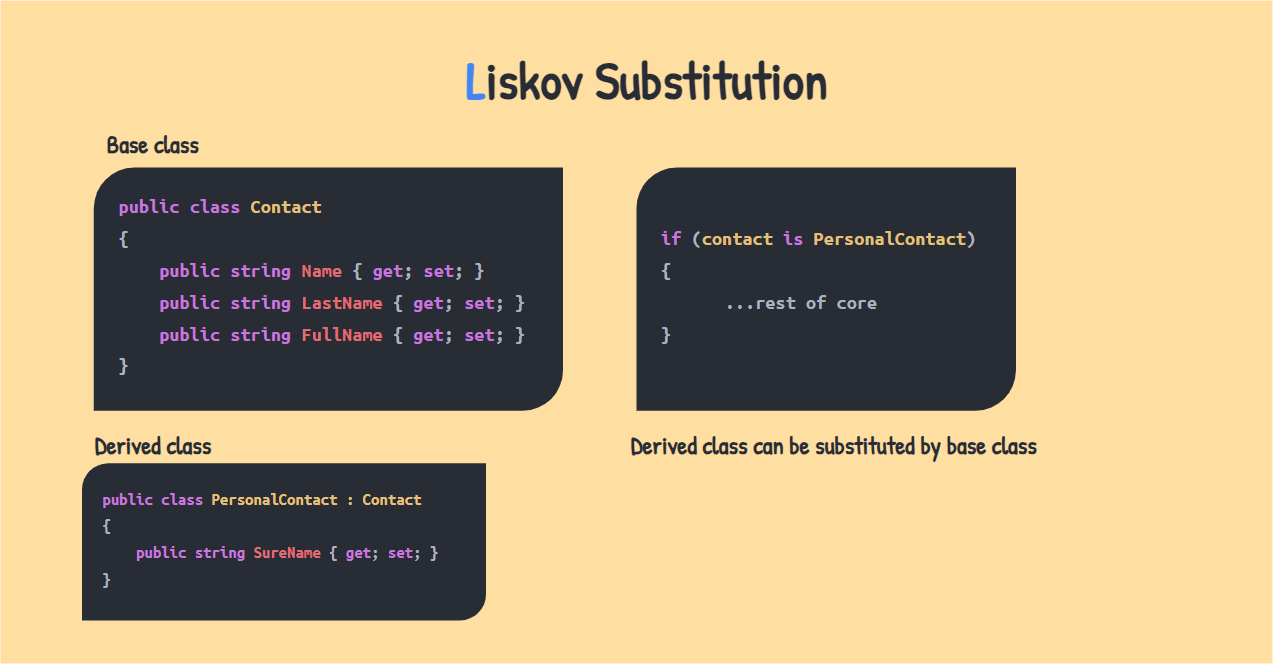
L - Liskov Substitution Principle: This principle emphasizes that derived classes (subclasses) must be replaceable by base classes (superclasses) without affecting program correctness. This promotes code consistency and interoperability.
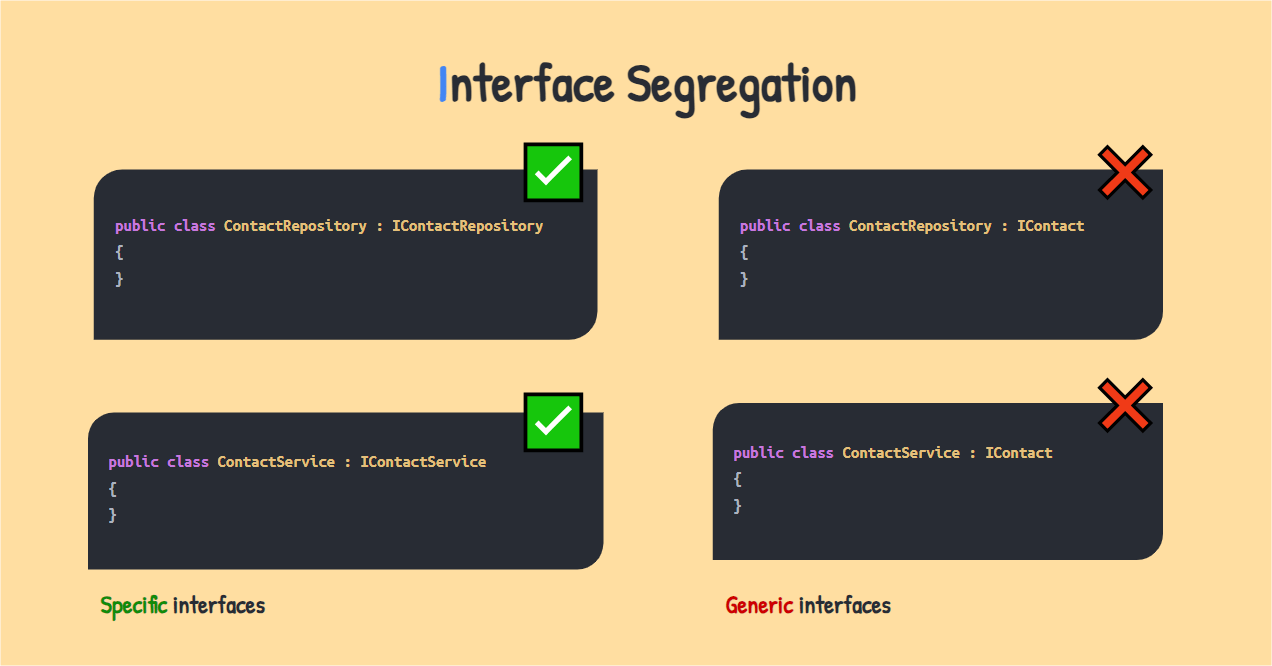
I - Interface Segregation Principle: This principle suggests that interfaces should not be too comprehensive, but specific to the clients that use them. This prevents classes from implementing methods they don’t need, reducing coupling and improving cohesion.
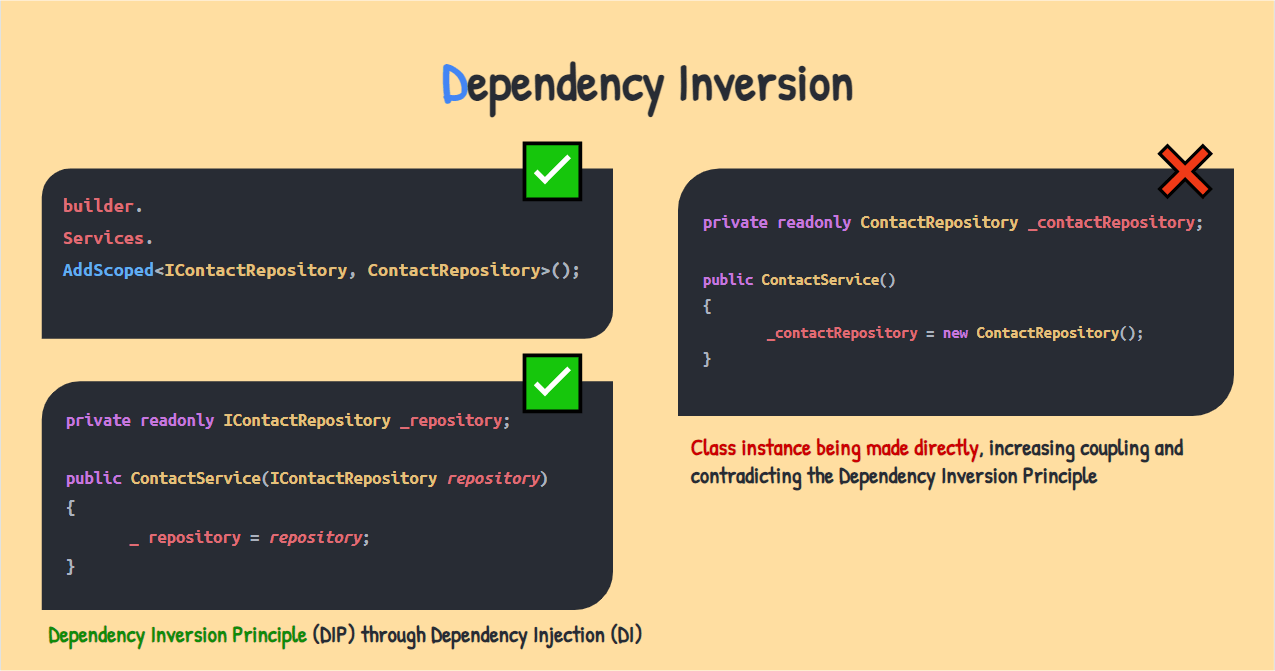
D - Dependency Inversion Principle: This principle proposes that high-level modules should not depend directly on low-level modules, but both should depend on abstractions. Furthermore, details should depend on abstractions, not the other way around, which promotes a more flexible and easily adaptable architecture.
Together, these SOLID principles provide guidelines for creating more robust, flexible and maintainable code, helping to build high-quality, scalable software systems.
SOLID in ASP.NET Core
ASP.NET Core uses C# as a programming language, an object-oriented language which allows developers to create modular and decoupled applications.
However, object orientation can become a problem if used without taking into account good programming practices. That’s why we need SOLID—it gives us five principles that help us to predict future problems in a software project through the creation of flexible and maintainable code.
To practice SOLID in an ASP.NET Core application, let’s create a simple minimal API to save some data to a database.
Throughout the post, we will see each of the principles and how we can use them in the application.
You can check the source code of the complete project here: ContactHub - GitHub source code.
Prerequisites
- You need to have the latest version of .NET installed. In this example, we’ll use version 7.
- An IDE (Integrated Development Environment). In this post, we’ll use Visual Studio Code.
Creating the Application
To create the application using the minimal API template, use the command below:
dotnet new web -o ContactHubTo practice SOLID principles, let’s first create some classes and configurations to prepare the application.
In the example of the post, we are going to use the SQLite database, which is a simple database, normally used in mobile applications, and which is stored in the root of the application.
We are also going to install EF Core, which is an ORM used to work with databases. EF Core is very useful because it has several functions that facilitate the construction of CRUD operations in the database.
So to download the SQLite and EF Core dependencies into the project, use the commands below:
dotnet add package Microsoft.EntityFrameworkCore --version 7.0.10
dotnet add package Microsoft.EntityFrameworkCore.Design --version 7.0.10
dotnet add package Microsoft.EntityFrameworkCore.Sqlite --version 7.0.10
Then, in the root of the project create a new class called “Models” and inside it, create the classes below:
- Contact
namespace Models;

public class Contact : EntityDto
{
    public string FullName { get; set; }
    public string PhoneNumber { get; set; }
    public string EmailAddress { get; set; }
    public string Address { get; set; }
    public bool IsDeleted { get; set; }
    public DateTimeOffset CreatedOn { get; set; }
}
- EntityDto
namespace Models;

public class EntityDto
{
    public Guid Id { get; set; }
};
Now, let’s create the context class to configure the database. In the root of the project, create a new folder called “Data”. Inside it, create a new class called “ContactDbContext” and put the code below in it:
using Microsoft.EntityFrameworkCore;
using Models;

namespace Data;

public class ContactDBContext : DbContext
{
    public DbSet<Contact> Contacts { get; set; }
    protected override void OnConfiguring(DbContextOptionsBuilder options) =>
            options.UseSqlite("DataSource=contacts_db.db;Cache=Shared");
}
Once that’s done, we can start implementing the SOLID principles.
Implementing the S (Single Responsibility)
The first principle of SOLID (Single Responsibility) says that a class must have only one function—that is, it must not contain more than one operation. In the context of ASP.NET Core, we can extend this logic to methods and functions. For example, a data insertion method should not contain validation logic, it should just insert the data.
So, in the folder “Data” create a new class called “ContactRepository” and put the code below in it:
namespace Data;
using Microsoft.EntityFrameworkCore;
using Models;

public class ContactRepository
{
    private readonly ContactDBContext _db;

    public ContactRepository(ContactDBContext db)
    {
        _db = db;
    }

    public async Task<List<Contact>> FindAllContactsAsync()
    {
        return await _db.Contacts.ToListAsync();
    }

    public async Task<Contact> FindContactByIdAsync(Guid id)
    {
        var contact = await _db.Contacts.SingleOrDefaultAsync(c => c.Id == id);
        return contact;
    }

    public async Task<Guid> InsertAsync(Contact contact)
    {
        contact.Id = Guid.NewGuid();
        contact.CreatedOn = DateTime.Now;

        await _db.AddAsync(contact);
        await _db.SaveChangesAsync();
        return contact.Id;
    }

    public async Task UpdateAsync(Contact contact, Contact existingContact)
    {
        existingContact.FullName = contact.FullName;
        existingContact.PhoneNumber = contact.PhoneNumber;
        existingContact.EmailAddress = contact.EmailAddress;
        existingContact.Address = contact.Address;
        existingContact.IsDeleted = contact.IsDeleted;
        await _db.SaveChangesAsync();
    }

    public async Task DeleteAsync(Contact contact)
    {
        _db.Remove(contact);
        await _db.SaveChangesAsync();
    }
}
Note that the code of the ContactRepository class implements the Single Responsibility Principle because it has a single well-defined responsibility, which is to deal with data persistence operations, providing methods
to fetch, insert, update and delete contacts in the database.
We can also identify other aspects of SOLID present in the ContactRepository class:
- Coherence: All methods in the class are related to the same domain entity, which are the contacts. This makes the class cohesive as all operations are related to the same functional area.
- Separation of Concerns: The
ContactRepositoryclass does not mix the business logic of the contacts with the interaction with the database. It just focuses on database operations without worrying about the business logic of contacts. - Ease of Maintenance: Due to its unique responsibility and cohesion, the
ContactRepositoryclass is easier to maintain and understand. Changes to database operations related to contacts can be made in this class without affecting other parts of the code.
Implementing the O (Open/Closed Principle)
In the “Open/Closed” principle, classes and modules should be open for extension, but closed for modification—that is, you can add new behaviors or functionalities without changing the existing code.
Thinking about the example in the post, imagine that instead of the Contact class having a property called FullName, it should now have two properties, namely First Name and Last Name.
To respect the Open/Closed principle, instead of modifying the Contact class and deleting the FullName property, let’s just add the new fields to it.
In the Contact class just add the following properties above the FullName property:
 public string Name { get; set; }
 public string LastName { get; set; }
This way, if any system module uses the FullName property, it will not break, as the property still exists, even if it is not so important in other contexts.
By using the Open/Closed principle, we ensure that the system is stable by adding properties and behaviors instead of modifying them.
Implementing the L (Liskov Substitution Principle)
In the principle of Liskov Substitution, objects of a derived class must be able to be treated as objects of the base class without problems.
For example, if you have a base class Contact and a derived class PersonalContact, you should be able to treat a PersonalContact object as a Contact without breaking the program logic, i.e., the PersonalContact class it should just extend the Contact class without overwriting the behavior of the base Contact class. Methods in the derived class must, at a minimum, maintain the same contract and functionality as the base class.
Following the Liskov Substitution Principle helps ensure that your class hierarchies are well-designed and that object substitutions do not introduce subtle errors into the code. This contributes to the maintainability and extensibility of the software.
To practice the Liskov Substitution Principle in the post example, let’s implement the PersonalContact class and see how the Contact base class can replace it.
So, in the “Models” folder, create the class below:
- PersonalContact
namespace Models;

public class PersonalContact : Contact
{
    public string Nickname { get; set; }
}
Now to create the application’s business rules and include methods that will use the repository class created earlier, create a new folder called Services and inside it create a new class called ContactService and place the code below in it:
using Data;
using Models;

namespace Services;

public class ContactService
{
private readonly ContactRepository _repository;

public ContactService(ContactRepository repository)
{
_repository = repository;
 }

 public string GetPersonalContactFullName(Contact contact)
  {
      if (contact is PersonalContact personalContact)
      {
          string fullName = $"{contact.FullName} {personalContact.Nickname}";
          return fullName;
      }
      return contact.FullName;
  }
}
Note that in the method GetPersonalContactFullName() a comparison is being made to find out if the object Contact is of type PersonalContact. This is only
possible because PersonalContact is a subclass of Contact and does not violate the principle of Liskov replacement because it just extends the base class. In other words, it can be
replaced, or in this case compared to the base class Contact.
Implementing the I (Interface Segregation)
In the principle of Interface Segregation, we must be careful to create interfaces that are not very comprehensive—that is, they must be specific to each client who will use them, thus avoiding the creation of unnecessary methods.
So, to practice the segregation of interfaces in the project, we will create an interface for the Repository class and another interface for the Service class. Inside the “Data”
folder, create a new interface with the name “IContactRepository” and place the code below in it :
using Models;

namespace Data
{
    public interface IContactRepository
    {
        Task<List<Contact>> FindAllContactsAsync();
        Task<Contact> FindContactByIdAsync(Guid id);
        Task<Guid> InsertAsync(Contact contact);
        Task UpdateAsync(Contact contact, Contact existingContact);
        Task DeleteAsync(Contact contact);
    }
}
Then, inside the “Services” folder, create a new interface called "IContactService " and place the code below in it:
using Models;

namespace Services
{
    public interface IContactService
    {
       Task<List<Contact>> FindAllContactsAsync();
        string GetPersonalContactFullName(Contact contact);
        Task<Guid> CreateContactAsync(Contact contact);
        Task UpdateContactAsync(Guid id, Contact updatedContact);
        Task DeleteContactAsync(Guid id);
    }
}
Note that both interfaces are very similar—after all, the Service class accesses the methods of the Repository class, but there is a method (GetPersonalContactFullName())
that is only present in the service class. So if we used the same interface for both classes, the GetPersonalContactFullName() method would not be useful in the Repository class, unnecessarily causing the use of duplicate
code in addition to increasing coupling between classes and violating the principle of Interface Segregation.
Therefore, when creating interfaces, always prefer to create specific interfaces, rather than generic interfaces.
Implementing the D (Dependency Inversion)
In the principle of Dependency Inversion, we must focus on the importance of reducing coupling between system modules.
To maintain loose coupling, high-level modules should not depend on low-level modules. Both must depend on abstractions.
In ASP.NET Core, a well-known way to practice this principle is through dependency injection (DI). Dependency injection is a design pattern and programming concept where dependencies external to an object are injected into it, rather than the object creating those dependencies on its own.
ASP.NET Core has a system of built-in dependency injection that allows you to register and inject dependencies into your classes through the ConfigureServices of the Program class in minimal APIs and the Startup class in older versions of ASP.NET Core.
To implement Dependency Inversion in the project, just add the following code to the Program.cs file:
builder.Services.AddDbContext<ContactDBContext>();
builder.Services.AddScoped<IContactRepository, ContactRepository>();
builder.Services.AddScoped<IContactService, ContactService>();
Then, replace the code in the “ContactService” with the code below:
using Data;
using Models;

namespace Services;

public class ContactService : IContactService
{
    private readonly IContactRepository _repository;

    public ContactService(IContactRepository repository)
    {
        _repository = repository;
    }

    public async Task<List<Contact>> FindAllContactsAsync()
    {
        return await _repository.FindAllContactsAsync();
    }

    public async Task<Contact> FindContactByIdAsync(Guid id)
    {
        var contact = await _repository.FindContactByIdAsync(id);
        return contact;
    }

    public async Task<Guid> CreateContactAsync(Contact contact)
    {
        return await _repository.InsertAsync(contact);
    }

    public async Task UpdateContactAsync(Guid id, Contact updatedContact)
    {
        var existingContact = await _repository.FindContactByIdAsync(id);

        if (existingContact != null)
        {
            await _repository.UpdateAsync(updatedContact, existingContact);
        }
    }

    public async Task DeleteContactAsync(Guid id)
    {
        var existingContact = await _repository.FindContactByIdAsync(id);
        if (existingContact != null)
        {
            await _repository.DeleteAsync(existingContact);
        }
    }

    public string GetPersonalContactFullName(Contact contact)
    {
        if (contact is PersonalContact personalContact)
        {
            string fullName = $"{contact.FullName} {personalContact.Nickname}";
            return fullName;
        }
        return contact.FullName;
    }
}
In the code above, we are defining the dependency injection configuration of the ContactDBContext, ContactRepository and ContactService classes.
Note that the ContactRepository class is being passed to the AddScoped method along with its interface. The AddScoped method is one of the ways to implement
dependency injection in ASP.NET Core. This way, every time the IContactService interface is invoked, a new instance of the ContactService class will be available for use.
In the ContactService class, we did dependency injection through the class constructor, passing the IContactRepository interface.
This way we implemented the principle of Dependency Inversion. Another way to do dependency injection would be to create a new instance of the ContactRepository class directly in the service class through the “new”
operator, but this is an extremely wrong practice and should not be used, as it completely deviates from the principle of Dependency Inversion.
Making the Project Functional
To make the API functional, we need to generate the database and tables. For this, we will use EF Core commands.
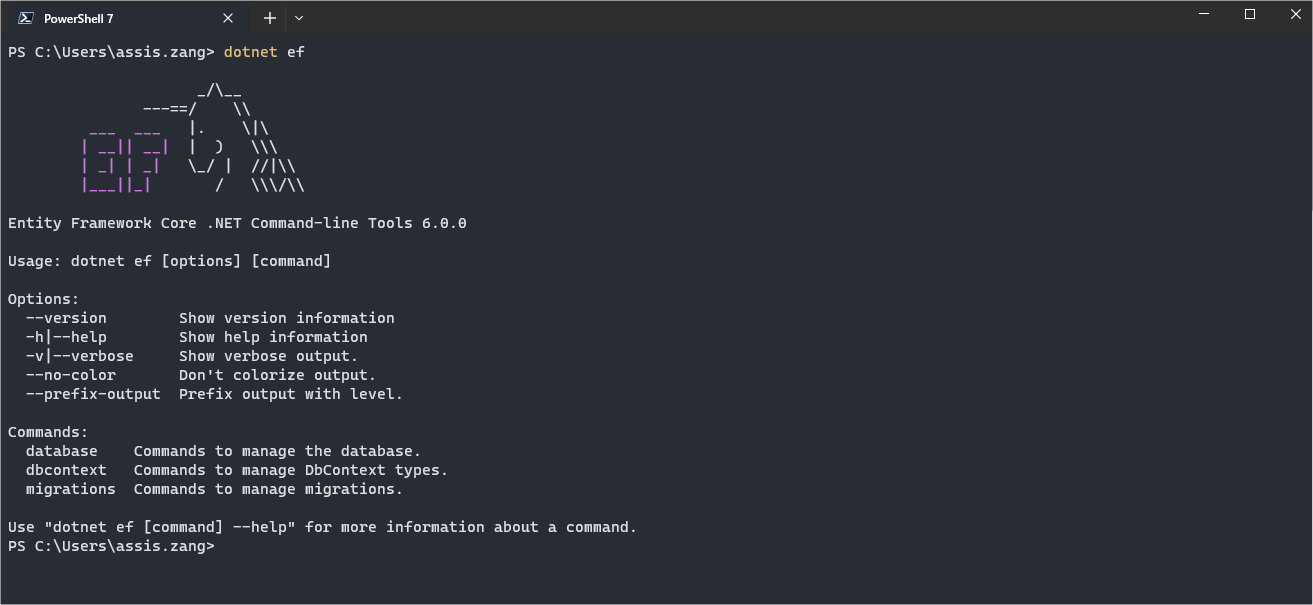
First, make sure you have EF Core installed globally via the command:
dotnet ef
If you have it, you should see something like this in the terminal:
If any error means you need to install it, you can use the command below to install EF Core globally:
dotnet tool install --global dotnet-ef
Open a terminal in the application, and run the commands below to create the database scripts and run them through EF Core’s Migrations feature:
- Generate Migrations scripts
dotnet ef migrations add InitialModel - Execute Migrations
dotnet ef database update
After executing the EF commands, the database is ready to be used.
We also need to add the API endpoints. So, in the Program.cs file, just below where the “app” variable is created, add the code below:
app.MapGet("v1/contacts", async (IContactService service) =>
{
    var allContacts = await service.FindAllContactsAsync();

    return allContacts.Any() ? Results.Ok(allContacts) : Results.NotFound();
}).Produces<Contact>();

app.MapGet("v1/contacts/{id}", async (IContactService service, Guid id) =>
{
    var existingContact = await service.FindContactByIdAsync(id);

    return existingContact is not null ? Results.Ok(existingContact) : Results.NotFound();
}).Produces<Contact>();

app.MapPost("v1/contacts", async (IContactService service, Contact contact) =>
{
    var createdId = await service.CreateContactAsync(contact);
    return Results.Created($"/v1/contacts/{createdId}", createdId);
}).Produces<Contact>();

app.MapPut("v1/contacts", async (IContactService service, Contact contact) =>
{
    var existingContact = await service.FindContactByIdAsync(contact.Id);
    if (existingContact is null)
        return Results.NotFound();

    await service.UpdateContactAsync(contact.Id, existingContact);
    return Results.Ok("Contact updated successfully");
});

app.MapDelete("v1/contacts/{id}", async (IContactService service, Guid id) =>
{
    var existingContact = await service.FindContactByIdAsync(id);
    if (existingContact is null)
        return Results.NotFound();

    await service.DeleteContactAsync(id);DD
    return Results.NoContent();
});
This way the API is functional and available to perform CRUD operations. As the purpose of the post is to demonstrate the implementation of SOLID, the execution of CRUD operations will not be covered, but feel free to perform them.
Conclusion
SOLID is a well-known paradigm in the world of systems development and learning its principles is essential for any developer who wants to create scalable applications, with low coupling and a modular design.
In this post, we learned what each of the principles means and how to implement them in an ASP.NET Core application.
Something important to note is that SOLID goes far beyond the examples demonstrated in the post, so feel free to explore more examples and consolidate your knowledge in this paradigm that has become a requirement in many places.

