
Creating a Custom AI Agent with Telerik Tools 1: Configuring an LLM for Azure or Ollama

Summarize with AI:
Create a custom RAG-enabled AI agent for an LLM with Progress Telerik Document Processing Libraries AI connectors.
The problem with general-purpose AI agents is that they are subject to “hallucinations” (these days, we say that those agents produce answers that aren’t “grounded”).
One solution to that problem is to create a custom AI agent with your own content and have your agent use that content to generate grounded answers (this is referred to as Retrieval Augmented Generation or RAG). Effectively, you can create a dedicated, reliable AI assistant for your users for any aspect of your organization.
Progress Telerik Document Processing Libraries (DPL) include a set of AI connectors that support creating those custom RAG-enabled AI agents of your own using any of the existing Large Language Models (LLMs) available to you in Azure or on your own computer/server using Ollama. And, once that agent is created, Telerik UI tools will let you integrate it into any application.
So, this post kicks off a series of posts where I’m going to walk you through all of the steps you need to create a custom AI agent by using Telerik DPL (and related AI tools), integrated with an LLM available on Azure or in Ollama. Once you’ve created an agent, I’ll show you how to add that custom agent into your application’s UI using AI-enabled Telerik UI components in either JavaScript or Blazor (though you could also create your frontend in ASP.NET, Windows Forms or .NET MAUI).
But … having said that, if all you want to do is add an AI prompt to your application, then, thanks to Telerik tools, this post might be the only one you need. At the end of this post, I’ll show you how to create a simple frontend for your application to use your LLM. In fact, if you’ve already got an LLM deployed (which is what this post is about), you might want to skip the rest of this post and go directly to that last section.
Picking Your LLM Provider
If you stick with Microsoft’s offerings, you actually have three options for creating the LLM your application will use. The good news here is that, thanks to Microsoft and Telerik tools, it doesn’t make much difference to your code which of those three options you use.
Your three choices are:
Microsoft Foundry: This gives you access to a wide variety of LLMs from multiple providers (including the OpenAI LLMs), while giving you integration with Azure security. Microsoft Foundry also gives you extensive monitoring for your LLM, enables data privacy and supports integration with other Azure services. This is Microsoft’s recommended option. I’ll call this the “Foundry option.”
Azure OpenAI: This is the easiest option to set up but also provides the least access to Azure functionality. The Azure OpenAI option gives you access only to OpenAI’s LLMs and only limited integration with other Azure resources (principally, security). With this choice you do, however, get access to the latest OpenAI LLMs, potentially before they show up in Microsoft Foundry. I’ll call this the “OpenAI-only option.”
Ollama: Unlike OpenAI or Microsoft Foundry, Ollama runs on your local computer, rather than in the cloud. Since there are no API fees, that makes Ollama an attractive choice for cheaper solutions (provided you have a powerful enough development computer). I’ll call this the “Client-side option.”
Setting Up OpenAI/Microsoft Foundry
While I’m treating the OpenAI-only option as a separate case from the Foundry option, the OpenAI-only option is actually hosted in Microsoft Foundry. As a result, the processes for setting up the OpenAI-only or the Foundry option are very similar:
- In the Azure portal at portal.azure.com, create an Azure resource.
- In the Microsoft Foundry portal at ai.azure.com, add an LLM—a “deployment”—to that resource.
Creating the Resource
To start, surf to the Azure Portal and search for Microsoft Foundry. On the Microsoft Foundry page, in the menu on the left, expand the Use with Foundry node and click on either:
- The Foundry node for the Foundry option
- The Azure OpenAI node for the OpenAI-only options
Either choice will open a page on the right. On that new page, click on the +Create menu choice at the left end of the menu running across the top of the page. That will start the wizard that will create your Azure resource.
If you opened this page from the Foundry node, you’ll start the wizard for creating your Foundry resource.
If you opened this page from the OpenAI node, you’ll get a dropdown list with two choices: OpenAI and Microsoft Foundry. This is, effectively, your last chance to switch to the Foundry option instead of OpenAI-only. Pick the OpenAI choice to open the wizard for creating an OpenAI-only resource.
Regardless of which wizard you’ve invoked, on the wizard’s first page you’ll need to provide a resource group, a name for your resource and a region for your LLM to run in. In addition, on the first page:
- For a Foundry resource, you’ll need to provide a default project name
- For an Azure OpenAI resource, you’ll need to select a pricing tier
After that, it’s just a matter of “Next”ing your way through the rest of the wizard’s tabs.
Setting Network Access
Both the Foundry and OpenAI-only wizards include a Network tab to control access to your resource. You have three choices on the Network tab:
- All networks: Gives access to your resource from anywhere
- Selected networks: Limits access to a subnet on a specific Azure virtual network, plus a list of IP addresses (e.g., your development computer)
- Disabled: Allows access only through a private endpoint on an Azure virtual network
You would use the last two options if you were going to run your application on a VM on a virtual network or in an App Service. You don’t need to use the network choices to control access to your resource. You could control access to your LLM just through the resource’s Access Control/IAM roles, for example, or your application’s built-in security. However, for a production application, you should always lean toward more control rather than less and pick whichever of these options that makes sense for limiting network access to your resource.
Setting Foundry Option
The Foundry wizard includes three additional tabs that the OpenAI wizard does not:
- Storage: This tab provides access to multiple additional Azure resources. You can:
» Tie your resource to an Azure Key Vault where you can store passwords or other credentials that agents in your resource will need
» Turn on Application Insights to log activities in your resource
» Tie in an AI Search agent that your resource can access when processing requests
» Add a Storage account to hold uploaded files
» Integrate a CosmosDB account to hold conversation history. - Identity: Assign a Managed Identity to your resource to support agents that access other Azure resources
- Encryption: Use your own encryption keys for any data stored by your resource
For a proof-of-concept project, you can take the defaults on all these tabs.
Both wizards finish with the standard Tags tab and Review-and-create tab. When you get to that last tab, click the Create button to create your resource.
Selecting an LLM
Your application interacts with a deployed instance of some LLM so your next step is to create a deployment that uses one of the LLMs available to your resource.
To do that, navigate to your resource and, on the Overview page, click on the Go to Foundry portal link at the top of the page. This will open a new tab in your browser displaying the ai.azure.com portal. This is where you will select the LLM you’ll use in your deployment.
To create a deployment, on the Microsoft Foundry page for your resource, in the menu on the left, click on the Model catalog node. That will take you to a page where you can select your LLM.
A warning: Over and above whatever criteria you have for getting the right model for your application, selecting a model may require some trial-and-error poking around. That’s because:
- Some models are deprecated or may not be available for your resource (e.g., selecting a non-OpenAI LLM for an OpenAI-only resource).
- You may not be eligible for some models.
- Your subscription may not have the necessary resources to support a model.
- The model you select may not support the processing you want to implement.
Once you open the page listing available LLMs, if you got to the page from a:
- Foundry resource: You can browse the lists of LLMs from a variety of providers or you can search for an LLM using the search box just below those lists
- OpenAI resource: You can browse the list of OpenAI LLMs
When you select an LLM, Azure will display a page with high-level information about your LLM. For my case study, I created three deployments, one each for these three LLMs:
- gpt-5.2-chat LLM as an example of a Foundry resource
- gpt-5-chat LLM as an example of an Azure OpenAI-only resource
- text-embedding-3-large as an example of an LLM with specific features (I’ll use it in a later post on querying with Telerik AI connectors).
Creating a Deployment
To create your deployment, at the top of the page, click the button labeled “Use this model.” That will display a dialog where you can customize the LLM you’ve chosen, including giving your deployment a name (your deployment’s name will default to the name of your LLM). Click on the button at the bottom of the page labeled “Create resource and deploy” … and then be patient because this can take a moment.
After your deployment is created with your selected LLM:
- In a Foundry resource, you’ll be taken to the page describing your deployment.
- In an OpenAI-only resource, you’ll be taken to an Overview page. In the menu on the left, click on the Models + endpoints node to open a list of your deployments. Select the deployment you just created to be taken to the page describing your deployment.
Once you’re on your deployment’s page, you need three required pieces of information from the page to use in your application and one optional piece:
- Name: Displayed at the top of the page.
- Authentication information: Your deployment will default to Key authentication, which is fine for a proof-of-concept application (you can switch to Entra Id authentication for production, but the code to access your resource will get more complicated). Assuming that you stick with Key Authentication, copy the Key provided on this page.
- URL: At the top of your deployment’s page, find the Target Uri and copy the first segment of the URL provided (i.e., everything from the “https://” and up to, but not including, the first forward slash in the URL).
- Version: Depending on how you intend to use your LLM, you may not need this, but it does no harm to grab it now. Again, the easiest place to get this is from the sample code. Look for the string put in the variable called api-version (it will look like a date, e.g., “2025-12-01”).
Returning to Your Deployment
To return to your resource or your model, first surf to ai.azure.com and sign in. This portal is, currently, in the process of migrating to a new UI, so:
- If you get the “old” UI then, you may get a list of Foundry and Open AI resources. If so, pick the resource you want to go to the resource’s page. On the other hand, you may just be taken directly to one of your resources. Either way, in the menu on the left, select the Models + endpoints node to see a list of your deployments.
- If you don’t get that list of your resources … well, then you’re probably in the new UI and, at this point, I’d recommend using the toggle at the top of the page to return to the old UI so you can follow along.
You have more to do to create your own custom RAG-enabled AI agent (load your own content, for example). But if all you want is an application that integrates an AI prompt, you’ve done everything you need to support that. You just need to create a frontend that lets the user query your LLM’s deployment. The Telerik AI Prompt will let you do that with minimum effort. I’ll cover that after showing how to set up the client-side option with Ollama.
Setting Up Ollama
To implement the client-side option, you first need to download Ollama and install it. To confirm that Ollama installed successfully, open a command window and enter ollama. You should get back a list of Ollama commands.
You next need to add the LLM you want to use to Ollama. To do that, open a command window and use Ollama’s pull command to install one of the LLMs from the Ollama registry. This command installs OpenAI’s gpt-oss LLM:
ollama pull gpt-oss
After using the pull command, you can use Ollama’s list command (which displays the installed LLMs) to confirm your installation.
The Ollama server should start automatically after installation (and after every reboot) and should be listening on port 11434 on localhost. You can confirm that by using Ollama’s serve command. If server isn’t running, it will start and report the address the server is listening on. If the server is already running, you’ll get an error message that includes address that Ollama is listening on.
Make a note of the address (probably http://localhost:11434) and the name of the LLM you installed—you’ll need both in your code.
I’m building up to a creating a custom AI agent over this series of posts. But, at this point, you’ve done everything you need to create an application with an AI prompt—it’s just a matter of adding a frontend to your LLM.
Adding a Front End
In my next posts, I’ll use Telerik Document Processing Library tools to create applications that allow users to apply AI to documents. However, once you’ve created an LLM deployment, you can tie that deployment into your application’s UI with a few lines of code in your application’s Program.cs file and then query your LLM through the Telerik AI Prompt component in your application’s UI.
To do that in a .NET 8 or later application, you first need to add the Microsoft.Extensions.AI.OpenAI NuGet package to your application. After that, you need to tie your model into your application by adding the following code to your application’s Program.cs file, inserting the information about your LLM that you gathered from your deployment’s information page.
For either of my Foundry or OpenAI-only options that code looks like this:
builder.Services.AddSingleton(new AzureOpenAIClient(
     new Uri(“<url>”),
     new AzureKeyCredential(“<key>”)
 ));
builder.Services.AddChatClient(services =>
         services.GetRequiredService<AzureOpenAIClient>()
            .GetChatClient(<deployment name>).AsIChatClient());
For Ollama, in addition to adding the Microsoft.Extensions.AI.OpenAI NuGet package, you’ll also need to add the OllamaSharp and Microsoft.SemanticKernel.Connectors.Ollama packages. After that, this single line of code will integrate Ollama into your application:
builder.Services.AddSingleton<IChatClient>(
    sp => new OllamaApiClient("<Ollama address>", "<model name>")
);
Your last step is to add the Telerik AIPrompt to your application’s UI (available in JavaScript for Kendo UI, Blazor, ASP.NET AJAX, WinForms and .NET MAUI). That can be as simple as this in an application that supports Razor (e.g., ASP.NET or Blazor):
<TelerikAIPrompt/>
And that would give you this UI:
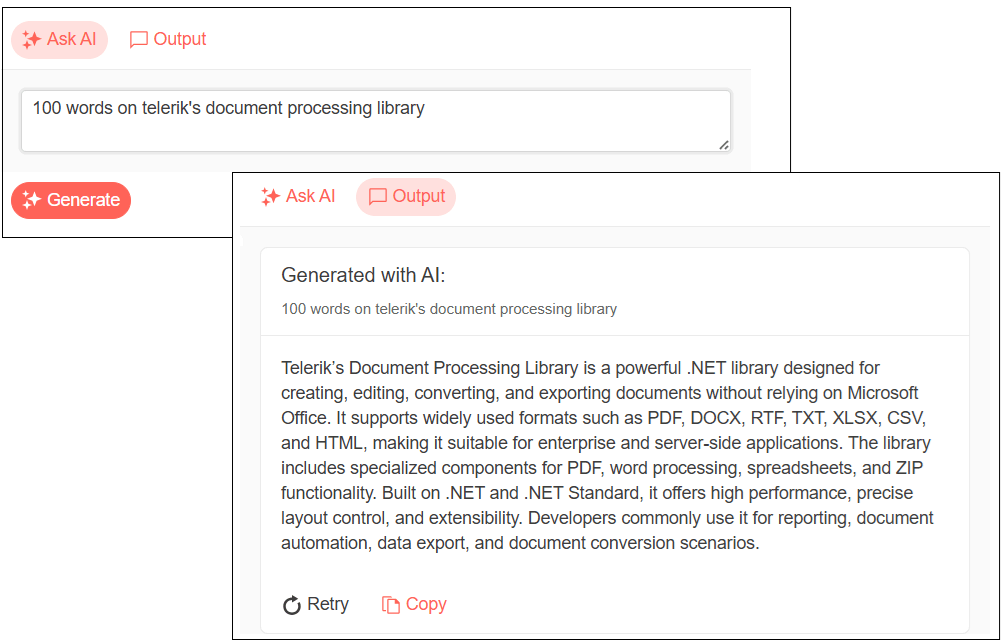
In a JavaScript application, you’ll need to add a <div> element, set the element’s id attribute, and write a couple lines of JavaScript code. I’ll cover that in a later post in this series.
You can now start your application, enter a prompt into the AIPrompt component (e.g., “Tell me about RAG-enabled AI applications”) and get a response.
There’s obviously far more that you can do with the AI Prompt … and I’ll return to that after my next post. Before that, however, I’m going to roll in Telerik Document Processing Library to let you load the content for your custom AI agent. Read Part 2!
Explore Telerik Document Processing Libraries, plus component libraries, reporting and more with a free trial of the Telerik DevCraft bundle:

Peter Vogel
Peter Vogel is both the author of the Coding Azure series and the instructor for Coding Azure in the Classroom. Peter’s company provides full-stack development from UX design through object modeling to database design. Peter holds multiple certifications in Azure administration, architecture, development and security and is a Microsoft Certified Trainer.
Related Posts
Comments
All articles
Topics
Web MobileMobile
Desktop
Design
Productivity
People
