WinForms Conference Buddy – Creating the Shell
Summarize with AI:
I’m just starting out in my new role at Telerik, and it's a thrill to be able to use these fabulous tools! My first task is to become familiar with the AMAZING products available in the DevCraft bundle. I'm completely blown away by the value - go and check it out for yourself!
I decided to piggy-back on the ideas of my co-workers to develop the Conference Buddy application. I'm going to shadow them and implement a version of this client using Windows Forms. This application is meant to make an Evangelists life easier when attending events, allowing us to quickly take down people’s information, inquiries, and best of all enter them in the raffle for the conference. If you don’t already have Telerik RadControls for WinForms installed you can download a free trial.
I sketched out on paper my vision for this application. Please note the design of the application is strictly my own, and I’m sure could be much better, or much worse – anyway, here is what I came up with. Please note that the layout and contents is subject to change throughout the implementation of the application.
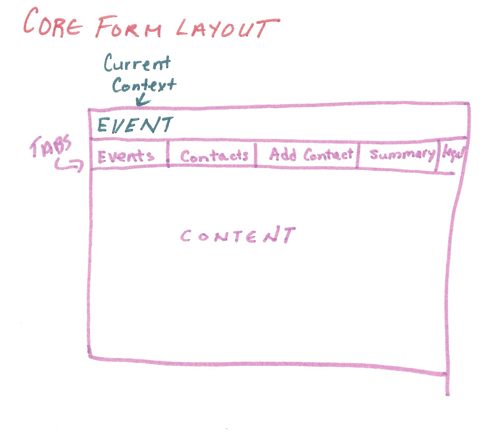
The goal of the application is to allow an Evangelist the ability to collect information from attendees at various events. It needs to work disconnected from the internet, thus must store information locally, this data will be stored in JSON format. This information will at some point be uploaded and aggregated into a central server of some type. The Evangelist will be working at only one event at a time, though may travel and gather information for multiple events prior to shipping the information back to the server. The shell of the application will display the Event Name that the Evangelist is attending prominently at the top of the screen, indicated by the Current Context in the sketch above. The Events tab will allow the user to switch to another event. The remaining tabs, View Contacts, Add Contact, Summary and Legal will display information relative to the Event displayed in the Current Context.
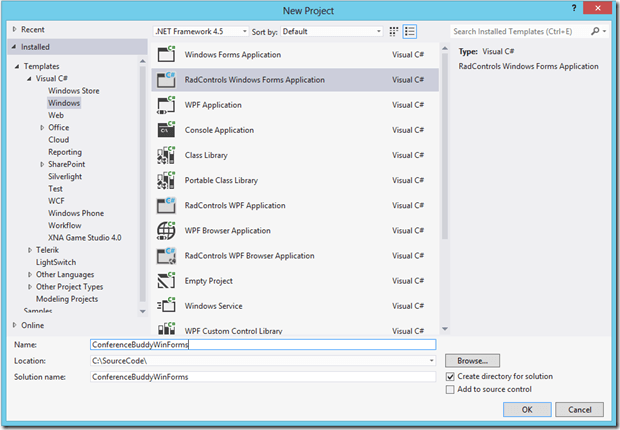
The first thing we want to do is to create the project. Do this by creating a new Visual C# RadControls Windows Forms Application, name the application “ConferenceBuddyWinForms” as shown in the dialog below.
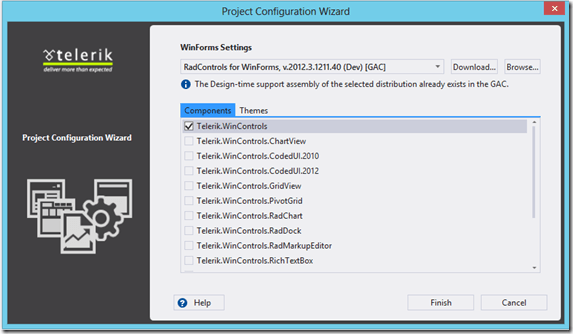
The RadControls Windows Forms Application project type then provides a handy Project Configuration Wizard that allows you to add references quickly and easily. For this example, we will check the Telerik.WinControls checkbox.
Once the project is successfully created, feel free to delete the default Form1.cs form. Now it’s time to start putting together our application. In your solution, add a new item, a Telerik RadForm and name it CoreForm. We now need to edit Program.cs to ensure that this form is the startup form for the application (see line 5 below).
1: static void Main()
2: {
3: Application.EnableVisualStyles();
4: Application.SetCompatibleTextRenderingDefault(false);
5: Application.Run(new CoreForm());
6: }
| Text | Conference Buddy |
| Size.Width | 800 |
| Size.Height | 600 |
1: private void CoreForm_Load(object sender, EventArgs e)
2: {
3: ThemeResolutionService.ApplicationThemeName = "Desert";
4: }
Alternatively, when in the Project Configuration Wizard, we could have added the theme by selecting the Theme tab and checking the Desert theme checkbox. Then we can avoid using the toolbox for the theme altogether and simply created an instance of the theme in our form Load event, it would look like the following:
1: private void CoreForm_Load(object sender, EventArgs e)
2: {
3: Telerik.WinControls.Themes.DesertTheme appTheme = new Telerik.WinControls.Themes.DesertTheme();
4: ThemeResolutionService.ApplicationThemeName = "Desert";
5: }
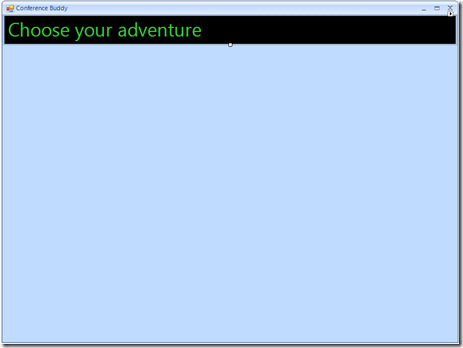
| BackColor | Black |
| Font.Size | 25 |
| ForeColor | LimeGreen |
| Text | Choose your adventure |
| Dock | Top |
| Size.Height | 50 |
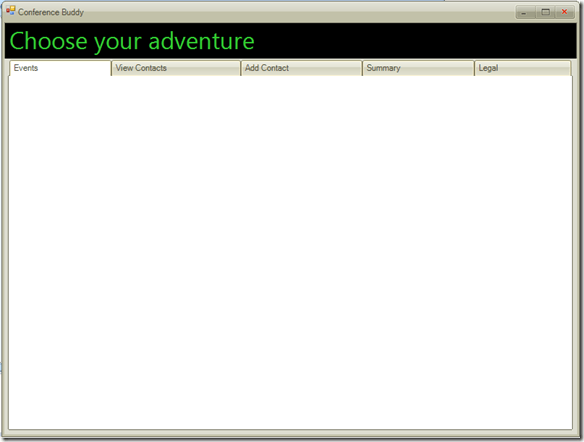
| Item Fit Mode | Fill |
| Strip Buttons | None |
| Name Property | Text Property |
| pageEvents | Events |
| pageViewContacts | View Contacts |
| pageAddContact | Add Contact |
| pageSummary | Summary |
| pageLegal | Legal |
This is the first post in a series that will be implementing the Conference Buddy using Windows Forms, through this series you will see design decisions being made, changes being required, we are blogging about our development every step of the way. This post has provided the launching point for implementing more functionality in the Conference Buddy, subsequent posts will deal with more advanced implementation details. The next post will deal with consuming JSON data in order to load and display Event data from the file system.
The video below walks you through the creation of the basic shell of the application using the RadPanel and RadPageView WinForms controls to easily achieve the look I was going for as outlined in this blog post. Enjoy!

Carey Payette
Carey Payette is a Senior Software Engineer with Trillium Innovations (a Solliance partner), an ASPInsider, a Progress Ninja, a Microsoft Certified Trainer and a Microsoft Azure MVP. Her primary focus is cloud integration and deployment for the web, mobile, big data, AI, machine learning and IoT spaces. Always eager to learn, she regularly tinkers with various sensors, microcontrollers, programming languages and frameworks. Carey is also a wife and mom to three fabulous boys.


