
Populating the WinForms RadGridView with Data in Unbound Mode

Summarize with AI:
Need to add data to your grid without a mapped source? Telerik UI for WinForms lets you use unbound mode for such cases, so you can add rows programmatically. Learn how!
There are different scenarios in which developers don’t want to directly map a source collection to the grid control. In such cases, it is suitable to use unbound mode for populating RadGridView with data.
When using unbound mode, RadGridView in Progress Telerik UI for WinForms supports adding rows programmatically according to the defined columns. Thus, it is possible to specify a value for each cell and store the suitable data type.
Depending on the data type that will be stored, RadGridView offers different data columns.
Adding Columns at Design Time
After selecting the RadGridView control in the designer, click the small arrow at the top right corner to open the Smart Tag:
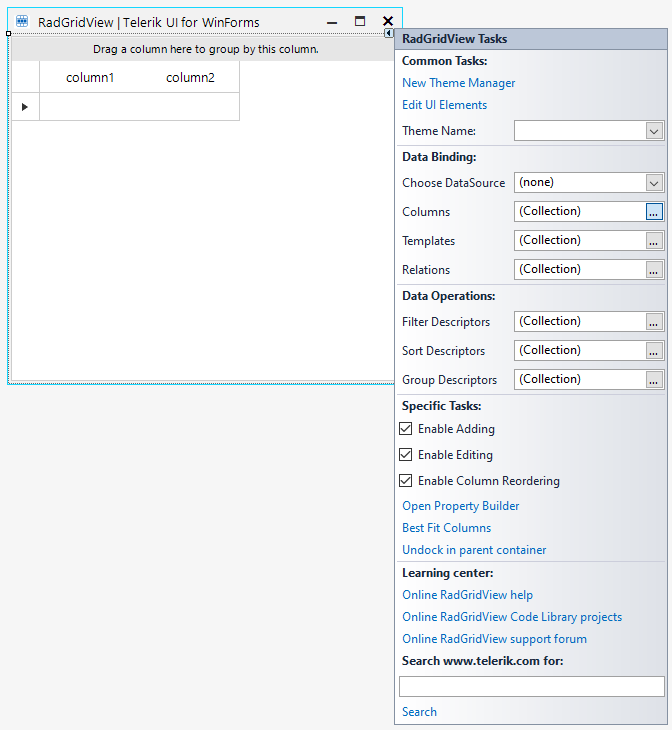
The Columns browse button opens the GridViewDataColumn Collection Editor
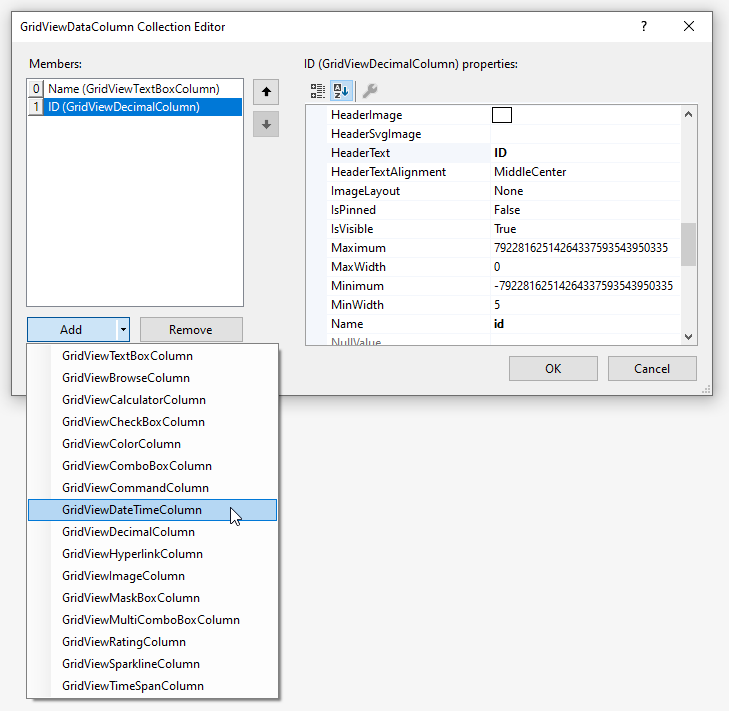
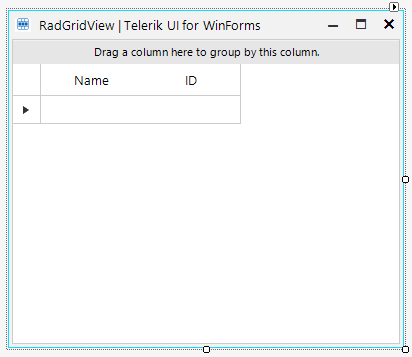
It allows you to add the types of columns required by the specific scenario. Once you are done with adding the columns, click the OK button and the grid will be filled with the columns from the collection editor:
Adding Columns at Run Time
We will get started with defining columns for managing DateTime, decimal, string and image values. For this purpose, we will use a GridViewDateTimeColumn, GridViewDecimalColumn, GridViewTextBoxColumn, GridViewImageColumn and GridViewBrowseColumn. Then, several rows will be added and populated with the appropriate data.
The browse column will be used for uploading an image to the respective column. The whole logic is performed in the CellValueChanged event when a valid file path is selected in the browse cell:
public UnboundForm()
        {
            InitializeComponent();

            this.radGridView1.TableElement.RowHeight = 40;
            this.radGridView1.AutoSizeRows = true;

            GridViewDateTimeColumn dateColumn = new GridViewDateTimeColumn("OrderDate");
            dateColumn.FormatString = "{0:dd/MM/yyyy}"; //format the cell's text
            dateColumn.Format = DateTimePickerFormat.Custom;
            dateColumn.CustomFormat = "dd/MM/yyyy"; //format the cell's editor
            dateColumn.Width = 200;
            this.radGridView1.Columns.Add(dateColumn);

            GridViewDecimalColumn priceColumn = new GridViewDecimalColumn("Price");
            priceColumn.HeaderText = "Unit Price";
            priceColumn.DecimalPlaces = 2;
            priceColumn.FormatString = "{0:C}";
            priceColumn.FormatInfo = new System.Globalization.CultureInfo("en-GB");
            priceColumn.Width = 100;
            radGridView1.MasterTemplate.Columns.Add(priceColumn);

            GridViewTextBoxColumn textBoxColumn = new GridViewTextBoxColumn("ProductName");
            textBoxColumn.MaxLength = 50;
            textBoxColumn.Width = 150;
            textBoxColumn.TextAlignment = ContentAlignment.MiddleCenter;
            radGridView1.MasterTemplate.Columns.Add(textBoxColumn);

            GridViewImageColumn imageColumn = new GridViewImageColumn("Photo");
            imageColumn.Width = 100;
            imageColumn.ImageLayout = ImageLayout.Zoom;
            radGridView1.MasterTemplate.Columns.Add(imageColumn);

            GridViewBrowseColumn browseColumn = new GridViewBrowseColumn("Upload photo");
            browseColumn.Width = 300;
            this.radGridView1.Columns.Add(browseColumn);

            this.radGridView1.CellValueChanged += RadGridView1_CellValueChanged;
            this.radGridView1.ValueChanged += RadGridView1_ValueChanged;

            this.radGridView1.Rows.Add(new DateTime(2023, 3,20),20.49, "Banana");

            this.radGridView1.TableElement.RowHeight = 50;


        }

        private void RadGridView1_ValueChanged(object sender, EventArgs e)
        {
            GridBrowseEditor browseEditor = sender as GridBrowseEditor;
            if (browseEditor!=null && browseEditor.Value!=null)
            {
                this.radGridView1.EndEdit();
                //commit the value directly after selecting a new image file
            }
        }

        private void RadGridView1_CellValueChanged(object sender, GridViewCellEventArgs e)
        {
            if (e.Column.Name == "Upload photo" && e.Value != null)
            {
                e.Row.Cells["Photo"].Value = Image.FromFile(e.Value.ToString());
            }
        }
Adding Rows at Run Time
The above example adds only one row to the grid. If we increase the number of added rows, e.g., 100, we expect to notice some delay when the add operation is being executed. Adding each row triggers a refresh operation of the visual elements. Hence, the more rows are added, the more refresh operations are being performed.
Important: The BeginUpdate and EndUpdate structure suspends all visual updates and allows you to boost the performance when you add numerous rows to the RadGridView.Rows collection:
private void radButton1_Click(object sender, EventArgs e)
        {
            AddRows(this.radCheckBox1.Checked);
        }

        private void AddRows(bool isSuspended)
        {
            Stopwatch sw = new Stopwatch();
            sw.Start();
            int n = 100;
            if (isSuspended)
            {
                this.radGridView1.BeginUpdate();
            }
            int startIndex = this.radGridView1.Rows.Count;
            for (int i = startIndex; i < startIndex+ n; i++)
            {
                this.radGridView1.Rows.Add(DateTime.Now.AddHours(i), i * 0.25, i + ". "  + Guid.NewGuid()); ;
            }
            if (isSuspended)
            {
                this.radGridView1.EndUpdate();
            }

            sw.Stop();
            RadMessageBox.Show(this.radGridView1,"Adding " + n + " rows took " + sw.ElapsedMilliseconds.ToString() + " milliseconds");
        }
The following animation illustrates in a better way the difference:
Sign up for a Trial
Feel free to sign up for our free 30-day trial, which gives you access to the components as well as our outstanding technical support at zero cost. Just head to the Telerik UI for WinForms overview page or click the button below to sign up for a trial today!
Time For Feedback
Oh, and one more thing. We would be more than happy to hear your thoughts and suggestions once you try the theme and the other release goodies, so please drop us a line in the comments section below or by visiting the Telerik UI for WinForms Feedback Portal.
Want to see how to populate via bound mode? Read How to Populate the WinForms RadGridView with Data in Bound Mode next.

Desislava Yordanova
Desislava Yordanova is a proactive ambassador of diligent processes and a customer-caring professional. Currently, she is a Technical Support Engineer, Principal in the Document Processing team after a successful journey in the Telerik UI for WinForms team. She joined the company in 2013. Desislava holds a master’s degree in Computer Systems and Technologies from the Technical University in Sofia. Apart from her job, she is keen on snowboarding and travelling. You can find Desislava on LinkedIn.
Related Posts
Comments
All articles
Topics
Web MobileMobile
Desktop
Design
Productivity
People
