Next-Level React Performance

Summarize with AI:
We're going to learn some techniques and APIs to improve user experience and remove performance problems to take our React apps to the next level.
In this article, we’re going to learn more about how to achieve a great performance in our React applications using some techniques and tricks to get a better application, improving our UX and performance in general, and making our users happier. Achieving a better performance in our application will result in more leads, higher conversion rates, better UX, etc.
So many years of web development, things are getting better every year, new languages getting launched, frameworks, libraries, open-source projects, etc., and one of the most renegade topics in React still is performance. How do I achieve a great performance in my React application? What metrics should I pay attention to? How is the usability affected by my problems, and how can I solve them?
Performance is an important topic in web development nowadays, but we don’t have enough people talking about it. So, let’s dive deep into how we can improve our performance all over our application.
Performance Matters
One of the most painful points for developers is the performance of their apps and the way they see their performance and how they can improve it. Most of the time, we don’t know exactly how to improve our applications and code, and what metrics we should pay attention to in order to understand the problem that we’re facing and the best solutions to it. Sometimes this can lead us to more serious problems like:
- We start to make our app performance a second priority, thinking we’ll fix it later. But sometimes we don’t fix it at all, or act as if we fixed it—poorly—but we insist that we fixed it.
- We try to fix and create some other problems we don’t see at first that will have a huge impact on the future, and which can make the previous performance error that we’re trying to fix even worse.
- We can create a false feeling of safety that our application is running fine and the performance is awesome by reading our metrics wrong and not understanding what and where exactly an error is and how to fix it.
By having these three points, the effects on your application will be awful. A pretty slow application, a worse UX, your user will leave your page as soon it renders for them—your page will take so long to render that they’ll leave right away, etc. This is one of the problems that you can imagine that might occur—or it’s occurring right now—in your application if you don’t have a real performance culture. By performance culture, I mean watching carefully every piece of your application, and the code you put there, to understand deeply how it’ll affect your application now and in the future.
So, now that we know one of the various effects that bad performance can have in our application, will see more how we can improve it by using some concepts and techniques that we have now available to us.
Concepts
All the points that I’m going to write about here are related to React. By doing them right, you’ll achieve a whole new level of performance in your application.
Profiling
One of the most useful extensions that you need to have in your browser is React DevTools. This extension allows you to inspect your React components directly in your browser and check what’s been passing as a prop, what functions have been called, when your application is rendering exactly, etc.
Since the React 16.5 version, we’ve had support for the DevTools Profiler plugin, which means that we can now have more detailed information about how our components are rendering to identify and address performance bottlenecks.
First, you need to run your React application and then go to the React DevTools. Inside the React DevTools, you’ll have two options: Elements, which will show you your React elements tree, and Profiler, the plugin that we’re going to use. Go to Profiler, and now all you need to do is to click on the button to start to record your application.
Now, every time your application renders, you’ll get something similar to this:

With the Profiler plugin, you can see how many times a particular component rendered while you were profiling, which components took the longest to render, why a component actually rendered, etc. By doing this, you’ll get information every time your application renders and a pretty detailed resume of what’s going on deep inside your React application, how it’s rendering your components, and you may discover some slow components and other issues.
React.PureComponent
An easy and powerful way that you can guarantee that your component isn’t going to re-render unnecessarily is using PureComponent. By using PureComponent in your application, you’ll increase the performance and reduce the number of render operations in the application.
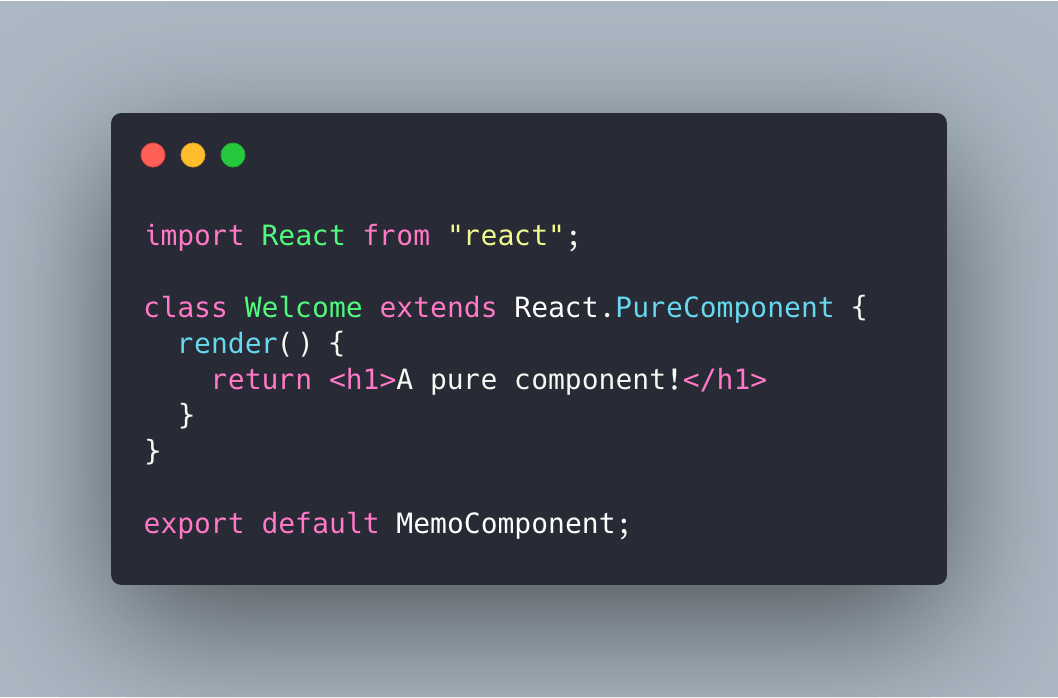
This is how the React.PureComponent works: It changes the shouldComponentUpdate life-cycle method, giving it the power to automatically check whether a re-render is required. So with that the React.PureComponent will call the method render only if it detects changes in state or props.
React.memo
Along the way in React history, it has had some important versions that introduced a lot of awesome new features that we gladly started including in our applications. One of the most important React versions of all time was 16.6, released in October 2018. It introduced us to a lot of awesome new features such as Lazy Loading, contextType, and memo.
React.memo is a way that you can guarantee that your component is not re-rendering when props don’t change.
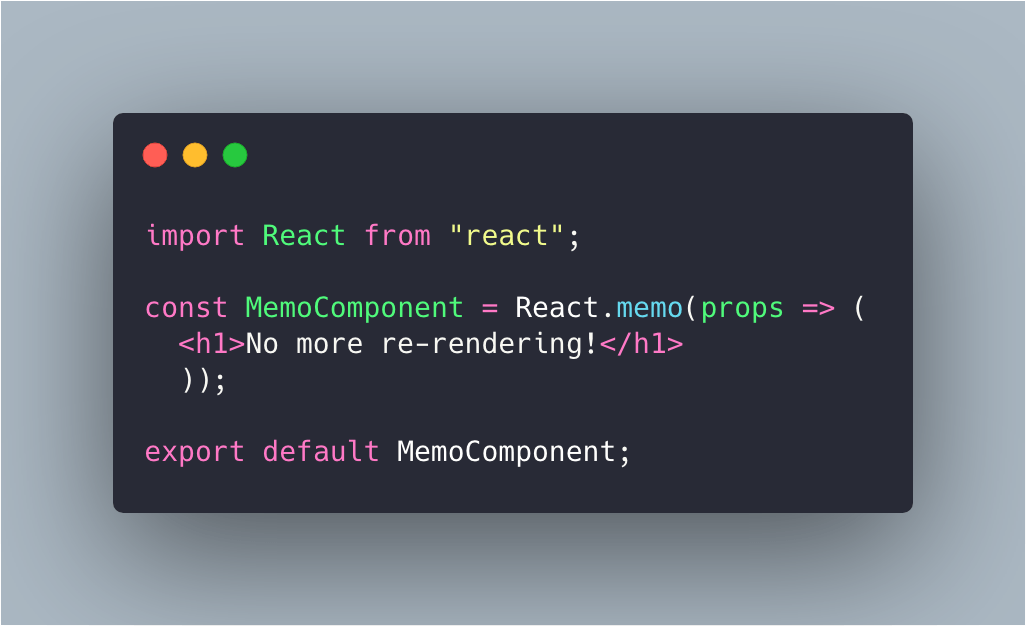
It’s similar to React.PureComponent, but it’s for function components. With it, you can now have a purely functional component in your application, removing the unnecessary updates that might occur on a daily basis in your code.
Memoize
To have a great performance in your application, an important technique that you must implement is memoization. But what is memoization exactly?
Memoization is a technique that we implement in our components and functions by storing the results of a function or component, and it returns a cached result. That means that, given the same input, we’ll have the same output. It’s basically pure functions, and in our case pure React components.
A way that we can have memoization in our applications is using the React.memo API that we discussed previously. Also, we can use the React.PureComponent to have the same behavior in class components. Memoization may seem great, but it comes with a cost. It trades memory space for speed—it will go unnoticed in low-memory functions, but you will see it in great effect in high-memory functions.
Virtualization
Every app nowadays has a list of data to display to the users. Some apps have a huge list of data, some have less data to display, but the fact is that lists are one of the best ways to display data. But we don’t always know how large of a data list we’ll have when we first start, and before we know it, the list grows to a considerable size and starts to slow down our entire app.
A way that we can render large lists of data in our React apps is using the technique of virtualization. Basically, virtualization is a technique that, when we have a large list of data, it’ll only render the elements that are visible on the screen. This technique is very powerful and makes a lot of sense—there’s no need to render all the elements in a specific list if they’re not yet visible to the user.
One of the best libraries to use is React Virtualized. By using this library, you’ll have a virtualized list of data, increasing the performance of your app, removing complexity without compromising the performance on the user’s side.
Code Splitting & Lazy Loading
As we learned before, one of the most important versions of React was 16.6 because it introduced to us a lot of new APIs that can help us improve the performance in our applications.
Code-splitting basically means that we’re going to “lazy-load” just the things that the user will need. Doing so, we can increase the performance of our application by removing the necessity of loading a ton of unnecessary code. And what about lazy loading?
Lazy loading is essentially the way we can render components lazily through code splitting—rendering only the most important elements at first, then the less important ones later.
At first in React, we didn’t have support for lazy loading, so we had to use some external libraries, such as react-loadable—which is a very nice library for lazy loading, but, since React 16.6, we have React.Suspense and React.lazy APIs to help us start to lazy load our applications.
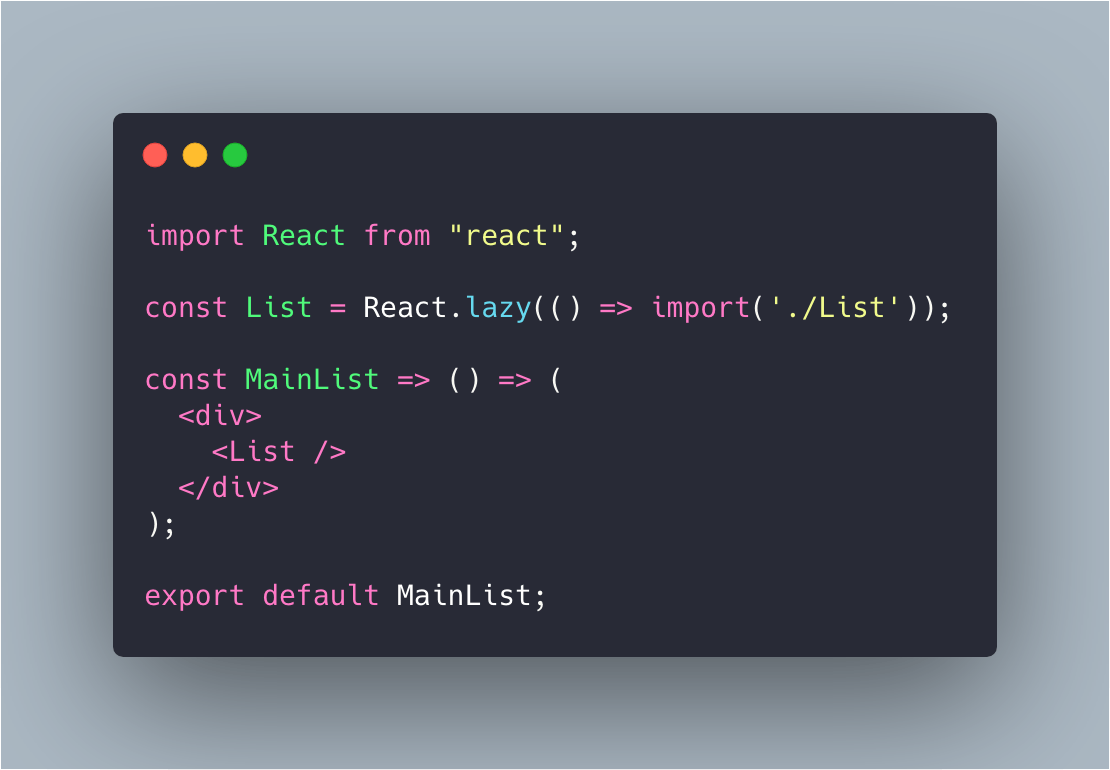
All we need to do to render a dynamic import as a regular component is pass React.lazy a function. Then it will load the bundle containing the specific components when this component gets rendered.
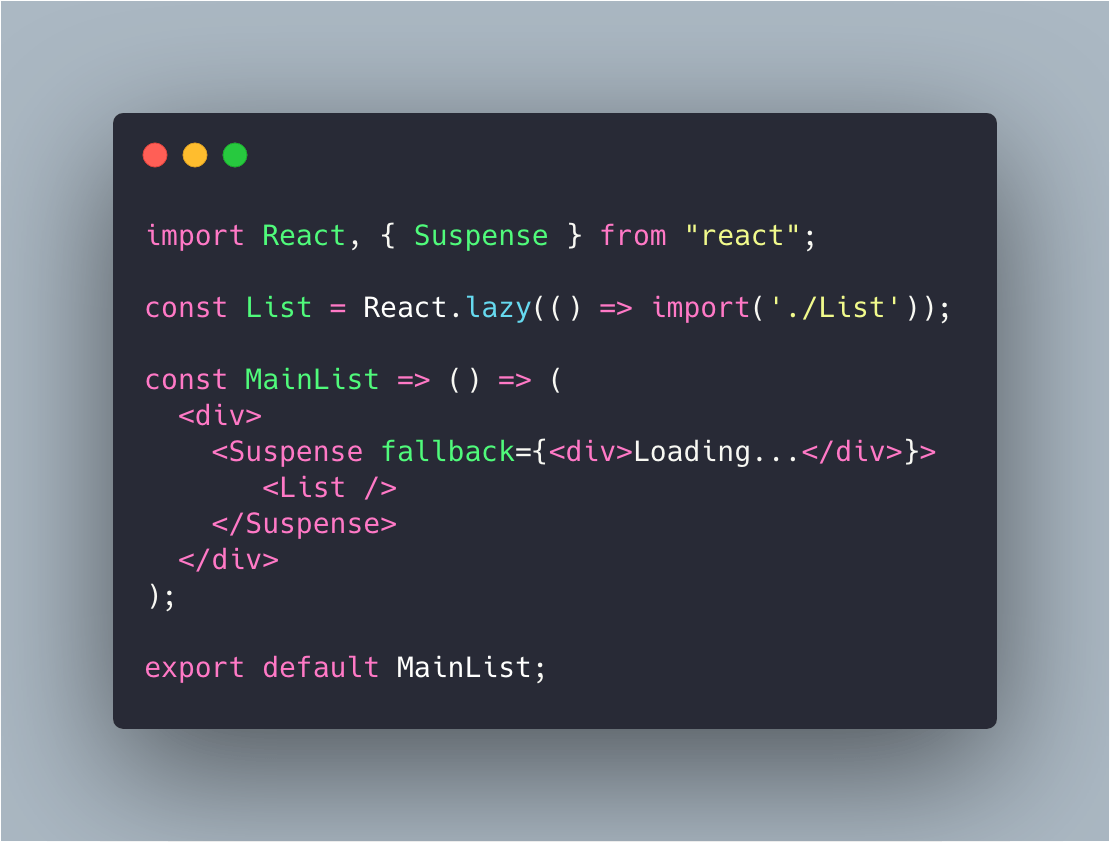
This is how this component works: If the List component is not rendered when the MainList gets rendered, it’ll show a fallback while we’re waiting for loading—in this case, the component that’s inside the Suspense component. With Suspense, there’s no more need to create fancy loading components with a ton of state login inside. All we need to do is import Suspense, then pass a loading component that we want, and let React handle things for us magically.
Fragments
A simple technique that can improve a lot in your application is Fragments. Sometimes in our applications, we don’t want to create a wrapper element, but we might feel obligated to, since there’s not an easy way to later. Fragments are not a new API—they were released in the 16.2 version—but it’s a very helpful way that we can create a new wrapper without creating a new DOM element.
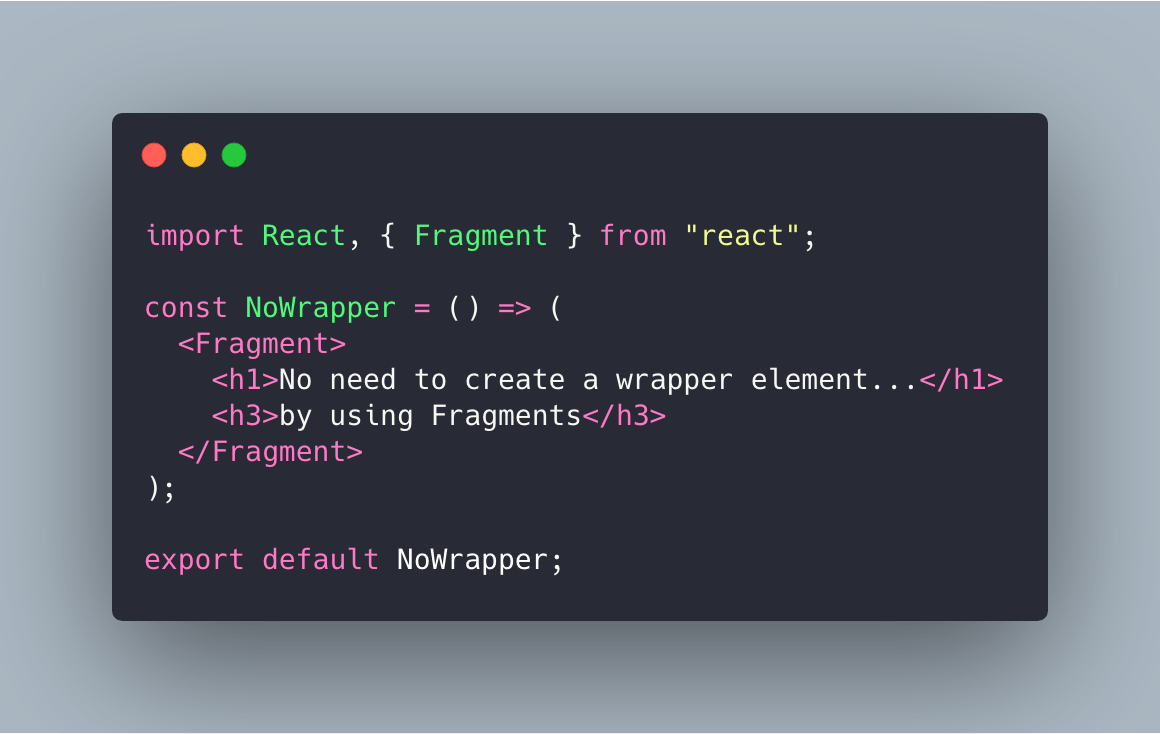
The benefits that we get from Fragments are numerous. They are way faster and use less memory because we’re not creating a new DOM element just to wrap some other elements. They increase the performance in some cases where we have very large element trees, the DOM inspector is less cluttered, etc.
You don’t need to start using Fragments everywhere in your application, but sometimes they’ll be very helpful for you and may improve the performance of your application.
Conclusion
In this article, we learned how we can achieve a whole new level of performance in our applications by using some of the techniques and concepts that React offers. We learned how we can use Profiling to troubleshoot some performance problems that we might face, how we can use Virtualization for a better rendering of large lists of data efficiently, etc. By applying those concepts and techniques in your application, you’ll have a better UX, you’ll raise your conversion rates and improve leads, and it’ll also become a practice that you’ll no longer want to live without—making you an even better developer.

Leonardo Maldonado
Leonardo is a full-stack developer, working with everything React-related, and loves to write about React and GraphQL to help developers. He also created the 33 JavaScript Concepts.
