
Getting Started with Xata: A Scalable Serverless Database

Summarize with AI:
In this article, we will describe how to get started with the Xata database and integrate it into an application. We will build a simple demo application showing how to perform the basic CRUD operations on our database.
Modern web development has become considerably complicated over the years, giving developers a lot to think about. However, the Jamstack approach of building web applications was introduced to restore simplicity and solve some common problems in modern web development.
Jamstack is often used to deliver fast and secure web applications to users while reducing the need to manage servers within the application. It aims to decouple the frontend and backend by outsourcing backend and database-bound tasks to third-party APIs and services.
Jamstack loses most of its advantages when used with traditional databases. This inspired the creation of Xata—a scalable serverless database delivered as a lightning-fast and highly available API that Jamstack websites can query from the client side or through serverless functions. With many incredible features built in, it provides a more powerful approach to building websites, making the lives of users and developers much easier.
In this article, we will go through how to get started with the Xata database. We will build a simple demo application to show how to perform the basic CRUD operations on our database.
What Is Xata?
Xata is a serverless database that combines the simplicity of a spreadsheet with a robust, globally distributed and infinitely scalable infrastructure. It is comparable to a serverless relational database, a search engine and an analytics engine combined, all hidden behind a single uniform API.
Xata uses a relational data model for data model representation, with support for JSON-like objects and a rigorous schema. Records are grouped into tables, which are further classified into databases.
The following are some of the advantages of Xata:
- Rich Data Types: Xata provides a much more user-friendly experience for interacting with our data. It supports strings, long text, integer numbers, decimal numbers, boolean, multiple select, date and email types. It also enables relationships between tables via the link type, similar to how foreign keys work in a relational database.
- Visual Schema Editor: Although Xata can be expressed as code in JSON, it is also manageable through a visual schema editor in the Xata Web UI.
- Support for Branching: Like branching works in Git, we can branch our Xata database, allowing for fast development while working independently in teams.
- Powerful Search: Xata allows the integration of a powerful search feature into our applications with just a few clicks.
- Integrations: Xata integrates seamlessly with other third-party services like Netlify, Vercel, Cloudflare, etc.
- Developer Experience: Xata can be interacted with in multiple ways, including the console, command line interface (CLI), its software development kits (SDKs) and REST APIs.
Xata offers a lot more benefits other than the ones highlighted above. You can click here for a complete list of what Xata offers.
Prerequisites
To follow along with this post, you need to have a basic understanding of React and Next.js.
Project Setup
Run the command below in your terminal to bootstrap a Next.js application.
npx create-next-app xata-demo
Creating a Xata Database
We need to check a few boxes before working with Xata. Before creating tables or databases or defining the data’s schema, we must create an account with Xata. Click here to register an account or log in if you already have one.
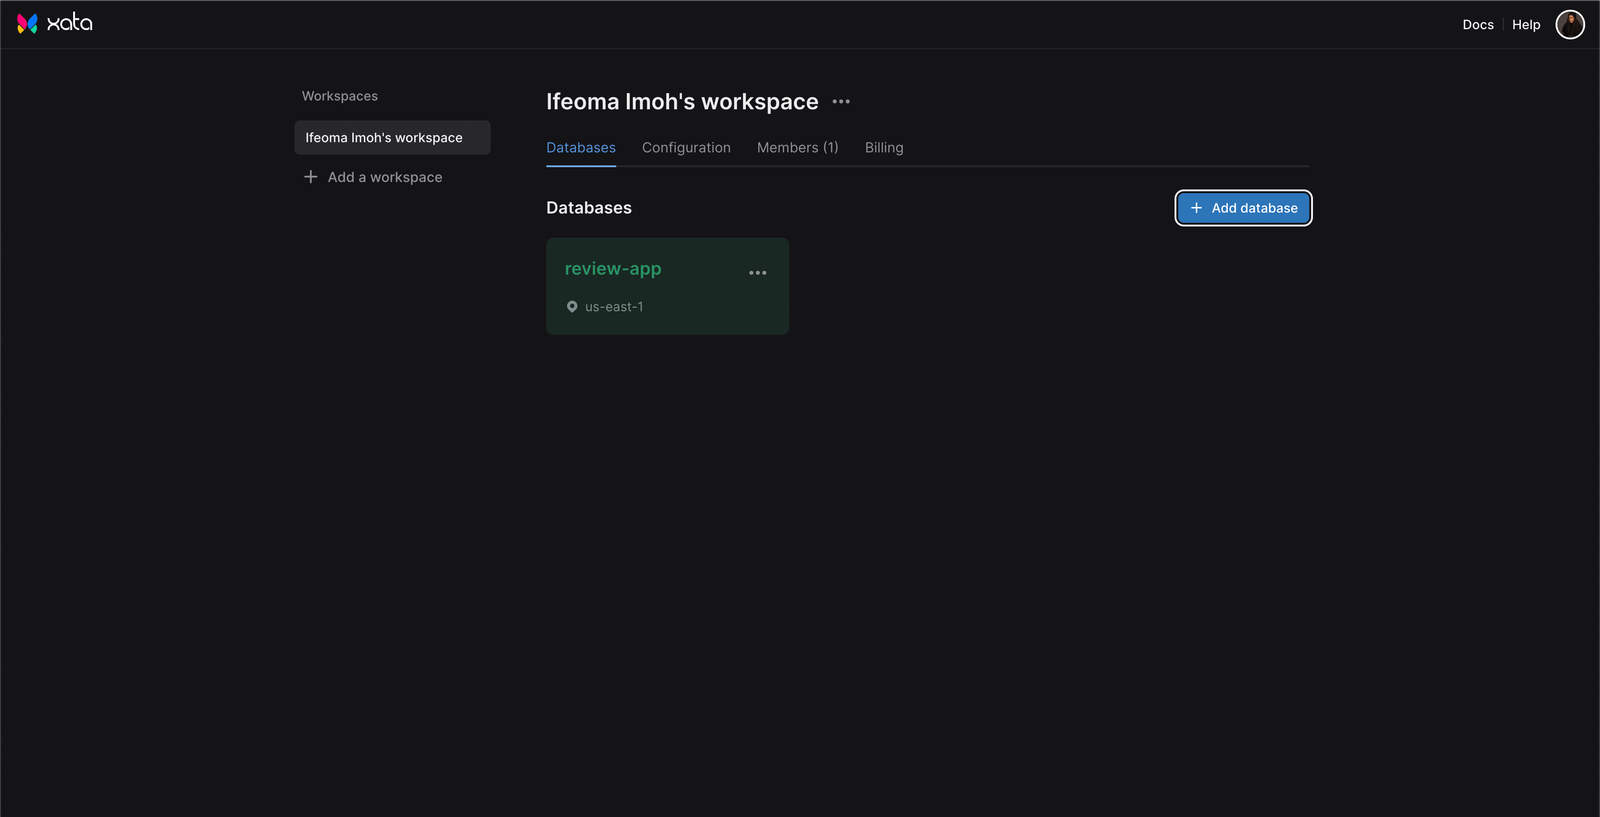
Following a successful onboarding process, the next step is to create a Xata workspace. Workspaces are like GitHub organizations, and they securely classify our data. Inside a workspace, we can have multiple databases. Create a workspace with a preferred name. You should see a screen like the one displayed below.

Click on the Add database button and enter “review-app” as the name of the database. You also need to select a zone from the three options provided and click the Create button.
Defining the Schema of the Database
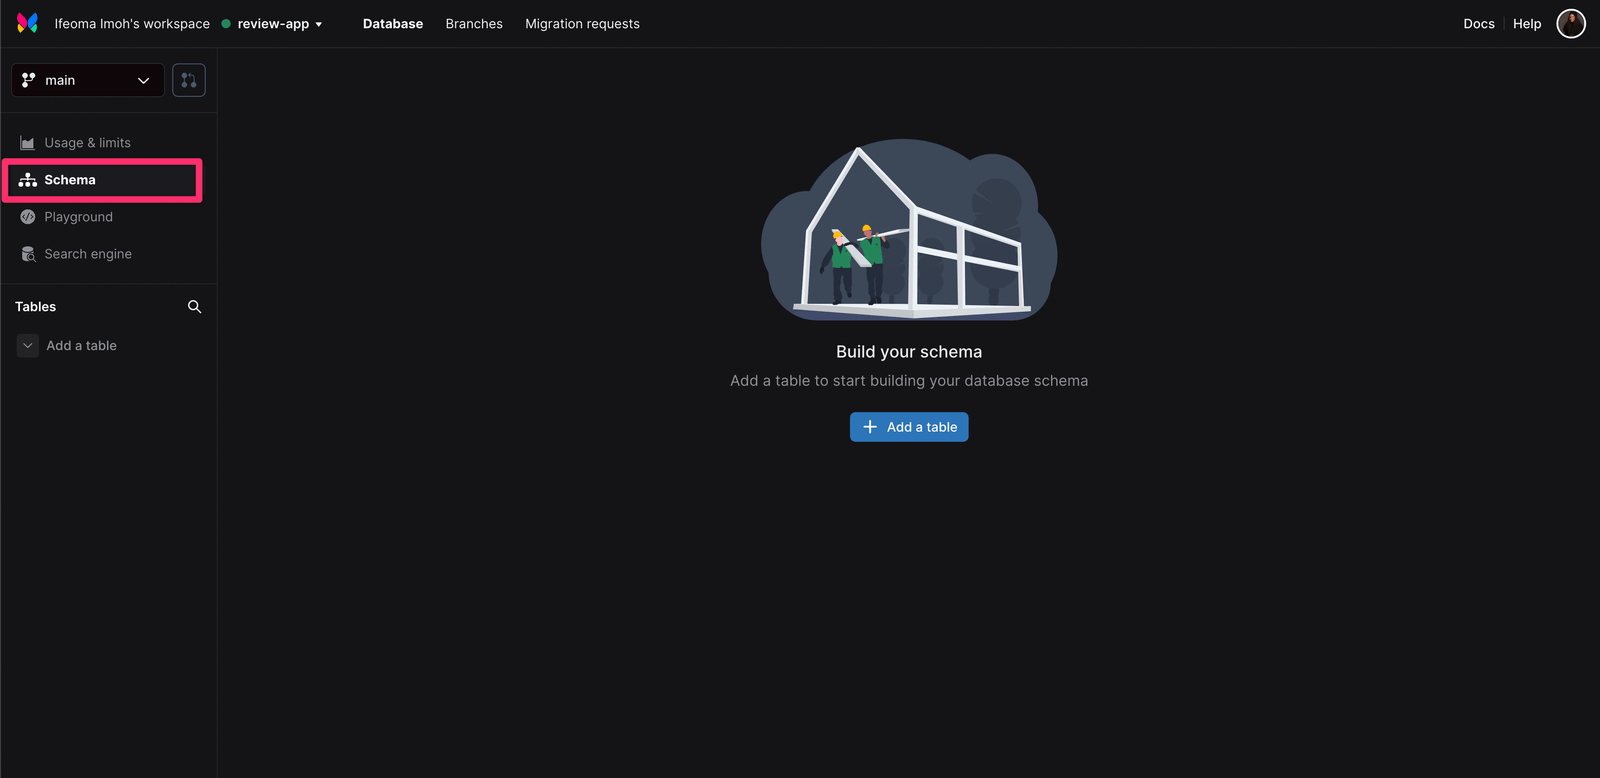
After creating our database, we need to define the structure of our data. Let’s create a reviews table to hold our review records. Click on the newly created database from the previous section, then click on Schema from the sidebar.
Click the Add a table button to create a reviews table. Add columns for the name and message fields, and set them to the type of String and Long text, respectively. We should also see an auto-generated id column added to the table by default.
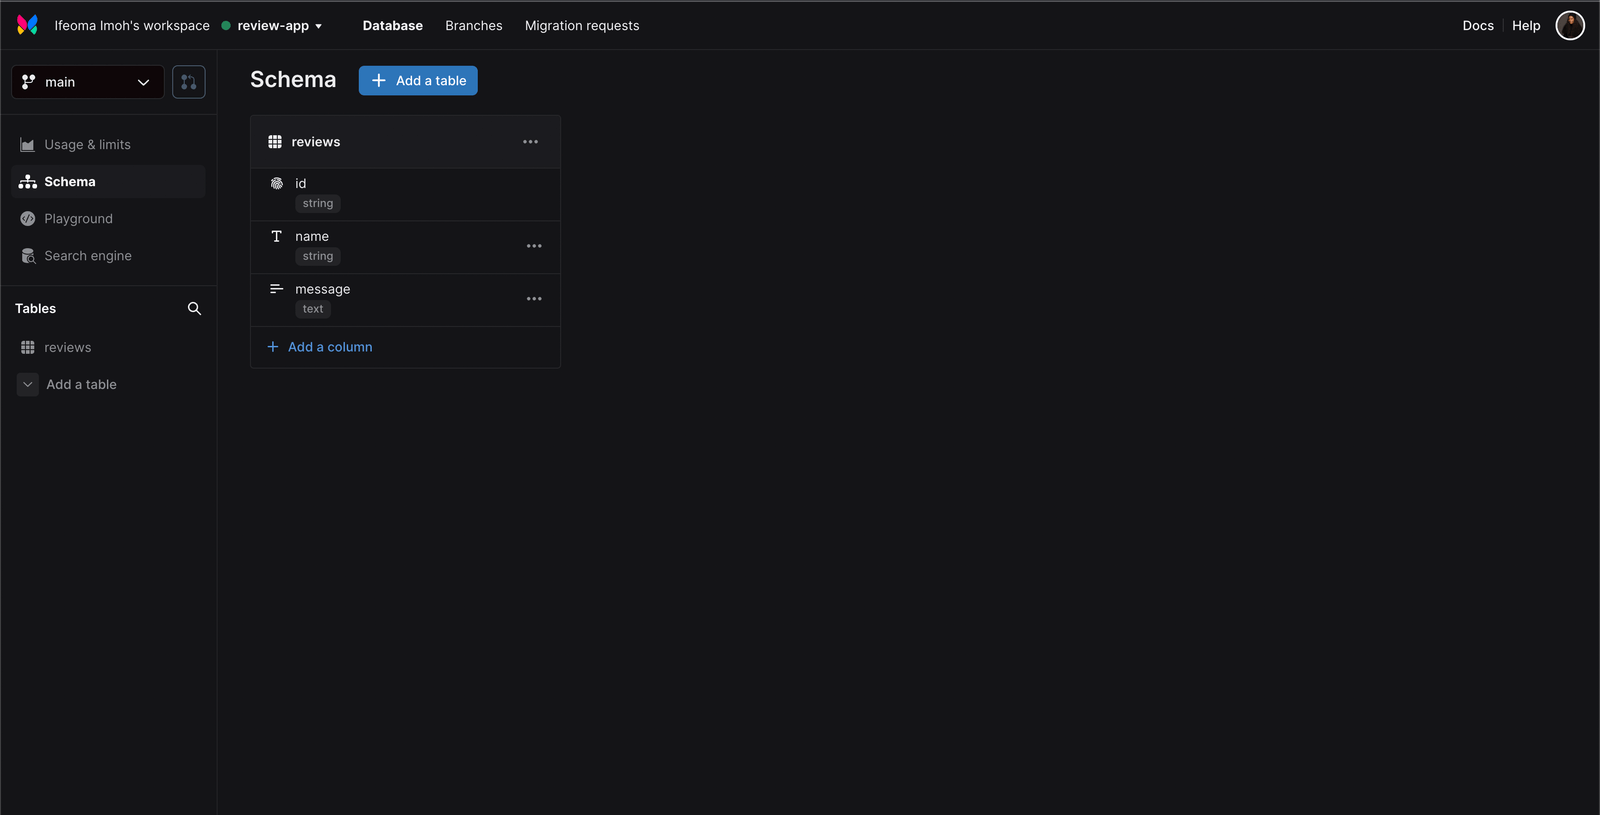
Click on reviews under the Tables section of the sidebar to see the UI that renders a list of records in the reviews table. Do not worry about initializing the table with some data. In the subsequent sections, we will see how to create and read records from our Next.js application.
Adding Xata to Our Application
With the database ready, we can integrate Xata into our application. As stated earlier, there are different ways we can communicate with Xata. In this article, we will use the Xata software development kit (SDK) to connect our Next.js application to Xata. To get started, we need to configure the SDK using the Xata command line interface (CLI).
Run the command below to install the Xata CLI globally:
npm i -g @xata.io/cli
Now, let’s log in to the CLI using the command below:
xata auth login
This should provide us with two options: to create a new API key by opening a browser or to paste in an existing one. Since this is a new project, let us create a new API key. Select the first option and create a new API key in the opened browser window.
You can learn more about authenticating with the CLI here.
Close the opened browser window and return to the application. The CLI would automatically detect the new API key.
Next, run the command below at the root of your project to initialize a new project:
npm init
This prompts a series of questions that will help configure our application. Answer the questions and use Code Generation. This project uses the Generate JavaScript Code with ES Modules option, as shown below:
On success, the Xata CLI creates a .env file in our project and adds the API key to it.
To be safe, run the command below to ensure that code generation works:
xata codegen
It ensures a src/xata.js file is created and contains all Xata configuration codes. A XataClient class that can query our database instance is exported in the file.
With that done, we are now set to work with Xata from our application. Run the command below to start your development server:
npm run dev
Reading Data from the Database
It is advised to query Xata from a safe environment, either from the backend or a serverless function. Using a browser to query Xata is dangerous since we risk disclosing our API key.
To query Xata to get an array of all reviews created in the database (none for now), we will use the Next.js getServerSideProps function.
Open the pages/index.js file and replace the template code in it with the code below:
import React from "react";
import styles from "../styles/Home.module.css";
import { XataClient } from "../src/xata";

export default function Home({ reviews }) {
  console.log(reviews);
  return (
    <div className={styles.container}>
      <h3>Review App</h3>
    </div>
  );
}

export const getServerSideProps = async (req, res) => {
  const xata = new XataClient();
  const reviews = await xata.db.reviews.getMany();
  return { props: { reviews } };
};
In the code above, we imported the XataClient. Next, we defined a getServerSideProps function and created a new instance of XataClient. We then query the database to get a list of all reviews
using the getMany method. The extracted reviews array is then passed as a prop to the Home component.
We’ll need some styles to give our application a decent look. Open your styles/Home.module.css file and replace the styles defined in it with the CSS styles below:
.container {
  border: 1px solid rgba(0, 0, 0, 0.3);
  border-radius: 4px;
  width: 700px;
  margin: 2rem auto;
  padding: 1rem 1.5rem;
  color: #333;
  font-size: 0.9rem;
}
.container > h3 {
  text-align: center;
}
.form {
  width: 100%;
}
.form > div {
  display: flex;
  flex-direction: column;
  margin: 0.7rem 0;
}
.form > div > label {
  font-weight: 600;
  margin-bottom: 0.3rem;
}
.form > div > input,
.form > div > textarea {
  border: 1px solid rgba(0, 0, 0, 0.2);
  padding: 0.5rem;
  border-radius: 2px;
}
.form > div > input:focus,
.form > div > textarea:focus {
  outline: none;
}
.form > button {
  padding: 0.5rem 1.5rem;
  background: #17ac1e;
  color: #fff;
  font-weight: 700;
  border: none;
  border-radius: 2px;
  cursor: pointer;
}
.card {
  width: 100%;
  padding: 0.7rem 1rem;
  border-radius: 2px;
  display: flex;
  justify-content: space-between;
  border: 1px solid rgba(0, 0, 0, 0.2);
  margin: 0.5rem 0;
}
.card > div > h5 {
  margin: 0;
  font-size: 0.8rem;
  margin-bottom: 0.5rem;
}

.card > div > p {
  margin: 0 0 0.3rem 0;
  font-size: 0.8rem;
}
.card > div:last-child > p {
  text-decoration: underline;
  cursor: pointer;
}
.card > div:last-child > p:first-child {
  color: #ff0000;
}
.card > div:last-child > p:last-child {
  color: #4169e1;
}

.not_found {
  text-align: center;
  font-size: 1rem;
  font-style: italic;
}
To display the reviews on the page, let’s create a review card component. Create a components folder at the root level of the application. In the folder, create a new file called Card.js,
and add the following to it:
import React from "react";
import styles from "../styles/Home.module.css";

export default function Card({ review }) {
  return (
    <div className={styles.card}>
      <div>
        <h5>{review.name}</h5>
        <p>{review.message}</p>
      </div>
      <div>
        <p>delete</p>
        <p>edit</p>
      </div>
    </div>
  );
}
To render the Card component, open the pages/index.js file and update the code as shown below:
import React from "react";
import styles from "../styles/Home.module.css";
import { XataClient } from "../src/xata";

//Import the card component
import Card from "../components/Card";

export default function Home({ reviews }) {
  console.log(reviews);
  //Update this
  return (
    <div className={styles.container}>
      <h3>Review App</h3>
      <h4>Reviews:</h4>
      {reviews && reviews.length === 0 ? (
        <p className={styles.not_found}>No review yet</p>
      ) : (
        reviews.map((review, index) => <Card key={index} review={review} />)
      )}
    </div>
  );
}

export const getServerSideProps = async (req, res) => {
  //...
};
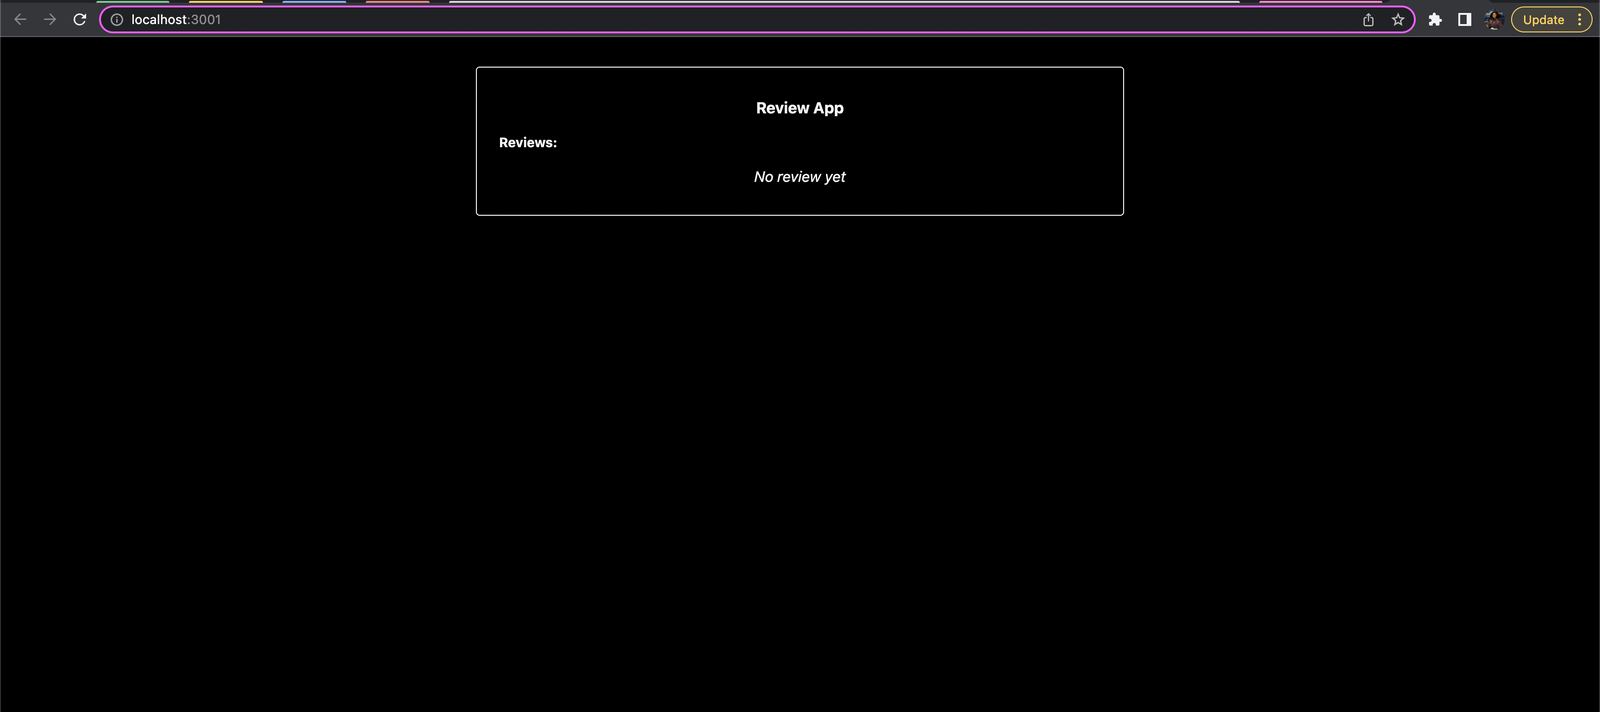
In the code above, we render the text “No review yet” if the reviews array is empty, or otherwise loop through the array and render a Card component for each object in the array.
Save the changes and preview the application in your browser. You should see the No reviews yet because our database is currently empty.
Adding Data to the Database
To add data to the database, let’s create a form. Create a file named Form.js in the components folder and add the following to it:
import React from "react";
import styles from "../styles/Home.module.css";

export default function Form({ formValues, setFormValues }) {
  const handleChange = (e) => {
    setFormValues((prevState) => ({
      ...prevState,
      [e.target.id]: e.target.value,
    }));
  };

  const handleSubmit = (e) => {
    e.preventDefault();
  };

  return (
    <form className={styles.form} onSubmit={handleSubmit}>
      <div>
        <label htmlFor="name">Name</label>
        <input
          type="text"
          id="name"
          onChange={handleChange}
          value={formValues.name}
        />
      </div>
      <div>
        <label htmlFor="message">Message</label>
        <textarea
          id="message"
          onChange={handleChange}
          value={formValues.message}
        />
      </div>
      <button type="submit">Submit</button>
    </form>
  );
}
Here, we defined a Form component that expects a formValues state and a setFormValues state function as a prop. Next, we rendered an input and a textarea element for the review name and message, respectively. We also rendered a button for submission.
We added an onChange property that triggers the handleChange method to the input and textarea elements. The method sets
the formValues state accordingly. To the form element, we added an onSubmit property that calls the handleSubmit function
when the submit button is clicked.
Update the pages/index.js file as shown below to render the Form component:
//...
// Import the useState hook
import React, { useState } from "react";
//Import the Form component
import Form from "../components/Form";

export default function Home({ reviews }) {
  //Add this
  const [formValues, setFormValues] = useState({ name: "", message: "" });

  return (
    <div className={styles.container}>
      <h3>Review App</h3>
      {/* Add this */}
      <Form formValues={formValues} setFormValues={setFormValues} />

      <h4>Reviews:</h4>
      {reviews && reviews.length === 0 ? (
        <p className={styles.not_found}>No review yet</p>
      ) : (
        reviews.map((review, index) => <Card key={index} review={review} />)
      )}
    </div>
  );
}

export const getServerSideProps = async (req, res) => {
  //...
};
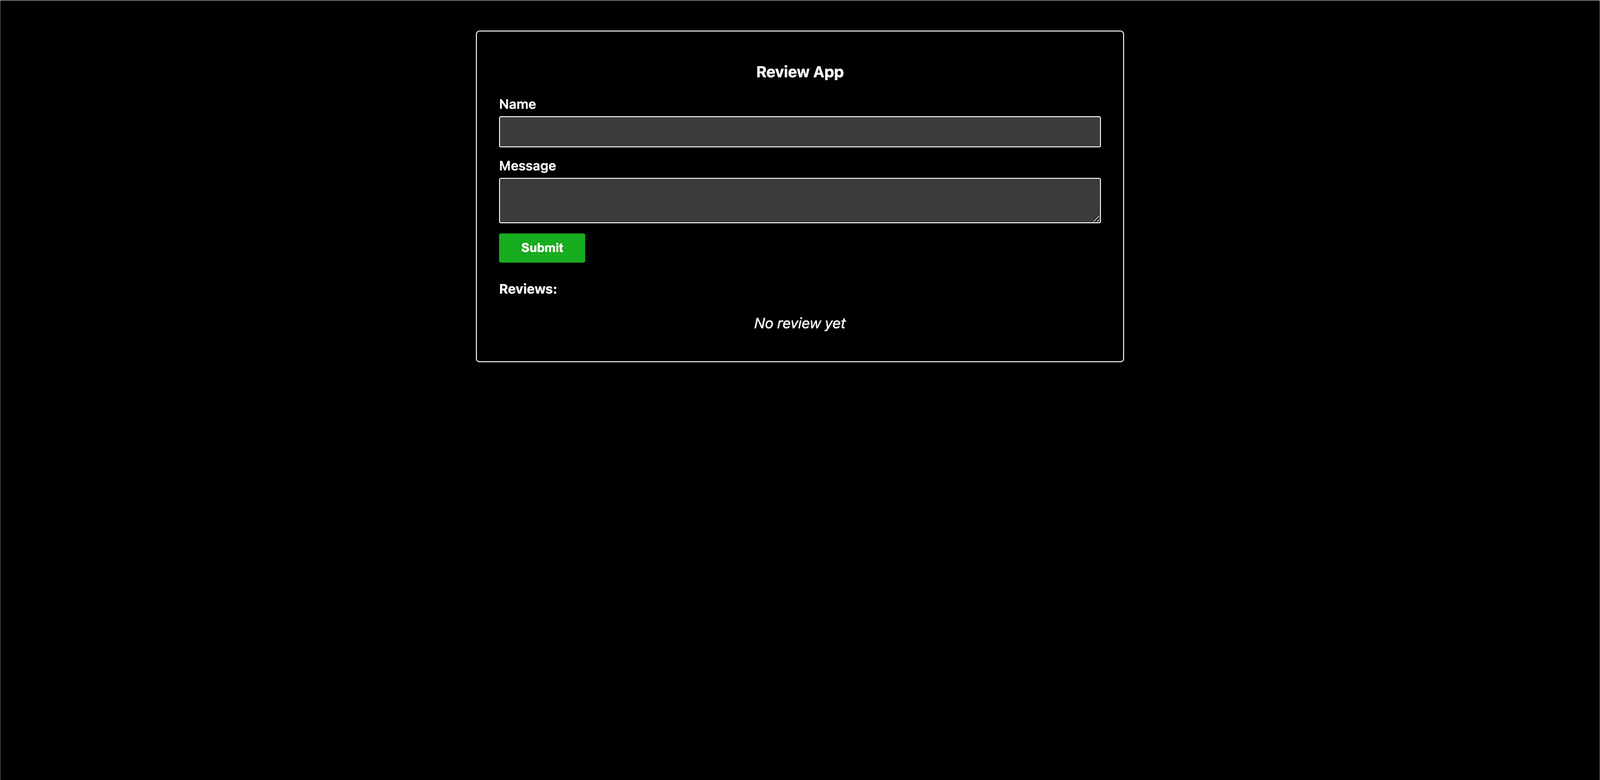
In the code above, we imported the Form component, defined a state variable called formValues to hold the form values, rendered the Form component, and passed it the required props.
Save the changes and preview the application in your browser.
Since it is not advisable to query the database from the client side, let us create an API route that handles the query to the database. Create a file named createReview.js in the pages/api/ folder and add the following to it:
import { XataClient } from "../../src/xata";

export default async function handler(req, res) {
  const { name, message } = req.body.values;
  try {
    const xata = new XataClient();
    const response = await xata.db.reviews.create({ name, message });
    res.status(200).json(response);
  } catch (error) {
    res.status(500).json(error);
  }
}
We imported the XataClient class, defined the route handler, and destructured the name and message values from the request body. Next, we called the
create method on the database instance and passed the new record object to it.
Xata automatically generates the id for each record, so we do not have to worry about adding one.
Let us create a helper function to handle request calls to this API and every other route we will subsequently create. Create a folder named helpers at the root of your project, and add a file named helpers.js to it. Add the following to the helpers.js file:
const handleRequest = (action, values) => {
  fetch(`/api/${action}Review`, {
    method: "POST",
    headers: {
      "Content-Type": "application/json",
    },
    body: JSON.stringify({
      values,
    }),
  })
    .then((response) => {
      if (!response.ok) {
        throw Error(response.statusText);
      }
      return response;
    })
    .then(() => window.location.reload())
    .catch((error) => {
      console.log(error);
      alert("an error occurred, try again");
    });
};

module.exports = handleRequest;
Here, we created and exported a handleRequest function that expects an action and values parameter. The action parameter
is used to configure the API route, and the values parameter is an object that gets attached to the request body.
To use this helper function in our code, open the Form.js file and import it at the beginning of the file as shown below:
import handleRequest from "../helpers/helpers";
Now, update the handleSubmit function as shown below:
const handleSubmit = (e) => {
  e.preventDefault();
  handleRequest("create", formValues);
};
Save the changes and create a new review. The page automatically reloads, and the review becomes visible.
Deleting Data from the Database
Let us create an endpoint to handle the deletion of reviews from the database. Create a file named deleteReview.js in the pages/api/ folder and add the following to it:
import { XataClient } from "../../src/xata";

export default async function handler(req, res) {
  try {
    const xata = new XataClient();
    await xata.db.reviews.delete(req.body.values);
    res.end();
  } catch (error) {
    res.status(500).json(error);
  }
}
In the code above, we imported and created an instance of the database. We called the delete method on the instance. The method accepts the id of the record to be deleted as an argument.
Next, open the components/Card.js file and update the code as shown below:
import React from "react";
import styles from "../styles/Home.module.css";
//Import this
import handleRequest from "../helpers/helpers";

export default function Card({ review }) {
  //Add this
  const handleDelete = (id) => {
    handleRequest("delete", { id });
  };
  return (
    <div className={styles.card}>
      <div>
        <h5>{review.name}</h5>
        <p>{review.message}</p>
      </div>
      <div>
        {/* Update this */}
        <p onClick={() => handleDelete(review.id)}>delete</p>
        <p>edit</p>
      </div>
    </div>
  );
}
Here, we imported the helper method handleRequest. Next, we added an onClick event to the p tag containing the delete text,
and it triggers the handleDelete function when clicked. The function accepts the id of the review to be deleted and makes a request to the API route using the helper function.
Save the changes, and test the application in your browser.
Updating Data in the Database
Let us make a slight adjustment to our application so we can also support the editing of reviews. Update your pages/index.js file as shown below:
//...

export default function Home({ reviews }) {
  const [formValues, setFormValues] = useState({ name: "", message: "" });
  //Add this
  const [update, setUpdate] = useState("");

  //Add this
  const updateFormValue = (id) => {
    setUpdate(id);
    const updatedReview = reviews.find((review) => review.id === id);
    setFormValues({ name: updatedReview.name, message: updatedReview.message });
  };

  return (
    <div className={styles.container}>
      <h3>Review App</h3>
      <Form
        formValues={formValues}
        setFormValues={setFormValues}
        // Add this
        update={update}
      />
      <h4>Reviews:</h4>
      {reviews && reviews.length === 0 ? (
        <p className={styles.not_found}>No review yet</p>
      ) : (
        reviews.map((review, index) => (
          <Card
            key={index}
            review={review}
            // Add this
            handleUpdate={updateFormValue}
          />
        ))
      )}
    </div>
  );
}

export const getServerSideProps = async (req, res) => {
  //...
};
In the code above, we defined a new state variable called update. The state is expected to hold an id, which will be used when querying the database to point to the record to be updated.
Next, we defined a function called updateFormValue that expects an id parameter. The function sets the update state, finds the review that needs to be updated from the array of reviews,
and sets the form values to that of the selected review.
The update state is also added as a prop to the Form component. A handleUpdate prop which points to the updateFormValue function, is also added as a prop
to the Card component.
Update the components/Card.js file as shown below:
//...

// Add handleUpdate as a prop
export default function Card({ review, handleUpdate }) {
  const handleDelete = (id) => {
    handleRequest("delete", { id });
  };

  return (
    <div className={styles.card}>
      <div>
        <h5>{review.name}</h5>
        <p>{review.message}</p>
      </div>
      <div>
        <p onClick={() => handleDelete(review.id)}>delete</p>
        {/* Update this */}
        <p onClick={() => handleUpdate(review.id)}>edit</p>
      </div>
    </div>
  );
}
Here, we attached the handleUpdate function to an onClick event on the p tag containing the Edit text.
Next, update the components/Form.js file as shown below:
//...

// Add update as a prop
export default function Form({ formValues, setFormValues, update }) {
  const handleChange = (e) => {
    //...
  };

  const handleSubmit = (e) => {
    //...
  };

  //Add this
  const handleUpdate = (e) => {
    e.preventDefault();
    handleRequest("update", { ...formValues, update });
  };

  return (
    <form
      className={styles.form}
      //Update this
      onSubmit={!update ? handleSubmit : handleUpdate}
    >
      <div>
        <label htmlFor="name">Name</label>
        <input
          type="text"
          id="name"
          onChange={handleChange}
          value={formValues.name}
        />
      </div>
      <div>
        <label htmlFor="message">Message</label>
        <textarea
          id="message"
          onChange={handleChange}
          value={formValues.message}
        />
      </div>
      {/* Update this */}
      <button type="submit">{!update ? "Submit" : "Update"}</button>
    </form>
  );
}
We used the update state value received as a prop to conditionally trigger different functions when the form is submitted. When the update state is populated, the form calls the handleUpdate function instead. The handleUpdate function attaches the id stored in the update state to the request call.
To conclude this section, let us add the API route to query the database. Create a file called updateReview.js in the pages/api/ route and add the following to it:
import { XataClient } from "../../src/xata";

export default async function handler(req, res) {
  const { name, message } = req.body.values;
  const id = req.body.values.update;
  try {
    const xata = new XataClient();
    const response = await xata.db.reviews.update({ id, name, message });
    res.status(200).json(response);
  } catch (error) {
    res.status(500).json(error);
  }
}
Here, we extracted the relevant data from the request body and passed it as an argument to the update method called on the database instance.
Save the changes and test the application in your browser.
Conclusion
In this article, we looked at what Xata is and how to integrate it into an application. We also looked at how to perform the basic CRUD operations on the database. We’ve just scratched the surface of what can be achieved with Xata. For example, you can build on the demo app by adding basic authentication. More information can be found in the official documentation.

Related Posts
Comments
All articles
Topics
Web MobileMobile
Desktop
Design
Productivity
People
