
Deploying a Vue Application with Netlify and GitHub

Summarize with AI:
Here’s how to deploy your Vue app with Netlify, which allows you to connect to various Git providers. We’ll see how to deploy our GitHub project in this post.
Deploying our application is the necessary step to enabling online access for additional users. Deploying using the incorrect tool might be difficult because it will make the process cumbersome. Netlify is an excellent solution for deploying our application because it supports tools such as GitHub, which allows us to effortlessly publish our application by connecting our GitHub account to our Netlify account.
This tutorial will teach us a simple method for deploying our Vue applications using Netlify and GitHub.
Prerequisites
This post assumes you have a basic understanding of Git and GitHub, as that will not be covered in this tutorial. We will solely talk about Netlify and how to set up a Netlify account.
Here are the few things we must set up to flow with this tutorial:
- A working Git and GitHub account. To create a new GitHub account, follow this guide.
- A compacted version of Node installed in our computer
Introduction to Netlify
Netlify is a serverless backend service for building web applications and dynamic websites. It offers a development platform that includes building and deploying of websites. The platform is built on open web standards, which means we can easily integrate build tools and frameworks.
Creating a New Vue Project
The first step is to create a new Vue project. Vue offers two ways to create a new
project—we can use the latest CLI command or the old CLI command. To create a new Vue project, we will use the command below:
npm init vue@latest
Next, we will create our file name and select the features we want to include in our application.
Once we are done, the next step is to run the following command:
cd file-name
npm install
After running the above command we will run the server with the command below:
npm run dev
Building a Basic Application
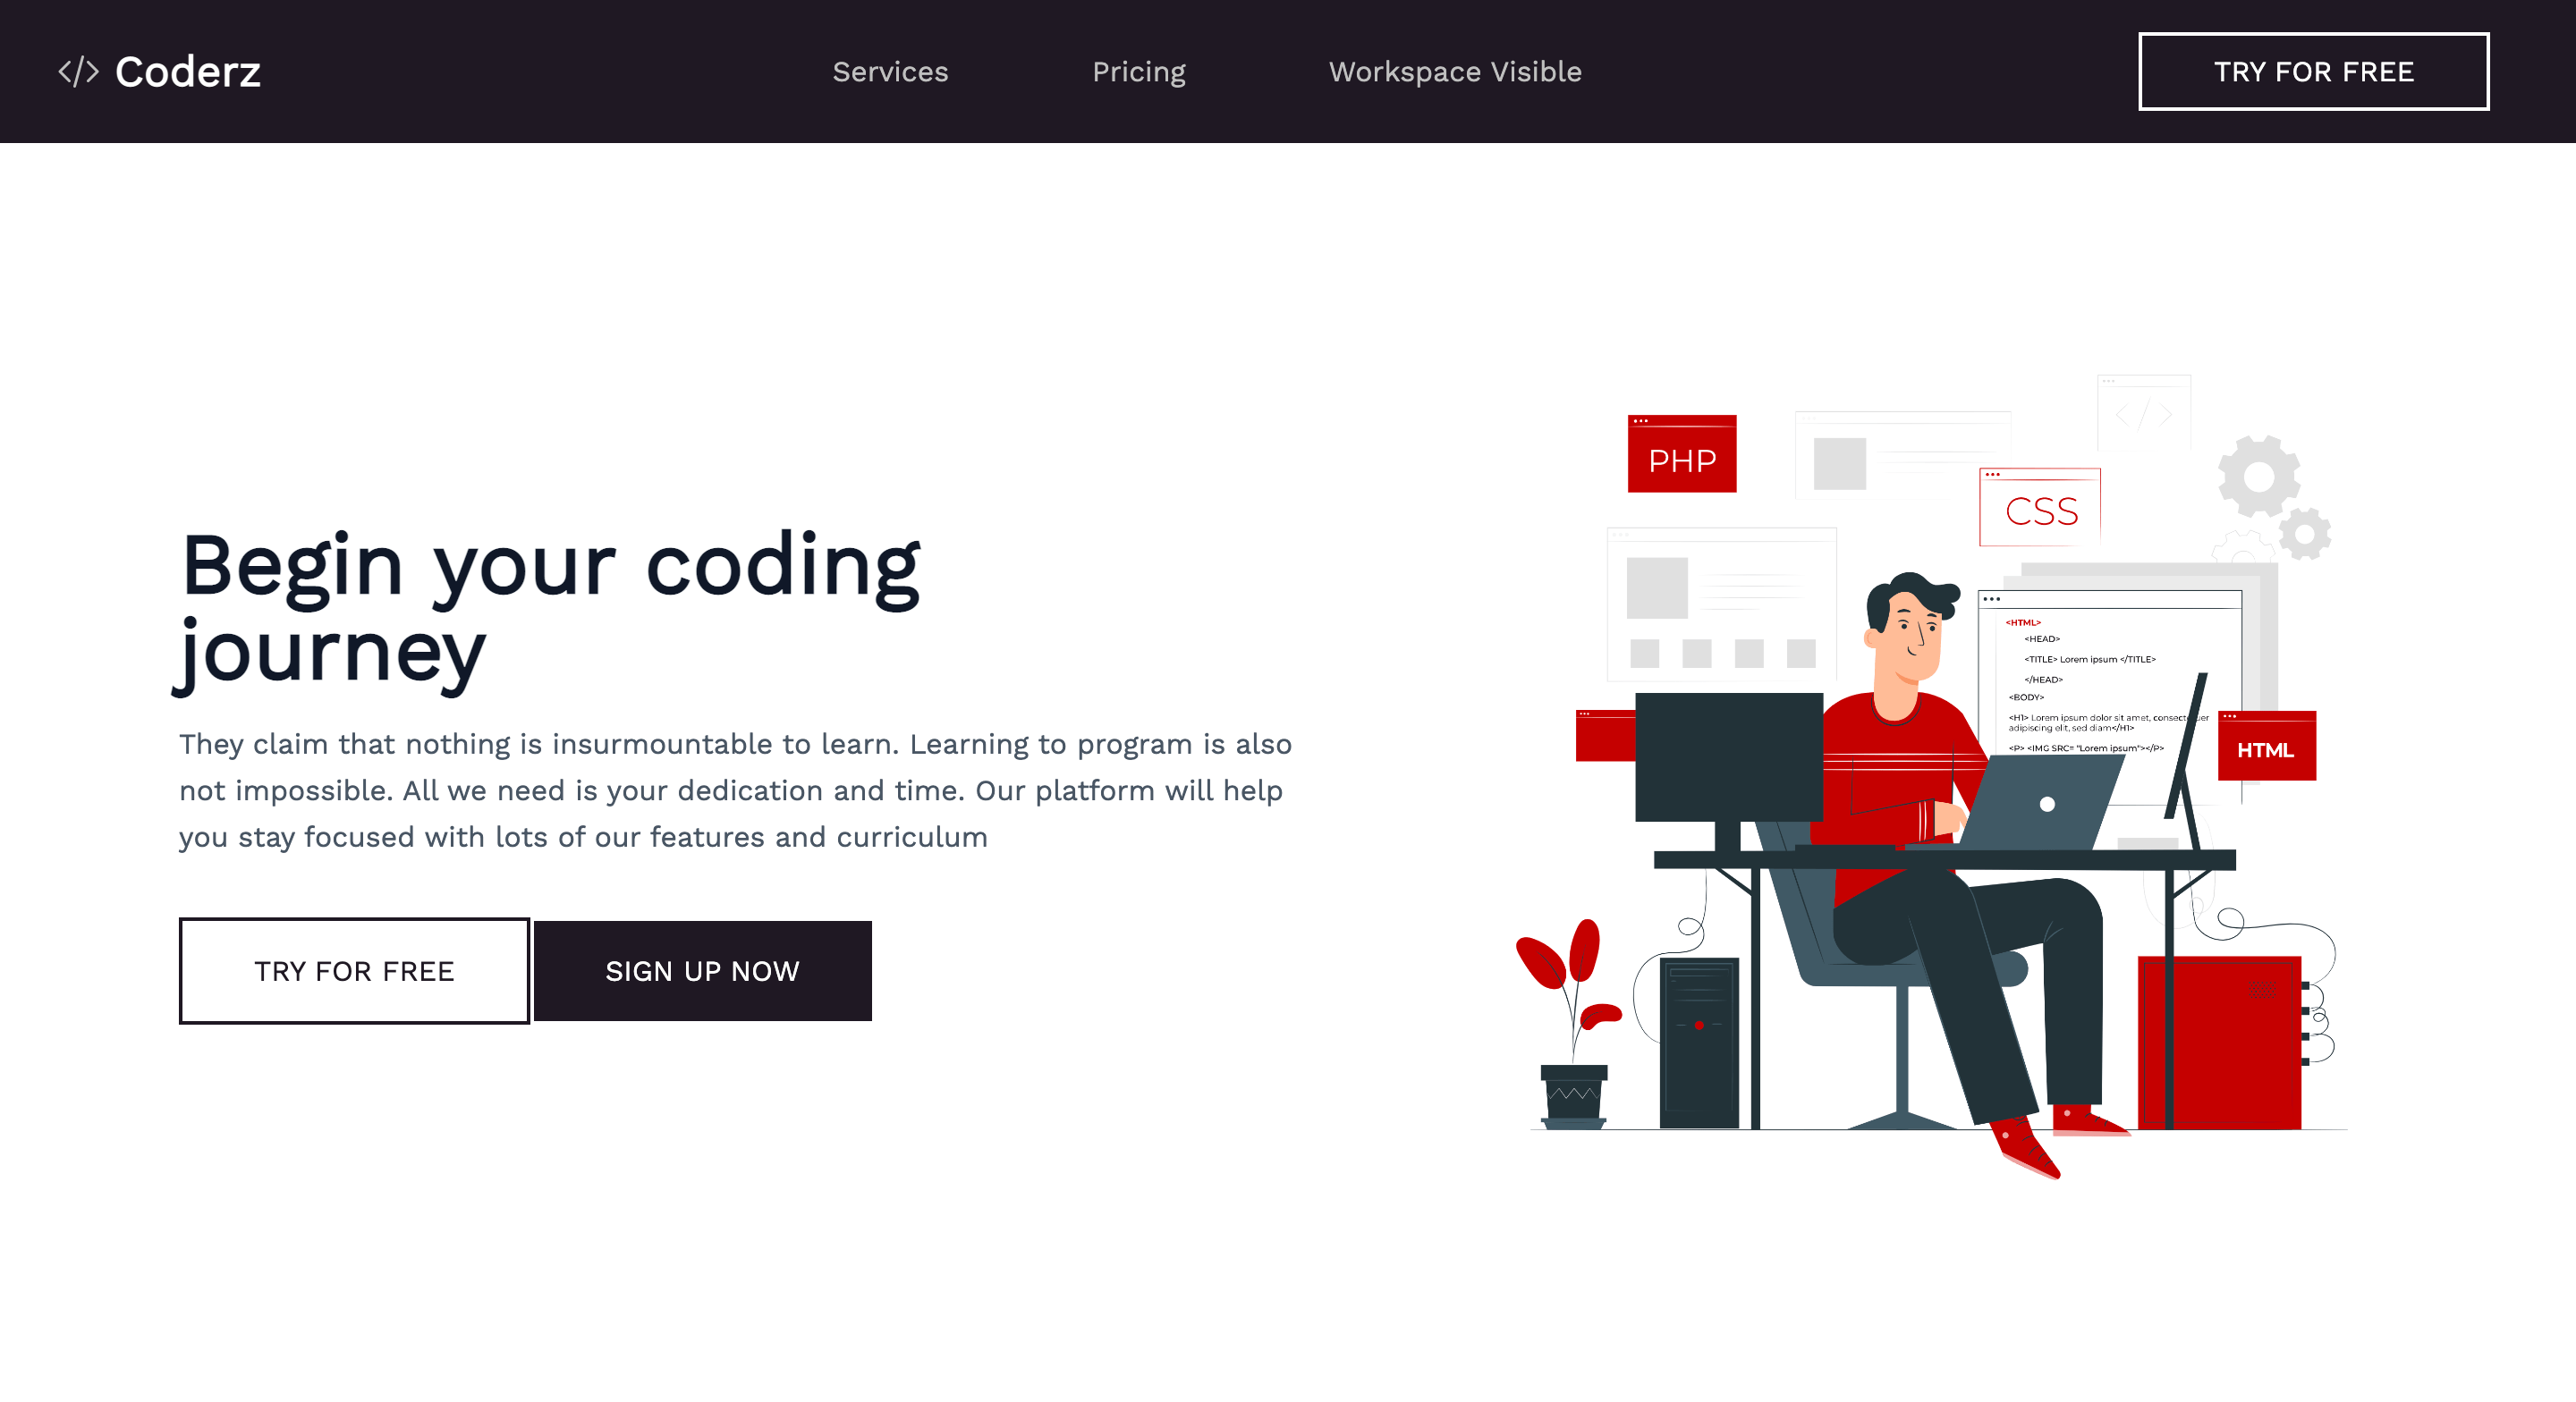
We will create a straightforward project that we will deploy using Netlify when we are done setting up and starting a new Vue project. In this example, we’ll create an online tech learning platform. We will only develop and launch the hero and nav section, since the primary goal of this tutorial is not to construct a full-featured program but rather to demonstrate how to launch our application using Netlify and GitHub.
Copy the code below, then paste it inside the created Vue component. Note that this is merely an example; following the same procedure, we may push and deploy our previous applications to Netlify.
<template>
  <section class="text-gray-600 body-font">
    <div class="container mx-auto flex px-5 py-24 md:flex-row flex-col items-center">
      <div
        class="lg:flex-grow md:w-1/2 lg:pr-24 md:pr-16 flex flex-col md:items-start md:text-left mb-16 md:mb-0 items-center text-center">
        <h1 class="title-font sm:text-5xl text-3xl mb-4 font-bold text-gray-900">Begin your coding
          <br class="hidden lg:inline-block">journey
        </h1>
        <p class="mb-8 leading-relaxed">They claim that nothing is insurmountable to learn. Learning to program is also
          not impossible. All we need is your dedication and time. Our platform will help you stay focused with lots of
          our features and curriculum</p>
        <div class="flex justify-center">
          <a class="inline-block py-4 px-10 free-btn text-md " href="#">
            TRY FOR FREE
          </a>
          <a class="inline-block py-4 px-10 bg-btn text-md " href="#">
            SIGN UP NOW
          </a>
        </div>
      </div>
      <div class="lg:max-w-lg lg:w-full md:w-1/2 w-5/6">
        <img class="object-cover object-center rounded" alt="hero" src="../assets/pana.png">
      </div>
    </div>
  </section>
</template>
Here is a complete example of our application.
Now that we are done creating our application, the next step is to push our application to GitHub via our Git terminal so we can deploy it with Netlify.
Creating a New Repository
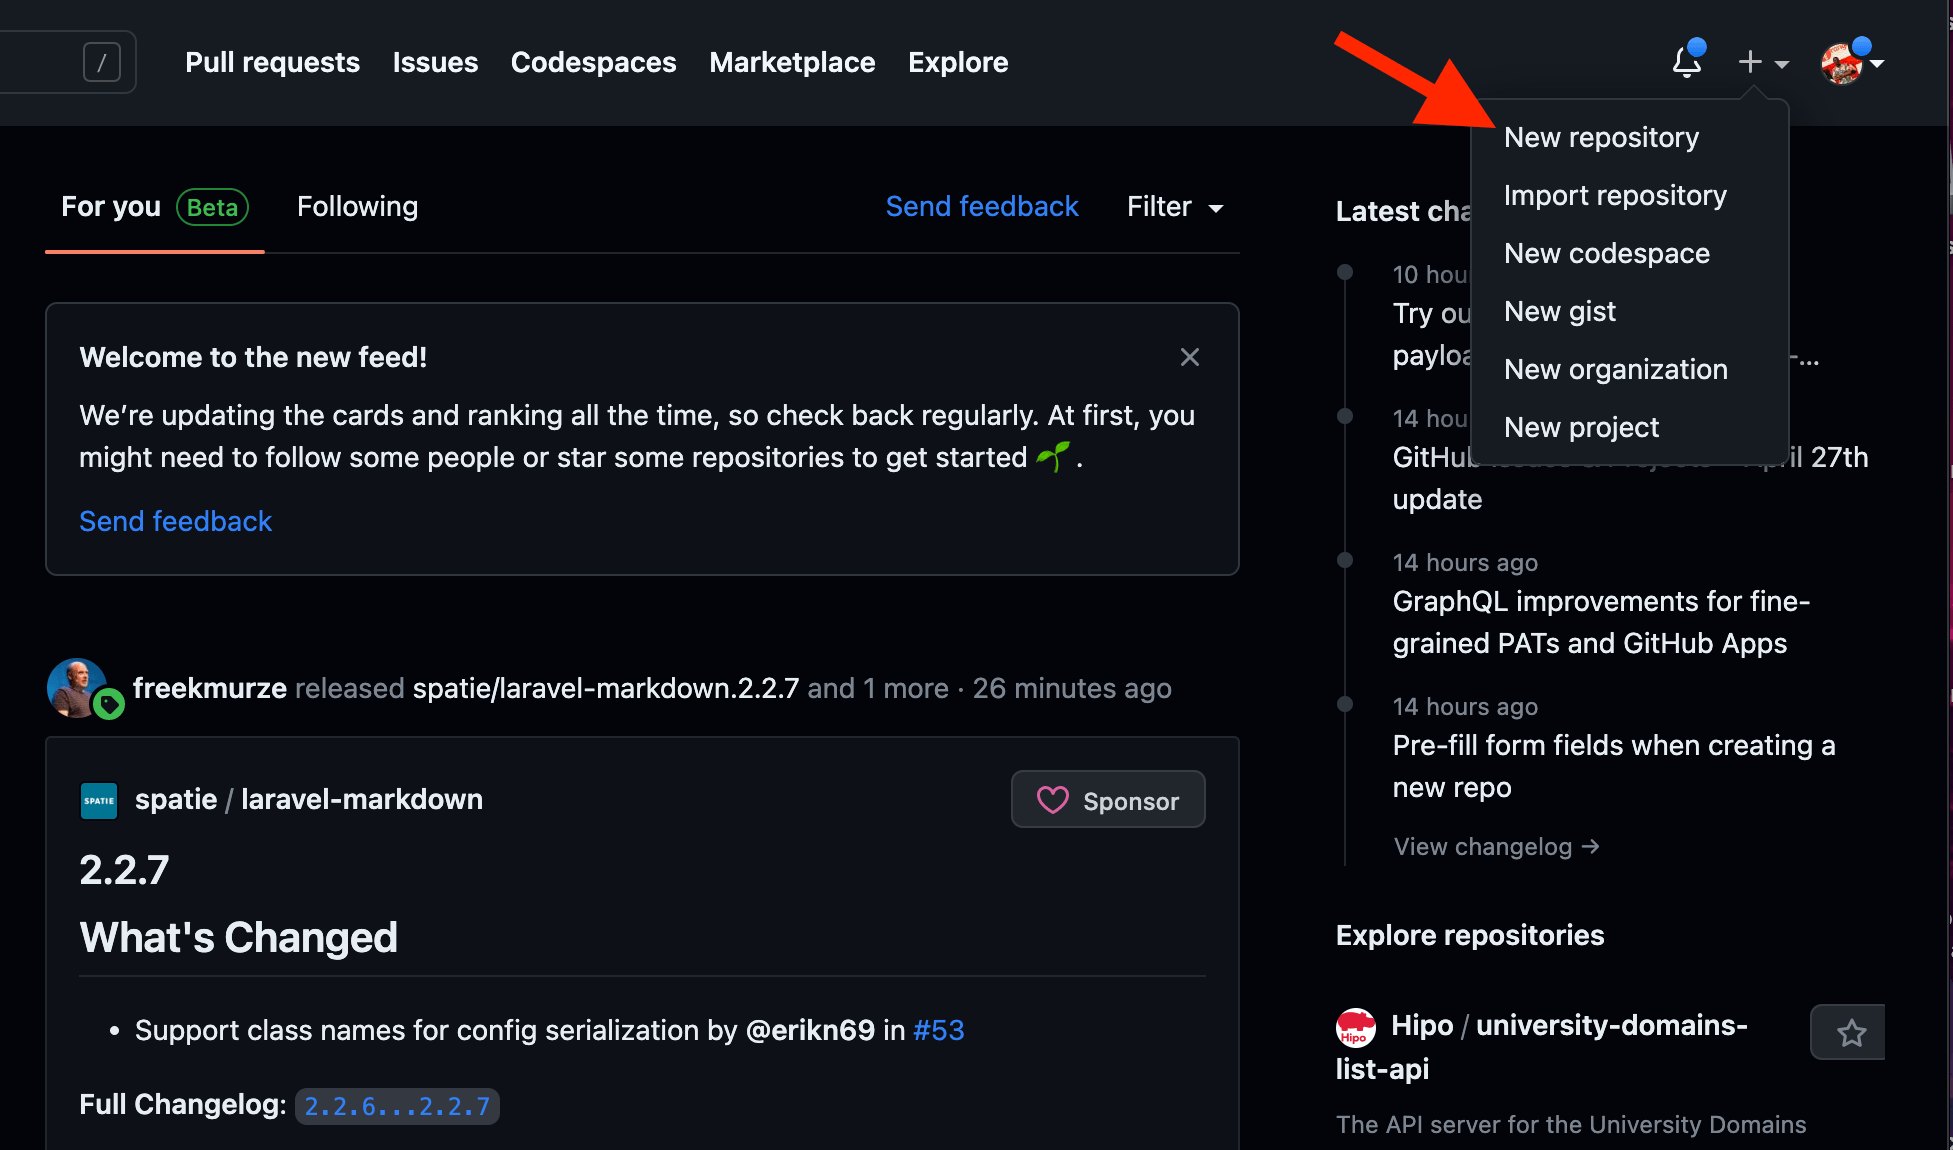
The first step is to create a new repository on GitHub. To do that, click on the “+” icon we will see a dropdown menu, click on the menu new repository this will redirect us to where we will create a new repository.
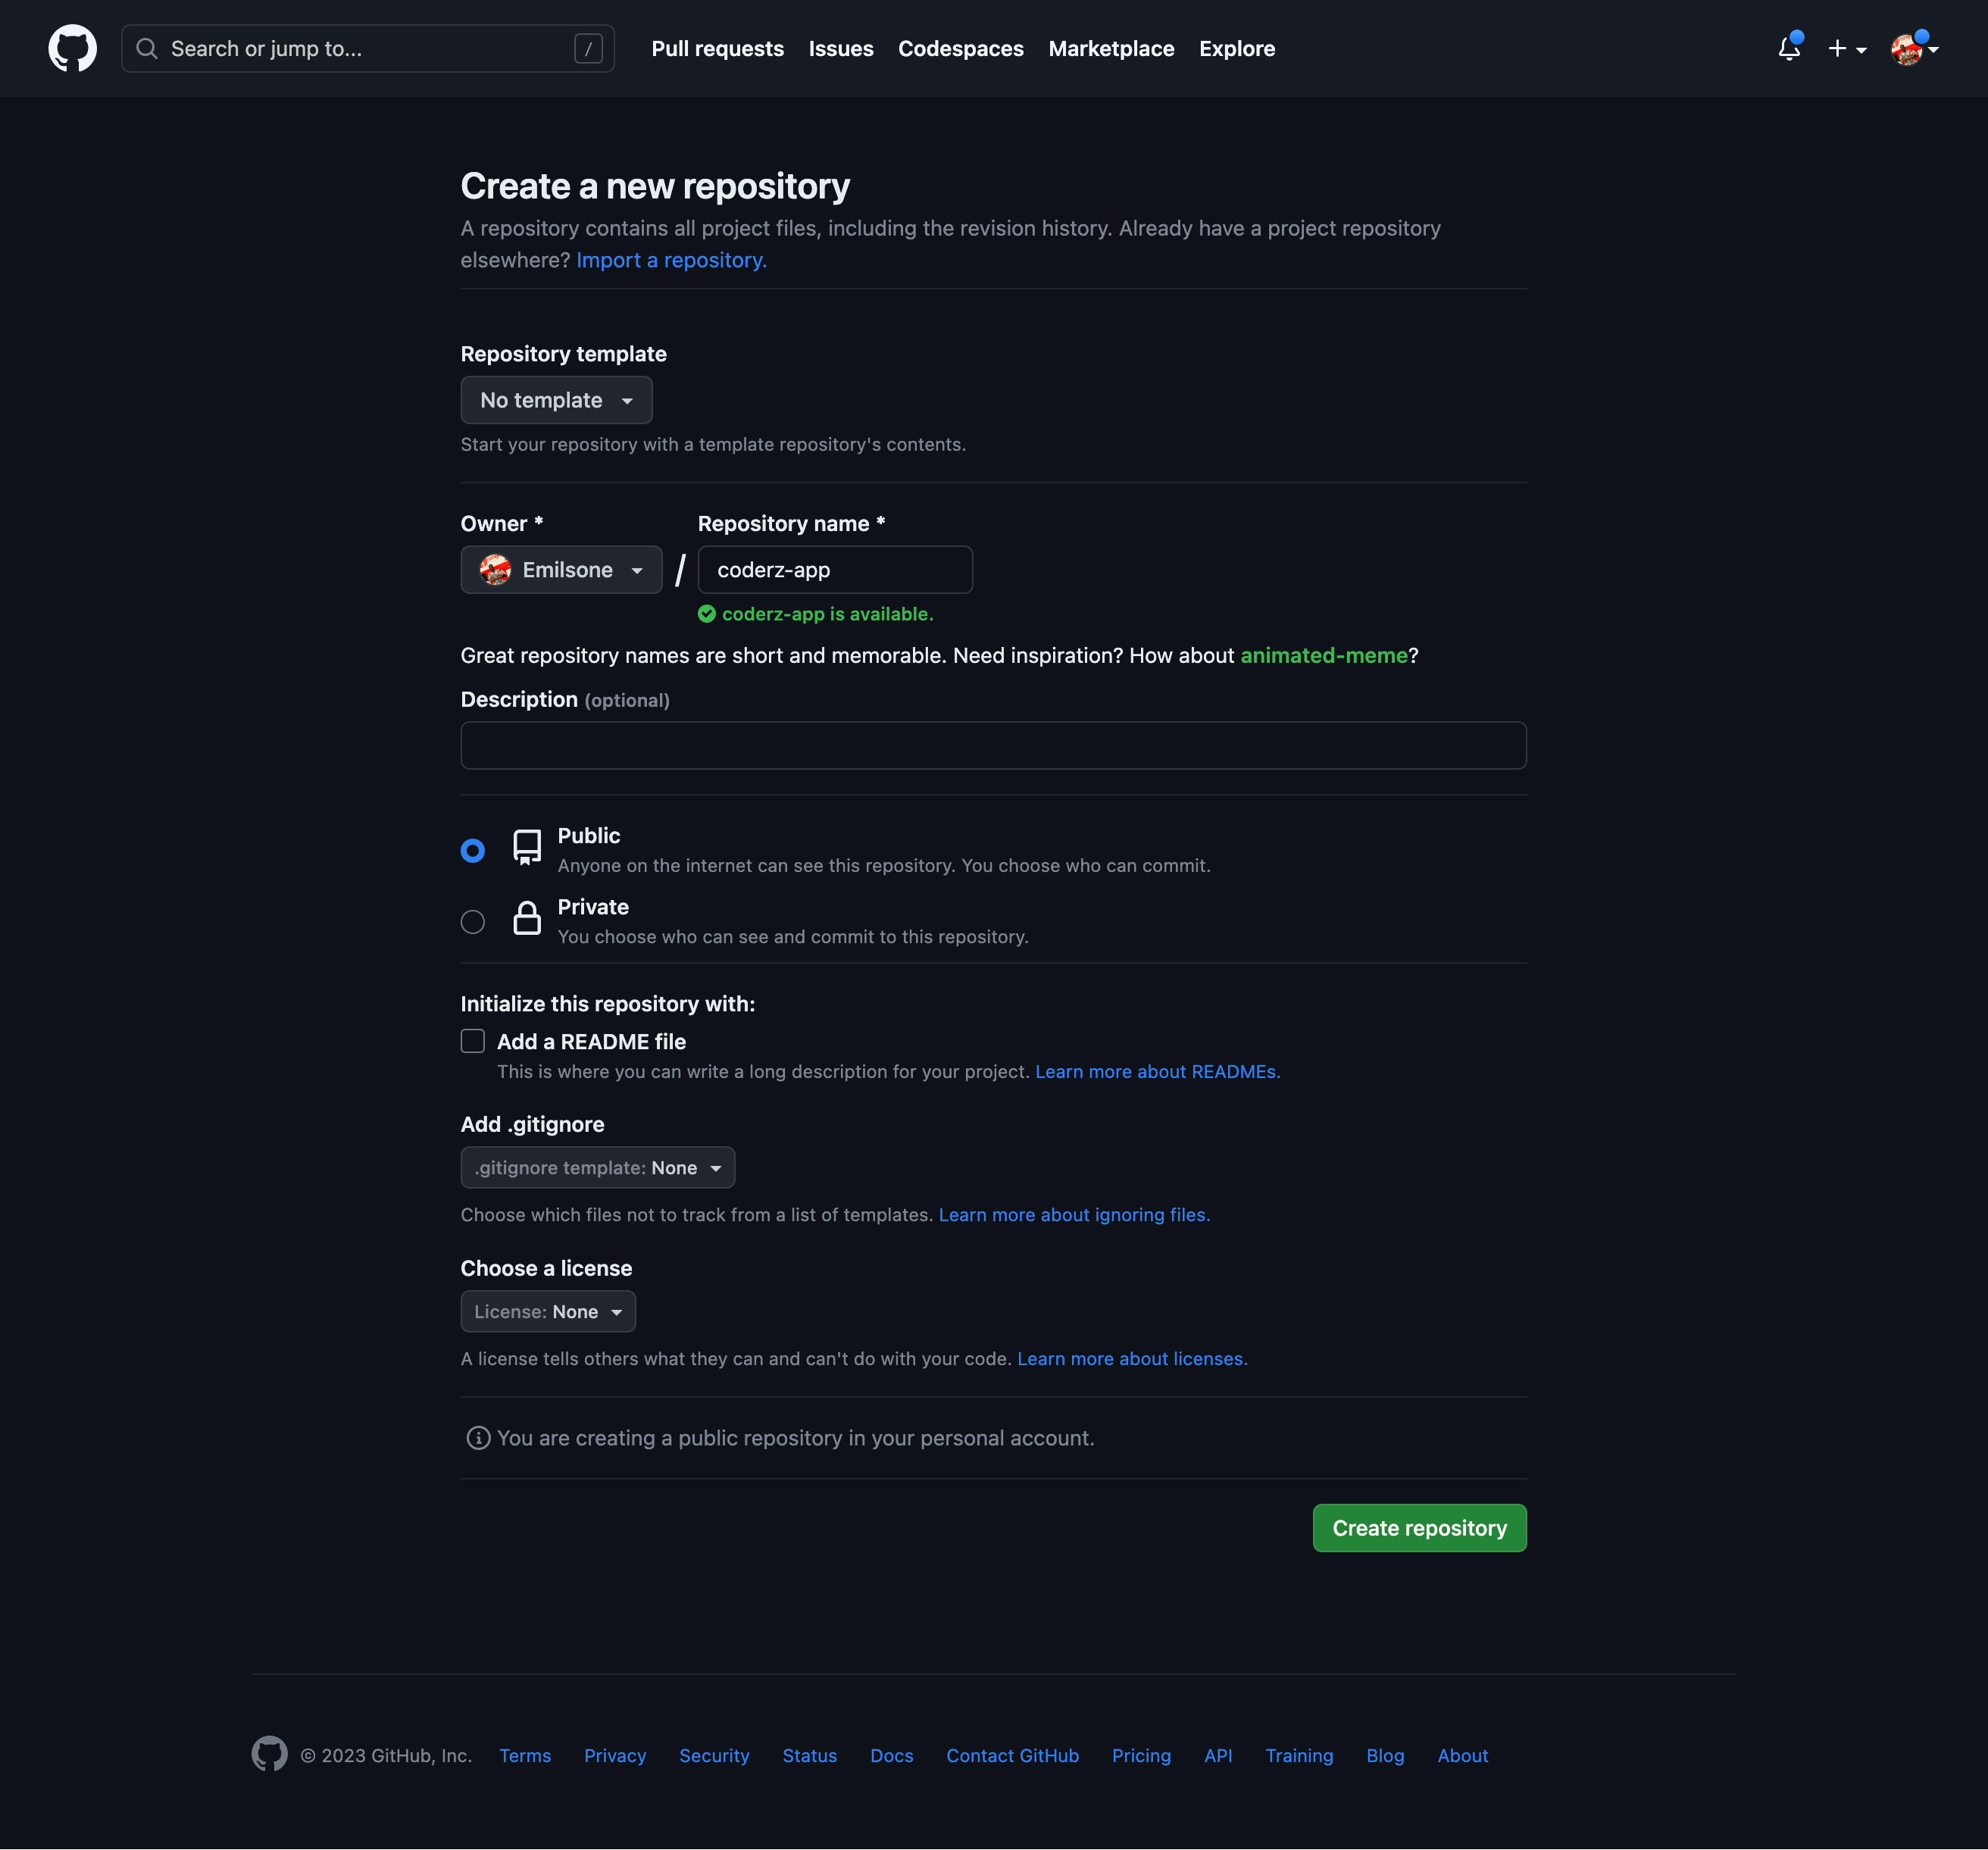
The name and description of our repository will then be added. Although the description is optional, it is recommended that we always explain what our application is all about because it helps users understand the project before they contribute. GitHub has the distinct advantage of being an open source platform while still allowing us to privatize our repository. For instance, we can choose whether to make this repository public or private.
We choose public because it is a public repository, but we may still change our minds and make it a private repository in the future.
Push an Existing Repository from the Command Line
Next, we will push an existing repository from our command line. To do that, we will create a Git init file or add the command below. Since we created a new Vue project, we won’t create a Git file. When installing a new Vue project, a Git file is also included.
To push to an existing repository, we will follow the list steps:
git remote add origin git@github.com:Emilsone/coderz-app.git
git add .
git commit -m "write commit message"
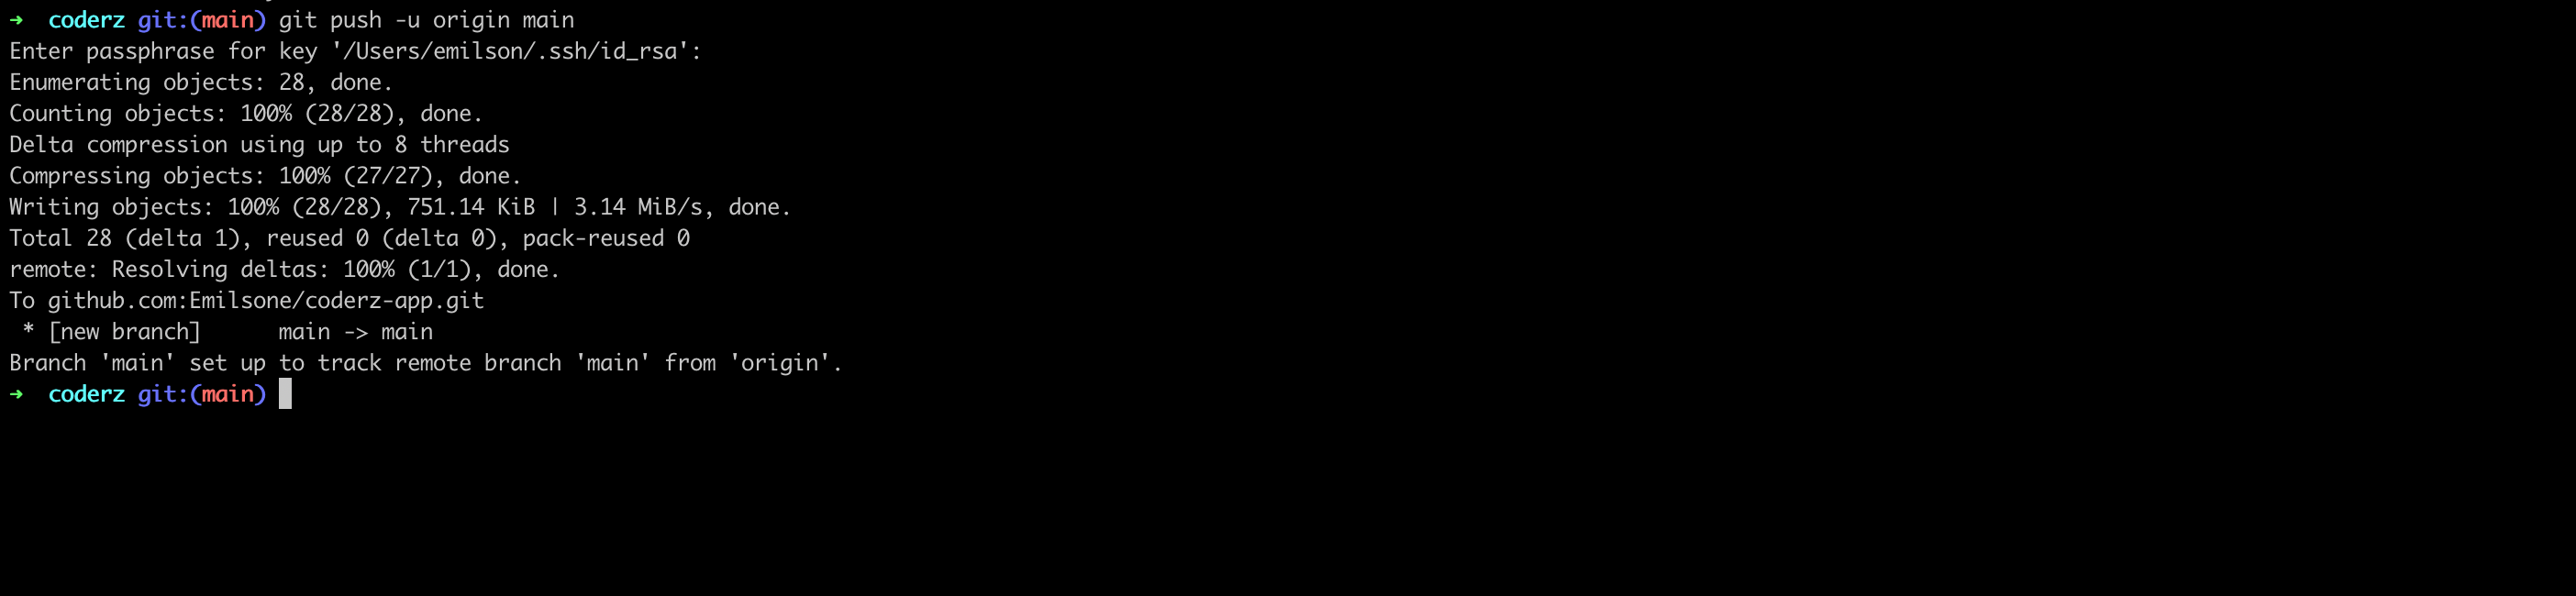
git push -u origin main
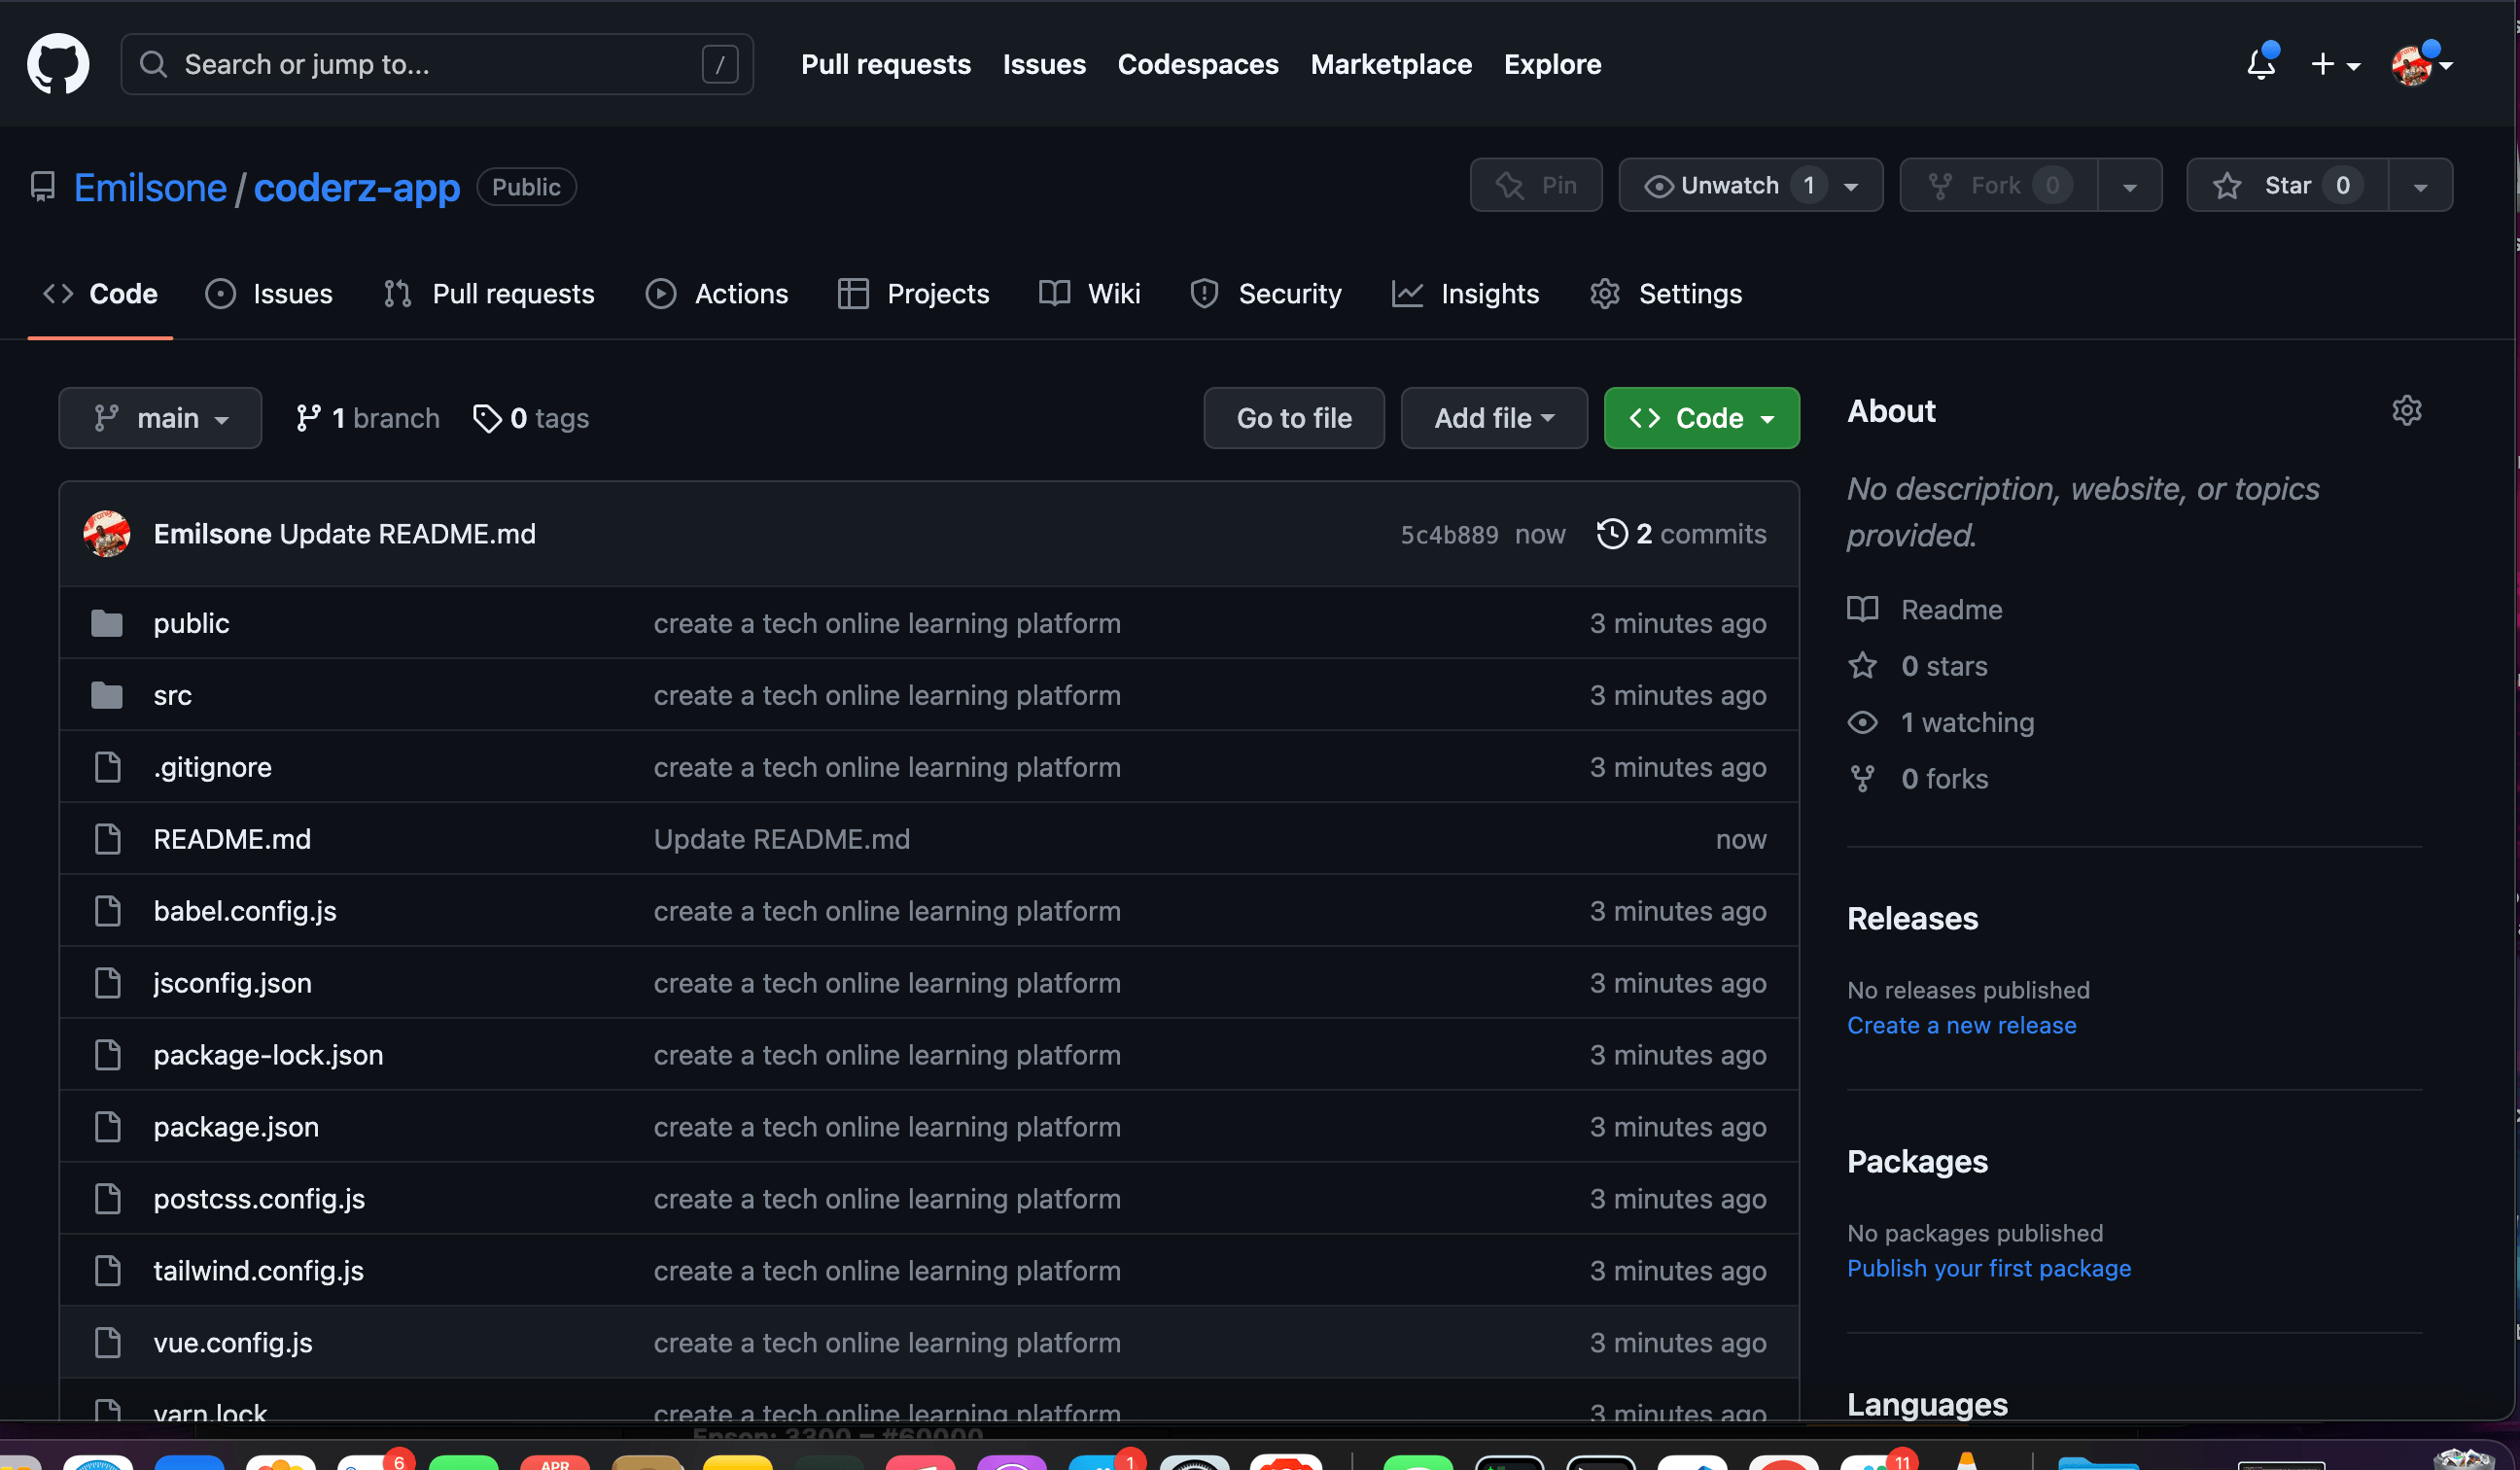
We have successfully pushed our project to GitHub:
This is our project on GitHub:
Setting up a Netlify Account
To create a Netlify account, go to the Netlify website and click on the sign up button in the top right corner of the screen.
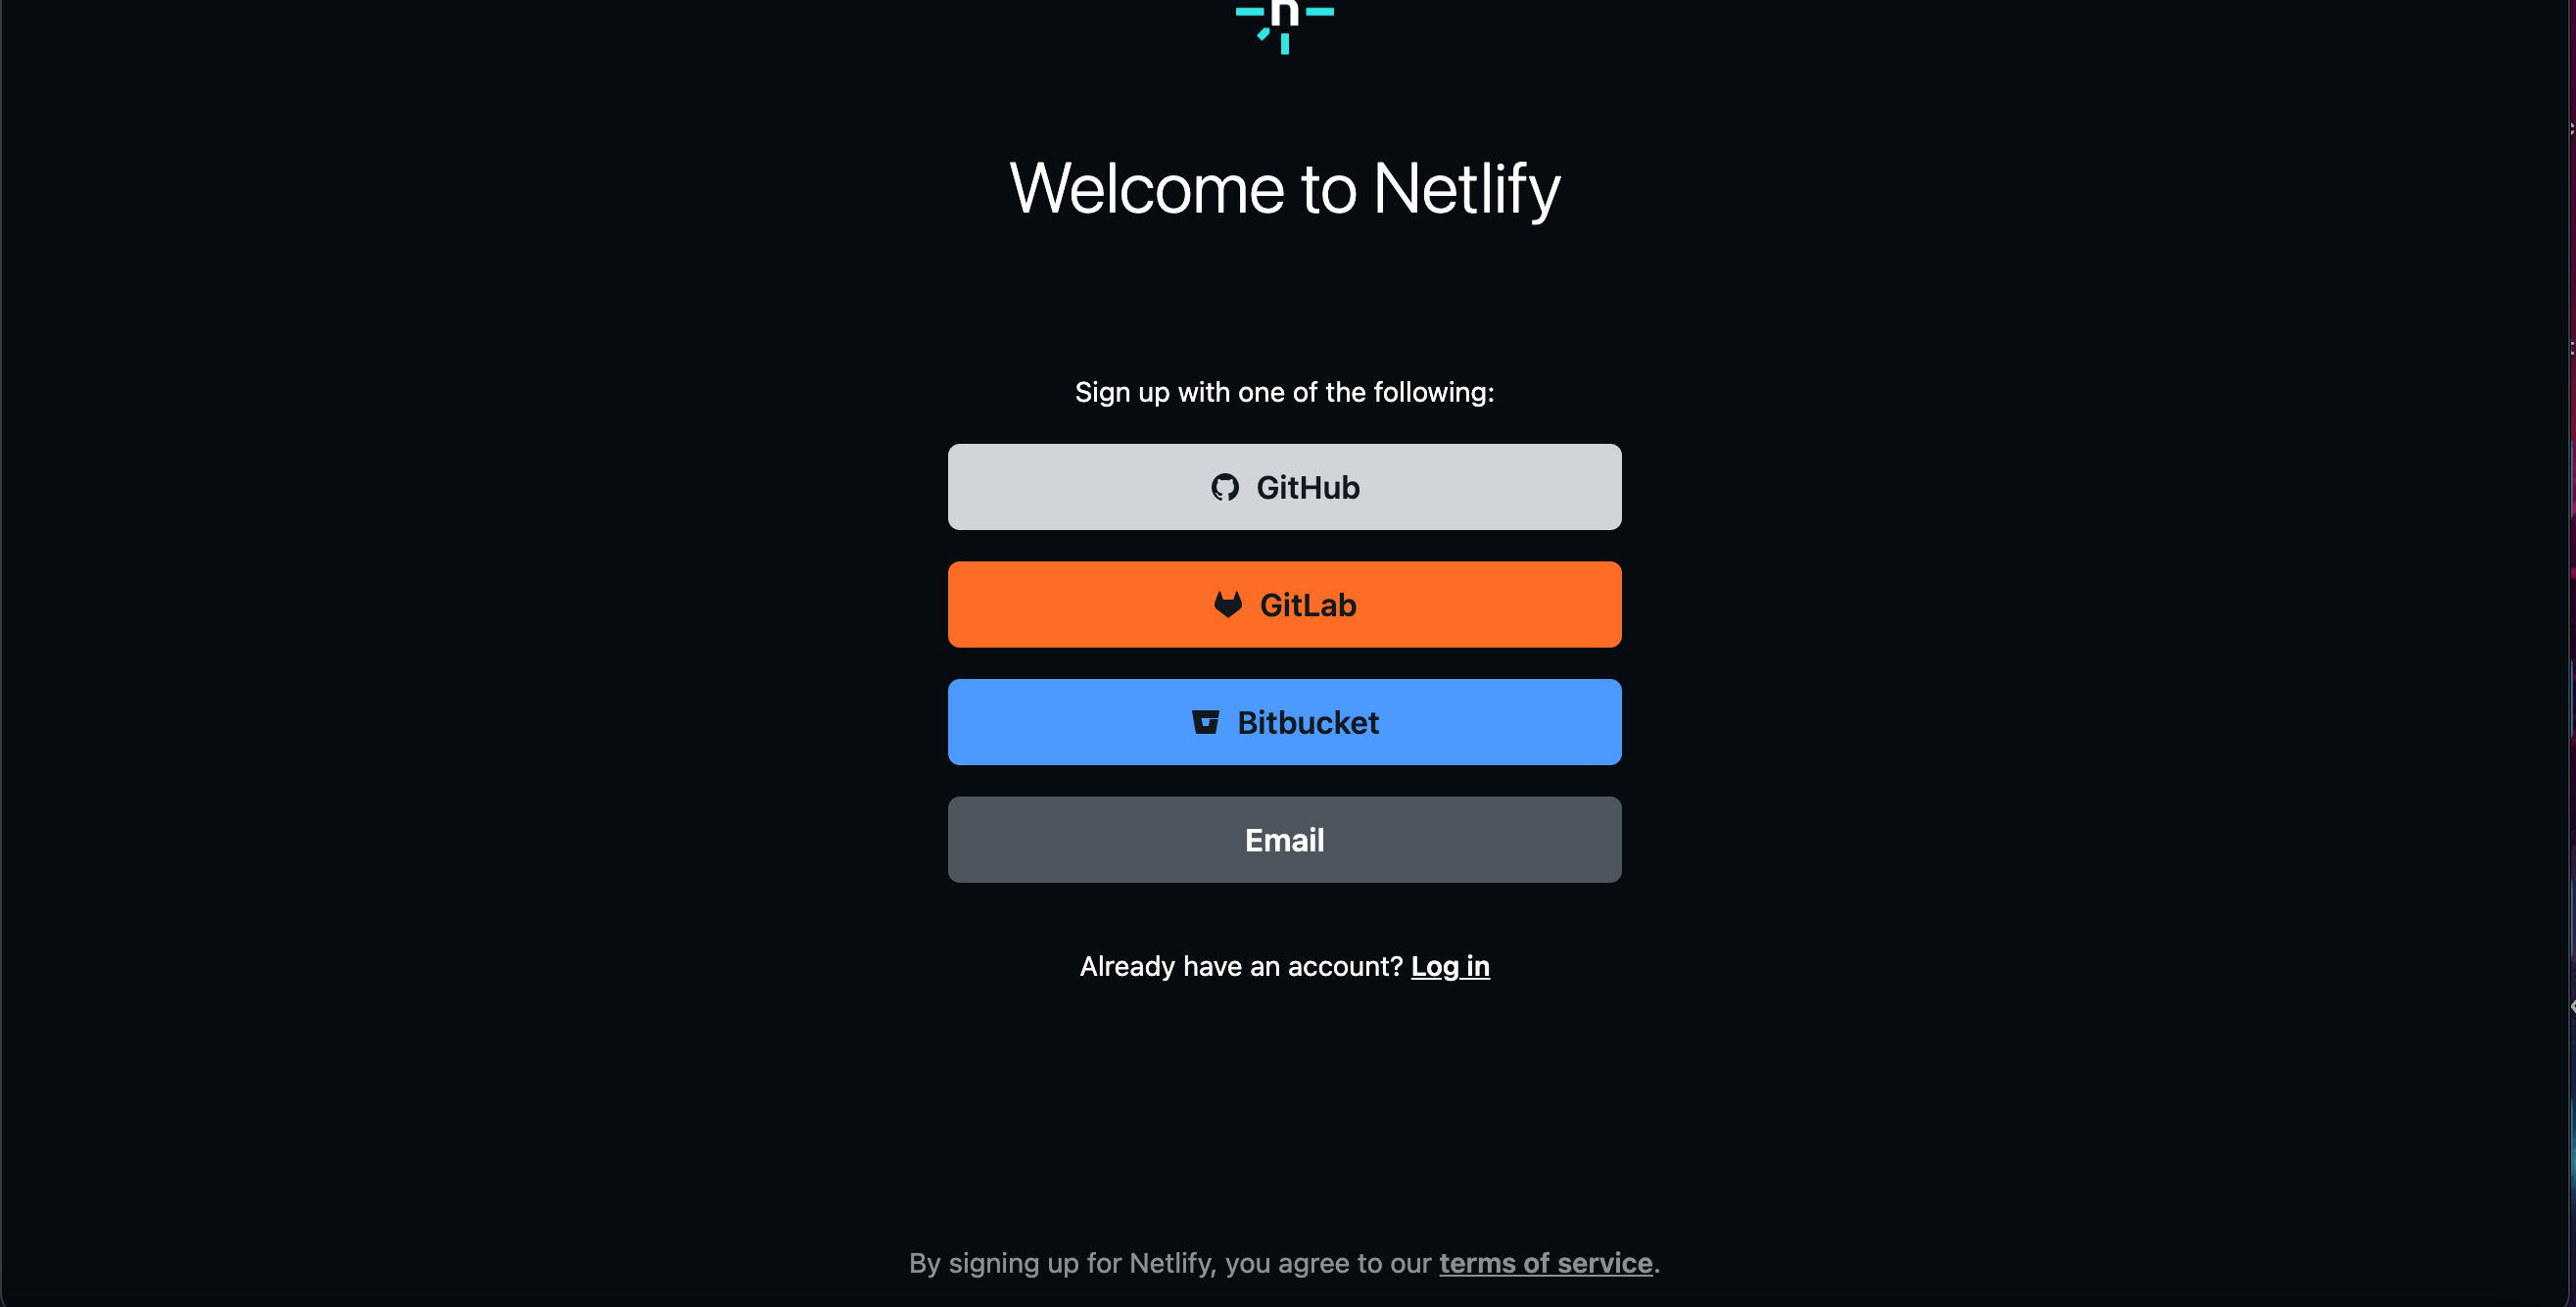
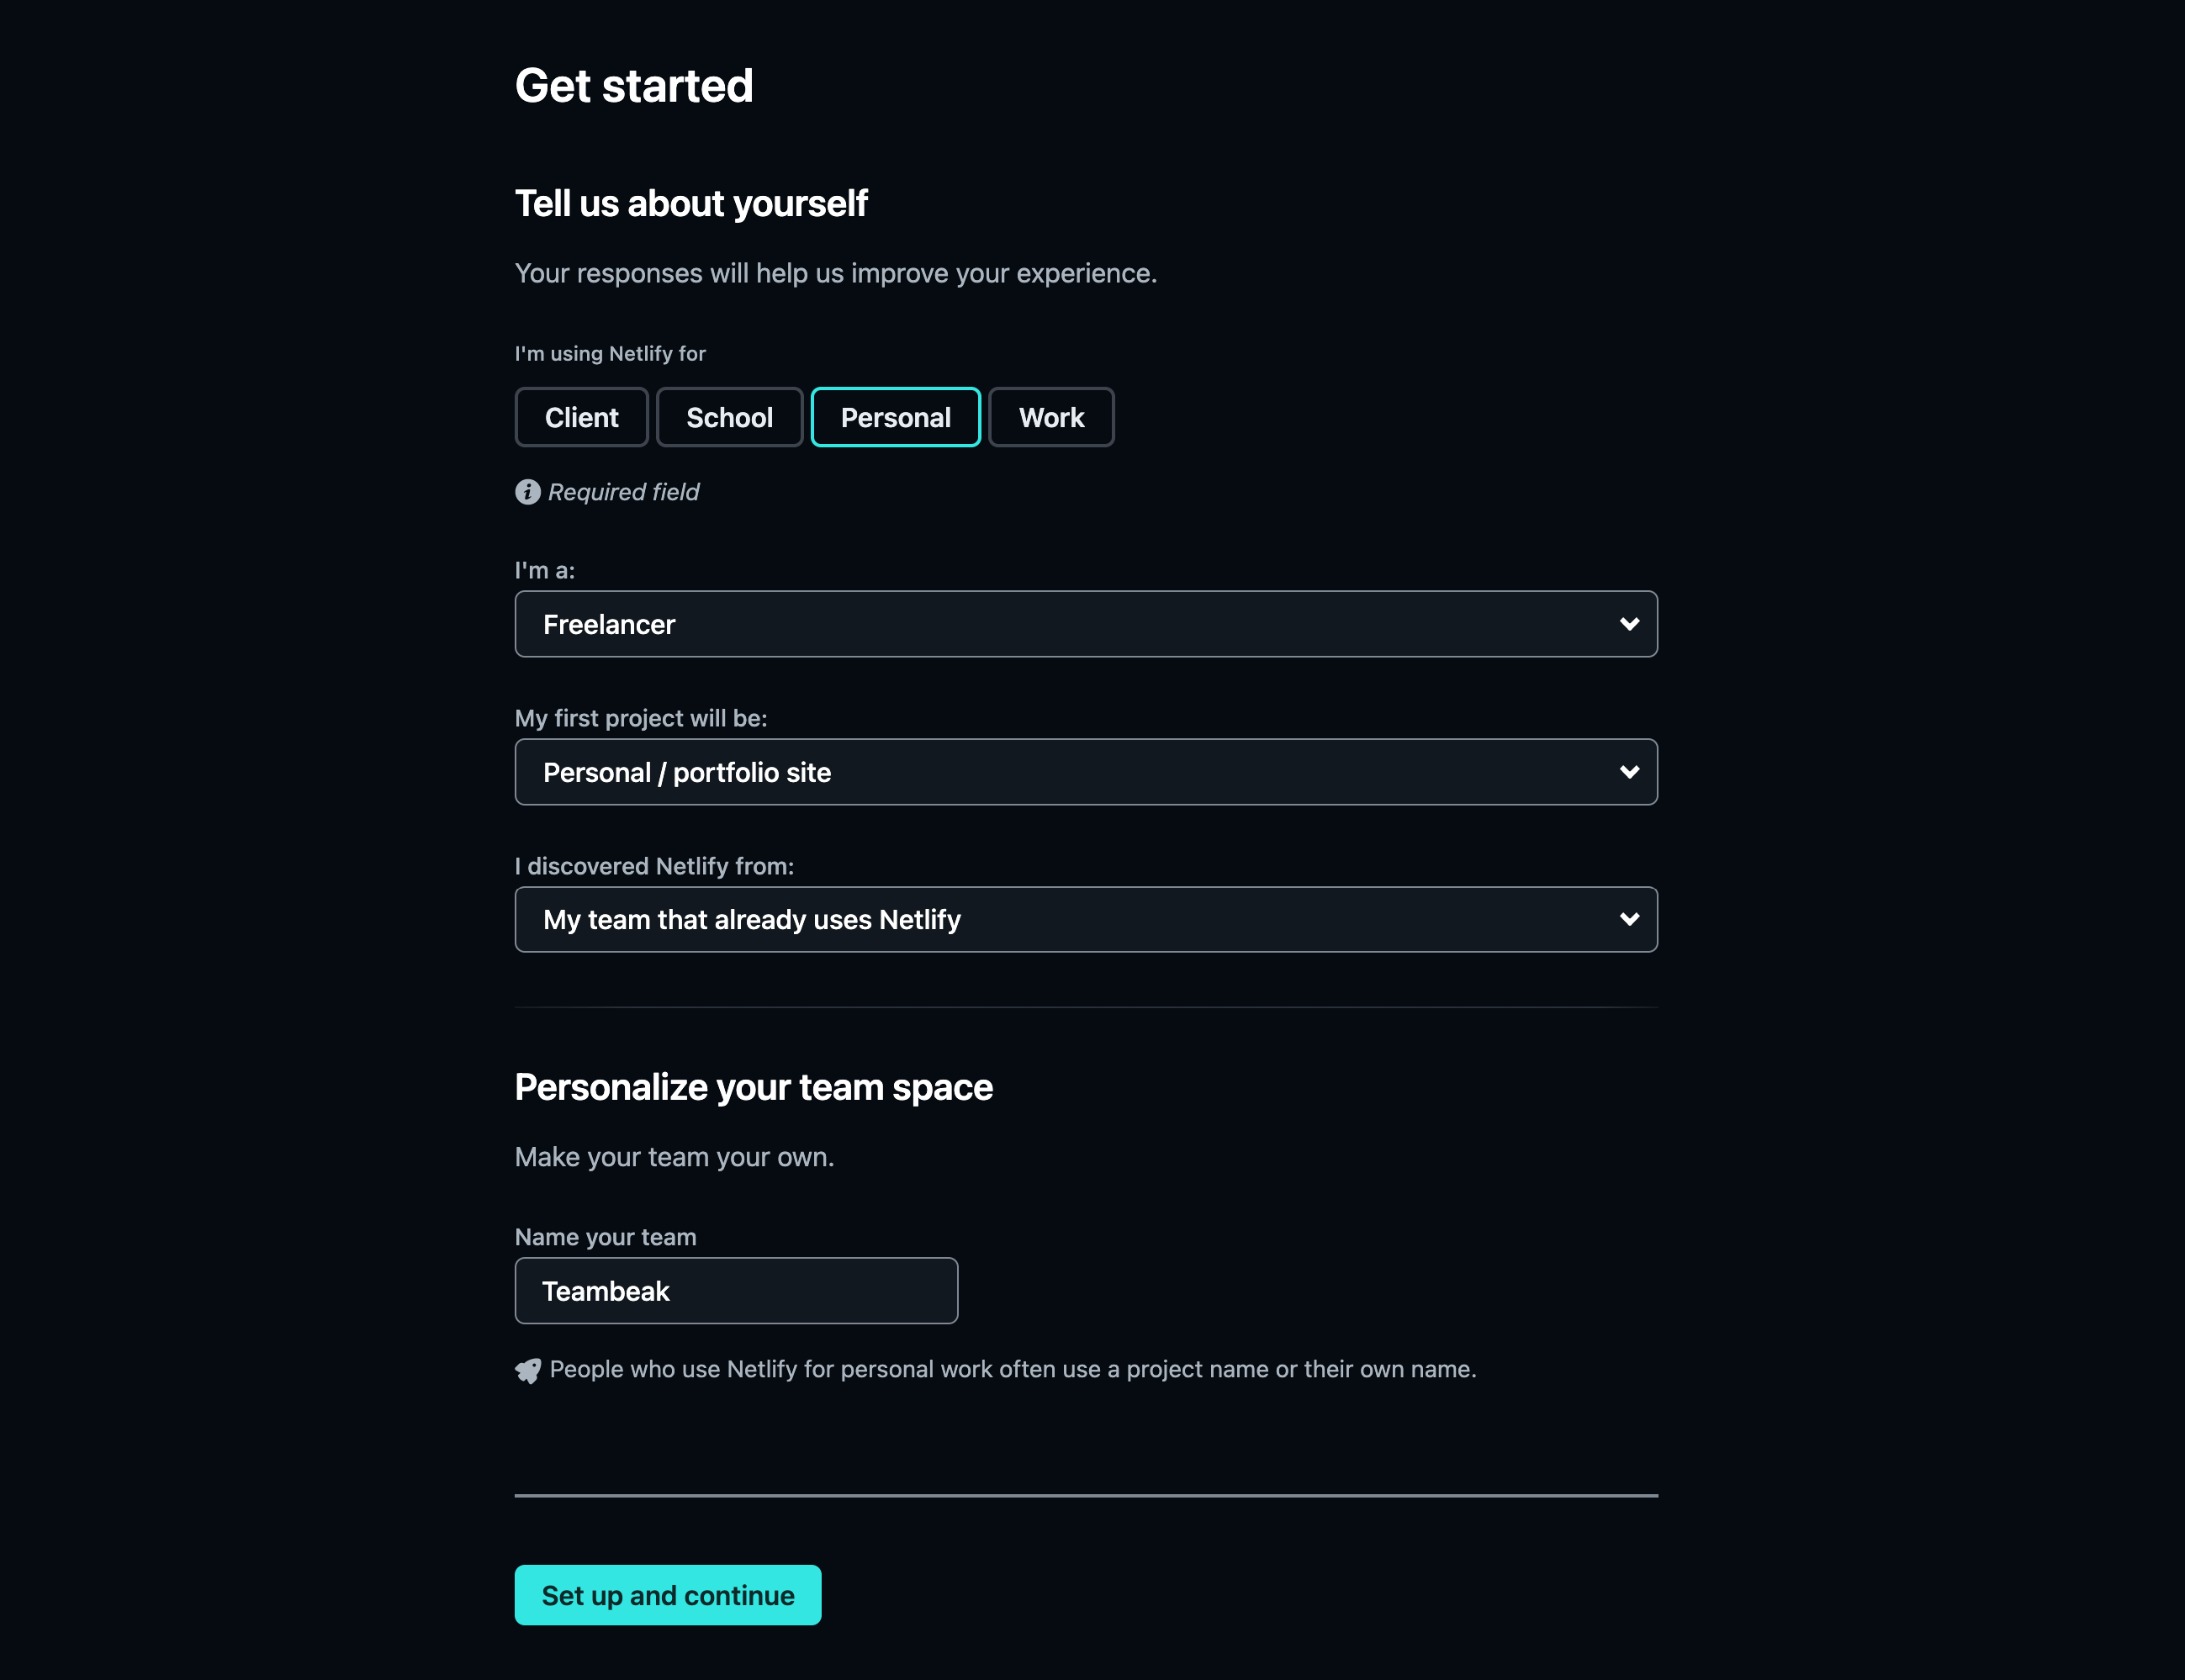
Netlify provides us with different sign in methods, as seen in the above diagram. Once we select our preferred sign in options, we will be redirected to set up our account. In this section, we will be asked to select what we want to use Netlify for. We
can use Netlify for four different purposes, including client, work, school and personal use.
Deploying Vue application with Netlify and GitHub
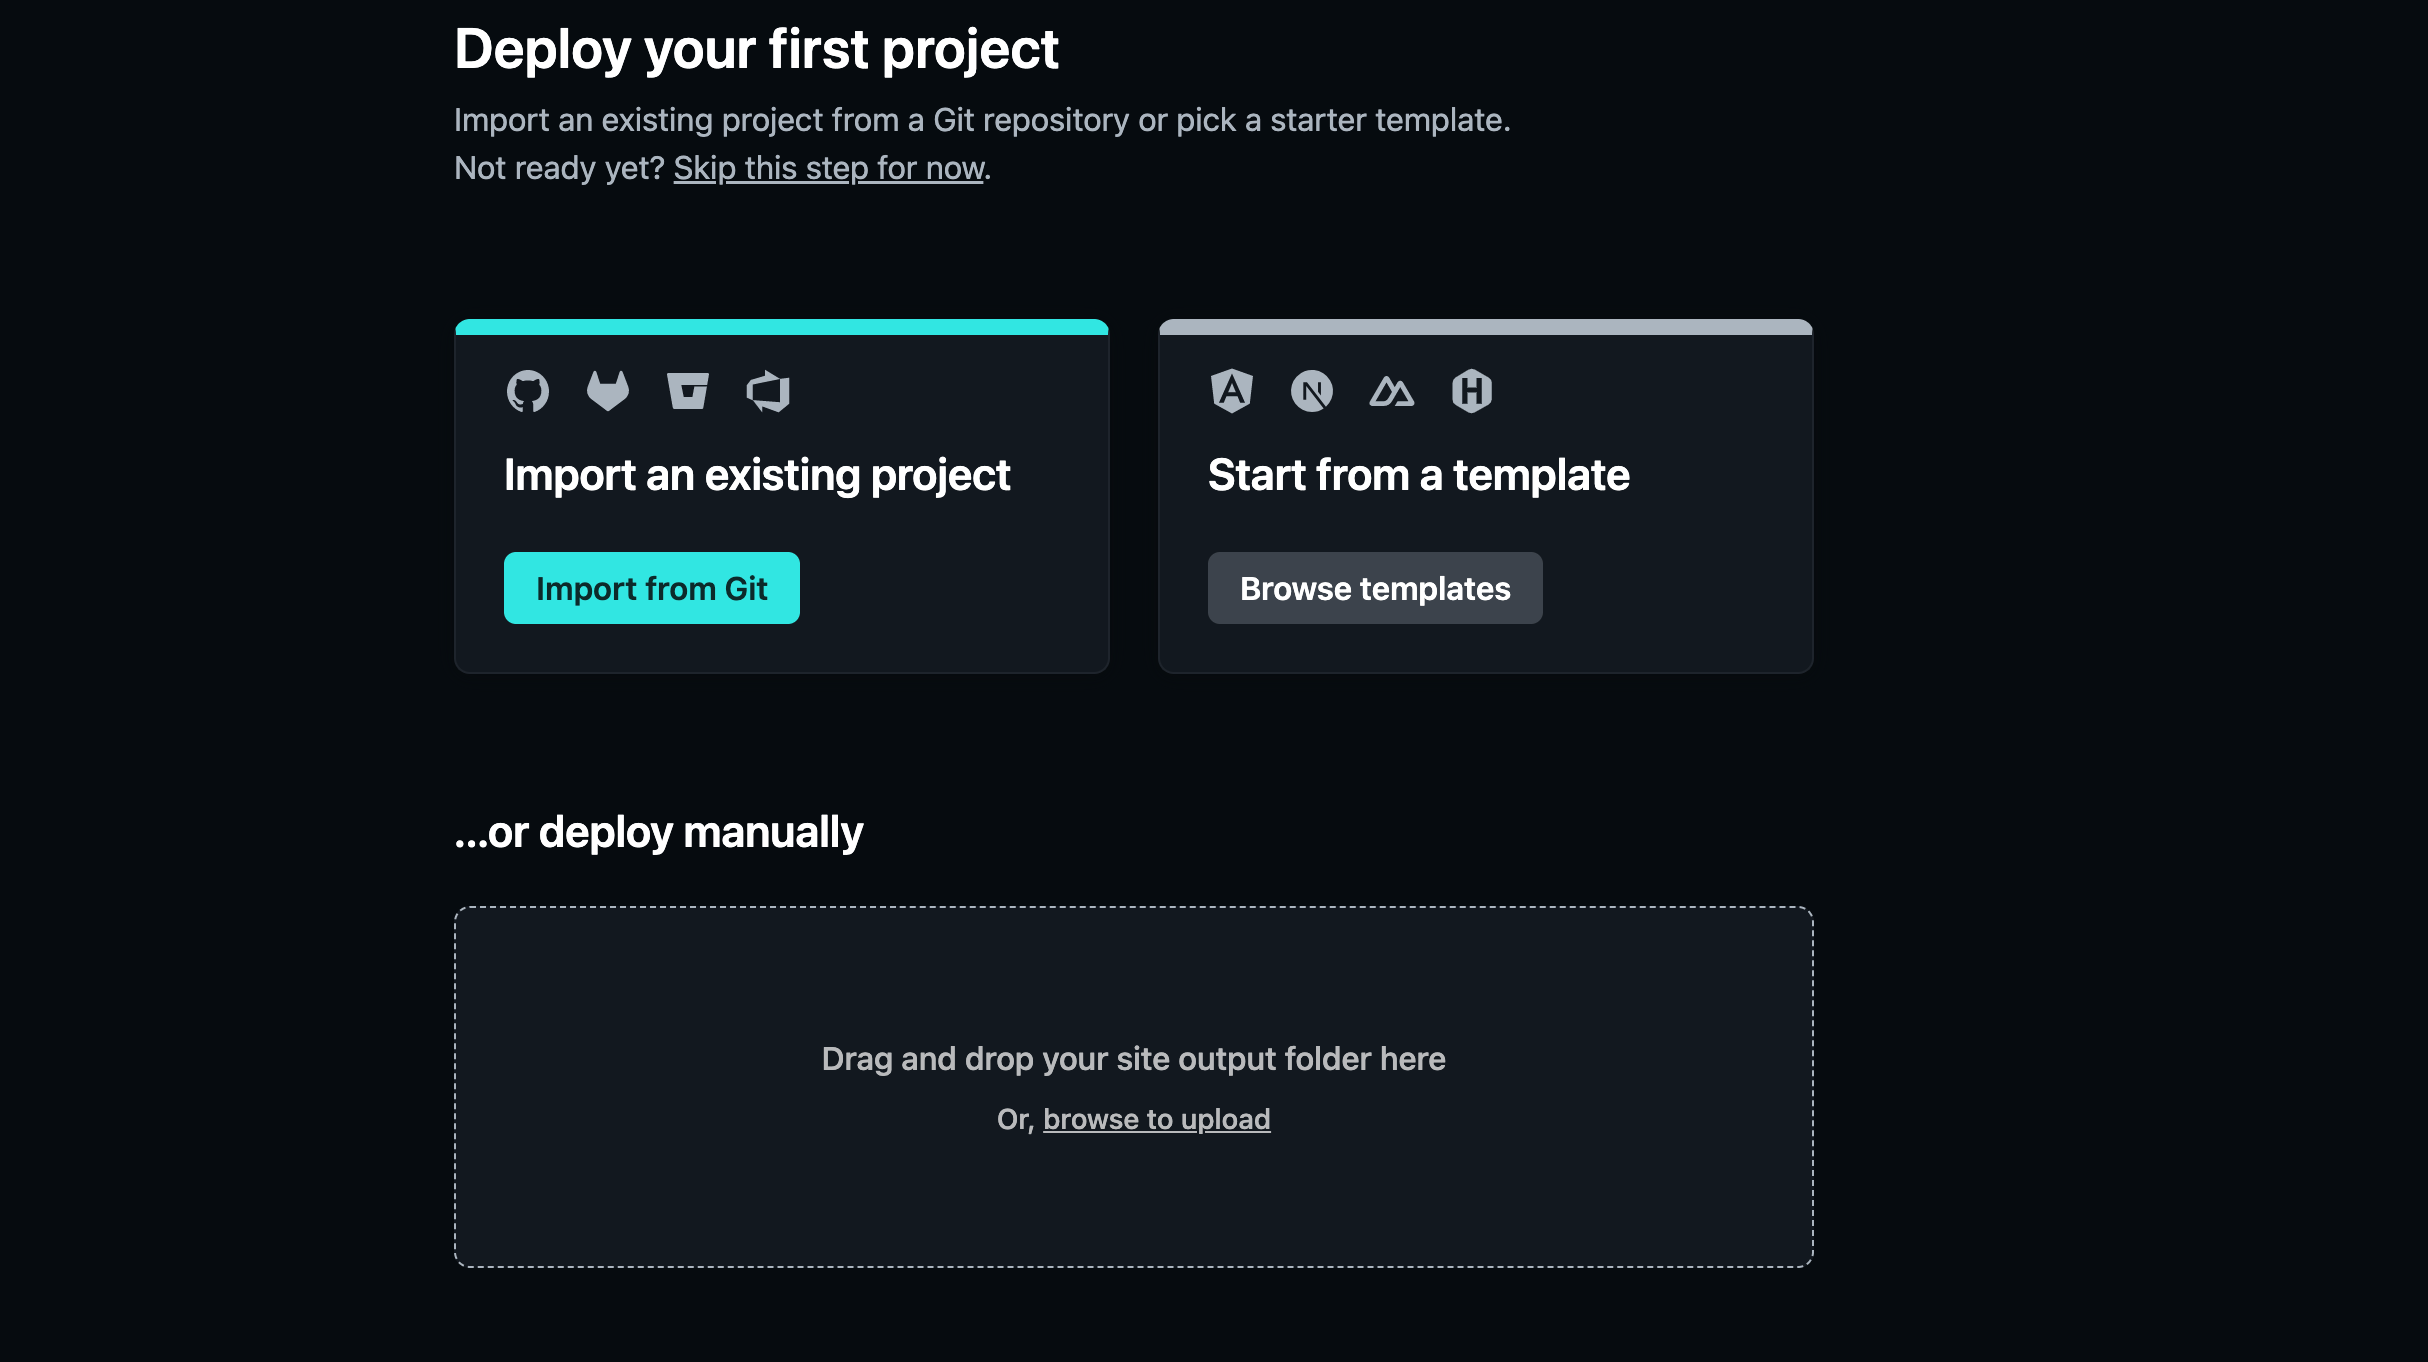
The next step is to deploy our application now that we have successfully created and configured our Netlify account. We have the option of deploying manually or from Git, but we won’t do either since we need to see the Netlify dashboard to understand how it functions and see other features. Instead, we’ll deploy via the main dashboard.
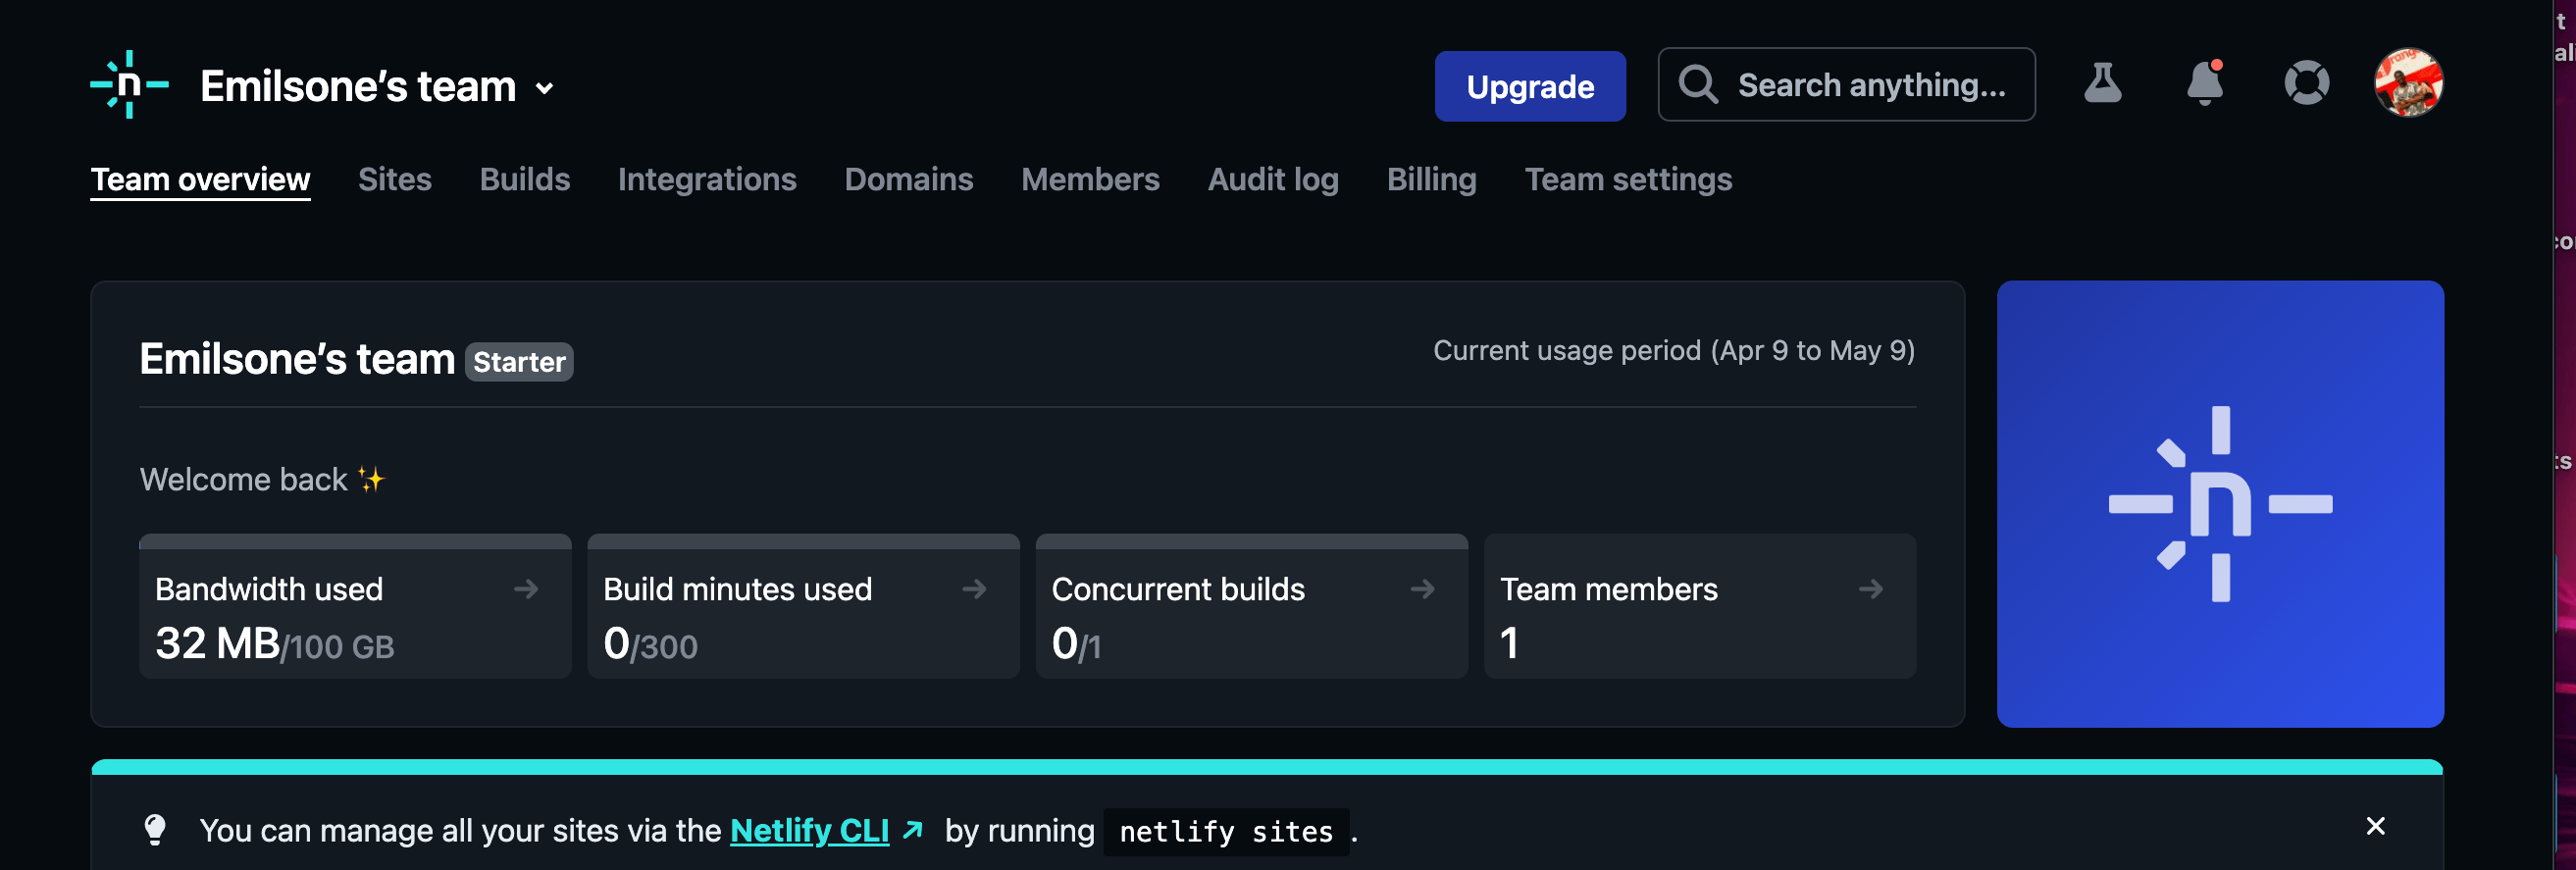
This is what our Nelify dashboard looks like, we have Bandwidth, Build minutes used, Concurrent builds and Team members.
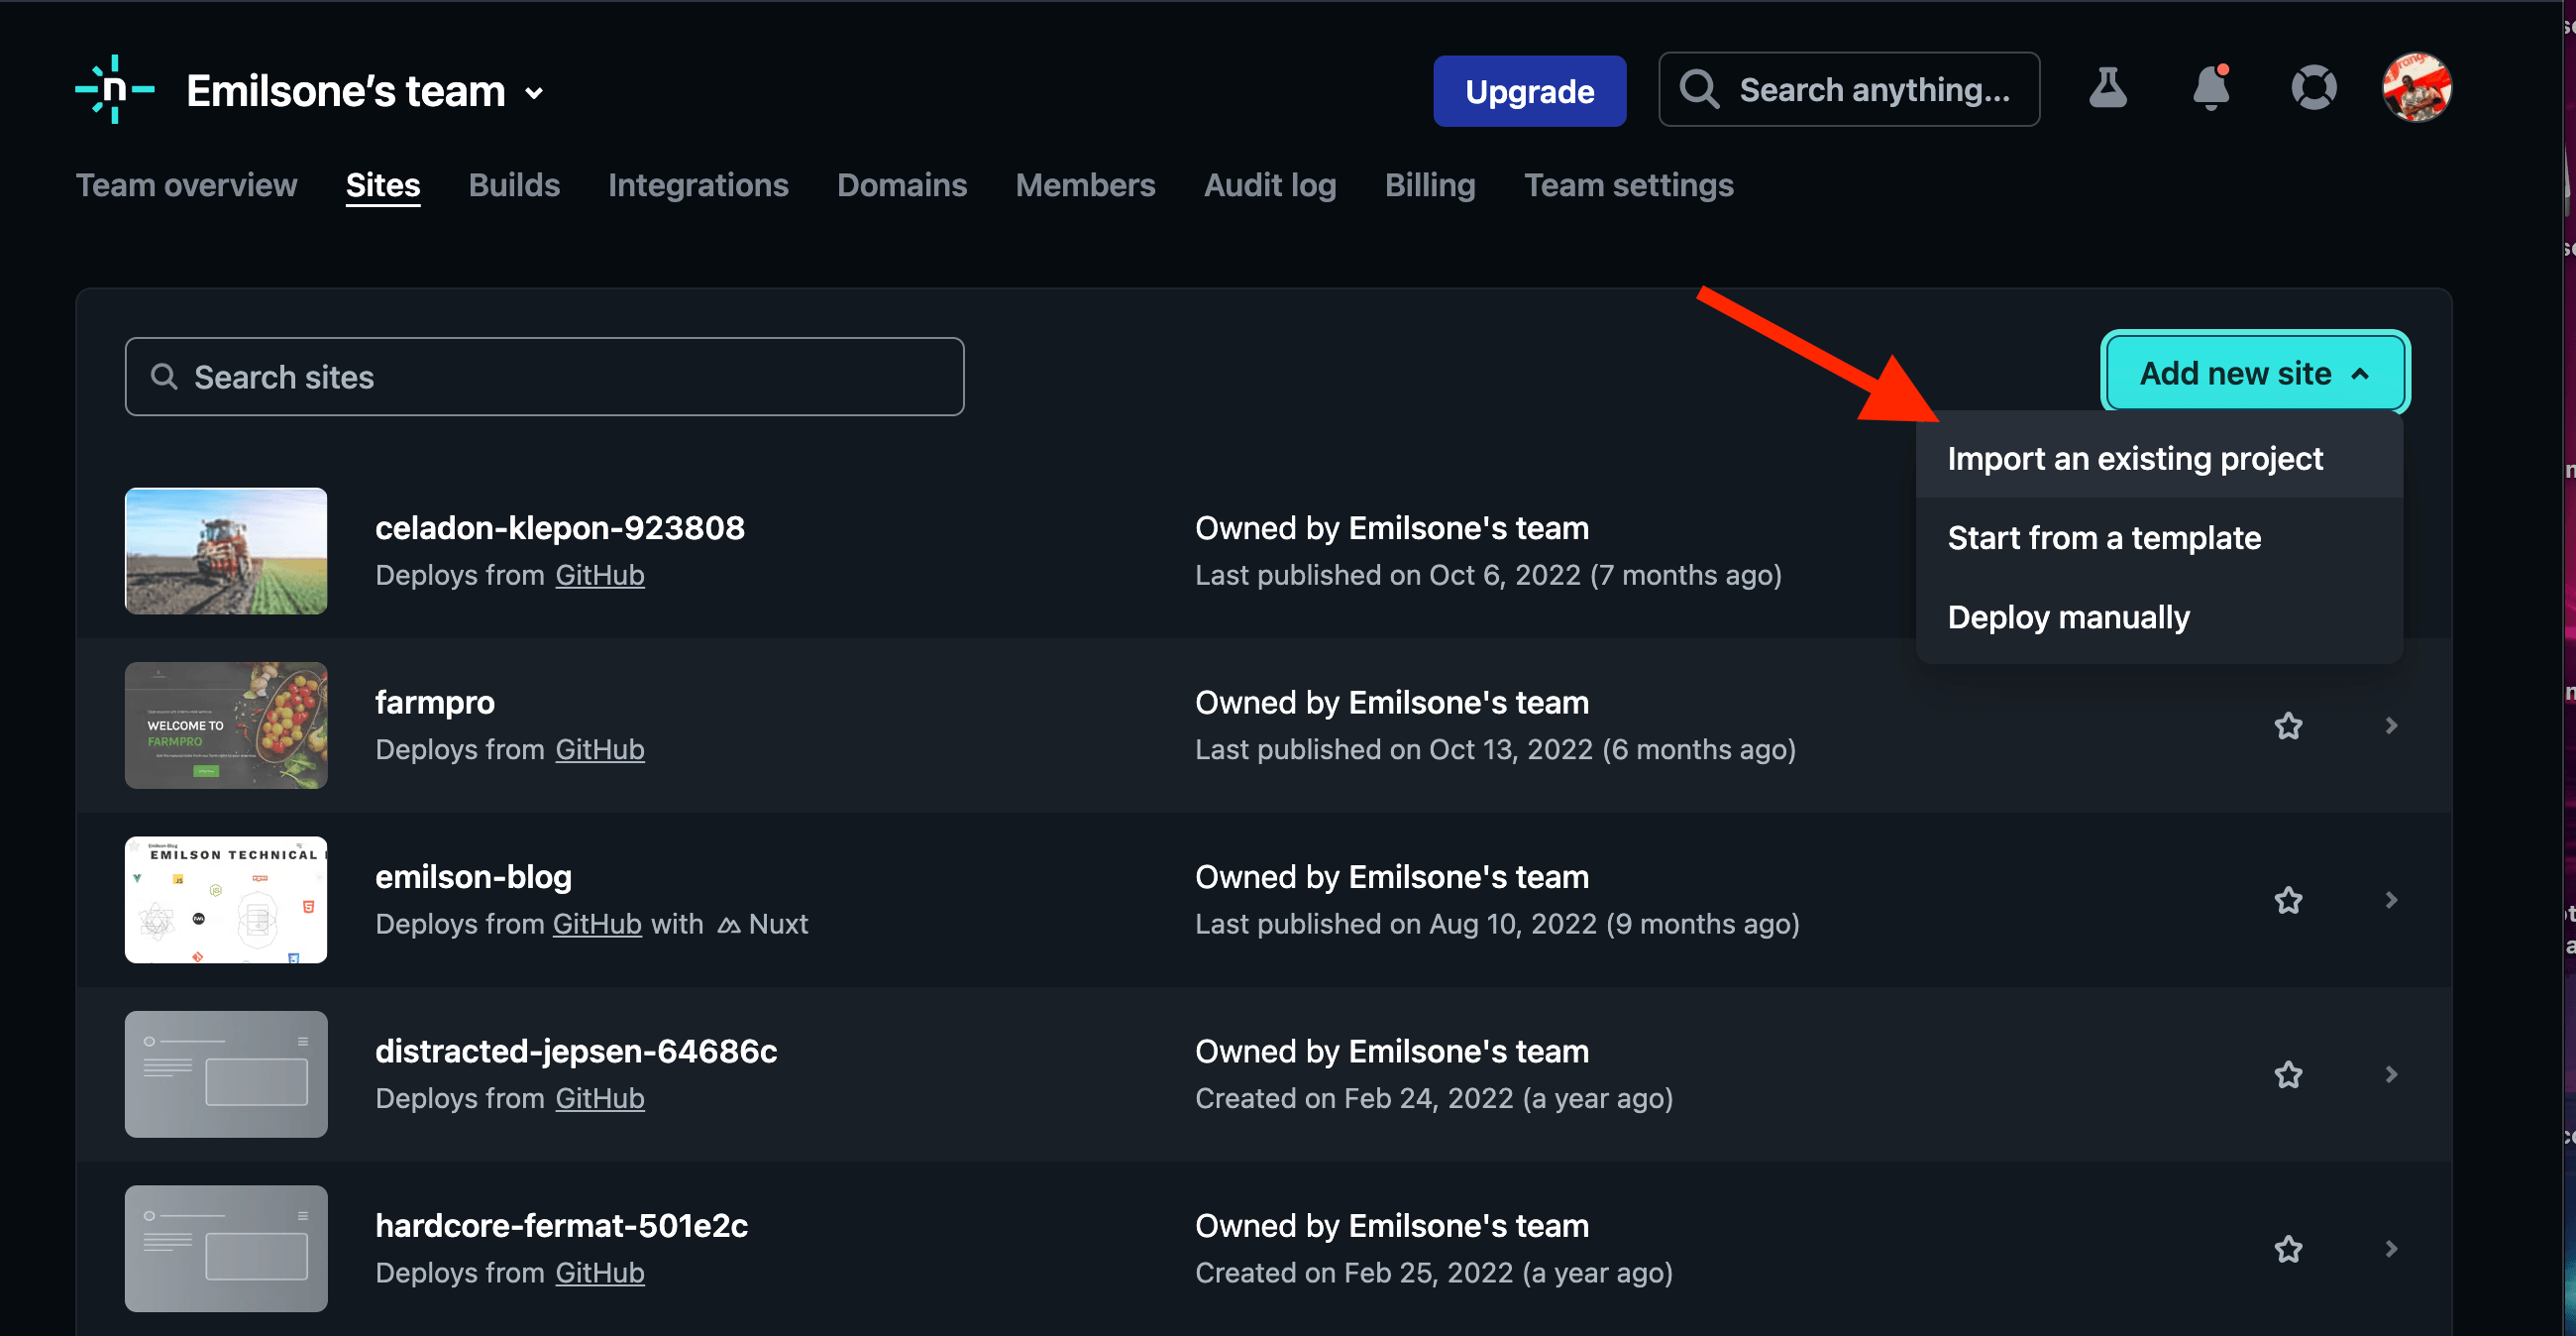
Next is to deploy a new site. To deploy a new site, we will click on the menu sites. It will take us to where we can add a new site from our GitHub. Click on the Add new site button, click
from the dropdown menu import an existing project.
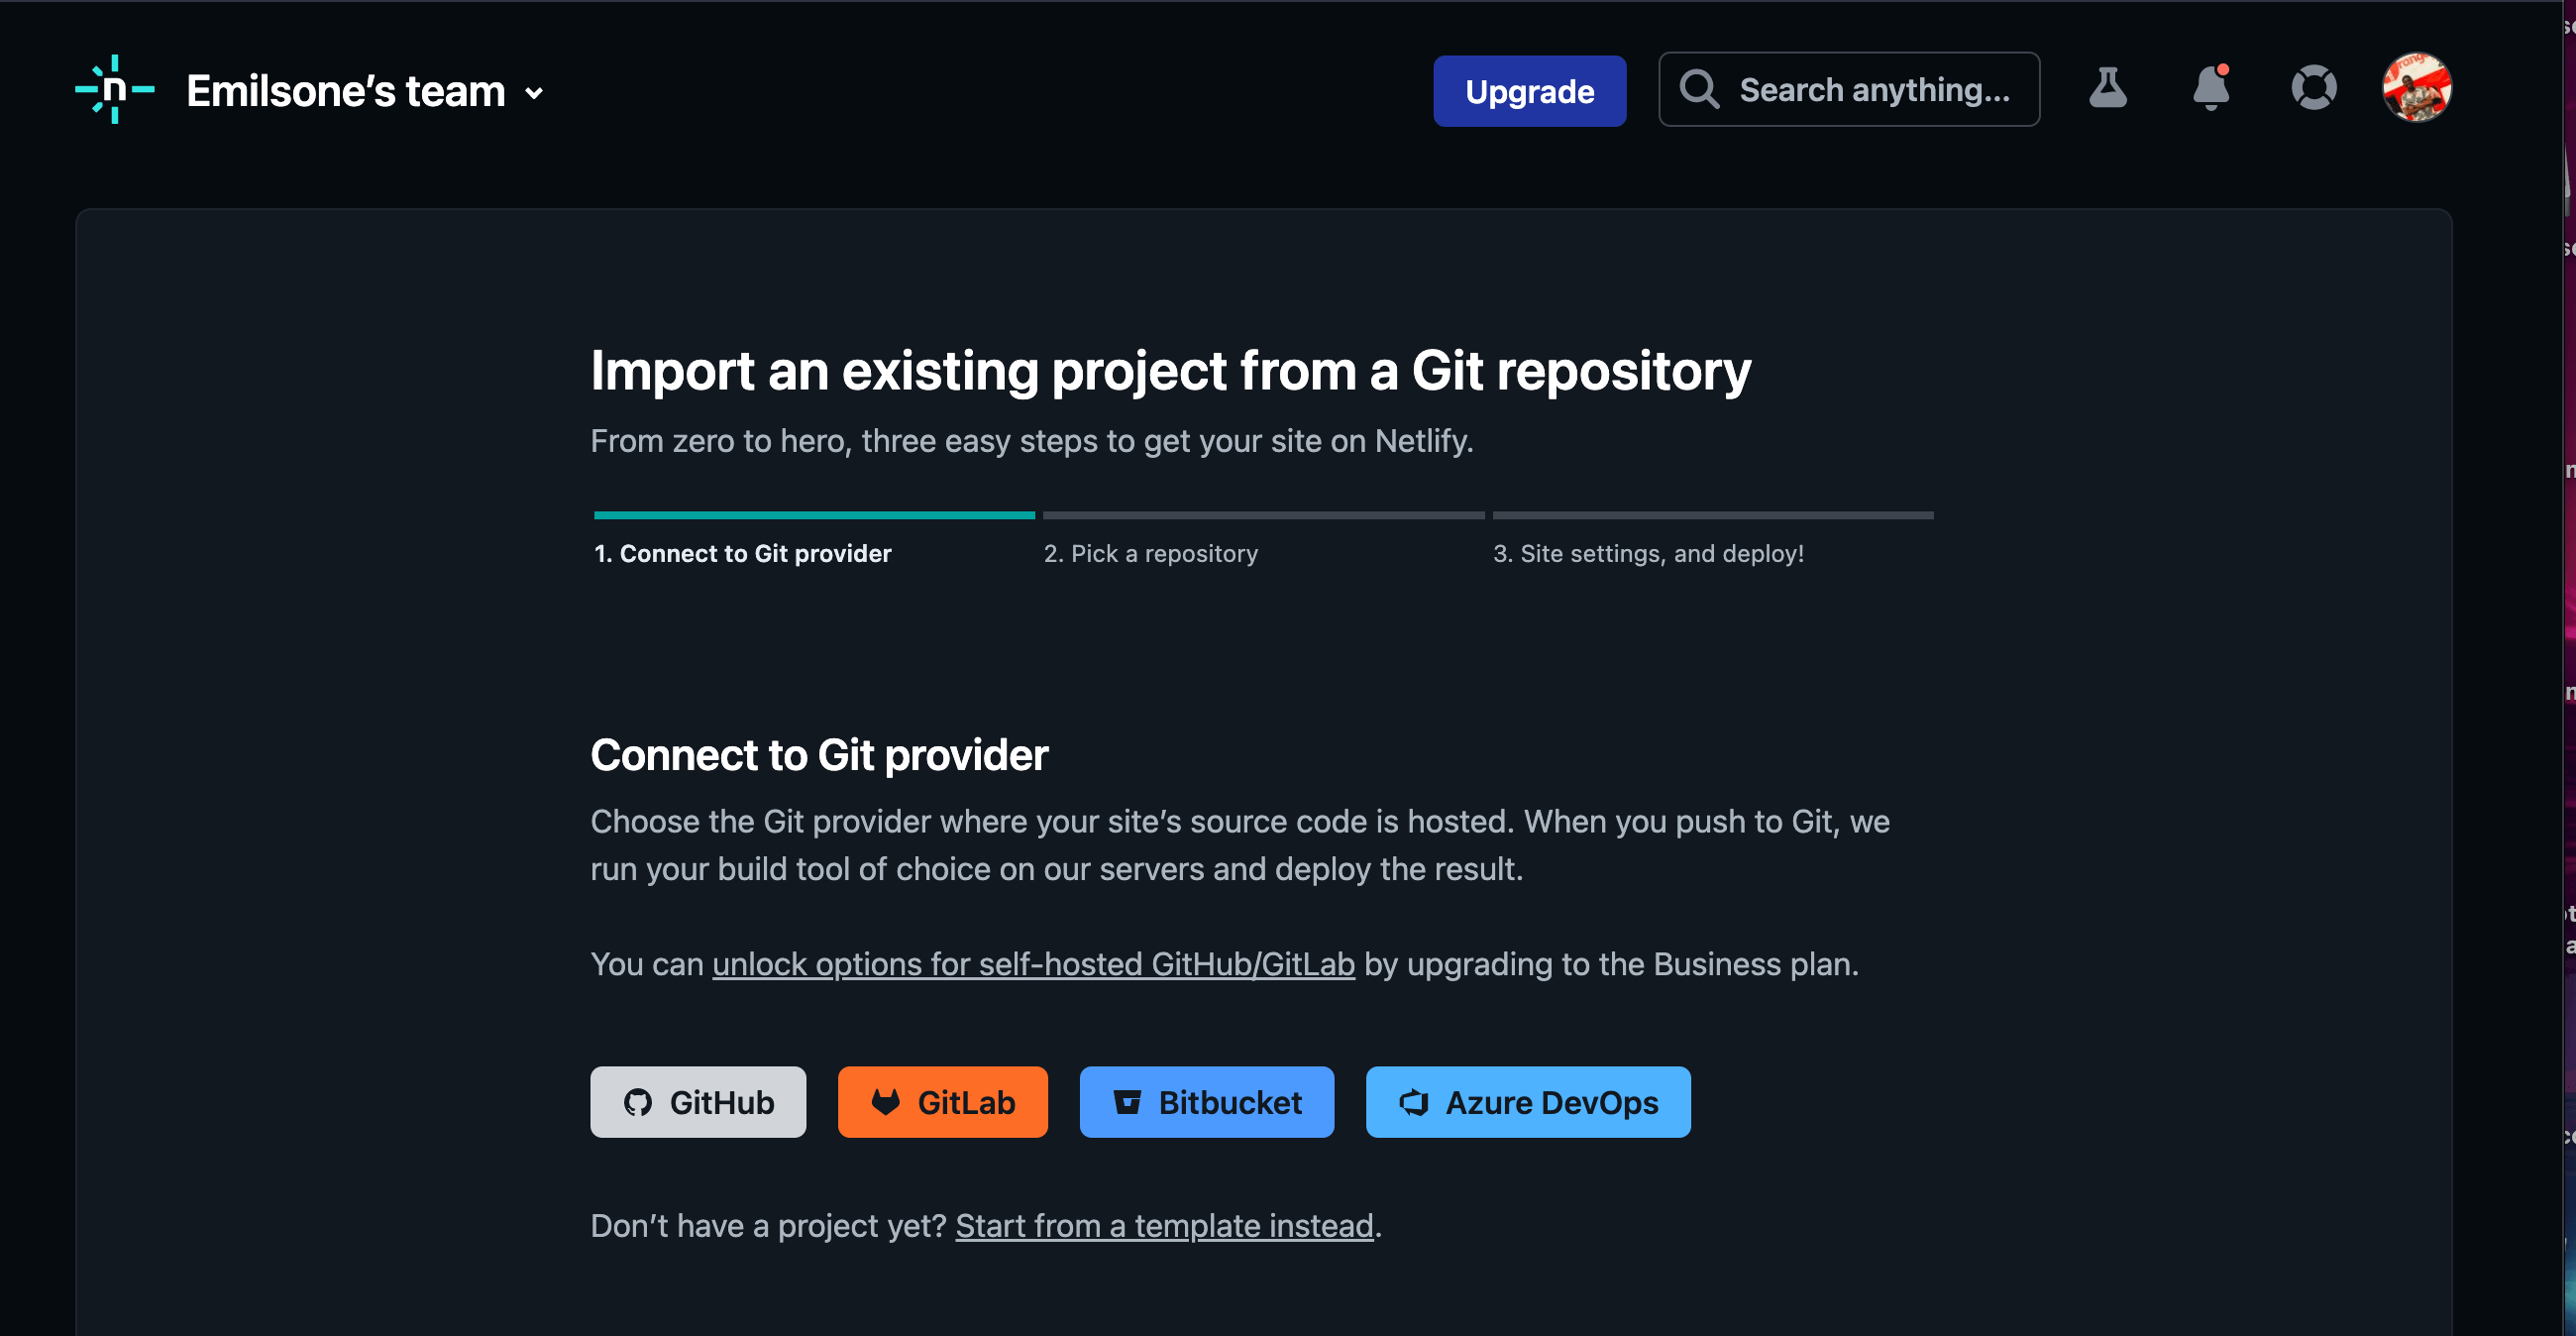
Next step, we will choose the Git provider where we host our code. For instance, we have GitHub, GitLab, Bitbucket and Azure DevOps. We will choose the GitHub option because we hosted our code on their platform.
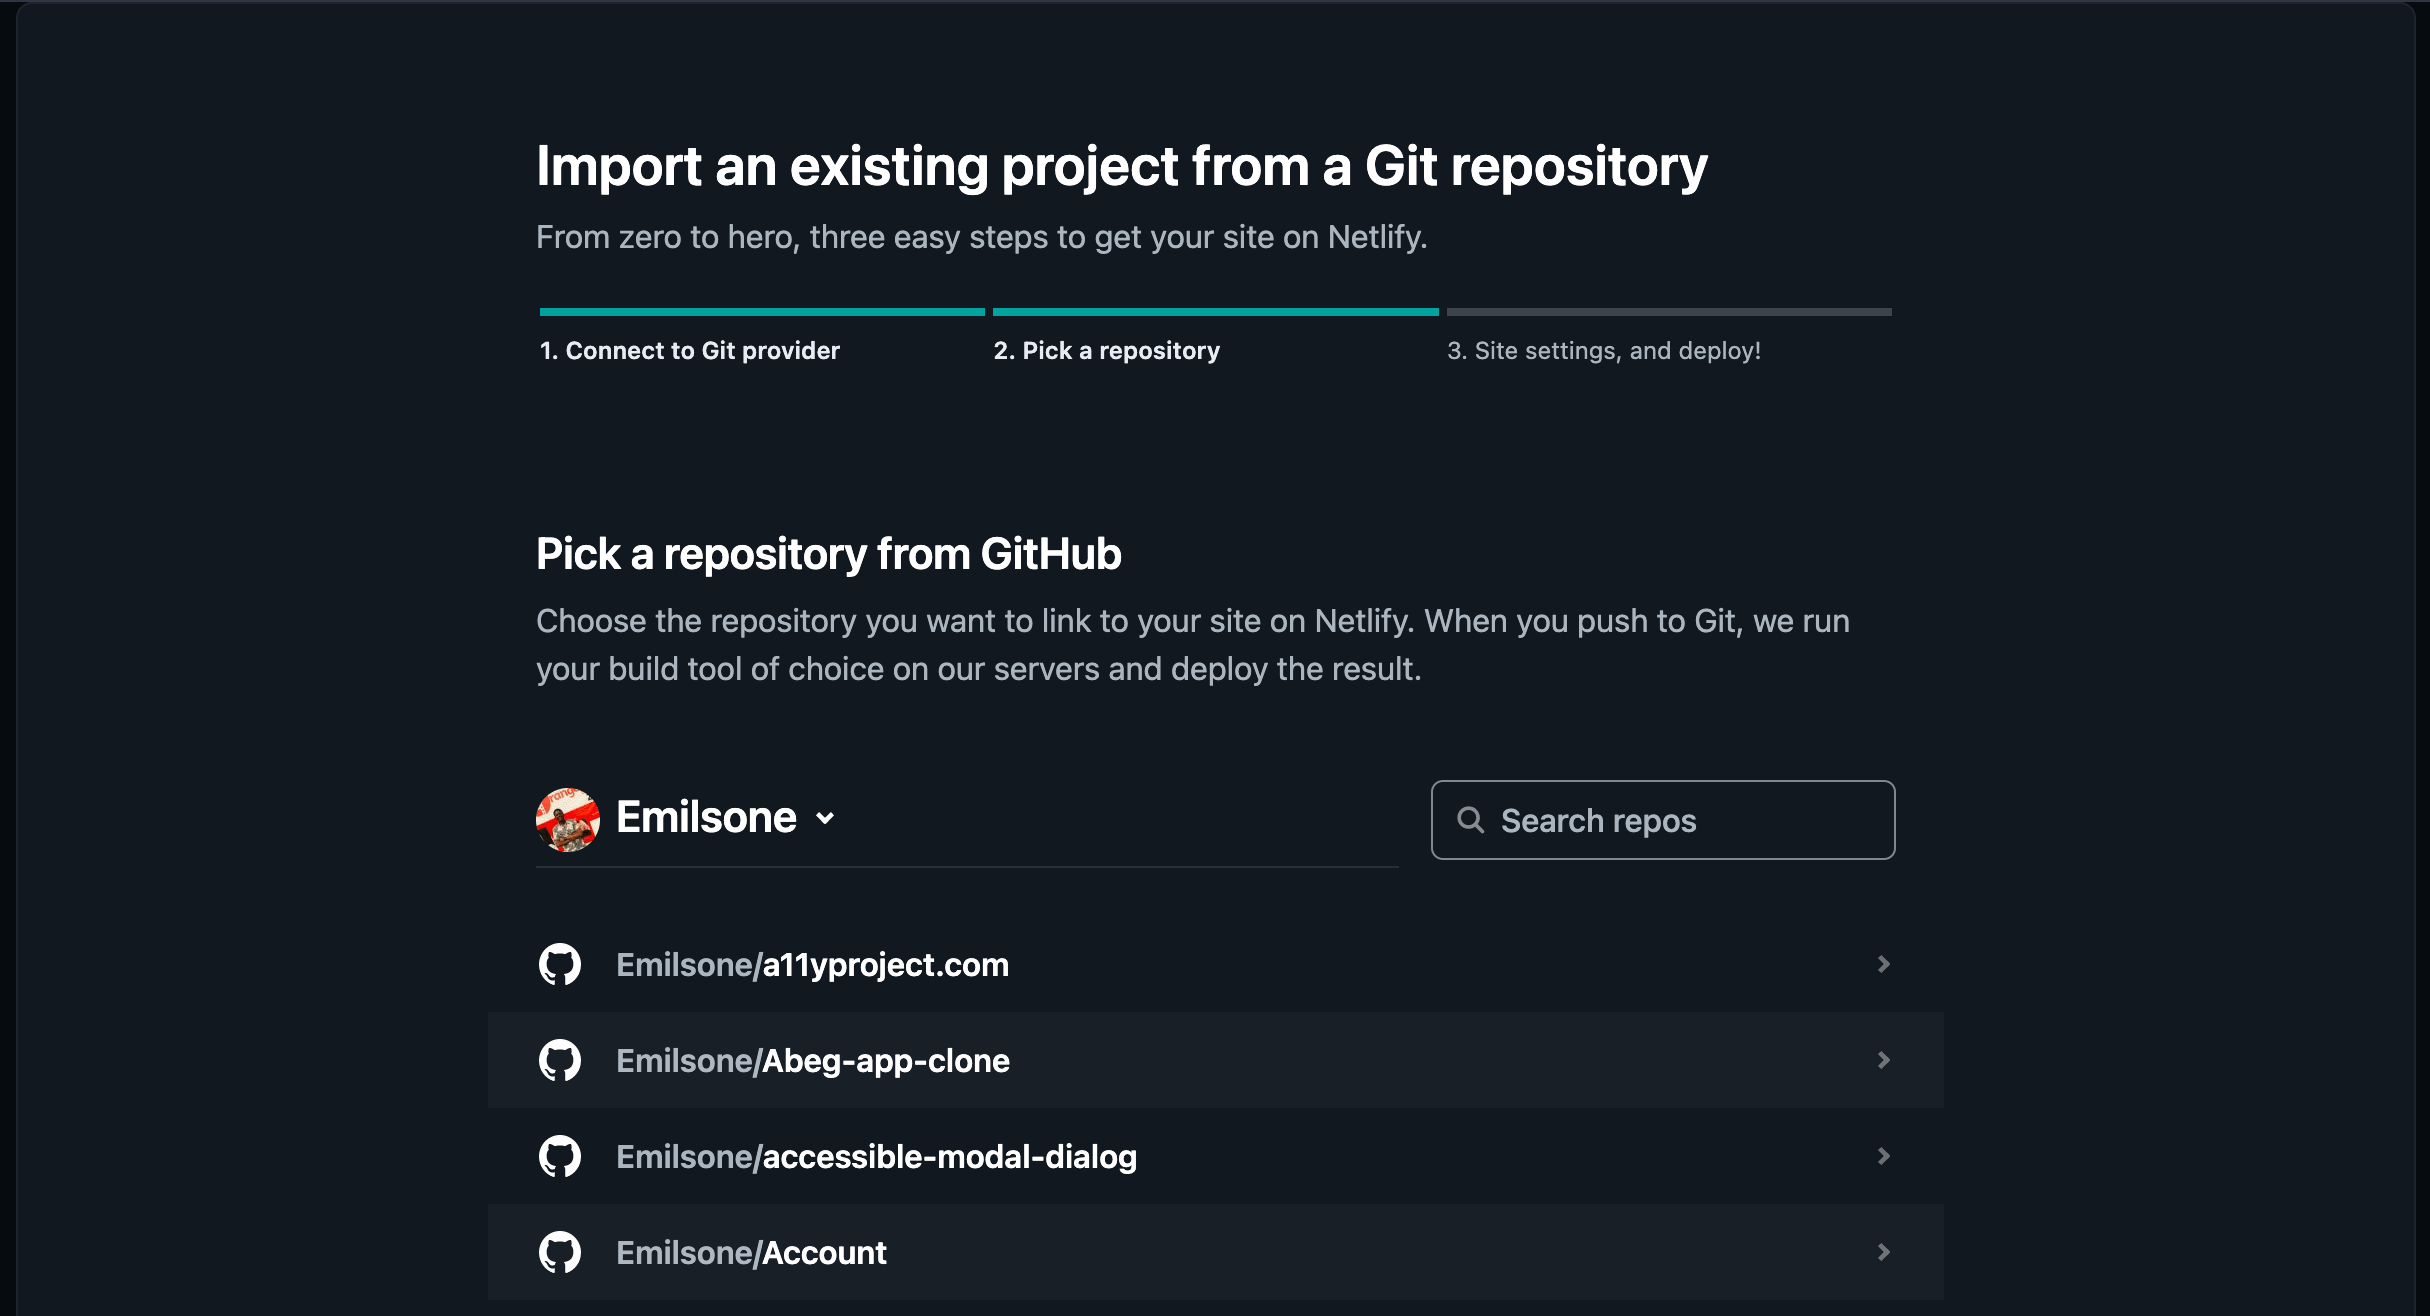
We will choose the repository we want to link and deploy our site on Netlify. In this example, I selected the repository I pushed to GitHub.
Deploying our repository comes next after we have finished choosing it. To avoid a failed deployment, we must carefully study the instructions before moving further.

We have successfully deployed our site!
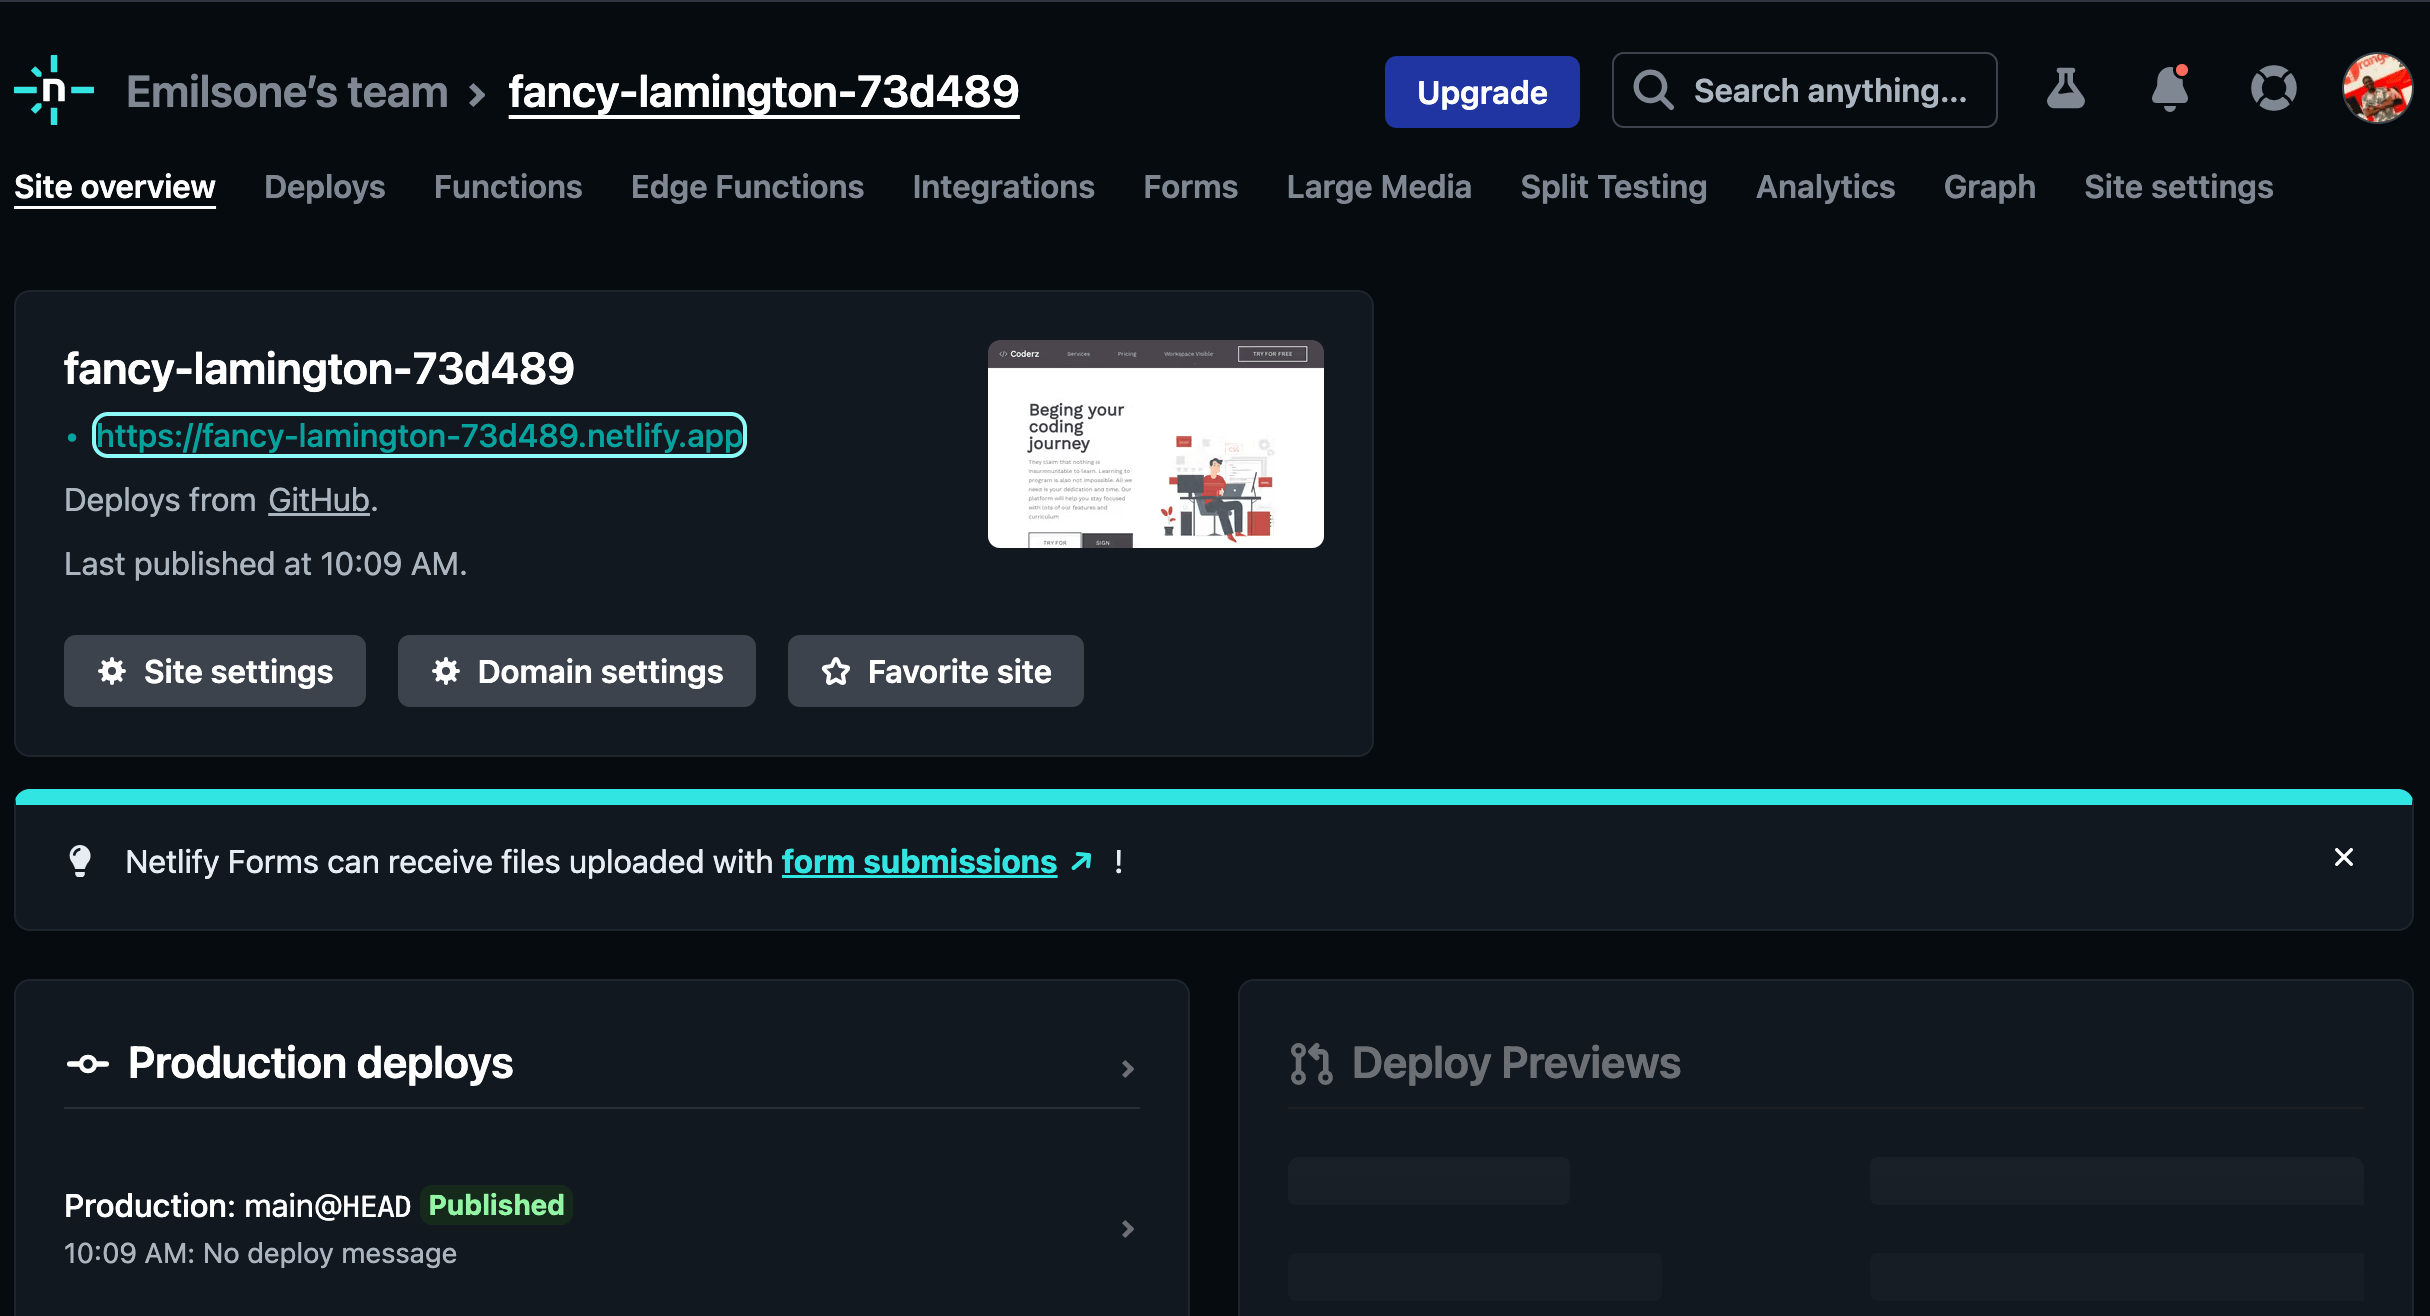
We have learned how we can deploy our application with Netlify and GitHub. Netlify also gives us the option to customize our domain name. Let’s see how we can do that. To do that, we will click on the link site settings.
Click on the “Change site name” button.
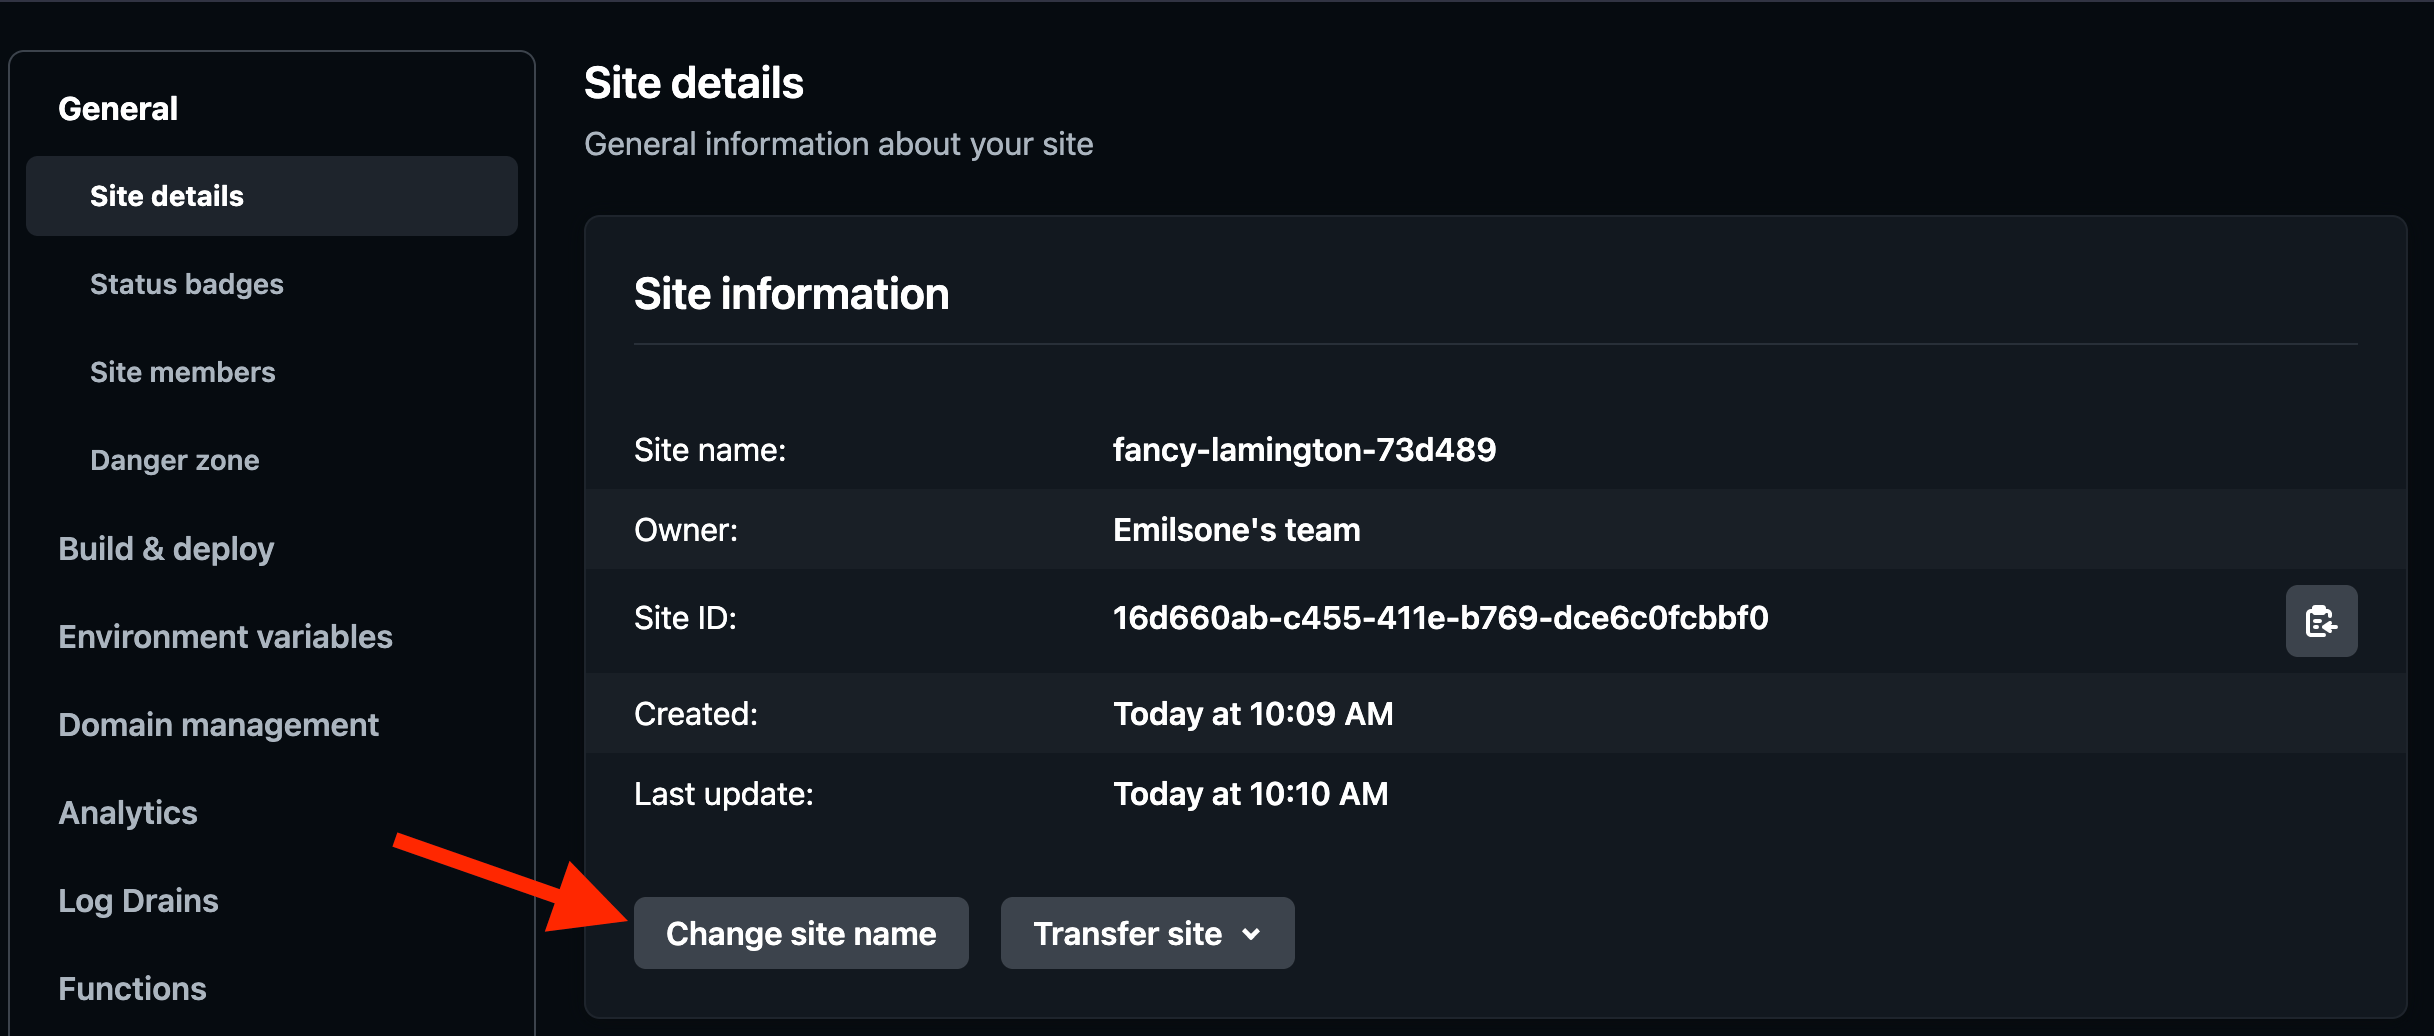
This will redirect us to where we will change our application name.
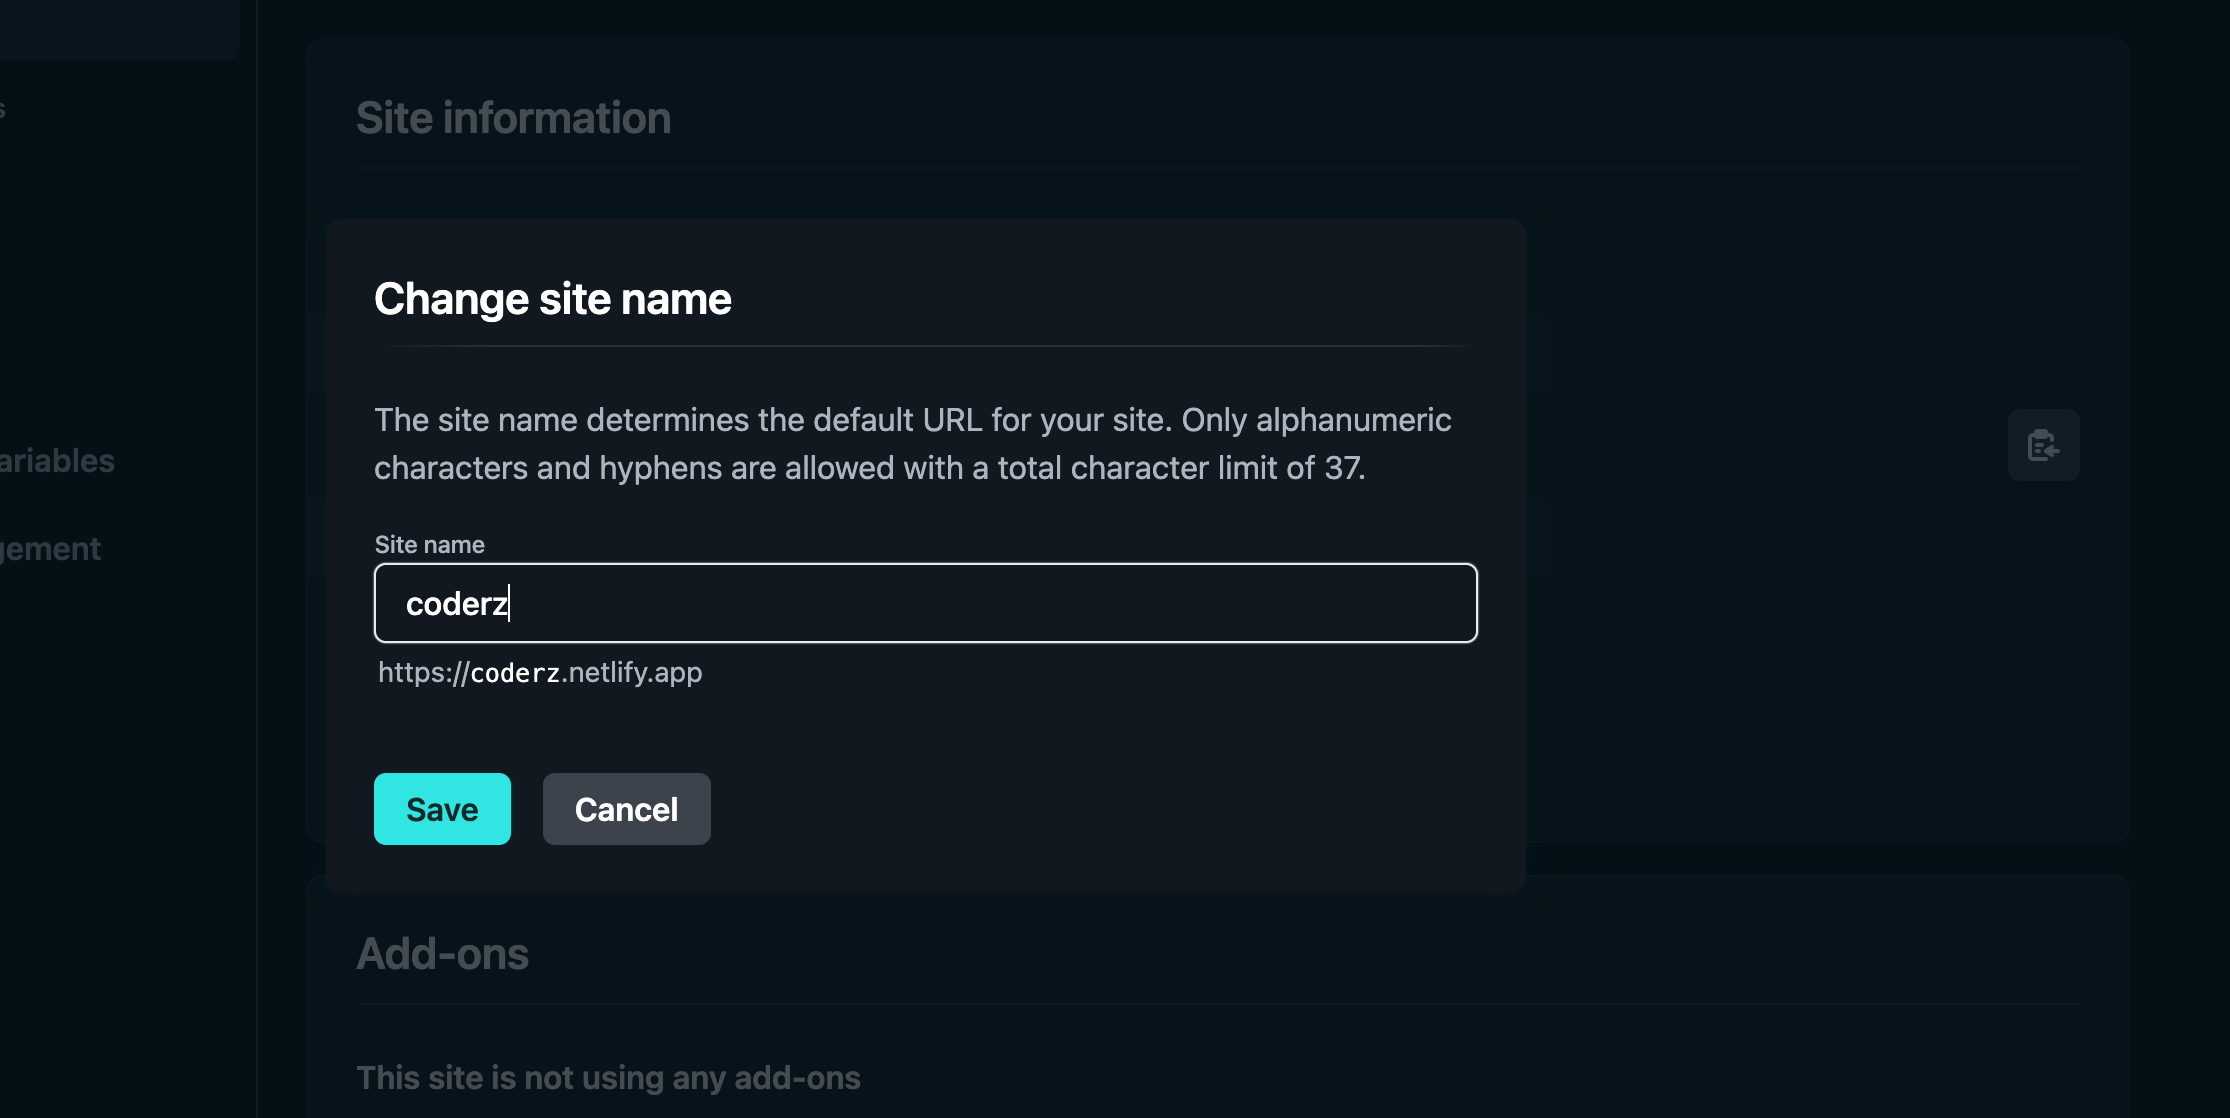
That’s all! We have successfully customized our domain name.
Conclusion
Deploying our Vue application with Netlify and GitHub is easy, as Netlify helps simplify the deployment process with just a few steps. Using Git and Netlify for hosting provides us with a simple and efficient workflow for deploying and managing our application. This article will help us deploy our application easily with Netlify.

Ezekiel Lawson
Ezekiel Lawson is a technical writer and software developer. Aside from building web tools and applications, he enjoys educating people and simplifying complicated issues for their easy understanding by sharing resources that will guide developers through technical writing.
Related Posts
Comments
All articles
Topics
Web MobileMobile
Desktop
Design
Productivity
People
