Code Like Never Before with the New WinForms Syntax Editor

Summarize with AI:
Application development just became even easier with the highly requested Syntax Editor, now available in the latest release of Telerik UI for WinForms. Let's walk through its features and how you can use it to code more effectively.
Welcome to the R1 2020 release of Telerik UI for WinForms! Application development just became even better with the latest release, which includes the highly requested and anticipated RadSyntaxEditor control. Our team worked tirelessly (yes, we are looking for your sympathy!) to pack the Syntax Editor with all the features you would expect from a proper code editor – everything from code editing, line numbers, selection, folding regions, undo and redo, find and replace, zooming, keyboard shortcuts, intelliprompts etc., we have it all.
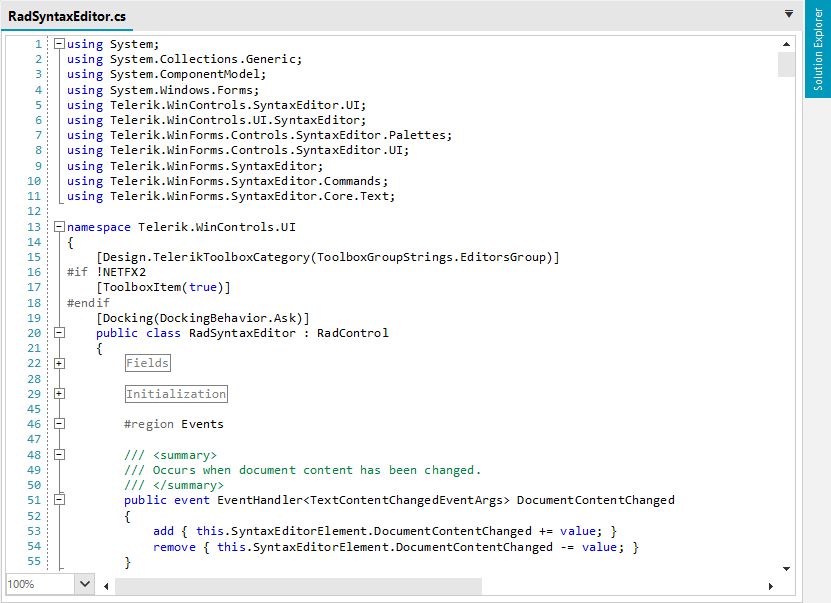
Telerik UI for WinForms - Code Editor Demo
The Syntax Editor control displays text by storing it in a special document object. This object is responsible for editing, inserting and deleting text. The editing operations are executed in a special and very efficient “rope” data structure. No matter how efficient these operations are, text editing by itself is not so exciting. The additional features are what makes the control special.
Most of these features are achieved with special tagger objects and UI layers. A tagger in the context of the Syntax Editor is a class which identifies parts of the text and assigns them with a special tag if they match a certain condition. For example, syntax highlighting is achieved with a special word tagger class. Basically, this tagger scans the text and searches for keywords. The elements of code editor control are rendered in different layers. Usually each tagger has a dedicated layer which renders the collected tags.
It may sound complex, but the API is straightforward and more importantly it can be easily extended. Only a couple of lines are needed to load a document and add syntax highlight and folding regions to it:
using (StreamReader reader = new StreamReader("../../RadSyntaxEditor.cs"))
{
    this.radSyntaxEditor1.Document = new TextDocument(reader);
}

CSharpTagger cSharpTagger = new CSharpTagger(this.radSyntaxEditor1.SyntaxEditorElement);
this.radSyntaxEditor1.TaggersRegistry.RegisterTagger(cSharpTagger);

CSharpFoldingTagger foldingTagger = new CSharpFoldingTagger(this.radSyntaxEditor1.SyntaxEditorElement);
this.radSyntaxEditor1.TaggersRegistry.RegisterTagger(foldingTagger);
Syntax Highlighting
RadSyntaxEditor comes with built-in support for some of the most popular programming languages: C#, JS, SQL, VB, XAML, and XML. The control can be easily extended to highlight any language. Head over to our documentation for a real-world example of implementing support for Python.
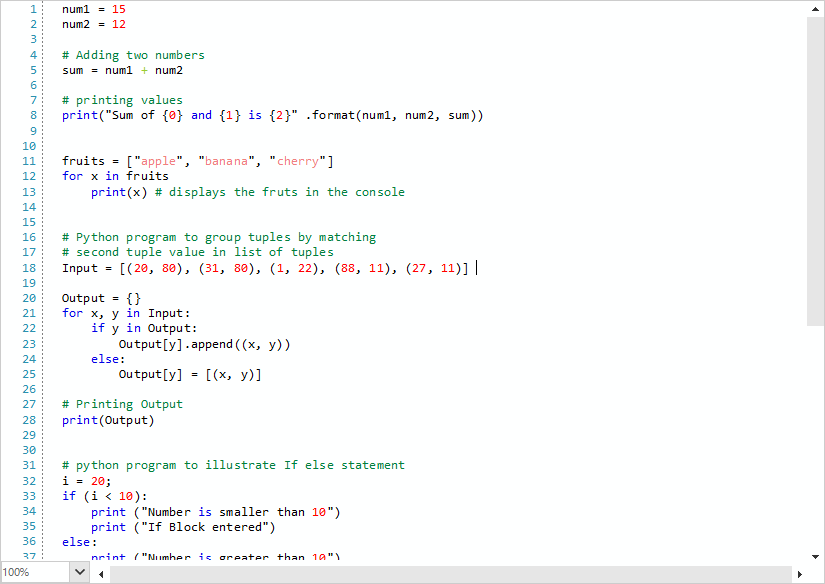
Code Editing
The input is directly handled by the control and any changes performed by the end user are immediately reflected by the loaded document.
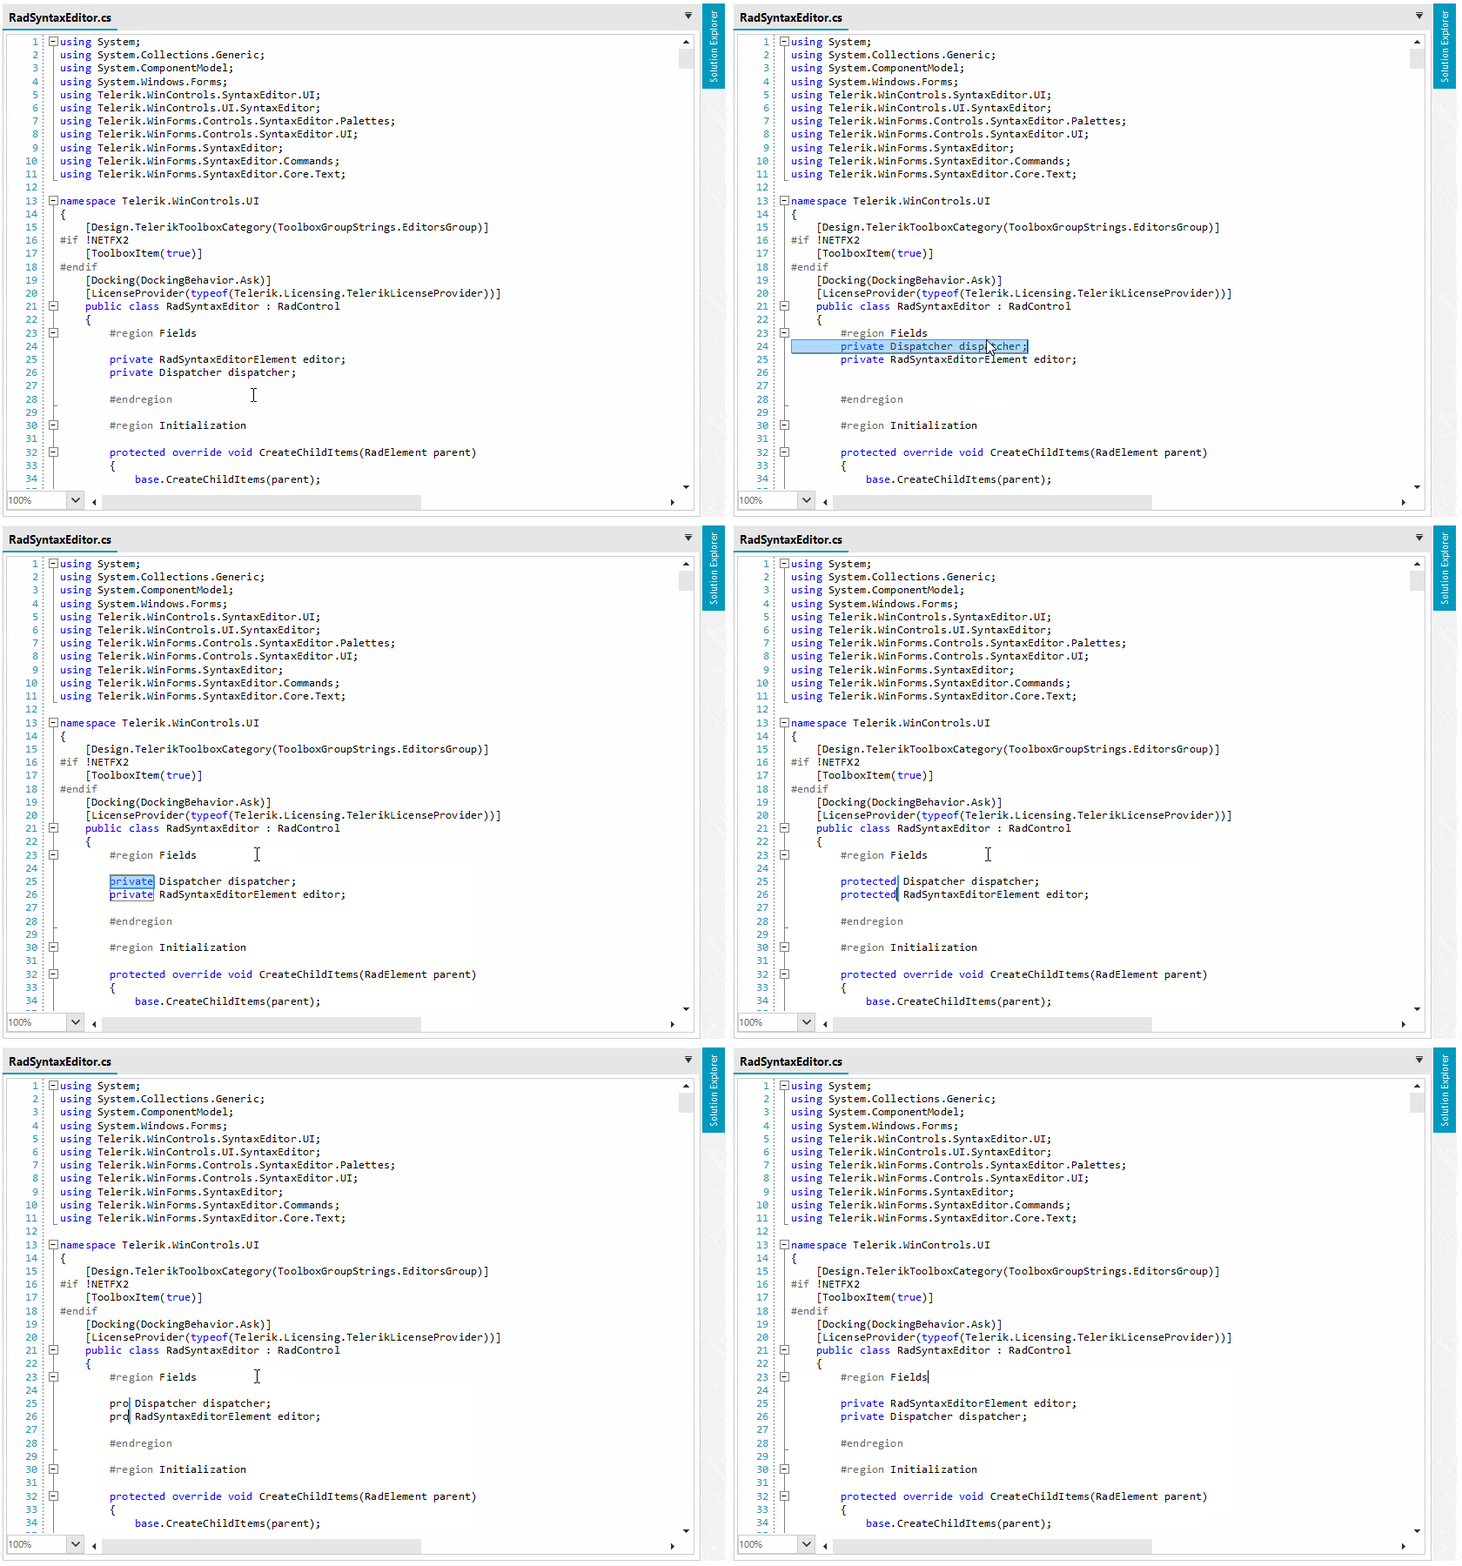
Commands and Keyboard Support
Keyboard shortcuts are usually tied to specific commands, which is also the case for the WinForms Syntax Editor. Various commands can be executed resulting in changes in the document. The commands are an integral part of the public API and they allow an easy and intuitive workflow. Commands are also used internally where most of the end user actions result in invoking a particular command. Detailed information on the available commands and shortcuts is available in our documentation:
Selection
A special UI layer handles the selection. The selection is enabled by default. To enable or disable it use the IsSelectionEnabled property. The selected text can be moved around the document via drag and drop, resulting in changes in the document.
Folding
Certain parts of the document can be folded. This is achieved with the help of a special tagger inheriting the FoldingTaggerBase class. The actual implementation of the folding tagger will vary from one programming language to another. The common part is that they all scan the document and determine where a folding region starts and ends. In C# such regions are the opening and closing brackets, the using keyword, XML comments etc. Custom folding regions can be also added easily, e.g. conditional compilation symbols:
CSharpFoldingTagger foldingTagger = new CSharpFoldingTagger(this.radSyntaxEditor1.SyntaxEditorElement);

foldingTagger.FoldingRegionDefinitions.Add(new FoldingRegionDefinition("#if", "#endif"));
this.radSyntaxEditor1.TaggersRegistry.RegisterTagger(foldingTagger);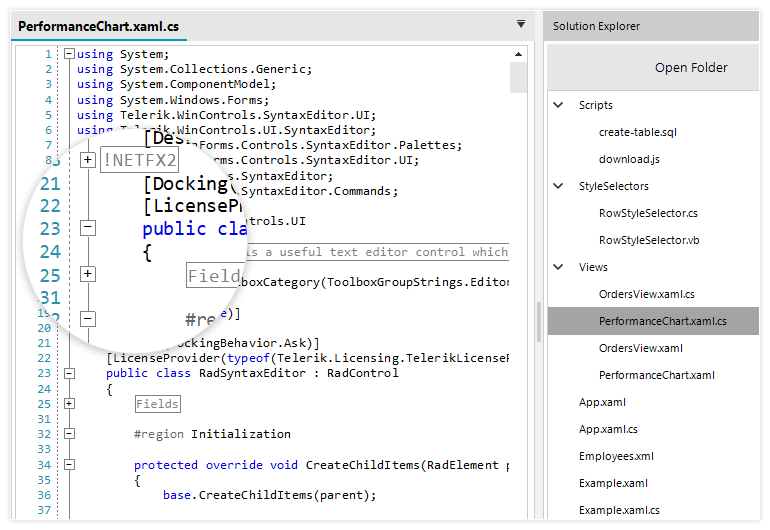
Intelliprompts
A real code editor would also need to display hints to users. Code completion and overload windows to the rescue, fellow developers! RadSyntaxEditor exposes two collections of intelliprompts, the CompletionListItems and OverloadListItems, aiming to speed up the coding process and reduce the number of errors. The items building the intelliprompts also support HTML-like formatting so that parts of the names and descriptions can be easily styled with different colors and fonts.
CompletionInfoCollection completionList = new CompletionInfoCollection()
{
    new CompletionInfo("Achitect", "A software developer expert.", Image.FromFile(@"../../SyntaxEditor/ Achitect.png")),
};

this.radSyntaxEditor1.SyntaxEditorElement.IntelliPrompts.CompletionListWindow.Presenter.CompletionListItems = completionList;

OverloadInfoCollection overloadList = new OverloadInfoCollection
{
    new OverloadInfo("<html><font=Consolas><size=10><color=43,145,175>Span<color=Black>? <color=43,145,175>RadSyntaxEditor<color=Black>.Find(<color=Blue><b>string <color=Black>searchText</b>, <color=Blue>int <color=Black>startIndex)", "<html><font=Consolas><size=10>Finds the specified search text.<br><b><i>searchText:</b> The search text.</i>"),
};

this.radSyntaxEditor1.SyntaxEditorElement.IntelliPrompts.OverloadListWindow.Presenter.OverloadListItems = overloadList;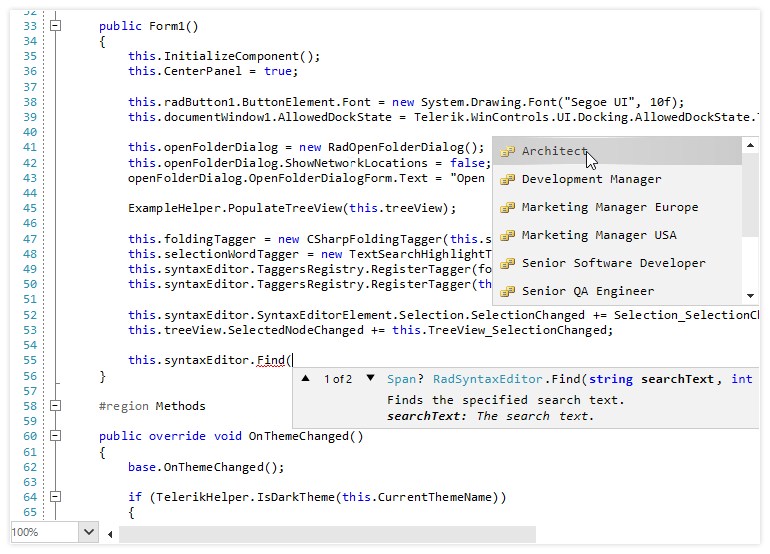
Find and Replace
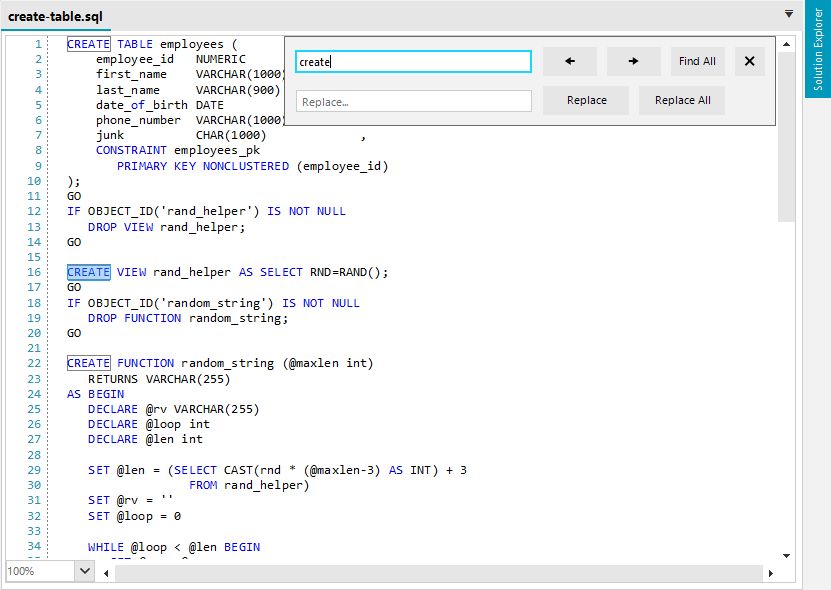
The Find and Replace dialog allows quick and easy navigation to parts of the loaded document. The dialog is also fully localizable, and the strings can be easily translated to any language.
Themes and Palettes
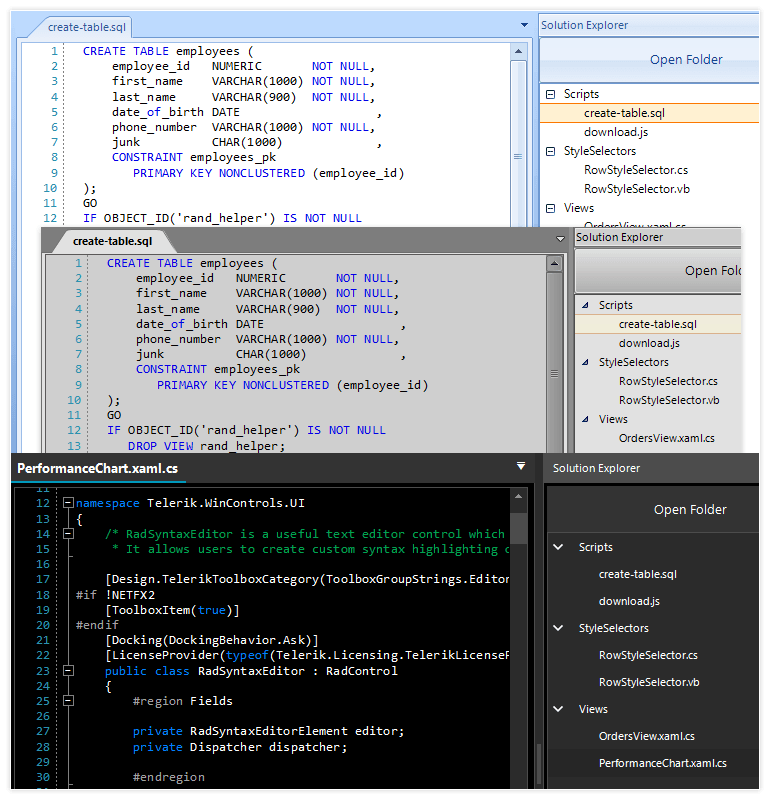
You have the freedom to choose whether to build a light or dark code editor. Why not even leave that decision to your end users? The code editor control is equally well supported by all of our themes. The themes determine the overall look of the editor like the color of the canvas, the scrollbars, borders etc. Besides the themes, RadSyntaxEditor also works with palettes. The actual text highlight colors are determined by the applied palette, and the built-in options are: Light, Dark, Neutral, Neutral Dark. It is also possible to modify the existing palettes or to create new ones.
Try it Out
Make sure to download and try the latest version of Telerik UI for WinForms to explore all the new features and themes.
Download and Start Your Free Trial
We'd love to hear how this all works for you, so please let us know your thoughts by visiting our Feedback portal or by leaving a comment below.

Hristo Merdjanov
Hristo joined the company in 2014 after graduating from Telerik Academy. He has been part of the WinForms team ever since. Hristo is passionate about the native technologies and WinForms in particular. Besides programming Hristo loves travelling, especially to the beach. He is also a keen tennis player.
