Building a Real-Time Paint Application with jQuery and Socket.io

Summarize with AI:
In this tutorial we will be building a real-time paint application with jQuery and Socket.io.
Real-time applications are programs that function within a time frame that the user senses as immediate, current or instant. On Facebook, when you send a message, the recipient receives it without having to refresh his browser. On Instagram, when someone likes your photo, you immediately receive a prompt without any action on your part. Some other examples of real-time applications are live charts, multiplayer games, project management and collaboration tools and monitoring services.
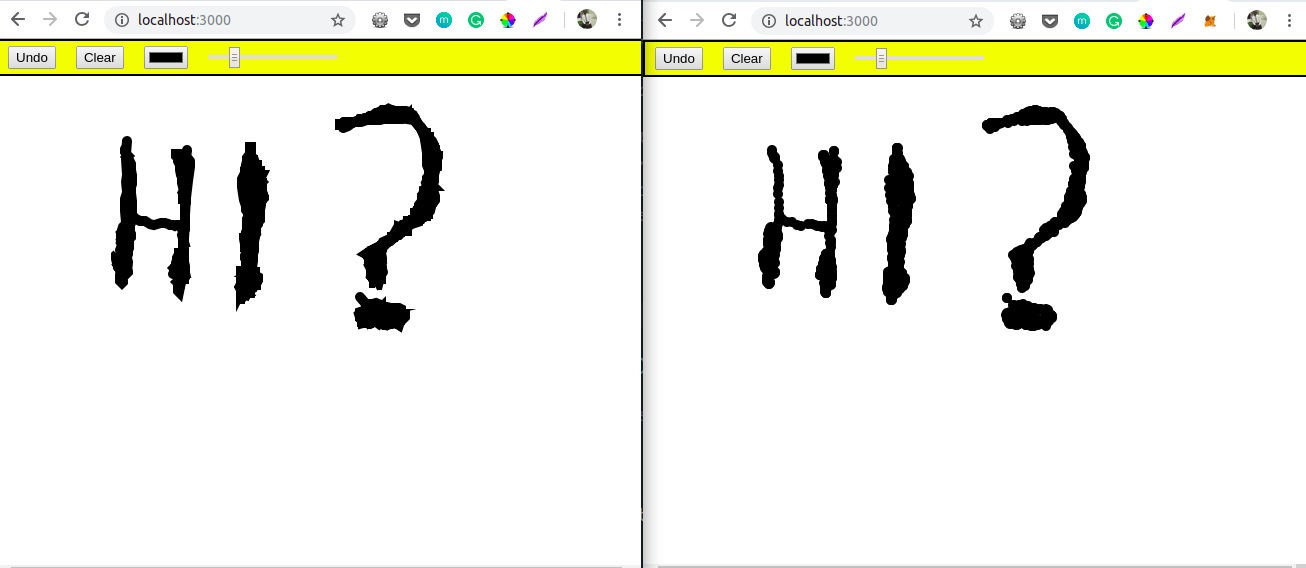
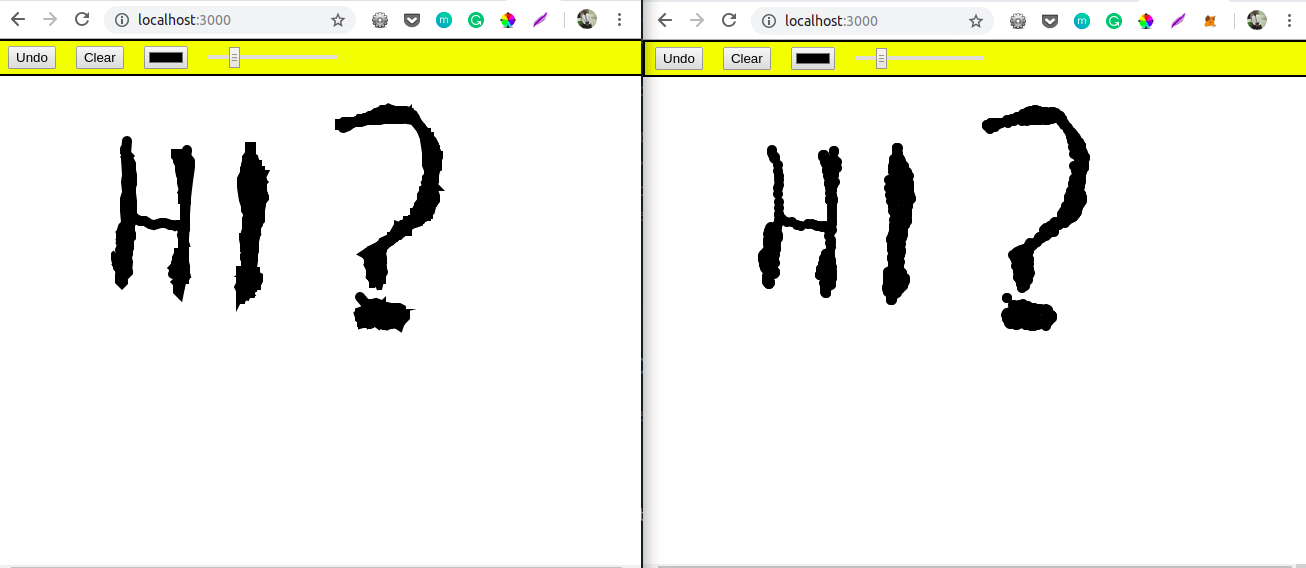
In this tutorial, we’ll be building a real-time paint application. Using our application, users can paint on the same screen at the same time with their different computers and collaborate instantly while using the application and receiving changes in real-time. We’ll be using Socket.io to get real-time updates, and HTML, CSS and jQuery for creating the user interface.
Prerequisites
To follow this tutorial, a basic understanding of jQuery and Node.js is required. Also ensure that you have at least Node version 8+ installed on your development machine before you begin. HTML/CSS knowledge is also recommended but not mandatory.
To build the required application, here are a few tools we’ll use:

Initializing the Application
Building a paint application with HTML, CSS and jQuery is possible. However, to add real-time collaborative features, we need a server to act as the middleman between all the connected clients (browsers). We will use Node because we can easily create a minimal server with Express. We will be using a very minimal setup for this project. Create a folder called paintapp and create a package.json file inside it. Now, add the following code:
    //package.json
    {
      "name": "PaintApp",
      "version": "1.0.0",
      "description": "Simple Paint app built with node.js and socket.io",
      "main": "app.js",
      "scripts": {
        "test": "echo \"Error: no test specified\" && exit 1",
        "start": "node app"
      },
      "author": "Your Name",
      "license": "ISC",
      "dependencies": {
        "express": "^4.16.2",
        "socket.io": "^2.2.0"
      }
    }
In this file we have defined the basic details about our app and also set its dependencies (Express and Socket.io), which we will be using in this tutorial.
Now run npm install and wait for it to finish. If it ran properly you should now see a node_modules folder and a package-lock.json file.
In the root directory create an app.js file. This file will be the entry point of our application. Now create a public folder where we will store our HTML file and static assets. Inside it, create an index.html file, a css and js directory and initialize two files in them paint.css and paint.js respectively.
Right now our folder structure should look like this:
    paintapp/
        node_modules/
        public/
            css/
             paint.css
            js/
             paint.js
            index.html
        app.js
        package.json
        package-lock.json
Open the app.js file and add the following code to it:
    // ./app.js

    const express = require('express')
    const app = express()

    //middlewares
    app.use(express.static('public'))

    //Listen on port 3000
    server = app.listen(3000)
Here, we require Express and initialize it. We then go ahead and use it to serve the files in our public folder. Now whenever you type npm start in the terminal the files in the public folder it gets served as your homepage.
That’s it for our basic server with Express. Now let’s go ahead and create the paint application. We will revisit this file when we are ready to add real-time features.
Creating the Paint Application
Open your index.html file in the public folder and add the following lines of code:
    <!-- /public/index.html -->

    <html>
     <head>
              <title>Paint App</title>
              <link href="css/paint.css" rel="stylesheet">
     </head>
     <body>
        <div class="top-nav">
            <button id="undo-btn">Undo</button>
            <button id="clear-btn">Clear</button>
            <input type="color" id="color-picker">
            <input type="range" id="brush-size" min="1" max="50" value="10">
        </div>

        <canvas id="paint"></canvas>

        <script src="https://code.jquery.com/jquery-3.3.1.js"
         integrity="sha256-2Kok7MbOyxpgUVvAk/HJ2jigOSYS2auK4Pfzbm7uH60="
         crossorigin="anonymous">
        </script>
        <script src="js/paint.js"></script>

     </body>
     </html>
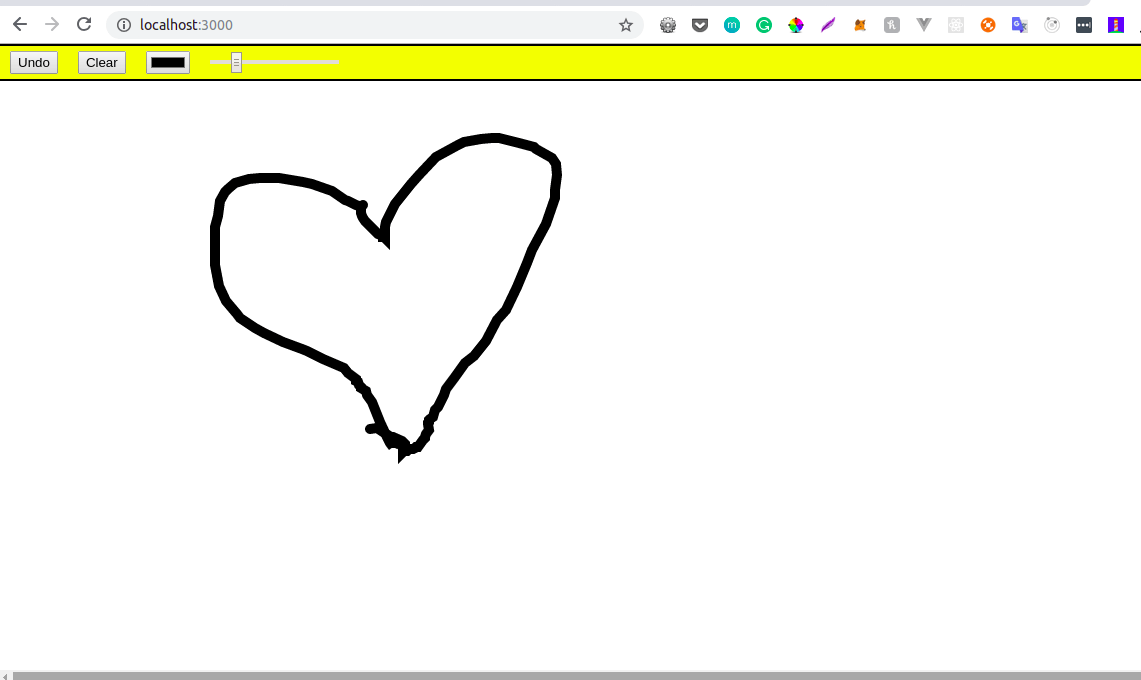
Basically, our application will have two parts: The top navigation where actions like adding color, undoing or clearing actions will be performed; you can also increase or decrease your paint brush size. Underneath it will be the main screen (canvas) where we will do the actual painting.
Next open your paint file in the css folder and add the following styles to it:
    // public/css/paint.css

    body {
        margin: 0;
    }

    .top-nav {
        display: flex;
        flex-direction: row;
        background-color: yellow;
        border: 2px solid black;
        position: absolute;
        width: 100%;
    }

    .top-nav * {
        margin: 5px 10px;
    }

    #paint {
        display: block;
    }
Now it’s time to write the function for the paint application. We will do that in the paint.js file. Open it up and add the following lines of code to it.
    // public/js/paint.js

    var socket, canvas, ctx,
        brush = {
            x: 0,
            y: 0,
            color: '#000000',
            size: 10,
            down: false,
        },
        strokes = [],
        currentStroke = null;

    function paint () {
        ctx.clearRect(0, 0, canvas.width(), canvas.height());
        ctx.lineCap = 'round';
        for (var i = 0; i < strokes.length; i++) {
            var s = strokes[i];
            ctx.strokeStyle = s.color;
            ctx.lineWidth = s.size;
            ctx.beginPath();
            ctx.moveTo(s.points[0].x, s.points[0].y);
            for (var j = 0; j < s.points.length; j++) {
                var p = s.points[j];
                ctx.lineTo(p.x, p.y);
            }
            ctx.stroke();
        }
    }


    function init () {

        canvas = $('#paint');
        canvas.attr({
            width: window.innerWidth,
            height: window.innerHeight,
        });
        ctx = canvas[0].getContext('2d');

        function mouseEvent (e) {

            brush.x = e.pageX;
            brush.y = e.pageY;

            currentStroke.points.push({
                x: brush.x,
                y: brush.y,
            });

            paint();
        }

        canvas.mousedown(function (e) {
            brush.down = true;

            currentStroke = {
                color: brush.color,
                size: brush.size,
                points: [],
            };

            strokes.push(currentStroke);

            mouseEvent(e);
        }).mouseup(function (e) {
            brush.down = false;

            mouseEvent(e);

            currentStroke = null;
        }).mousemove(function (e) {
            if (brush.down)
                mouseEvent(e);
        });

        $('#undo-btn').click(function () {
            strokes.pop();
            paint();
        });

        $('#clear-btn').click(function () {
            strokes = [];
            paint();
        });

        $('#color-picker').on('input', function () {
            brush.color = this.value;
        });

        $('#brush-size').on('input', function () {
            brush.size = this.value;
        });
    }

    $(init);
Let’s go over the variables and functions in more detail:
- canvas - The canvas where we will paint.
- ctx - The context of the screen which is 2D in our case.
- brush - This is an object containing the initial brush positions, color, size and initial mouse position.
- strokes - This is an array of all user strokes.
- currentStroke - This is a reference to the last stroke which starts off as null.
-
Paint() - This is the function in which we do our actual painting. When the user first starts out, it clears the whole screen with the
ctx.rex()function. We then loop through all the strokes sent to us from themouseEvent()function and set the variouscontextproperties required to paint on the screen. Then we create another loop within the first to go through all the points in the stroke. Finally we initialize it the stroke function. - init() - Here we define what happens when the user performs actions either by clicking the mouse or on the buttons.
First we initialize the canvas by giving it the id to display in and set the attribute so it displays through the browser screen. We then set its context to 2D and move on to create several mouse event functions to handle mouse interactions when the mouse is down, up or moving. Every event returns data that is passed to the mouseEvent() function to process. Once it is done, it passes the refined data to the paint() function that handles the painting on the screen. We then set commands to handle events where the user clicks a button.
Finally we use $(init) to tell the browser to trigger this function on page load.

Note: All static files referenced here can be found in the demo repository.
Going Real-Time with Socket.io
Right now, we have a working paint application. Next, we need to make it real-time using Socket.io. We already installed Socket.io as one of our node dependencies so all we need to do is initialize it in our app.js. Open up the file and add the following code to it:
    // ./app.js

    //socket.io instantiation
    const io = require("socket.io")(server)

    //listen on every connection
    io.on('connection', (socket) => {
            //add function to receive and emit response
    })
Now that we have initialized Socket.io in our app on the server, we need to add code to the client side to make it connect to the socket instance on the server and send the relevant data to it. Open the index.html file and add the following code before the end of the body tag.
    // /public/index.html

    <script src="/socket.io/socket.io.js"></script>
    <script>
      var socket = io('http://localhost');
      socket.on('connect', function(){});
      socket.on('event', function(data){});
      socket.on('disconnect', function(){});
    </script>
Now add the following code to the init function in the paint.js file:
    // /public/js/paint.js

    socket = io.connect("http://localhost:3000");

    function mouseEvent (e) {

        brush.x = e.pageX;
        brush.y = e.pageY;

        currentStroke.points.push({
            x: brush.x,
            y: brush.y,
        });

        data = {
            x: brush.x,
            y: brush.y
        }

        socket.emit('mouse', data);

        paint();
    }
Here, we initialize Socket.io, and inside the mouse event function we send the current brush positions back to the server. The data we send back is enclosed in a function named mouse, and that is what we will use to reference it on the server. Now let’s process this on the server and return back relevant data to all the connected clients. Open your app.js and add the following lines of code to it:
    // ./app.js

    io.on('connection', (socket) => {
        socket.on('mouse', (data) => {
            socket.broadcast.emit('painter', data);
        });
    })
Here we receive the data sent by the client and then send it to all the connected clients within a function we called painter. More information on Socket.io functions can be found here.
Finally we receive the data from the server and display to all our connected clients. Open your paint.js file and add the following to it.
    // /public/js/paint.js

    socket.on('painter', (data) => {

      currentStroke = {
              color: brush.color,
              size: brush.size,
              points: [],
      };

      strokes.push(currentStroke);

      currentStroke.points.push({
          x: data.x,
          y: data.y,
      });

      paint();

     });
Here we receive the data and display it back to all connected clients.
Now start your application by typing npm start under the project directory in your terminal. Open up http://localhost:3000 on two browser screens and your app is live!

Conclusion
In this tutorial we learned how to use jQuery, Node.js, HTML and CSS to build a real-time paint application. The knowledge from here can help you create more complex real-time apps. Be sure to check out the Socket.io docs and post comments for clarity on parts you don’t understand. Happy coding.

Christian Nwamba
Chris Nwamba is a Senior Developer Advocate at AWS focusing on AWS Amplify. He is also a teacher with years of experience building products and communities.
