
Build a Powerful Reader with Kendo UI for Angular PDF Viewer

Summarize with AI:
The Angular PDF Viewer makes it easy to load PDFs without requiring plugins, save the last page read, require term acceptance before downloading, and implement a paywall page limit.
Today, when users need to work with PDF files, they often have to download applications or browser plugins. Controlling how users interact with the PDF is not an easy task.
If we offer the PDF as content, users can download it and interact using controls provided by the browser or the PDF itself. However, some businesses may want to control how users engage with the PDF, to provide a better experience or limit downloading under certain conditions.
Building a solution like this requires significant effort on both the backend and frontend. However, what if I told you that you could manage PDF interactions with just a few lines of code in the Angular PDF Viewer?
I can explain every feature about Progress Kendo UI for Angular PDFViewer, but I think the best way to learn about it and see it in action is with a real-world scenario.
Scenario
We are developing an app for a university. The administration wants to provide students with the following features:
- Load PDFs without requiring plugins.
- Save the last page read in the book.
- Enable downloads only after accepting terms and conditions.
These features must be demo-ready today. Sound like too much work? There’s one more feature: We want to display a banner if a reader exceeds three pages.
No worries! We have Kendo UI for Angular PDFViewer to handle these challenges, leaving us a few hours to enjoy the NBA game.
Set Up the Project
To meet the university’s needs, we will utilize the Kendo UI for Angular PDFViewer. This robust component offers a plethora of features that, when integrated with Angular, provide a comprehensive solution.
First, set up your Angular application with the command ng new elearning-platform.
ng new elearning-platform
cd elearning-platform
npm install
Kendo UI offers a schematics command to register its Angular PDF Viewer.
ng add @progress/kendo-angular-pdfviewer
i Using package manager: npm
√ Found compatible package version: @progress/kendo-angular-pdfviewer@14.0.0.
√ Package information loaded.
The package @progress/kendo-angular-pdfviewer@14.0.0 will be installed and executed.
Would you like to proceed? Yes
√ Packages successfully installed.
UPDATE src/app/app.module.ts (515 bytes)
UPDATE package.json (1708 bytes)
UPDATE angular.json (3165 bytes)
√ Packages installed successfully.
UPDATE src/main.ts (259 bytes)
UPDATE tsconfig.app.json (294 bytes)
UPDATE tsconfig.spec.json (300 bytes)
We’ve already set up, so let’s start defining the layout and interface for both the users and the PDF Viewer.
Layout and PDF Viewer
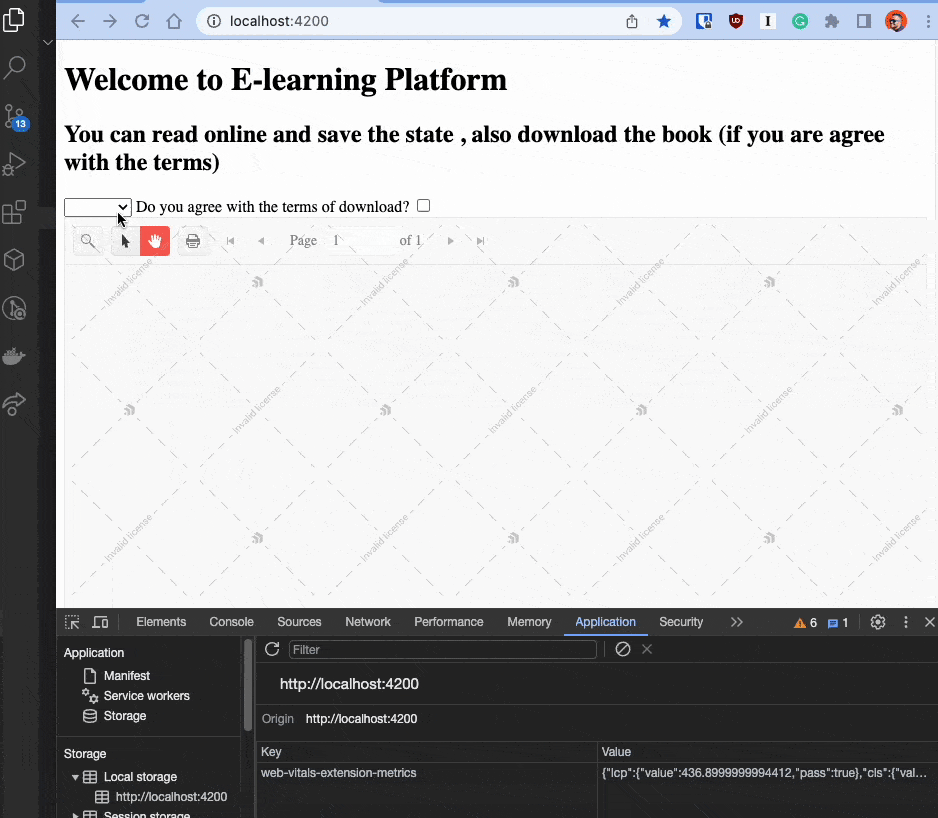
Start by removing the default HTML from app.component.html. Add in the following HTML elements:
- A dropdown list for selecting the PDF (options: angular.pdf and signals.pdf).
- A checkbox to agree to download terms and conditions.
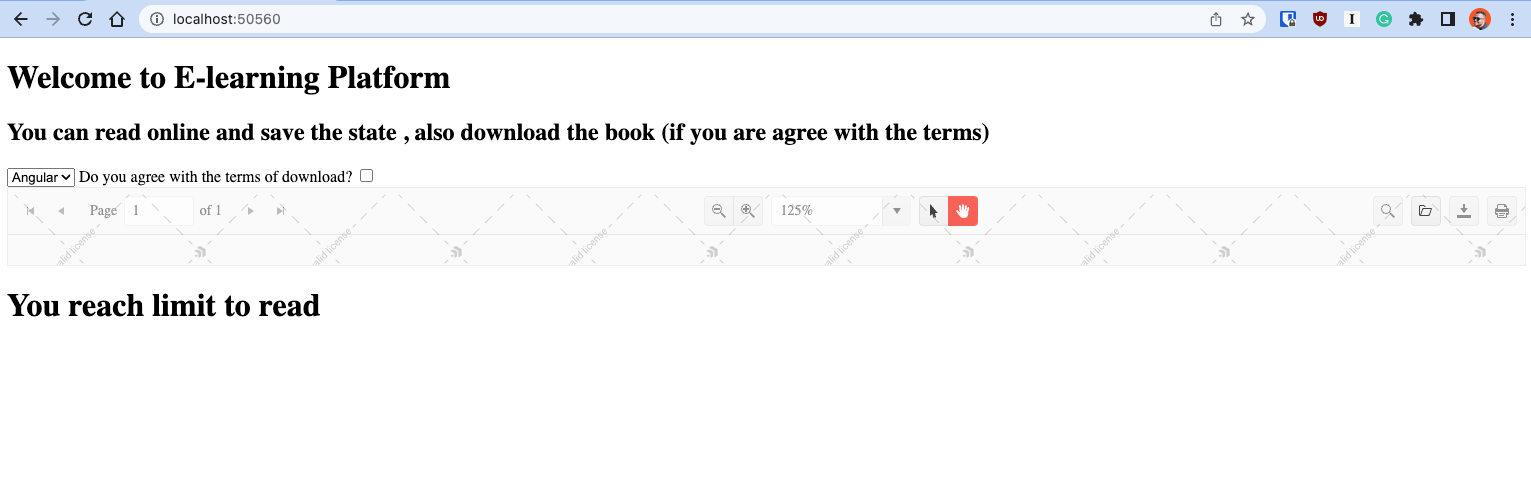
<h1>Welcome to E-learning Platform</h1>
<h2>You can read online and save the state, also download the book (if you agree with the terms)</h2>

<select>
  <option value="angular.pdf">Angular</option>
  <option value="signals.pdf">Signals</option>
</select>

<label for="acceptTerms">
  Do you agree with the terms of download?
</label>

<input id="acceptTerms" type="checkbox" />
To add a kendo-pdfviewer and a “paywall” banner, import the PDFViewerModule, module in the imports section.
import { Component } from '@angular/core';
import { CommonModule } from '@angular/common';
import { RouterOutlet } from '@angular/router';
import {PDFViewerModule} from "@progress/kendo-angular-pdfviewer";

@Component({
  selector: 'app-root',
  standalone: true,
  imports: [CommonModule, RouterOutlet, PDFViewerModule],
  templateUrl: './app.component.html',
  styleUrl: './app.component.css'
})
export class AppComponent {
  title = 'elearning-platform';
}
Next, add the kendo-pdfviewer and the pay-wall elements; these elements should only appear when the user selects an option from the dropdown list. To simplify, wrap them in an ng-container.
<ng-container>
  <kendo-pdfviewer >
  </kendo-pdfviewer>
  <div class="pay-wall">
        <h1>You reach limit to read </h1>
        <button>Close</button>
  </div>
</ng-container>
Once saved, your layout should look like:
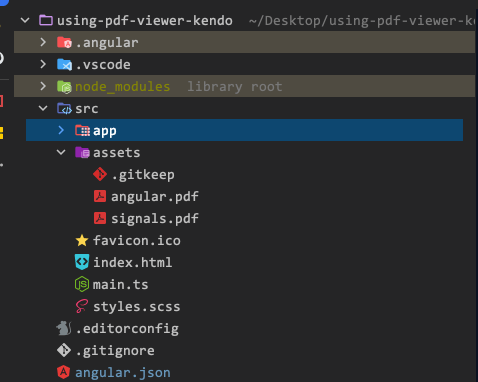
We now have a layout without any interaction. Before we continue, create two PDF files—named exactly as they appear in the dropdown (angular.pdf and signals.pdf)—into the assets directory.
The Reader Service
One of the main features is the ability to remember where users left off when they return to the platform. This means that when users open a PDF, they should be taken to the exact page where they left off during their last session.
The easiest way to achieve this is by using local storage in the browser. However, to reduce the amount of code in app.component, we will create a service to encapsulate the logic for saving and storing the page number.
To generate this service, use the Angular CLI command ng g s services/reader.
ng g s services/reader
CREATE src/app/services/reader.service.spec.ts (357 bytes)
CREATE src/app/services/reader.service.ts (135 bytes)
Open the reader.service.ts file and perform the following actions:
- Specify the assets URL for PDF files as http://localhost:4200/assets/.
- Add
storageKeyandinitialPagevariables. - Implement two methods,
savePageandgetPage. We will connect these methods to thepdf-kendo-viewerevents to save and load the page.
public assetURL = 'http://localhost:4200/assets/';
private currentPage: number = 1;
private storageKey: string = 'book-page';

savePage(page: number) {
  localStorage.setItem(this.storageKey, page.toString());
}

getPage() {
  const savedPage = localStorage.getItem(this.storageKey) || this.currentPage;
  return +savedPage;
}
Perfect, we have the first version of our reader.service. Let’s connect it with the HTML markup and the Kendo UI PDF Viewer.
Read more about localstorage.
Binding Assets to the Kendo PDF Viewer
Now that we have our ReaderService ready, the next step is to enable the first interaction and display the PDF. To do this, we’ll need to work within the app.component.ts file and inject the ReaderService.
Here’s what we’ll cover:
- Inject the
ReaderServiceinto the component. - Initialize
pdfAssetUrlandbookNamevariables. - Create a
selectBookmethod to updatepdfAssetUrlbased on the selected book from the dropdown list. - Bind
pdfAssetUrlandbookNameto the PDF Viewer.
First, import the ReaderService and inject it into the component using Angular’s dependency injection.
import { Component, inject } from '@angular/core';
import { ReaderService } from './services/reader.service';

@Component({
  selector: 'app-root',
  templateUrl: './app.component.html',
  styleUrls: ['./app.component.scss'],
})
export class AppComponent {
  title = 'elearning-platform';
  readerService = inject(ReaderService);
  ....
Next, let’s declare the necessary variables and implement the selectBook method. In this method, we’ll update the pdfAssetUrl by combining readerService.assetUrl and bookName.
Here’s how:
export class AppComponent {
  title = 'elearning-platform';
  readerService = inject(ReaderService);
  pdfAssetUrl = '';
  bookName!: string;
  selectBook() {
    this.pdfAssetUrl = `${this.readerService.assetURL}${this.bookName}`;
  }
}
How do we connect these variables with the methods and react to changes? Well, Angular provides several ways to listen for events and react to changes. To react to the change method in the select element, we can use the (change) event and link it to the selectBook function.
How do we link the value of the select element to the bookName variable? Don’t worry, Angular provides ngModel, which is part of the FormsModule. It helps us react to changes through two-way data binding.
<select (change)="selectBook()" [(ngModel)]="bookName">
  <option value="angular.pdf">Angular</option>
  <option value="signals.pdf">Signals</option>
</select>
To use ngModel, import FormsModule in app.module or include it in the imports for standalone components.
Next, we want to respond to changes in order to load the PDF into the kendo-pdfviewer component. To achieve this, we bind the url and saveFileName properties.
The saveFileName property allows us to define the name of the file when the user clicks on the download toolbar.
The url property is one of several ways to bind the PDF to the component; in our case, we provide the URL where the PDF is stored.
Read more about Angular’s PDF Viewer and its data-binding capabilities in the PDFViewer Data-Binding documentation.
The final code looks like:
   <kendo-pdfviewer
     [saveFileName]="bookName"
     [url]="pdfAssetUrl">
    </kendo-pdfviewer>
Save your changes, then reload the page and interact with the dropdown menu to load different PDFs.
Learn more about two-way binding in Angular.
Yes, we’ve successfully loaded the PDF! However, there are still some features to complete, such as saving the page position and controlling the download options. Let’s get to it!
Handle Kendo UI PDF Viewer Events
We have a few challenges to tackle:
- Enable the download option from the toolbar when the user accepts the terms and conditions.
- Save and store the last page the user was on.
- Display a payment modal when the user reaches the page limit.
Think it’s too much work? The Kendo UI PDF Viewer simplifies the process with event listeners and just a few lines of code.
Working with the Kendo UI PDFViewer Toolbar
By default, the Kendo PDFViewer displays all options in the toolbar. However, we want more control and wish to show the download button only if the user agrees to the terms and conditions.
The Kendo UI PDF Viewer allows us to define a list of options in the toolbar by providing an array of PDFListViewerTool keys. We can specify this list in the reader.service.ts and append it with a new array containing the desired toolbar options.
Lastly, implement an allowDownload method that adds the “download” key to the toolbar options array. This way, when the user accepts the terms and conditions, the “download” option will become available.
The final code will look something like this:
import { Injectable } from '@angular/core';
import {PDFViewerTool} from "@progress/kendo-angular-pdfviewer";

export class ReaderService {
  public assetURL = 'http://localhost:4200/assets/';

  private currentPage: number = 0 ; // Initialize with the default page
  private storageKey: string = 'book-page';

  //list of new list of options
  public toolbar: PDFViewerTool[] = ['search', 'selection', 'print', 'pager'];

  savePage(page: number) {
    localStorage.setItem(this.storageKey, page.toString());
  }

  getPage() {
    const savedPage = localStorage.getItem(this.storageKey) || this.currentPage;
    return +savedPage;
  }

   allowDownload(acceptTerms: boolean) {
    if (acceptTerms) {
      this.toolbar.push('download');
    } else {
      this.toolbar.pop();
    }
  }
}
Next, declare a new variable named toolbarOptions and bind with readerService.toolbar:
toolbarOptions = this.readerService.toolbar;
Then, link the tools property in the kendo-pdfviewer component to toolbarOptions:
<kendo-pdfviewer
  [tools]="toolbarOptions"
  [saveFileName]="bookName"
  [url]="pdfAssetUrl">
</kendo-pdfviewer>
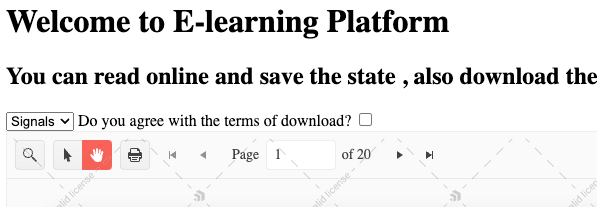
After saving your changes, you’ll notice that the toolbar now only displays the first four options, as specified by toolbarOptions.
To display the “download” option only when the user agrees to the terms, we need to take a few steps.
First , create a variable called acceptTerms. Using Angular’s ngModel and the ngModelChange event, we can then call a new method named activateDownload. This method will trigger theallowDownload method from our service to update the toolbar options.
export class AppComponent {
  ....
  acceptTerms: boolean = false;

  activateDownload() {
    this.readerService.allowDownload(this.acceptTerms);
  }
}
In the app.component.html file, we can use ngModel to bind the acceptTerms variable and listen for changes with the (ngModelChange) event. This event will trigger the activateDownload method when the user interacts with the checkbox.
<input [(ngModel)]="acceptTerms" id="acceptTerms" type="checkbox" (ngModelChange)="activateDownload()"/>
Save the changes. Now the “Download” option should appear in the toolbar when you check the “Agree with the Terms of Download” checkbox, and it should disappear when you uncheck it.🔥

Perfect, we now have control over the toolbar! Next, let’s delve into the event-handling capabilities of the Kendo UI PDF Viewer.
Save and Load Events
This is the final and most exciting part, as we can create a seamless user experience. The Kendo UI PDF Viewer provides two handy events: load and pageChange. We’ll attach these events to methods in our reader.service to either load or save relevant information.
To do this, open app.component.ts and create a method called saveCurrentPage that takes a PDFViewerPageChangeEvent as an argument. This event object contains information about the current page within the PDF.
saveCurrentPage($event: PDFViewerPageChangeEvent) {
  this.readerService.savePage($event.currentPage);
}
In your HTML file, associate the pageEvent with the saveCurrentPage method, and set the height of the PDF viewer to 600 pixels.
<kendo-pdfviewer
  [tools]="toolbarOptions"
  [saveFileName]="bookName"
  [url]="pdfAssetUrl"
  style="height: 600px;"
  (pageChange)="saveCurrentPage($event)">
</kendo-pdfviewer>
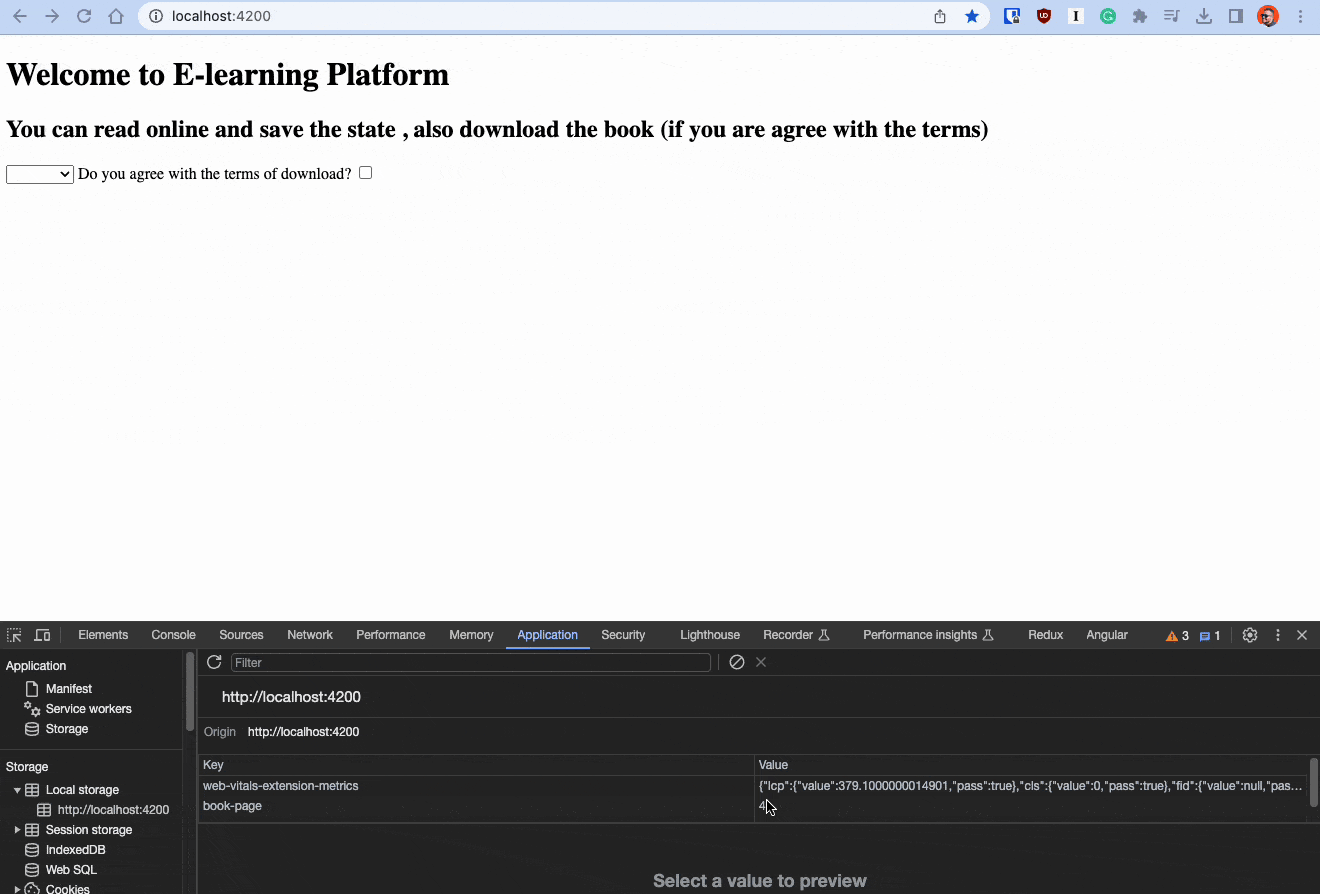
After saving your changes, the service will store the book-page key in the local storage.
To jump to a specific page when the user loads the PDF and to also access the Kendo UI for Angular PDFViewer, we can use Angular’s ViewChild decorator. This allows us to get access to the component and listen for the load event.
First, add a template reference to the Kendo UI PDF Viewer component, and then link the load event with a new method called loadPage().
<kendo-pdfviewer
  #pdfViewer
    [tools]="toolbarOptions"
    [saveFileName]="bookName"
    [url]="pdfAssetUrl"
    style="height: 600px;"
    (pageChange)="saveCurrentPage($event)"
    (load)="loadPage()"
    >
</kendo-pdfviewer>
In the app.component.ts, declare a ViewChild pdfViewer with the same name as the template reference to get access to the PDFViewerComponent reference and bookPage to store the getPage from the service:
@ViewChild('pdfViewer') pdfViewer!: PDFViewerComponent;
 bookPage = this.readerService.getPage();
Add the loadPage method, which utilizes the pdfViewer's scrollToPage function to navigate to the page returned by readerService.getPage.
loadPage() {
  this.bookPage = this.readerService.getPage();
  this.pdfViewer.scrollToPage(this.bookPage);
}
Save the changes, and the PDF will jump to the last page you viewed. Yeah!
Show the Paywall
To put the cherry on top, we want to block the UI when the user reaches the page limit and prevent them from moving to the next page.
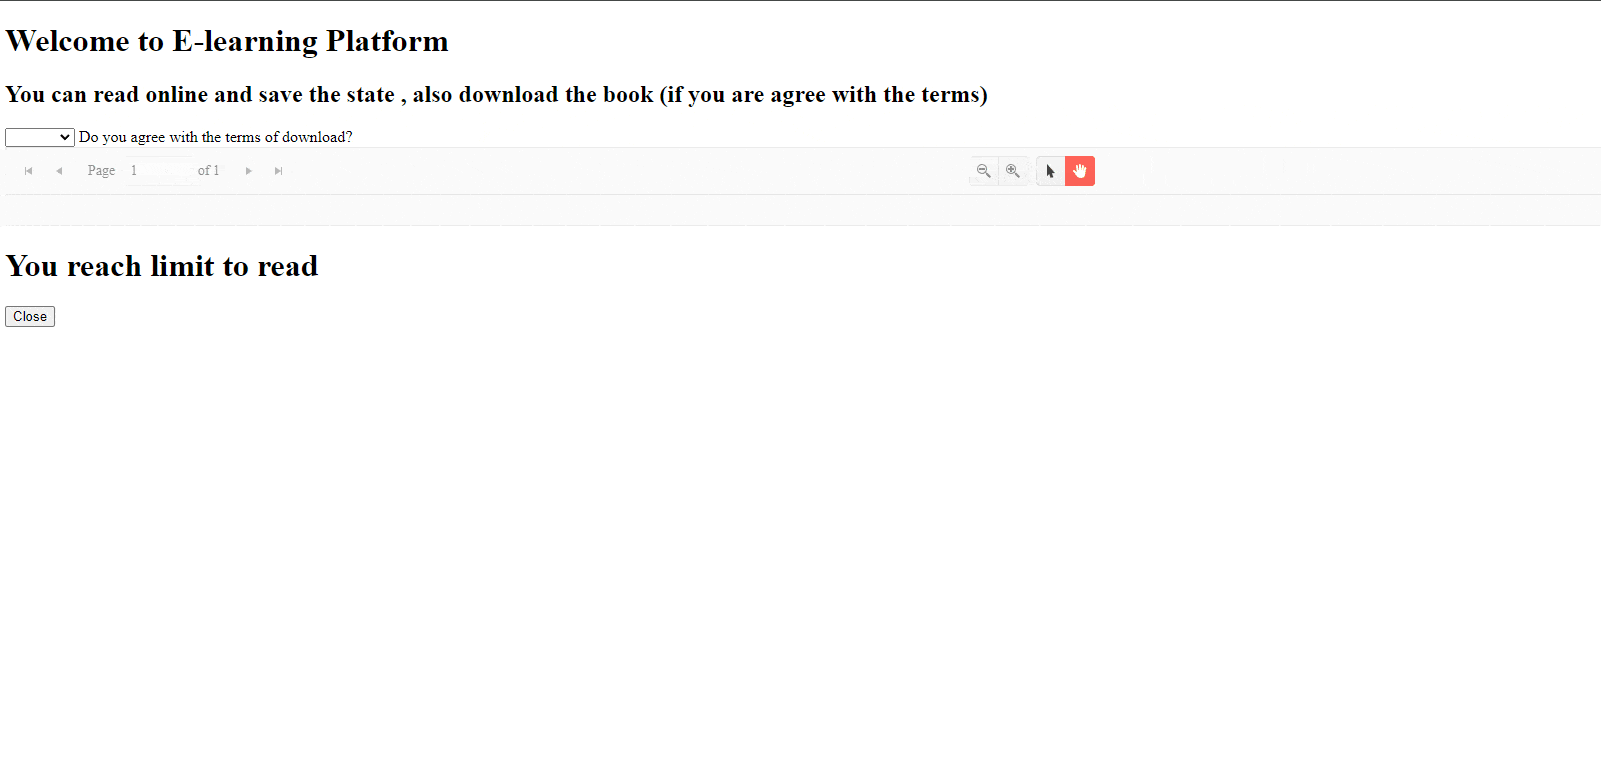
Open app.component.html. First, we’ll display the kendo-pdf-viewer and the paywall only when a book is selected. Add an *ngIf directive to the ng-container to watch for bookName. Also, use another *ngIf directive to display the paywall based on the showMessageWall variable.
<ng-container *ngIf="bookName">
  ...

   <div class="pay-wall" *ngIf="showMessageWall">
      <h1>You reach limit to read </h1>

      <button (click)="showMessageWall = false"> close</button>
    </div>
</ng-container>
In app.component.ts, add two new variables:
pageLimit = 2;
showMessageWall = false;
Add a new method to validate whether the currentPage exceeds the pageLimit. If true, set showMessageWall to true and use the scrollToPage method to jump back to pageLimit.
private canReadMore(currentPage: number) {
  if (currentPage > this.pageLimit) {
    this.pdfViewer.scrollToPage(this.pageLimit);
    this.showMessageWall = true;
  } else {
      this.showMessageWall = false;
  }
}
Finally, invoke this method in our saveCurrentPage function to trigger it every time the user changes the page.
saveCurrentPage($event: PDFViewerPageChangeEvent) {
  const { currentPage } = $event;
  this.readerService.savePage(currentPage);
  this.canReadMore(currentPage);
}
Go ahead and save them. After that, we see the entire workflow functioning as expected: the Kendo UI for Angular PDFViewer loading, the toolbar customization, and the paywall appearing when the page limit is reached.

Conclusion
We’ve demonstrated how Kendo UI for Angular PDFViewer can save you both time and effort. With out-of-the-box functionalities like toolbar customization and event handling, you can quickly build a feature-rich PDF viewer with minimal code. The ability to save user preferences and integrate paywall features adds an extra layer of sophistication to your application, enhancing the user experience.
By using Kendo UI for Angular PDFViewer, you’re not just adding a tool to view PDFs; you’re integrating a powerful asset that elevates the entire user interface, while also speeding up your development process.
This is just the beginning of what you can do with Kendo UI for Angular PDFViewer. Check out the official documentation with many examples and customizations, and don’t forget you can try Kendo UI for free.
Resources
- Learn more about Angular PDFViewer
- Source Code

Dany Paredes
Dany Paredes is a Google Developer Expert on Angular and Progress Champion. He loves sharing content and writing articles about Angular, TypeScript and testing on his blog and on Twitter (@danywalls).
Related Posts
Comments
All articles
Topics
Web MobileMobile
Desktop
Design
Productivity
People
