Beyond the Basics: Getting Started with .NET MAUI Extension for Visual Studio Code

Summarize with AI:
You can use VS Code to build your .NET MAUI app! Stroll through the extension in this post.
If you’re a fan of Visual Studio Code, you’ll be happy to know that you can use it to develop .NET MAUI applications! 🎊 All you have to do is use the MAUI extension created by Microsoft. It provides you with all the necessary tools to develop your apps on your favorite editor. Learn how to install and use the extension in this article!
🔧 Prerequisite: Install the Latest Visual Studio Code Version

As this extension is designed for Visual Studio Code, it’s essential that you have the editor pre-installed. If you haven’t already installed it, you can download it here.
About .NET MAUI Extension
To start using the .NET MAUI Extension for Visual Studio Code, it’s important to be familiar with the C# Dev Kit extension. This lightweight, editor-first experience augments your C# development in Visual Studio Code.
Once you’re familiar with the C# Dev Kit, you can work with the .NET MAUI extension, which provides all the necessary tools for cross-platform desktop and mobile application development using VS Code on Windows, macOS and Linux.
This extension utilizes the benefits of C# extensions and brings them to .NET MAUI. Below is an image highlighting these benefits.
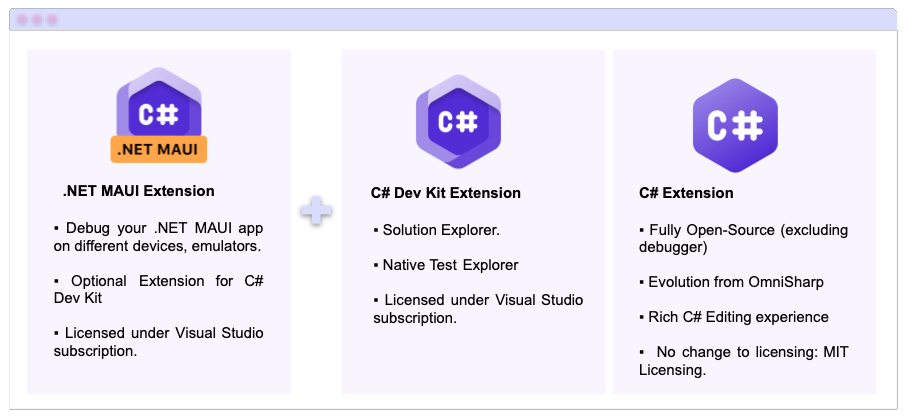
This image was generated according to the design specified in the official documentation.
Adding the .NET MAUI extension to your Visual Studio Code is easy. Follow the steps in this article to fully prepare your environment for running your .NET MAUI apps.
Installing .NET MAUI Extension in VS Code
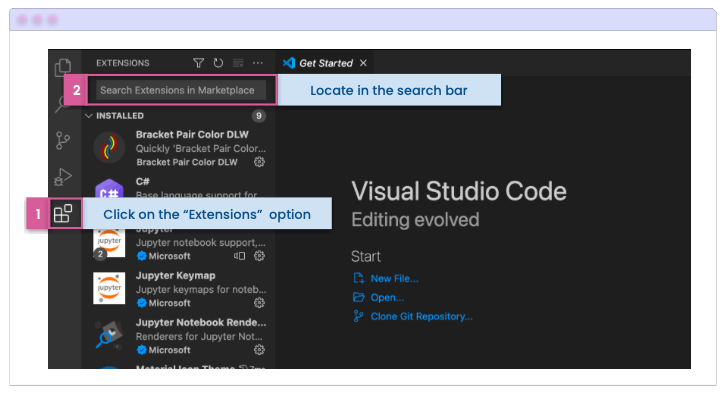
1. Open Visual Studio Code Extensions. Go to the left sidebar in CS Code. Click on the “Extensions” option (you can identify it with the icon that is made up of four squares).
2. Locate the search bar, as you can see below:
3. Type “.NET MAUI” in the search bar.
4. Find the .NET MAUI extension and click on Install.
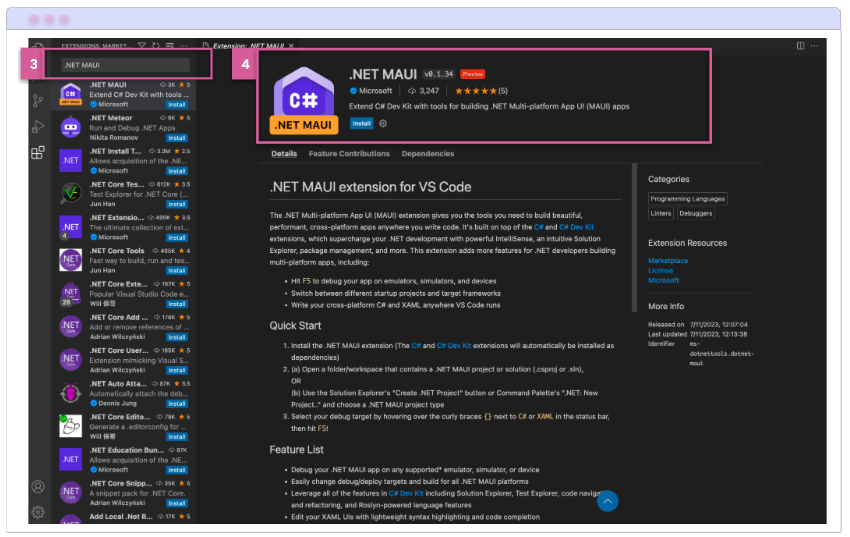
The .NET MAUI extension is dependent on the C# Dev Kit extension, which means that both extensions share functionalities as shown in the previous image.
If you don’t have the C# Dev Kit extension installed, the .NET MAUI one will install it automatically during its own installation process. Moreover, the extension will take care of installing all other necessary components for it to work. Although, it’s worth noting that certain requirements, such as some Android-specific installations for example, will not be automatically configured by VS Code. Therefore, it’s advisable to have everything set up beforehand.
Walk Through the .NET Extension
Once the installation is finished, a walk-through will automatically appear to complete the necessary steps. The first step the extension needs is to be connected to the C# Dev Kit account. Upon clicking, a page will open for you to enter your Microsoft credentials.
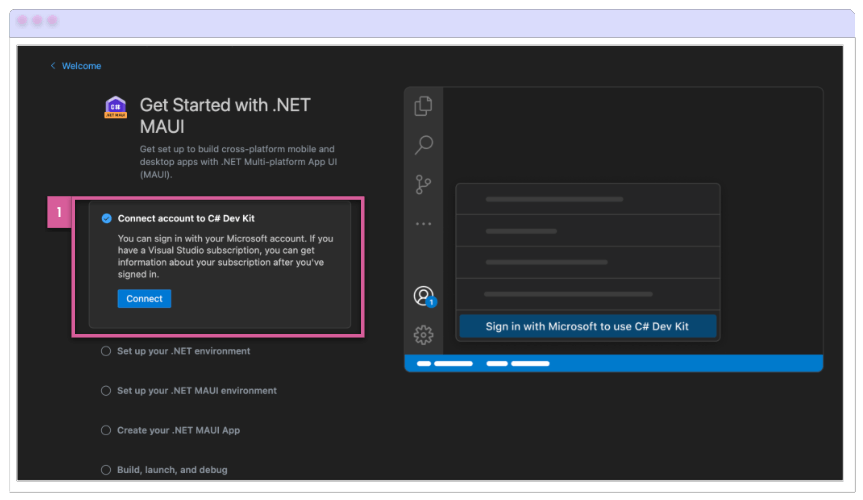
After that, you’ll be given the option to install .NET. This step is only necessary if you haven’t installed the .NET SDK before. (If you already have it, simply check the option and you’re done.)
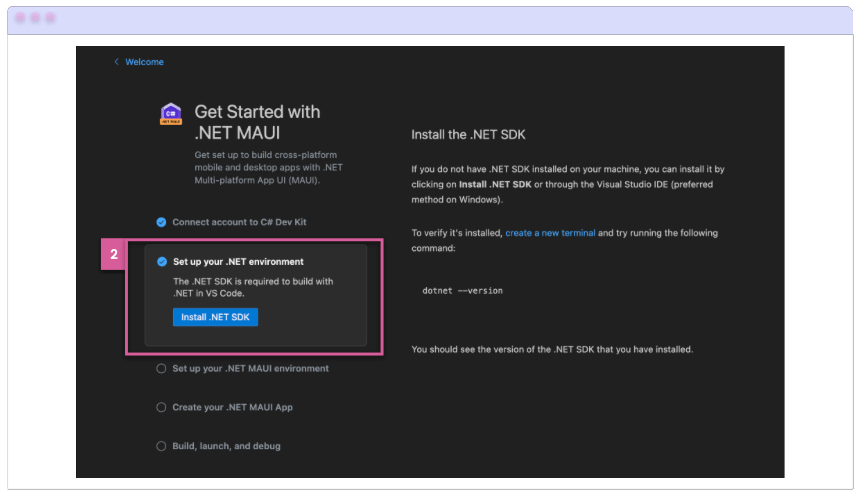
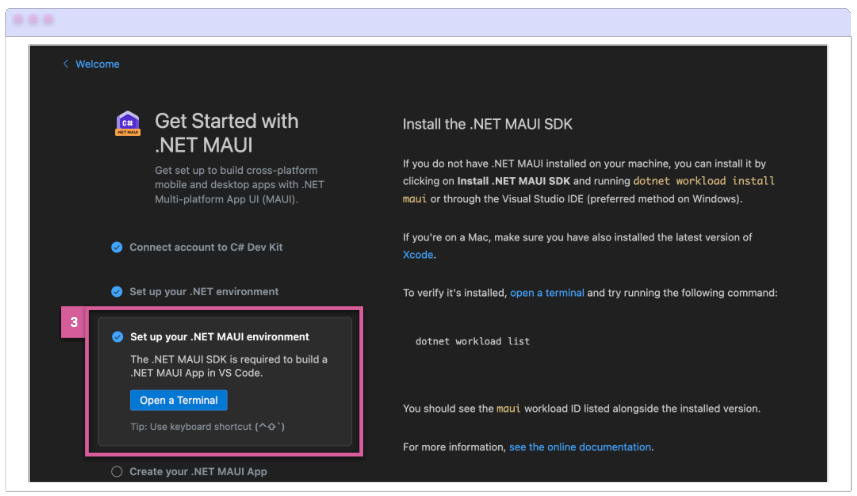
Finally, you will be able to install the .NET MAUI environment if you don’t already have it. (If you already have it, simply check the option and you’re done.)
Creating Your First App in .NET MAUI with VS Code
You can now start creating your .NET MAUI applications. After completing the previous step, you will see an option labeled “Create .NET MAUI App.” Click on it and you will be presented with the command to create a new project, as shown below:

After clicking, you will see various project options. Choose .NET MAUI App.
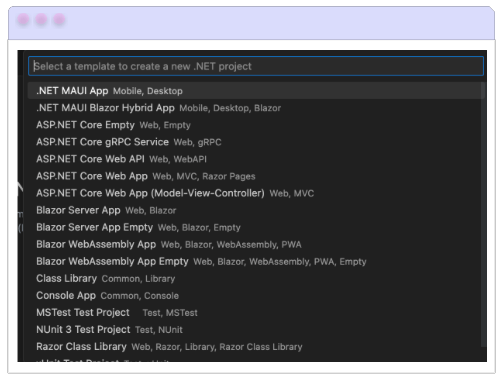
Once you complete the previous step, a dialog box will open, prompting you to specify the folder where you want to save your project. In my case, I created a folder called “VS Code - Maui projects.” The predefined project name will appear, which you can adapt to your needs. If it is suitable, press Enter to confirm and create the project.

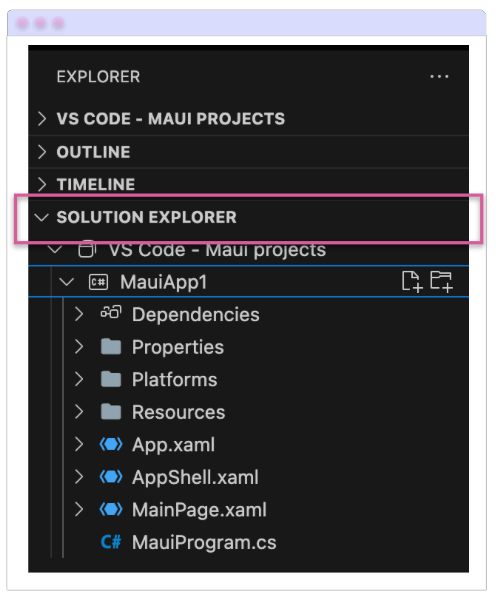
If you prefer a view of your project that is more similar to what you’re used to seeing in Visual Studio, you can open the Solution Explorer, which is an option located in the left side menu. Here, you’ll see a structure that looks like the following:
Running & Debugging Your App
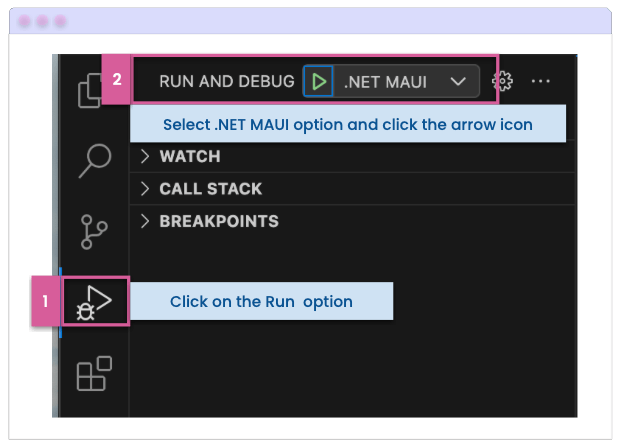
After creating the project, you can run and debug it. To do this, go to the left side menu and click on the arrow, then press the “Run and Debug” button. An options menu will appear asking for the profile you want to use to run the application. Select “.NET MAUI” and click the arrow icon to run.
Selecting Your Emulator & Simulator
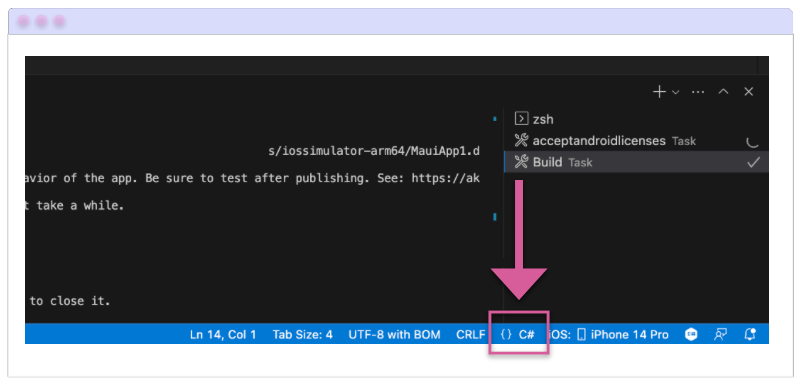
You can select the emulator and simulator you need to run your app. To achieve this, apply the following steps:
- Go to the status bar and click on the option that says
{} C#.
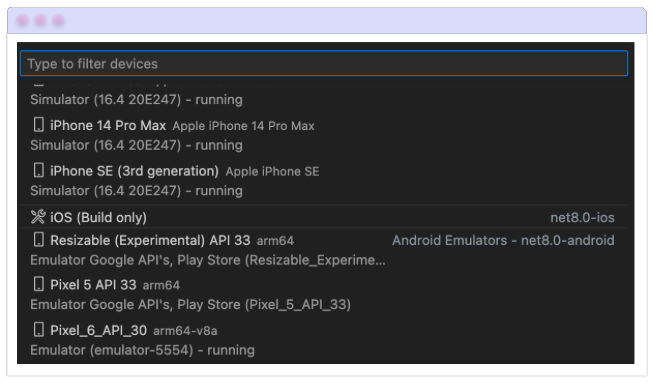
- A box will pop up on the screen. Click on “Debug Target” and the emulators will be displayed, allowing you to choose the one you want. I chose to use the iPhone 14 Pro.
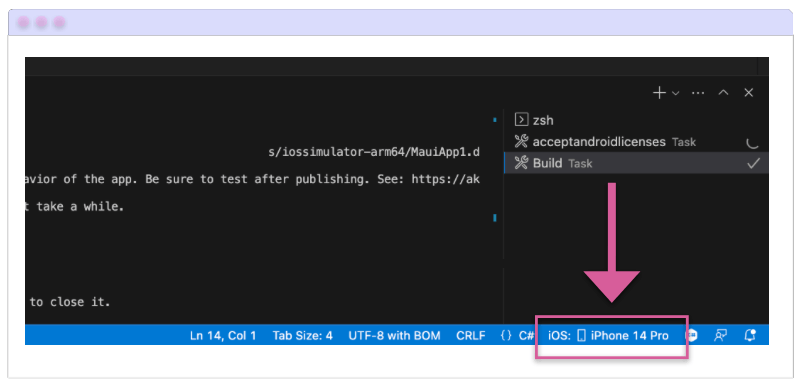
- You can see the selected emulator in the status bar that we saw in the previous step.
- Finally, you can see your app running! 😎
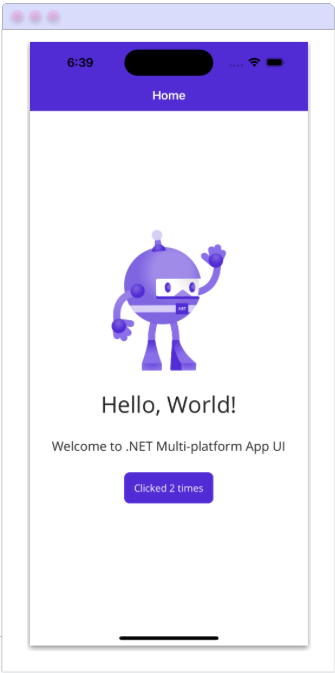
Great! We have completed the configuration of the .NET MAUI extension for VS Code and even launched an app! 😍
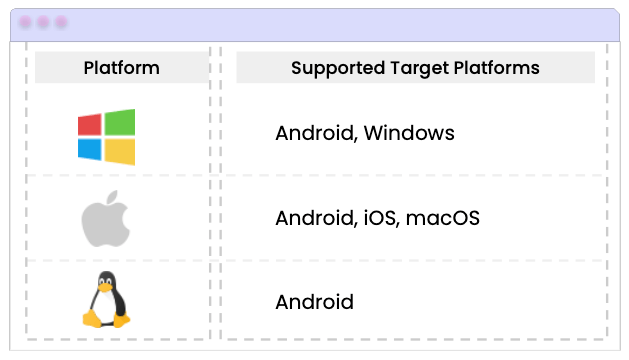
Supported Platforms
🚫 Limitations
- At present, it is not possible to bridge iOS apps using your Mac from Windows using VS Code.
- Very light XAML editing: The editing is limited to basic extension and auto-completion.
- iOS: Not yet fully tested for compatibility with iOS and Xcode beta.
Conclusion
That’s all! You can now start creating your .NET MAUI applications using Visual Studio Code! I encourage you to start using it in your daily life! 💚💕
See you next time! 💁♀️
References

Leomaris Reyes
Leomaris Reyes is a Software Engineer from the Dominican Republic, with more than 5 years of experience. A Xamarin Certified Mobile Developer, she is also the founder of Stemelle, an entity that works with software developers, training and mentoring with a main goal of including women in Tech. Leomaris really loves learning new things! 💚💕 You can follow her: Twitter, LinkedIn , AskXammy and Medium.

