Binding to a Database
The following tutorial demonstrates binding RadTreeView to an Access Data Source containing hierarchical data. The table contains columns for "ItemID", "ParentID" and "Name". "Name" is used to populate the text of each node while "ItemID" and "ParentID" describe the hierarchy. The screenshot below shows the appearance of the running example application.
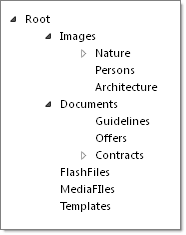
-
In a new AJAX-Enabled Web Application, drop a RadTreeView to the default form.
-
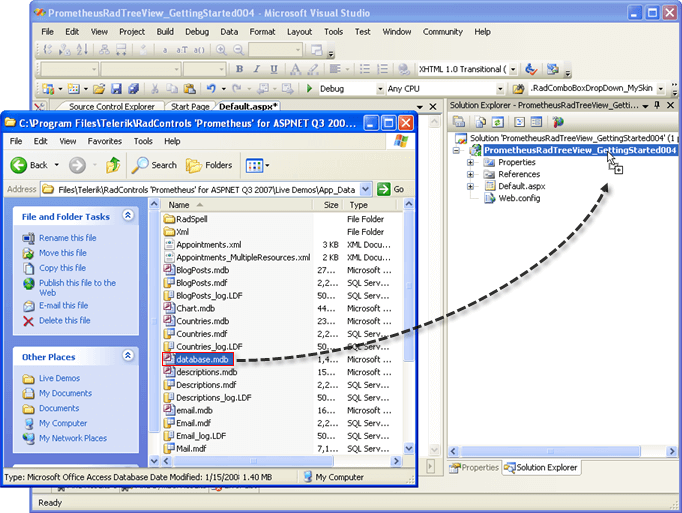
Locate the "Database.mdb" Access Data Base in the RadControls for ASP.NET AJAX suite version installation directory under \Live Demos\App_Data. The typical path would be similar to this one: \Telerik\RadControls for ASPNET
\Live Demos\App_Data\Database.mdb -
Drag the "Database.mdb" file to the project in the Solution Explorer.
-
Open the Smart Tag and set the Skin to Vista from the drop down list. Then select
from the Choose Data Source drop down list. This step will display the Data Source Configuration Wizard. 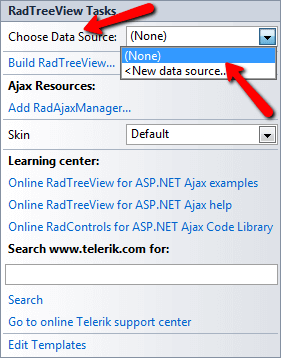
-
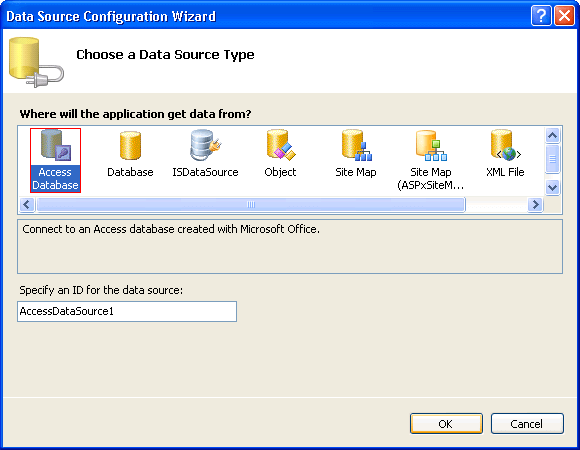
In the Data Source Configuration Wizard, "Choose a Data Source Type" page, select the Access Database icon and click the OK button. This step will display the Configure Data Source Wizard.
-
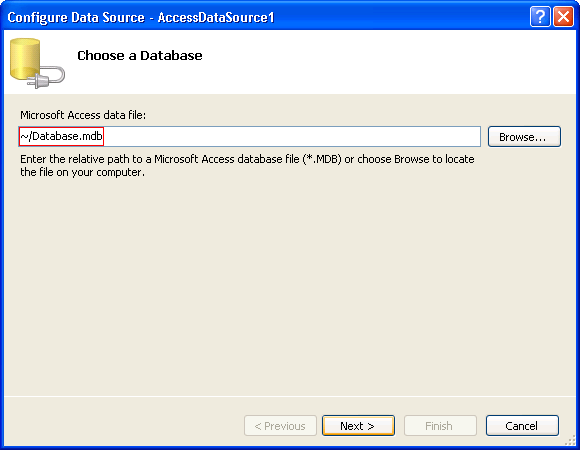
In the "Choose a Database" page, Microsoft Access Data File text box enter "~/Database.mdb". Click the Next button to continue.
-
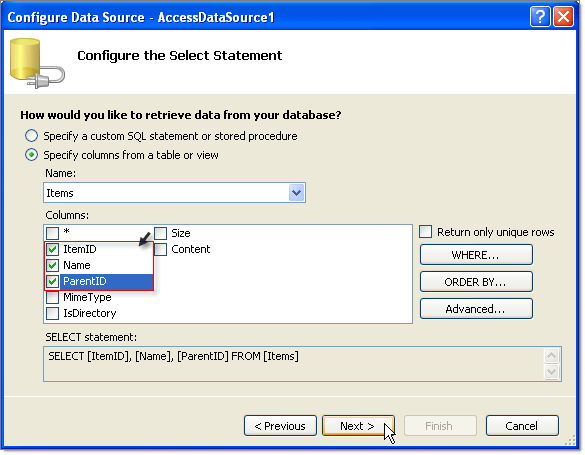
In the "Configure the Select Statement" page of the wizard, choose "Items" from the drop down list. Check the "ItemID", "Name" and ParentID columns. Click the Next button.
-
In the "Test Query" page of the wizard, click the Finish button to close the wizard. The Access Data Source component will be created automatically and assigned to the DataSourceID property of RadTreeView
-
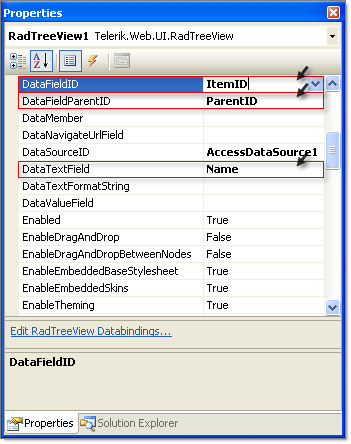
In the Properties Window for the RadTreeView:
-
Set the DataFieldID property to "ItemID".
-
Set the DataFieldParentID property to "ParentID".
-
Set the DataTextField property to "Name".
-
Press F5 to run the application.