Building a Simple TreeView
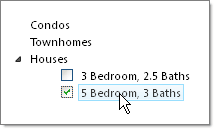
The following tutorial will demonstrate how to create a simple TreeView using the designer and shows how to:
-
Create root level nodes.
-
Create child nodes.
-
Apply a pre-defined style to the TreeView.
-
Display checkboxes next to nodes.
-
In a new AJAX Enabled Web Application, drop a RadTreeView to the default form.
-
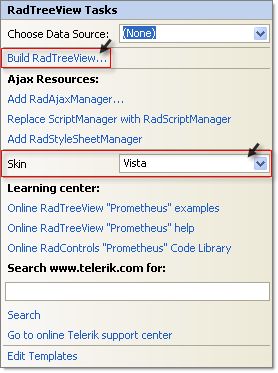
Open the Smart Tag and set the Skin to Vista from the drop down list. Then select the Build RadTreeView link. This step will display the RadTreeView Item Builder Dialog.
-
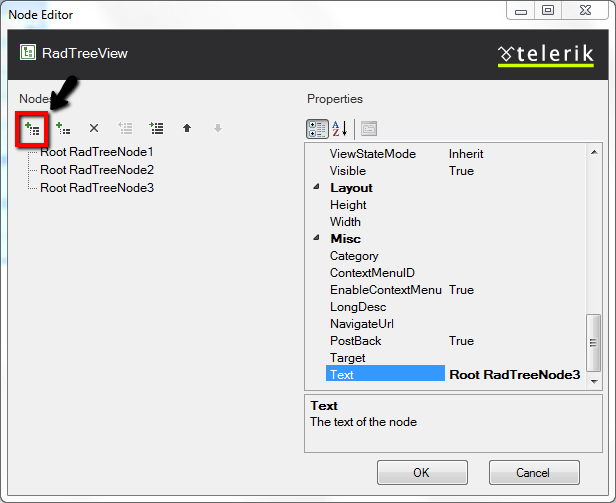
In the RadTreeView Item Builder dialog click the Add Root Node button to add three nodes.
-
Click the first node and set the Text property to "Condos". Set the Checkable property to False.
-
Click the second node and set the Text property to "Townhomes". Set the Checkable property to False.
-
Click the third node and set the Text property to "Houses". Set the Checkable property to False.

-
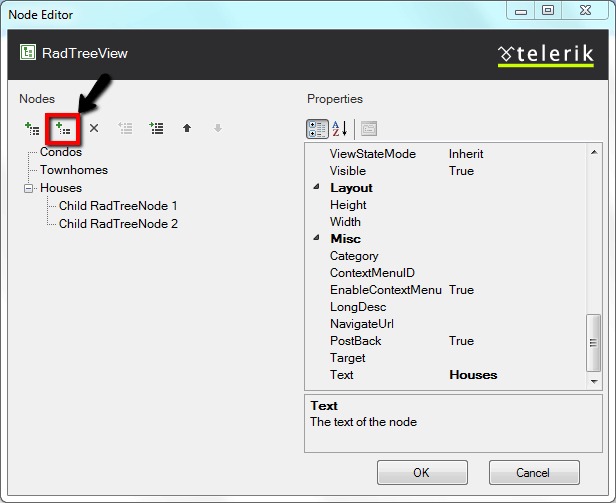
While the third node, "Houses", is still selected, click the Add Child Item button twice.
-
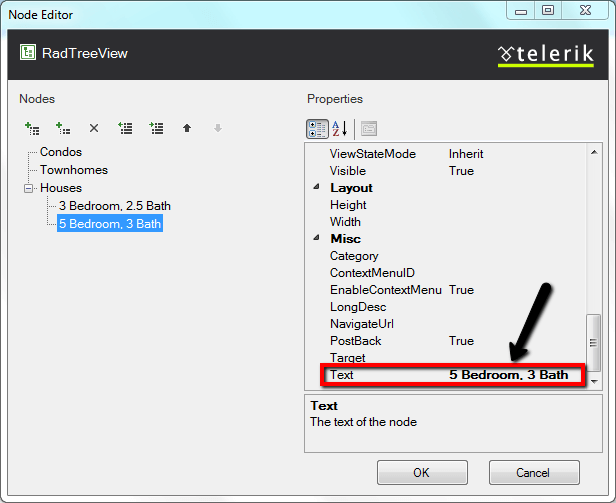
Select the first child item and set the Text property to "3 Bedroom, 2.5 Baths".
-
Select the second child item and set the Text property to "5 Bedroom, 3 Baths".
-
Click OK to close the RadTreeView Item Builder dialog.
-
In the Properties Window, set the RadTreeView CheckBoxes property to true.
-
Press F5 to run the application.