Getting Started with the Telerik WebForms MaskedTextBox
This tutorial will walk you through creating a Web page that uses the RadMaskedTextBox controls. It shows how to:
-
Use the RadMaskedTextBox.
-
Apply a Skin to customize the look and feel.
-
Add labels to the input controls.
-
Add messages to appear when nothing is entered.
-
Customize the selection behavior when the control receives focus.
-
Specify formats for display and editing.
-
Drag a RadMaskedTextBox control from the toolbox onto your Web page. It's Smart Tag should appear automatically.
-
In the designer, right-click the RadMaskedTextBox control and choose Properties from its context menu
-
In the properties pane for the RadMaskedTextBox control, set the Label property to "Mask:". Note that a label automatically appears in the RadMaskedTextbox control.
-
In the Behavior section of the properties pane, locate the SelectionOnFocus property and change it to "SelectAll". This causes the entire text in the text box to become selected when focus moves to the text box so that it is replaced when the user starts typing. Other options move the caret to the beginning or end of the text box.
-
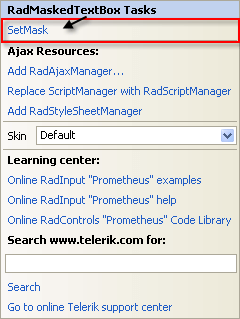
In the RadMaskedTextBox Smart Tag, click the link labelled SetMask:

-
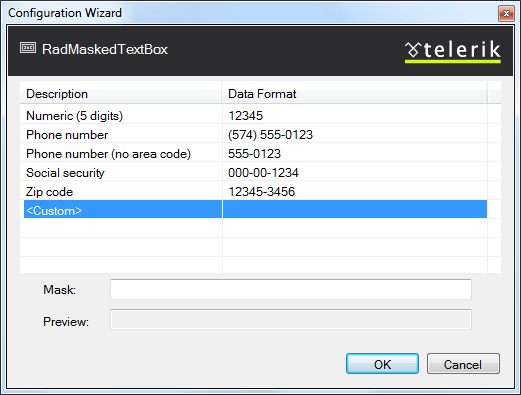
The Input Mask dialog appears. In the dialog, choose the mask for Phone number hand click OK.

-
Choose the "Office2007" Skin in the Smart Tag so that the masked text box matches the other text box on your page.
-
Experiment with entering data in the controls:
- On the RadMaskedTextBox control, note that the edit mask appears when you move focus to the control. Try to enter a non-numeric value. It is rejected by the control because it does not match the mask.