Getting Started with the Telerik WebForms DropDownTree
This article will helo you get started using the RadDropDownTree control. It contains the following sections:
-
Configure the RadDropDownTree Using the Configuration Wizard
-
Populate RadDropDownTree with Simple Data in the Code-behind
Creating a Simple RadDropDownTree
-
In a new AJAX Enabled Web Application, drop a RadDropDownTree onto the default form.
-
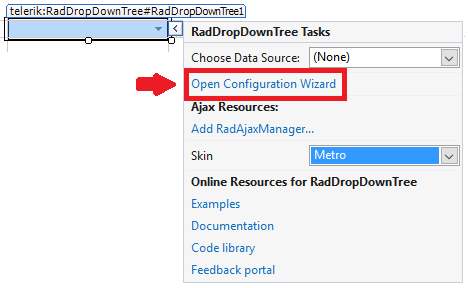
Open the Smart Tag and set the Skin to Metro from the drop-down list. Then select the Open Configuration Wizard link. This step will display the RadDropDownTree Configuration Wizard window.
Configure the RadDropDownTree Using the Configuration Wizard
-
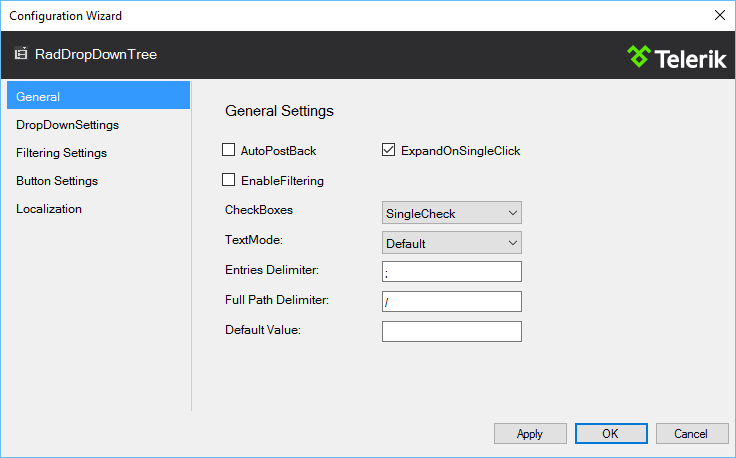
On the Configuration Wizard General tab, check the ExpandOnSingleClick checkbox. From the CheckBoxes drop-down list, choose SingleCheck:
-
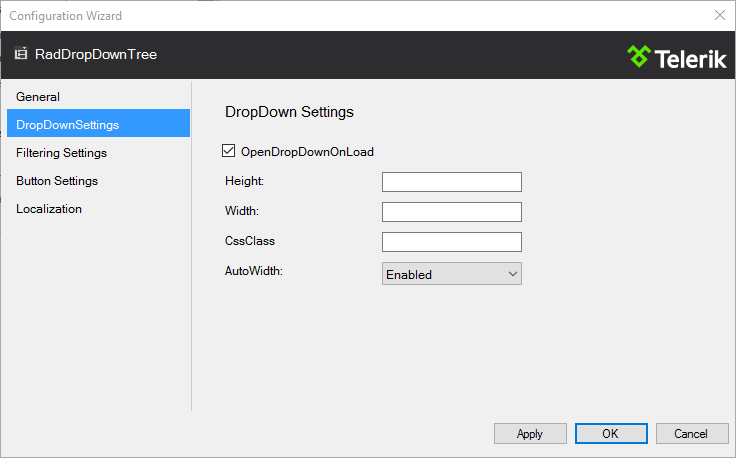
On the DropDownSettings tab, check the OpenDropDownOnLoad checkbox:
-
On the Filtering Settings tab, check the EnableFiltering checkbox. Type in the EmptyMessage TextBox Search for a tree node...:

-
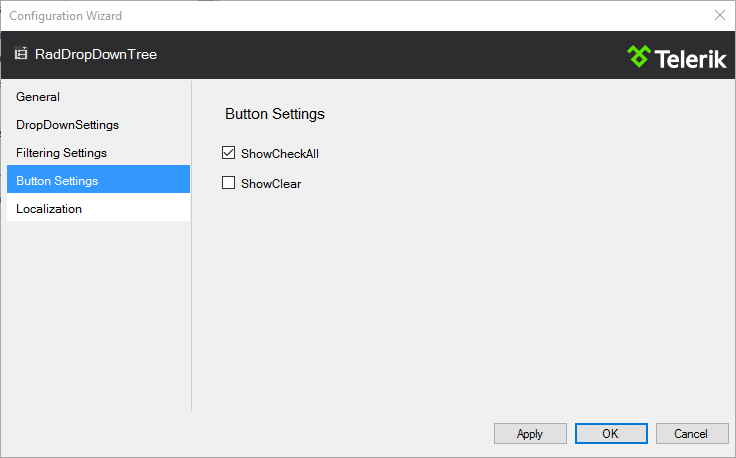
On the Button Settings tab, check the ShowCheckAll checkbox:
-
Click Apply and then OK.
Switch from Designer to Source view. The generated markup for the RadDropDownTree should look like the following:
<telerik:RadDropDownTree ID="RadDropDownTree1"
    runat="server"
    CheckBoxes="SingleCheck"
    EnableFiltering="True"
    ExpandNodeOnSingleClick="True"
    Skin="Metro">
    <DropDownSettings AutoWidth="Enabled"
        OpenDropDownOnLoad="True" />
    <ButtonSettings ShowCheckAll="True" />
    <FilterSettings Highlight="None"
        EmptyMessage="Search for a tree node..."></FilterSettings>
</telerik:RadDropDownTree>
Populate RadDropDownTree with Simple Data in the Code-behind
In the code-behind you could populate the newly created RadDropDownTree with data in the Page_Load() method:
protected void Page_Load(object sender, EventArgs e)
{
    if (!IsPostBack)
    {
        RadDropDownTree1.DataFieldID = "ID";
        RadDropDownTree1.DataFieldParentID = "ParentID";
        RadDropDownTree1.DataValueField = "Value";
        RadDropDownTree1.DataTextField = "Text";
        RadDropDownTree1.DataSource = GetData();
        RadDropDownTree1.DataBind();
    }
}

public DataTable GetData()
{
    DataTable table = new DataTable();
    table.Columns.Add("ID");
    table.Columns.Add("ParentID");
    table.Columns.Add("Value");
    table.Columns.Add("Text");

    table.Rows.Add(new String[] { "1", null, "World_Continents", "World Continents" });
    table.Rows.Add(new String[] { "2", null, "World_Oceans", "World Oceans" });

    table.Rows.Add(new String[] { "3", "1", "Asia", "Asia" });
    table.Rows.Add(new String[] { "4", "1", "Africa", "Africa" });
    table.Rows.Add(new String[] { "5", "1", "Australia", "Australia" });
    table.Rows.Add(new String[] { "6", "1", "Europe", "Europe" });
    table.Rows.Add(new String[] { "7", "1", "North_America", "North America" });
    table.Rows.Add(new String[] { "8", "1", "South_America", "South America" });

    table.Rows.Add(new String[] { "9", "2", "Arctic_Ocean", "Arctic Ocean" });
    table.Rows.Add(new String[] { "10", "2", "Atlantic_Ocean", "Atlantic Ocean" });
    table.Rows.Add(new String[] { "11", "2", "Indian_Ocean", "Indian Ocean" });
    table.Rows.Add(new String[] { "12", "2", "Pacific_Ocean", "Pacific Ocean" });
    table.Rows.Add(new String[] { "13", "2", "South_Ocean", "SouthOcean" });

    return table;
}
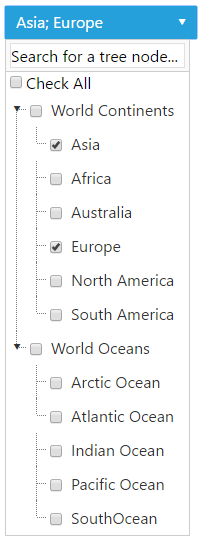
On the initial load of the page you will see the RadDropDownTree:
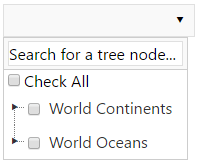
After expanding all collapsed nodes, your RadDropDownTree should look like:
