The Windows Toast Notification System: Welcome the Telerik Toast Notification Manager for WinForms!

Summarize with AI:
In the days of mobile technologies, notifications systems are playing a crucial role in developing a responsive application. Notifying the user of important events happening in the app is paramount nowadays. But how is today’s Windows OS coping with notification mechanism?
The Emergence of Windows Toast Notification System
Microsoft introduced toast notifications with Windows 8. In the beginning the system was crude and the toasts were quite plain. But it has evolved since then and now the toast notification is quite powerful, but still a bit chaotic to understand. Where in the early days a Windows toast could contain three lines of text and one image, now it can show a richer experience to the user—more interactive toasts with textboxes, comboboxes and buttons. Different scenarios were added for alarm, reminder and incoming calls. You can also have progress bars, audio elements, grouping, etc.
A toast notification is described by XML. In the beginning the XML was simpler as there were not many different elements—only the text fields and an image field. But with the development of the toast notifications, the XML has grown more complex with a lot of different elements and attributes to describe it.
A lot has been done in the last few years, and now the toast notifications in Windows can be a powerful tool in the hands of a developer.
Toast Notification and WinForms
Developing toast notifications for Windows is streamlined for UWP apps. But when it comes to older technologies, there are some hurdles developers have to overcome, like registering servers and activators, in order to have the toast notifications running. Luckily the new RadToastNotificationManager in Telerik UI for Windows Forms comes to save the day! With it, you can easily design and show your notifications using a powerful Visual Studio designer. Now let’s see how we can use this new tool.
Getting Started
You can always try the new RadToastNotificationManager. Just download the trial and start designing your own toast notifications.
Designer
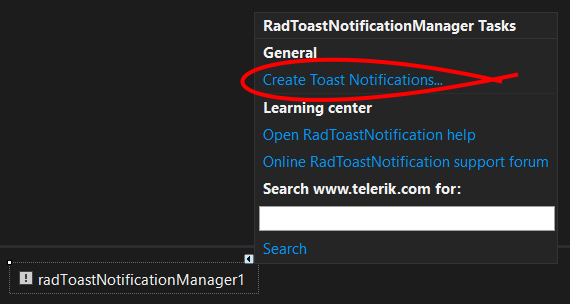
As a start, drag & drop the RadToastNotificationManager component from the toolbox to your form. Then select “Create Toast Notifications…” from the smart tag menu and the designer will show.
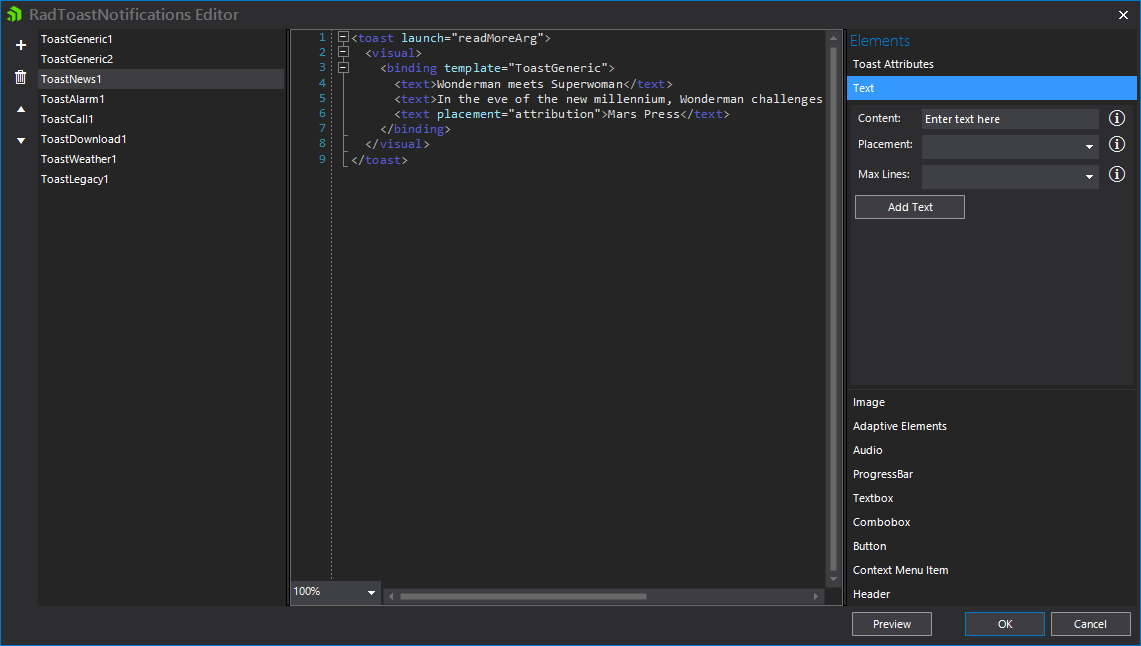
The designer has three panels:
- List of created toast notifications, on the left
- XML SyntaxEditor editor, in the middle
- Elements list, on the right
- Preview button!
Using a simple menu on the left, you can create different toast notifications from predefined templates. The Generic template is the most basic, plain template. The other templates offer examples that you can use to see how some of the elements interact. Feel free to play around with them.
The Legacy template is used only for Windows 8. If you are running the toast under Windows 10, the Legacy template will be show as the modern Generic template. Generic templates do not work on Windows 8!
In the middle pane you can see a SyntaxEditor, where the currently selected template is shown. You can edit the XML and immediately view the result, using the Preview button.
On the right side, there is a list of elements with attributes that can be added to the toast. Remember that you can always use the XML editor and just write or edit them in place, but until you learn the subtleties of the toast notifications, the Elements pane will come in handy.
The Preview button can show the currently edited XML as a toast notification. Keep in mind that it is shown on your system as Windows renders it. Since a toast notification's look depends on the Windows version and theme this may look differently on different machines.
Toast Elements
Most of the elements that you can have in a toast are straightforward. There is also an information icon that explains a bit more for each attribute that you can have. You can follow this article for full description of the toast schema.
Some of the elements are introduced in Windows 10 Anniversary / Creators Update. The article describes this in details.
There are four main groups of elements that you can have in a toast: Visual, Actions, Audio and Header.
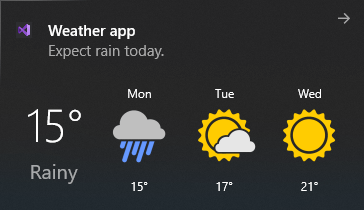
 In the Visual group you have the non-interactive elements like text, image, adaptive group, etc. Adaptive groups act like rows and columns. Each group element is displayed in a single row. Each subgroup is a single column in this row. Check out the weather template for example.
The Actions are all interactive elements—buttons, textboxes, comboboxes and context menu items. Textboxes and comboboxes have id, which alongside with the value of the field forms a key-value pair that is passed to the activator. You can have up to five Actions including the different context menu items.
An Audio is a separate element and can be used for alarms and reminders for example. There are different predefined tone samples that you can use.
A Header is like grouping. When you set up the same header for different toast, they will be grouped in the action center.
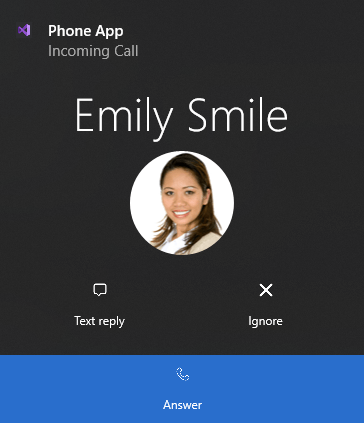
The toast themselves can have one of three different scenarios applied—reminder, alarm or incoming call. This is done with an attribute in the toast element itself. The scenarios modify how the notification looks and behaves. You can take a look at the appropriate examples that are using these scenarios.
On the left you see an incoming call scenario—there is a ringing tone, when the toast is shown and buttons are designed and arranged in a different way in comparison with a regular toast notification.
Under the Hood
Now that you have designed your first toast notification, let’s see how to use it. Firstly, you will need to register the manager, so Windows will know to call it upon user interaction. We will dive into the different registration options and explain a bit about the role of the shortcuts and activators.
Shortcuts
In order to have the toast notifications showing, a shortcut in the start menu has to be installed or created for the app that is showing the notifications. You can either create the shortcut yourself or use the RadToastNotificationManager to do that for you. If you chose to create the shortcut yourself you will need the AUMID of your application and an activator.
Activator
When the user interacts with the notification, we will need a way to know this. Here comes the activator. Again you have two possibilities—define your own activator, which derives from RadToastNotificationActivatorBase or use the RadToastActivated event, which will fire upon user interaction, if you have not defined your custom activator. I recommend using the event, but if you need to define your own custom activator, you will have to add a reference to Microsoft.Toolkit.Uwp.Notifications 6.1.1 in your project.
If your application is closed and the user interacts with a toast, Windows will start your application up using “-ToastActivated” argument. You can add the following code in your Main method to handle this case.
// If launched from a toast
string[] args = Environment.GetCommandLineArgs();
if (args.Contains("-ToastActivated"))
{
    // Handle your custom logic here
}
Register/Unregister
Before you can show and interact with toast notifications you must register ther manager. RadToastNotificationManager offers four different Register methods.
- Register<T>(string exePath, string shortcutName, string aumid) where T : RadToastNotificationActivatorBase
Here you have the full freedom to define your own activator and the registration will create a shortcut for you if you pass shortcutName. If shortcutName is null or empty no shortcut will be created, but you will need to do this yourself. If you create a shortcut using the shortcutName you must pass the path of your executable as well. - Register(string exePath, string shortcutName, string aumid)
Same as above, but instead of using custom activator, RadToastActivated event will be fired. - Register<T>() where T : RadToastNotificationActivatorBase
You pass your own activator, but a default shortcut is created in the start menu. - Register()
Default shortcut is created and RadToastActivated event will be fired upon activation.
I recommend using the 2nd or 4th Register methods, depending on how you will handle shortcut creation. The other two registrations, will require you to define your custom activator.
Similarly to the Register methods, there are four Unregister methods with similar definitions. The Unregister will clear current toasts and clean up the registries from the registration. It is recommended to call the appropriate Unregister method when exiting the application or preferably, when uninstalling it.
Keep in mind that Unregister will clear all current toast notifications from the action center.
Show Notification
After designing our beloved toast notifications and registering the shortcuts and activators, we will want to show them in the end 😊. There are three ShowNotification methods in the manager. Two of them are showing notifications from the ToastNotifications collection in the manger based on the index or the name of the notification.
The names of the notifications you design must be unique!
There is also one method that can show a single RadToastNotification, which does not have to be part of the collection.
With the HideNotification method, you can hide the most recently shown notifications.
Final Thoughts
The Toast Notification mechanism in Windows 10 proves to be very powerful. Developers can create rich and user-friendly notifications with both simple and complex UI. It is up to you to envision good and intuitive toasts that will accompany your app.
Alas my friend, while the Toast Notification system is fantastic, keep in mind it's not yet supported for .NET 5, but rumor has it—that's on the horizon alongside other great features! Either way, start with the new toast notification today and may the code be with you!
P.S.: Psst, if you haven't tried the Telerik UI for WinForms, you should check out our free trial or better yet—go though all our UI suites in the DevCraft bundle!
Stoyan Furnadzhiev
Stoyan was member of the WinForms team at Progress.


