Brand New Virtual Keyboard Control for Your WinForms Application

Summarize with AI:
Does your WinForms app need on-screen data input? Look no further than the feature-rich Virtual Keyboard, now part of Telerik UI for WinForms.
Are you developing an application for touchscreen devices that requires an alternative method for data input? You have come to the right place! With the R1 2020 release of Telerik UI for WinForms, we have shipped a brand new control for such use cases - the Virtual Keyboard.
The RadVirtualKeyboard is a software component designed to provide users with a feature-complete digital keyboard and accommodate the various use cases for an on-screen input method for various touchscreen devices such as kiosks, POS terminals, etc.

The Telerik UI for WinForms touch keyboard can be used in two different ways:
Virtual Keyboard as a Control
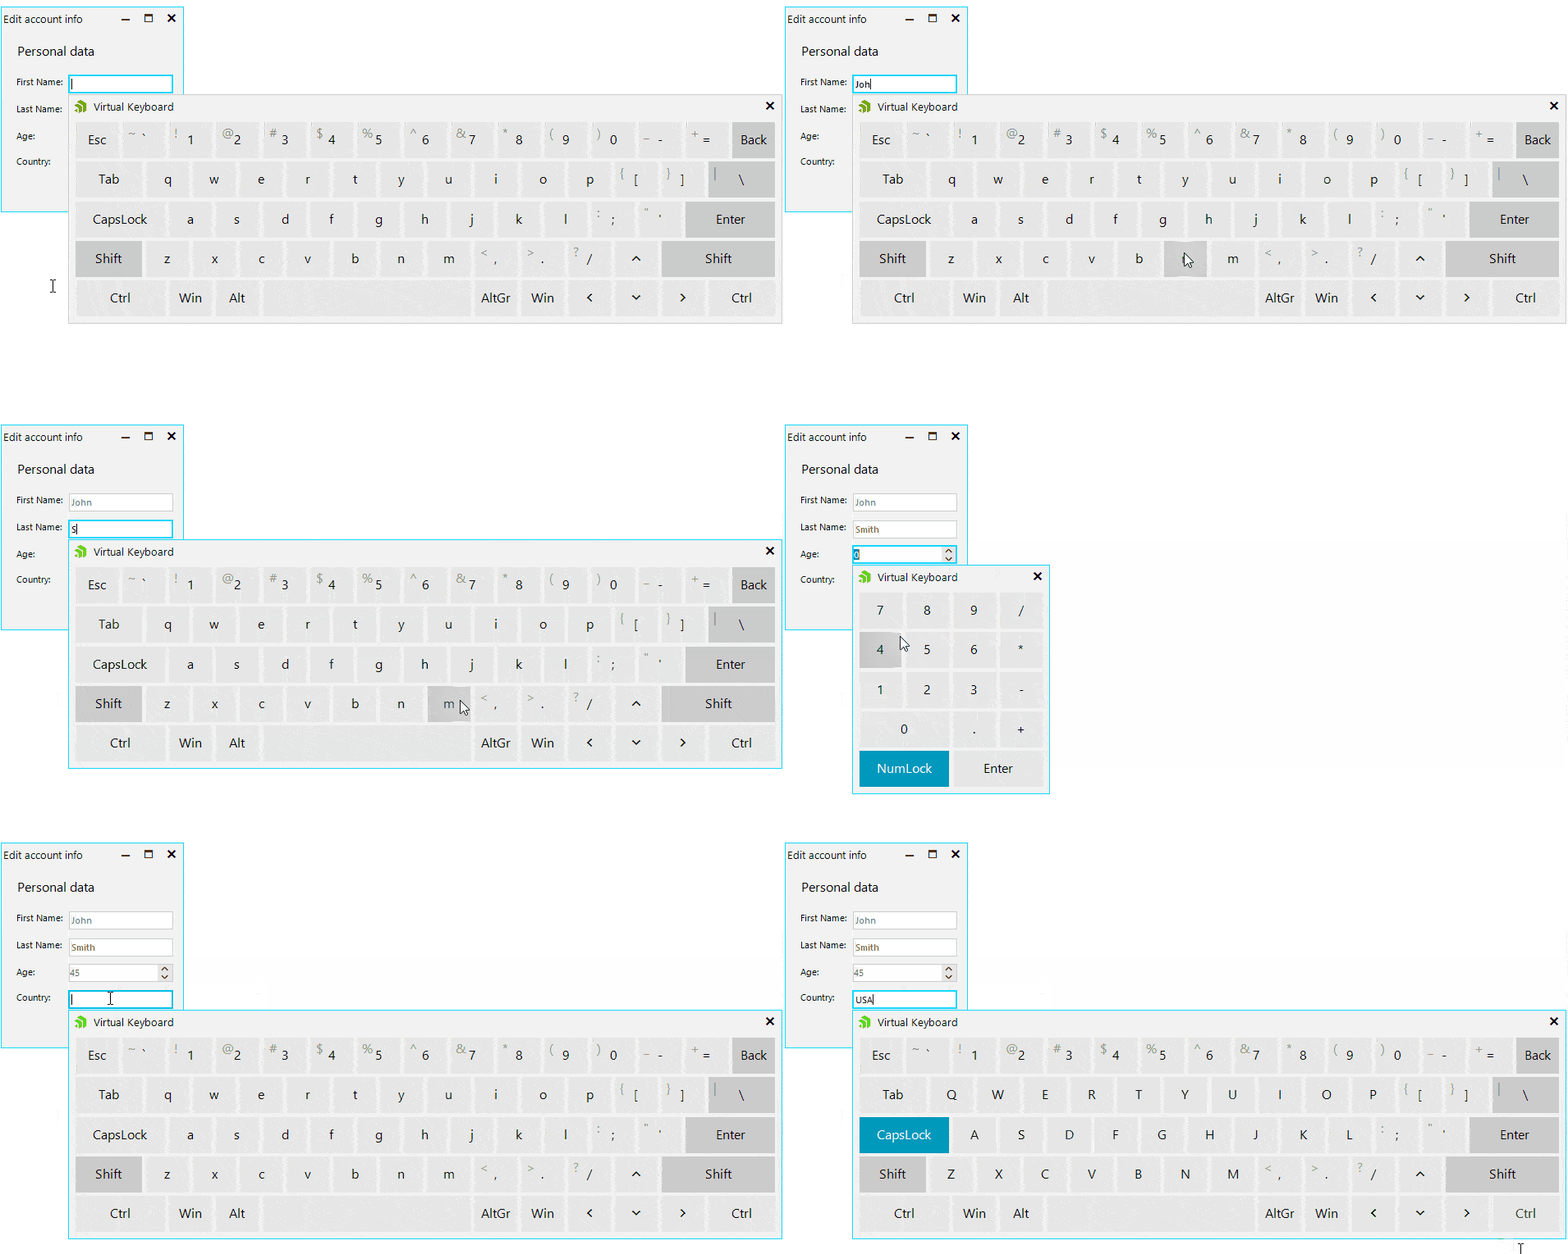
The RadVirtualKeyboard can be implemented into a Form with a TextBox or any other editor control added to the form. When the text box is on focus, its text will be fully editable by the virtual keyboard.
VirtualKeyboardForm
In addition to the RadVirtualKeyboard control, we have also introduced the RadVirtualKeyboardForm component. It can be used as a standalone form or it can be easily associated to each focusable control (for example RadTextBox)/or multiple controls. You just need to select the control and from the property grid in VisualStudio, set the AssociatedKeyboardType to AssociatedControl. When an associated control is on focus, the VirtualKeyboardForm is shown.
The OpenUnderAssociatedControl property allows the associated keyboard form to be positioned next to the editing control. Setting it to false will give the keyboard static size and location and the user will be able to reposition it easily.

Key Features
- Layout options RadVirtualKeyboard has three predefined layouts:
- Extended layout has the same buttons as a standard physical keyboard.

- The Simplified layout looks like a laptop keyboard without a number pad.

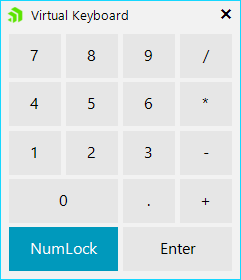
- Numpad layout allows numeric input.

- Extended layout has the same buttons as a standard physical keyboard.
- Synchronize culture with system – The control tracks for system language change and updates all buttons texts.
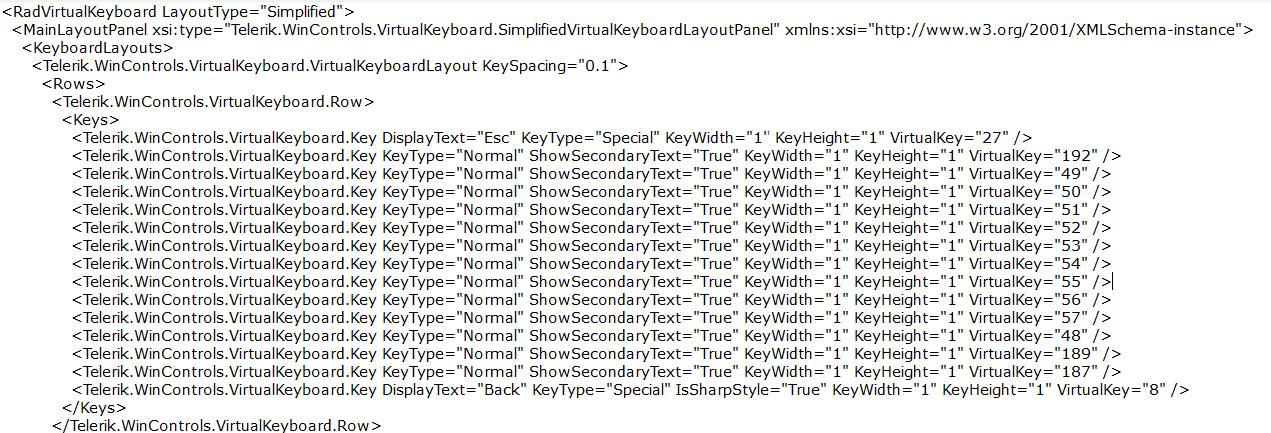
- Save and Load layout – A customized layout can be loaded and saved to an XML file with a ComponentXmlSerializer.

- CalculateDesiredSize – Can be used to get the desired size of RadVirtualKeyboard. It is based on the VirtualKeyboardLayoutPanel.KeyDefaultSize property.
- ScaleFontOnResize is a feature that allows the key fonts to be increased or decreased when the size of the RadVirtualKeyboard is changed.

- KeySending event – This event is suitable to cancel a key from being sent or modify the parameters.
- KeySent event – This event notifies that a key is successfully sent.
Structure
We are going to navigate further into the skeleton of the RadVirtualKeyboard.
- Key is the smallest piece of the keyboard control and represents a button. The keys are divided into five different types:
- Normal – A regular key with one or two symbols.
- Special – A key, which cannot be toggled and represents a command (like Tab, Enter, Backspace, PageUp/PageDown).
- Numpad – The key changes its text/symbol and action when NumLock is altered.
- Modifier – A toggleable key used for modifier keys like Ctrl, Shift, Alt.
- Lock – Used for toggle lock keys like Caps lock, Num lock, Scroll lock.
- VirtualKeyboardLayout is the element that holds all the keys. The keys are divided into logical rows and this allows adding a different rowspan to each key.
- The spacing between the keys can be adjusted by setting the KeySpacing property. The default spacing is 10% of the width of a single key.
- VirtualKeyboardLayoutPanel is the parent of other VirtualKeyboardLayoutPanels and/or VIrtualKeyboardLayouts. This panel can have horizontal or vertical orientation.
- The spacing between the the different layout panels can be adjusted by setting the LayoutSpacing property. By default, the spacing is 30% of the width of a single key.
- RadVirtualKeyboardElement – Has a MainLayoutPanel property which holds the displayed VirtualKeboardLayoutPanel.
For more information about the structure of RadVirtualKeyboard visit our online documentation.
Layout
Furthermore, the touch keyboard has a unique layout mechanism. Each key has its own logical bounds. These bounds are updated only when a key, layout and or panel is added or removed. So, when the virtual keyboard control needs to be arranged and painted, the logical bounds of the key will be scaled to fit the available space in pixels.
Customizing the Layout
Custom Keys
The following code will demonstrate how to simply add two keys with predefined texts.
Next to the Enter and Shift keys we will add two new buttons with “www.” and “telerik” texts.
First, we will access the VirtualKeyboardLayout and then make the enter and shift keys a bit thinner. After that we will create our new keys and add them to the corresponding rows. This is illustrated below:
VirtualKeyboardLayout mainButtonsLayout = virtualKeyboard.MainLayoutPanel.KeyboardLayouts[0] as VirtualKeyboardLayout;
Row row2 = mainButtonsLayout.Rows[2];
IKey enterKey = row2.Keys.LastOrDefault();
enterKey.KeyWidth = 1;
Key wwwKey = new Key(-1, "www.", KeyType.Normal, 1, 1);
row2.Keys.Insert(row2.Keys.Count, wwwKey);

Row row3 = mainButtonsLayout.Rows[3];
IKey shiftKey = row3.Keys.LastOrDefault();
shiftKey.KeyWidth = 1;
Key telerikKey = new Key(-1, "telerik", KeyType.Normal, 1.5f, 1);
row3.Keys.Insert(row3.Keys.Count, telerikKey);

mainButtonsLayout.ResetLayout();
After adding the new keys, we need to reset the layout of buttons, so the logical bounds of the keys are correctly updated. Here is what the modified keyboard looks like:

Custom Layout
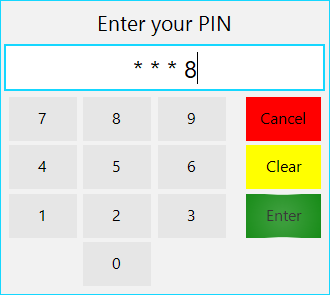
The next code snippet will demonstrate how to create a numeric PIN keyboard layout. This time we will create a brand new VirtualKeyboardLayoutPanel and add two VirtualKeyboardLayout instances in it. The first one will hold the numeric keys for the PIN, and the second will hold the cancel, clear and enter buttons.
VirtualKeyboardLayoutPanel panel = new VirtualKeyboardLayoutPanel();
panel.Orientation = Orientation.Horizontal;

VirtualKeyboardLayout digitsLayout = new VirtualKeyboardLayout();
digitsLayout.AddKey(Keys.D7, KeyType.Normal);
digitsLayout.AddKey(Keys.D8, KeyType.Normal);
digitsLayout.AddKey(Keys.D9, KeyType.Normal);
digitsLayout.AddNewLine();

digitsLayout.AddKey(Keys.D4, KeyType.Normal);
digitsLayout.AddKey(Keys.D5, KeyType.Normal);
digitsLayout.AddKey(Keys.D6, KeyType.Normal);
digitsLayout.AddNewLine();

digitsLayout.AddKey(Keys.D1, KeyType.Normal);
digitsLayout.AddKey(Keys.D2, KeyType.Normal);
digitsLayout.AddKey(Keys.D3, KeyType.Normal);
digitsLayout.AddNewLine();

digitsLayout.AddEmptySpace();
digitsLayout.AddKey(Keys.D0, KeyType.Normal);
panel.KeyboardLayouts.Add(digitsLayout);

VirtualKeyboardLayout commandsLayout = new VirtualKeyboardLayout();
float buttonWidth = 1.1f;
Key button = commandsLayout.AddSpecialKey(Keys.Back, "Cancel", KeyType.Special, buttonWidth, 1, true) as Key;
button.DrawFill = true;
button.GradientStyle = Telerik.WinControls.GradientStyles.Solid;
button.BackColor = Color.Red;
commandsLayout.AddNewLine();

Key clear = new Key(-1, "Clear", KeyType.Normal, buttonWidth, 1, true, false);
clear.DrawFill = true;
clear.GradientStyle = Telerik.WinControls.GradientStyles.Solid;
clear.BackColor = Color.Yellow;
commandsLayout.AddKey(clear);
commandsLayout.AddNewLine();

Key enter = new Key(-1, "Enter", KeyType.Normal, buttonWidth, 1, true, false);
enter.DrawFill = true;
enter.GradientStyle = Telerik.WinControls.GradientStyles.Solid;
enter.BackColor = Color.Green;
commandsLayout.AddKey(enter);
commandsLayout.AddNewLine();
panel.KeyboardLayouts.Add(commandsLayout);

this.radVirtualKeyboard1.MainLayoutPanel = panel;
And here is the result:

Try it Out
Make sure to download and try the latest version of Telerik UI for WinForms to explore all the new features and themes.
We'd love to hear how this all works for you, so please let us know your thoughts by visiting our Feedback portal or by leaving a comment below.

Todor Vyagov
Todor Vyagov is a Software Developer on the WinForms team at Progress.
