Using KendoReact with Qwik

Summarize with AI:
Since Qwik lets you import any React component, let’s give it a whirl with KendoReact.

Kendo UI works well with many frameworks, not just React, Angular, jQuery and Vue. However, did you know you can also use it with Qwik? The “resumable” framework can import any React component and works well with React UI libraries like KendoReact.
Qwik Installation
First, create a new Qwik application.
npm create qwik@latest
Next, add react for compatibility.
npm run qwik add react
Added Dependencies
{
  "dependencies": {
    "@builder.io/qwik-react": "0.5.0",
    "@types/react": "18.0.28",
    "@types/react-dom": "18.0.11",
    "react": "18.2.0",
    "react-dom": "18.2.0"
  }
}
Added React Plugin
// vite.config.ts
import { qwikReact } from '@builder.io/qwik-react/vite';
export default defineConfig({
  plugins: [qwikReact()]
});
KendoReact Installation
You set up KendoReact the same way you would a React or Next.js app.
- Get a License Key for React Kendo UI
- Download the
kendo-ui-license.txtfile and put it in the root of your project. - If you use Git, make sure to add it to the
.gitignorefile. - Install the activation package.
npm i -D @progress/kendo-licensing
- Activate your license.
npx kendo-ui-license activate
- Install the KendoReact components you want to use. Here is a Charts example.
npm i -D @progress/kendo-react-charts @progress/kendo-drawing @progress/kendo-react-intl @progress/kendo-react-layout @progress/kendo-react-progressbars @progress/kendo-svg-icons @progress/kendo-licensing hammerjs
Notice I’m installing the packages to devDependences, although it really doesn’t matter.
- Specify
reactJSX at the top of the React component.tsxfiles you import.
/** @jsxImportSource react */
☢️ Highly important for this to work!
Creating the Component
You want to create a component for the React integration. The React MUI example likes the integrations directory, so let’s use the subdirectory kendo.
/** @jsxImportSource react */

import { qwikify$ } from "@builder.io/qwik-react";
import { Chart, ChartSeries, ChartSeriesItem } from "@progress/kendo-react-charts";

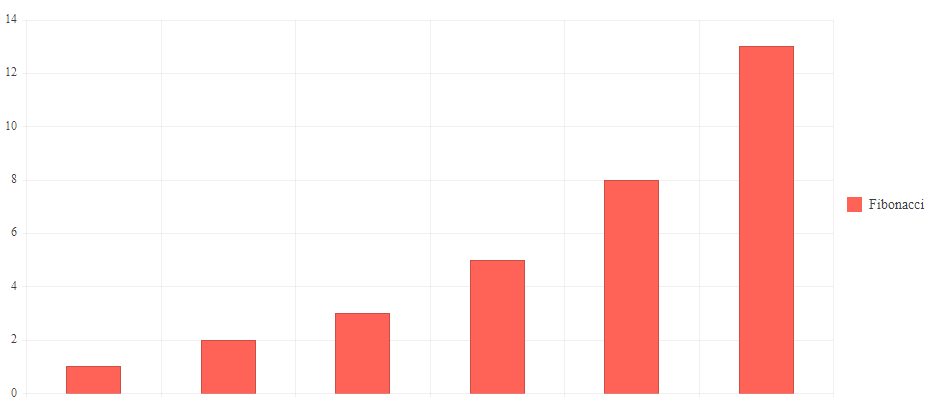
export const KendoChart = qwikify$(() => {
    const data = [1, 2, 3, 5, 8, 13];
    return (
        <div>
            <Chart>
                <ChartSeries>
                    <ChartSeriesItem data={data} name="Fibonacci" />
                </ChartSeries>
            </Chart>
        </div>
    );
});
Notice we import the qwikify$ function instead of the component$ function. This function magically compiles the component to React, allowing you to use it in Qwik.
Notes
- Every Qwik component is an isolated React component. To make sense, you want to group as many React components as possible in one
qwickify$statement. This will avoid overloading the React application compiler. - While partial hydration techniques are possible, these components lose resumability, which is what makes Qwik incredibly fast.
- Do not mix React and Qwik in the same file.
Options
You could also add a hover hydration technique.
export const KendoChart = qwikify$(() => {
    const data = [1, 2, 3, 5, 8, 13];
    return (
        <div>
            <Chart>
                <ChartSeries>
                    <ChartSeriesItem data={data} name="Fibonacci" />
                </ChartSeries>
            </Chart>
        </div>
    );
}, { eagerness: 'hover' });
The { eagerness: 'hover' } option will download the data when a user hovers over the component. It will be the whole React component itself.
Using the Component
Import the component just like you would any other Qwik component.
import { component$ } from "@builder.io/qwik";
import { KendoChart } from "~/integrations/kendo/chart";

export default component$(() => {

    return <KendoChart client:visible />;

});
📝 Notice you need to add client:visible if the component is interactive. You can also use client:load, client:idle, client:hover, client:signal, client:event and client:only for fine-tuned hydration.
Communication
- You can communicate between components by sharing a signal between them.
- You could also use host listeners. This is the same technology you might see in web components created from different frameworks or libraries. Use the
host:prefix.
Deployment
You can use a Qwik Adapter to deploy your app. Make sure to add Kendo UI to your cloud server’s environment variables.
KENDO_UI_LICENSE=...YOUR_KEY_HERE...

Repo: GitHub
Demo: Vercel Edge
Easy peasy.
For more on the Qwik React Integration, see Qwik React.
KendoReact comes with a free 30-day trial, so give it a try today!

Jonathan Gamble
Jonathan Gamble has been an avid web programmer for more than 20 years. He has been building web applications as a hobby since he was 16 years old, and he received a post-bachelor’s in Computer Science from Oregon State. His real passions are language learning and playing rock piano, but he never gets away from coding. Read more from him at https://code.build/.

